This guide will show you how I transfer my photos from Lightroom to Instagram. It’s pretty easy and only requires a few relatively quick steps. This technique works from Photoshop and is the same on PC and Mac.

What Not To Do – Using Lightroom Mobile
If you edit your photos on Lightroom mobile and use Lightroom Classic on your Windows, which syncs photos to your mobile device, you’ll only get smart previews on your phone or tablet, which are only about 2MP. You cannot get full-resolution images on your mobile device if you’re using Lightroom Classic.
You would have to convert your catalog to Lightroom CC and sync the full-resolution images to the Adobe Cloud, where you would quickly run out of space.
Now that I said what not to do, that’s actually what I do. I export LR photos on my tablet to post to Instagram. IG photos are only about 2MP anyway, so it’s all fine. But this is not ideal if you want higher-resolution photos on your phone or tablet.
How to Get Photos From Lightroom Classic To Your Phone or Tablet
Airdrop: If you’re on the Apple Echosystem, the easiest way to get your photos to your phone is to use Airdrop.
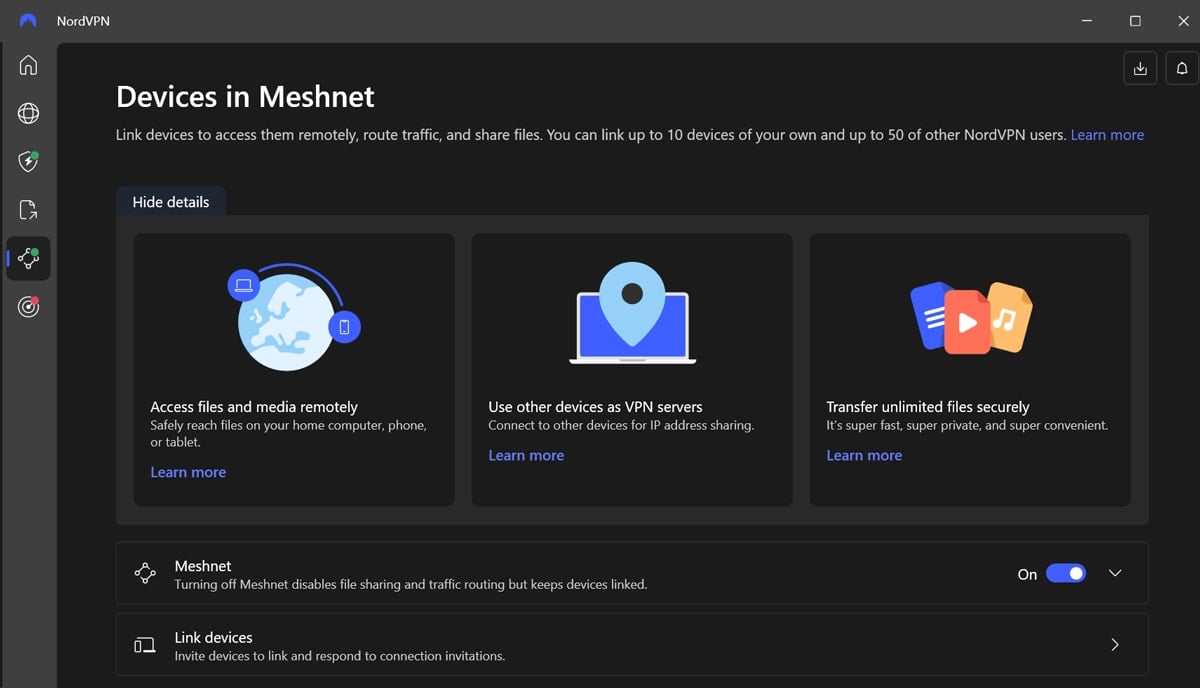
Meshnet: If you use NordVPN, you can use Meshnet. It is free and works very similarly to AirDrop on Apple devices.
Cloud Sync: I usually sync all my photo exports with one of the Clouddrive services. I used to use Dropbox, but today, I mostly use OneDrive.
Here is how you can do that.
Step 1. Create A Dropbox, OneDrive, or Google Drive Account
I like OneDrive. I have 5GB for free, but I use a 365 Basic business account that gives me 1TB and costs less than Dropbox.
Step 2. Dedicate A Folder On You Computer For Your Exports
I’ve named my Exports/Prints in my Dropbox folder.
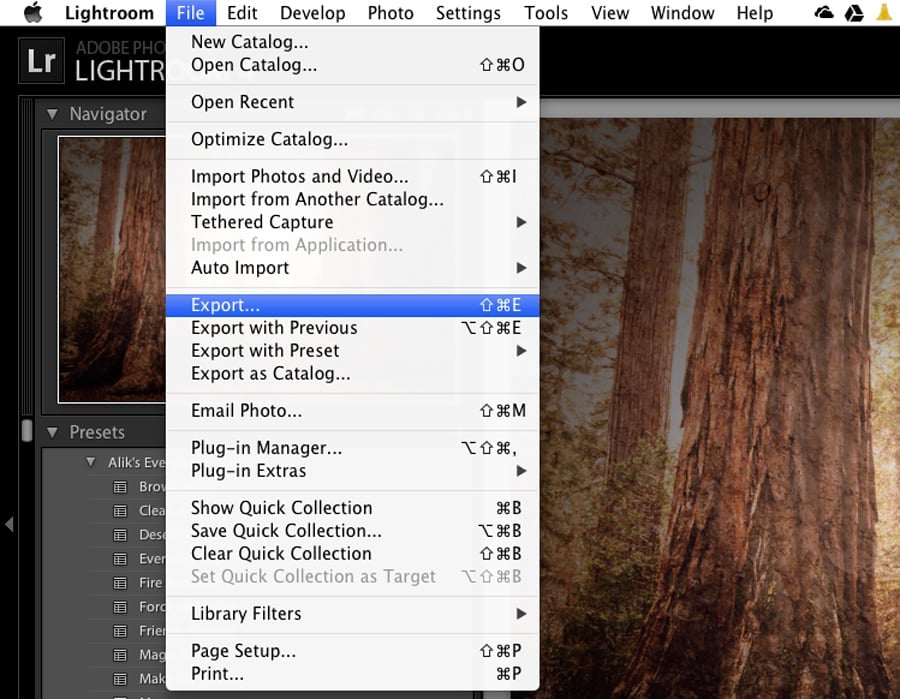
Step 3. Create An Export Preset In Lightroom
Using Lightroom, create an export preset that will automatically export your photos at a reasonable size to the Dropbox folder you made above.
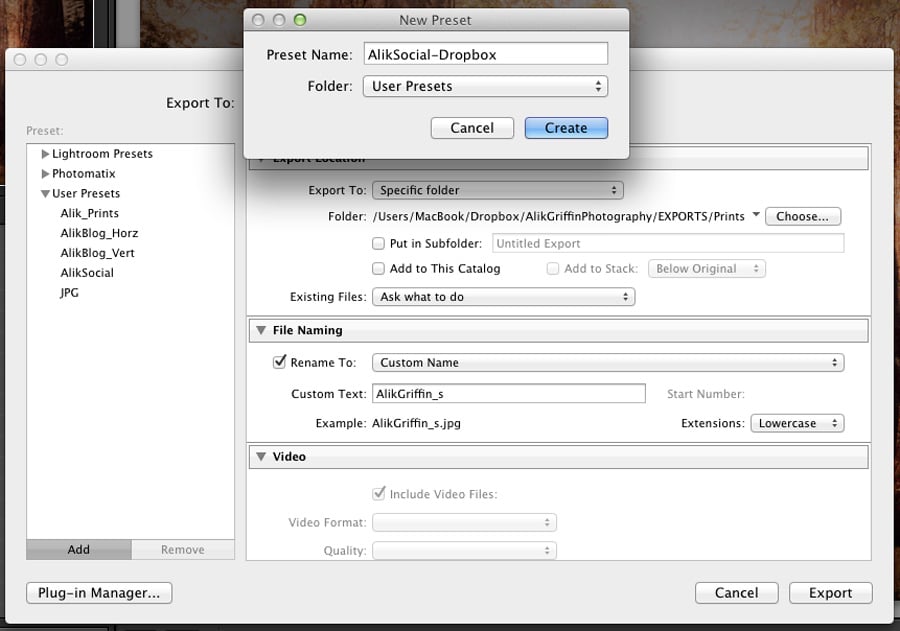
The smaller file will automatically go into my Dropbox folder whenever I export.
Step 4. Install Dropbox On Your Android Or iPhone
Link your account and adjust your upload setting. Make sure to specify if you want to upload it on Wi-Fi or over the network.
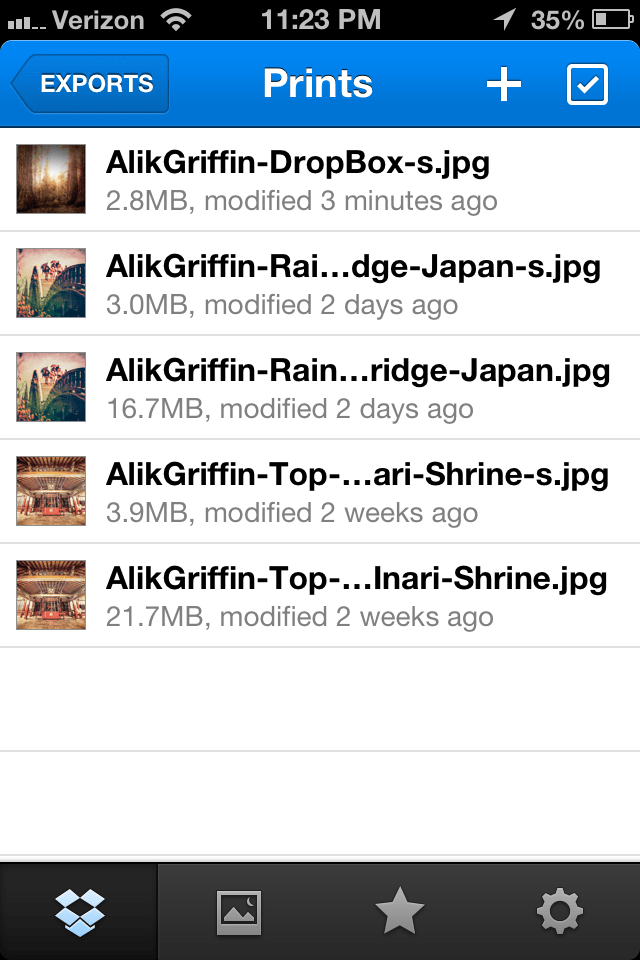
Step 5. Open Your Photo In Dropbox On Your iPhone Or Android And Save To Your Phone
This process will be different depending on your device. Here are some images of an older version of Dropbox.
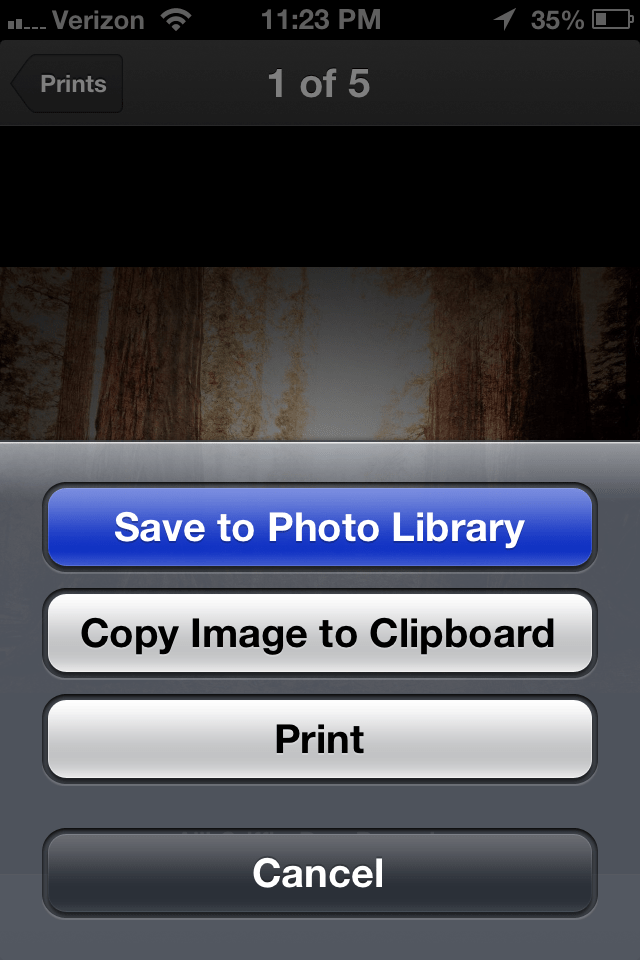
Step 6. Open Photo In The Instagram App
Now, you can access the photo, crop it as you wish, and upload it to Instagram. It’s very easy and quick.
If you don’t want to crop your photo, you can always letterbox it in Photoshop before downloading it to your phone.
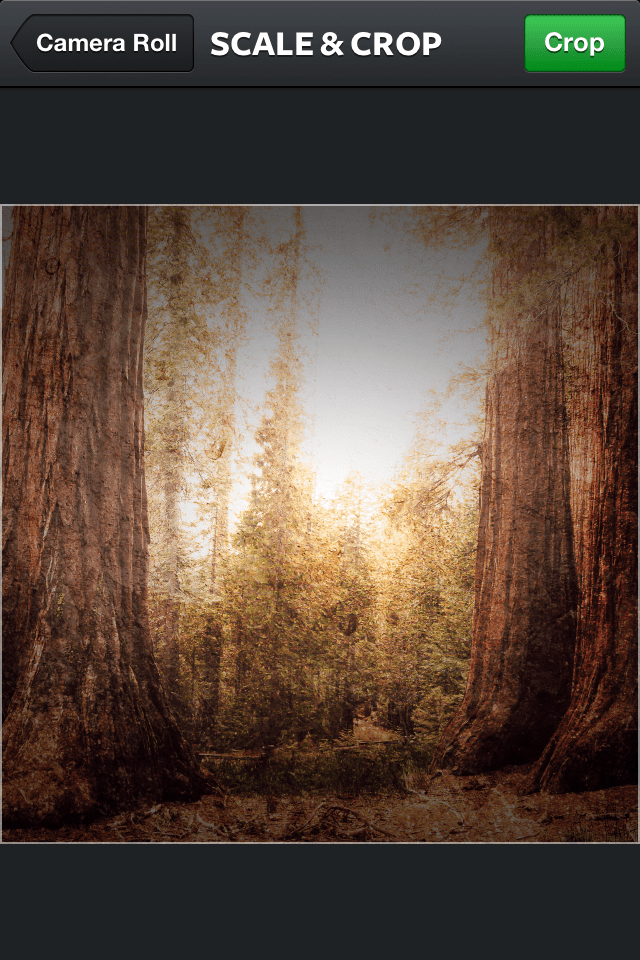
How To Get The White Boarders For Instagram
Instagram limits your portraits to the 4×5 aspect ratio, so if you have an image that you want to show in a 2×3 aspect ratio, you need to place it into a 4×5 image with borders.
On my iPhone or iPad, I use the Darkroom App to add borders to my images; unfortunately, this is only available on iOS.
The Darkroom app is the best for adding borders to your Instagram images. It gives you a ton of flexibility and options, including the ability to change the borders’ color.
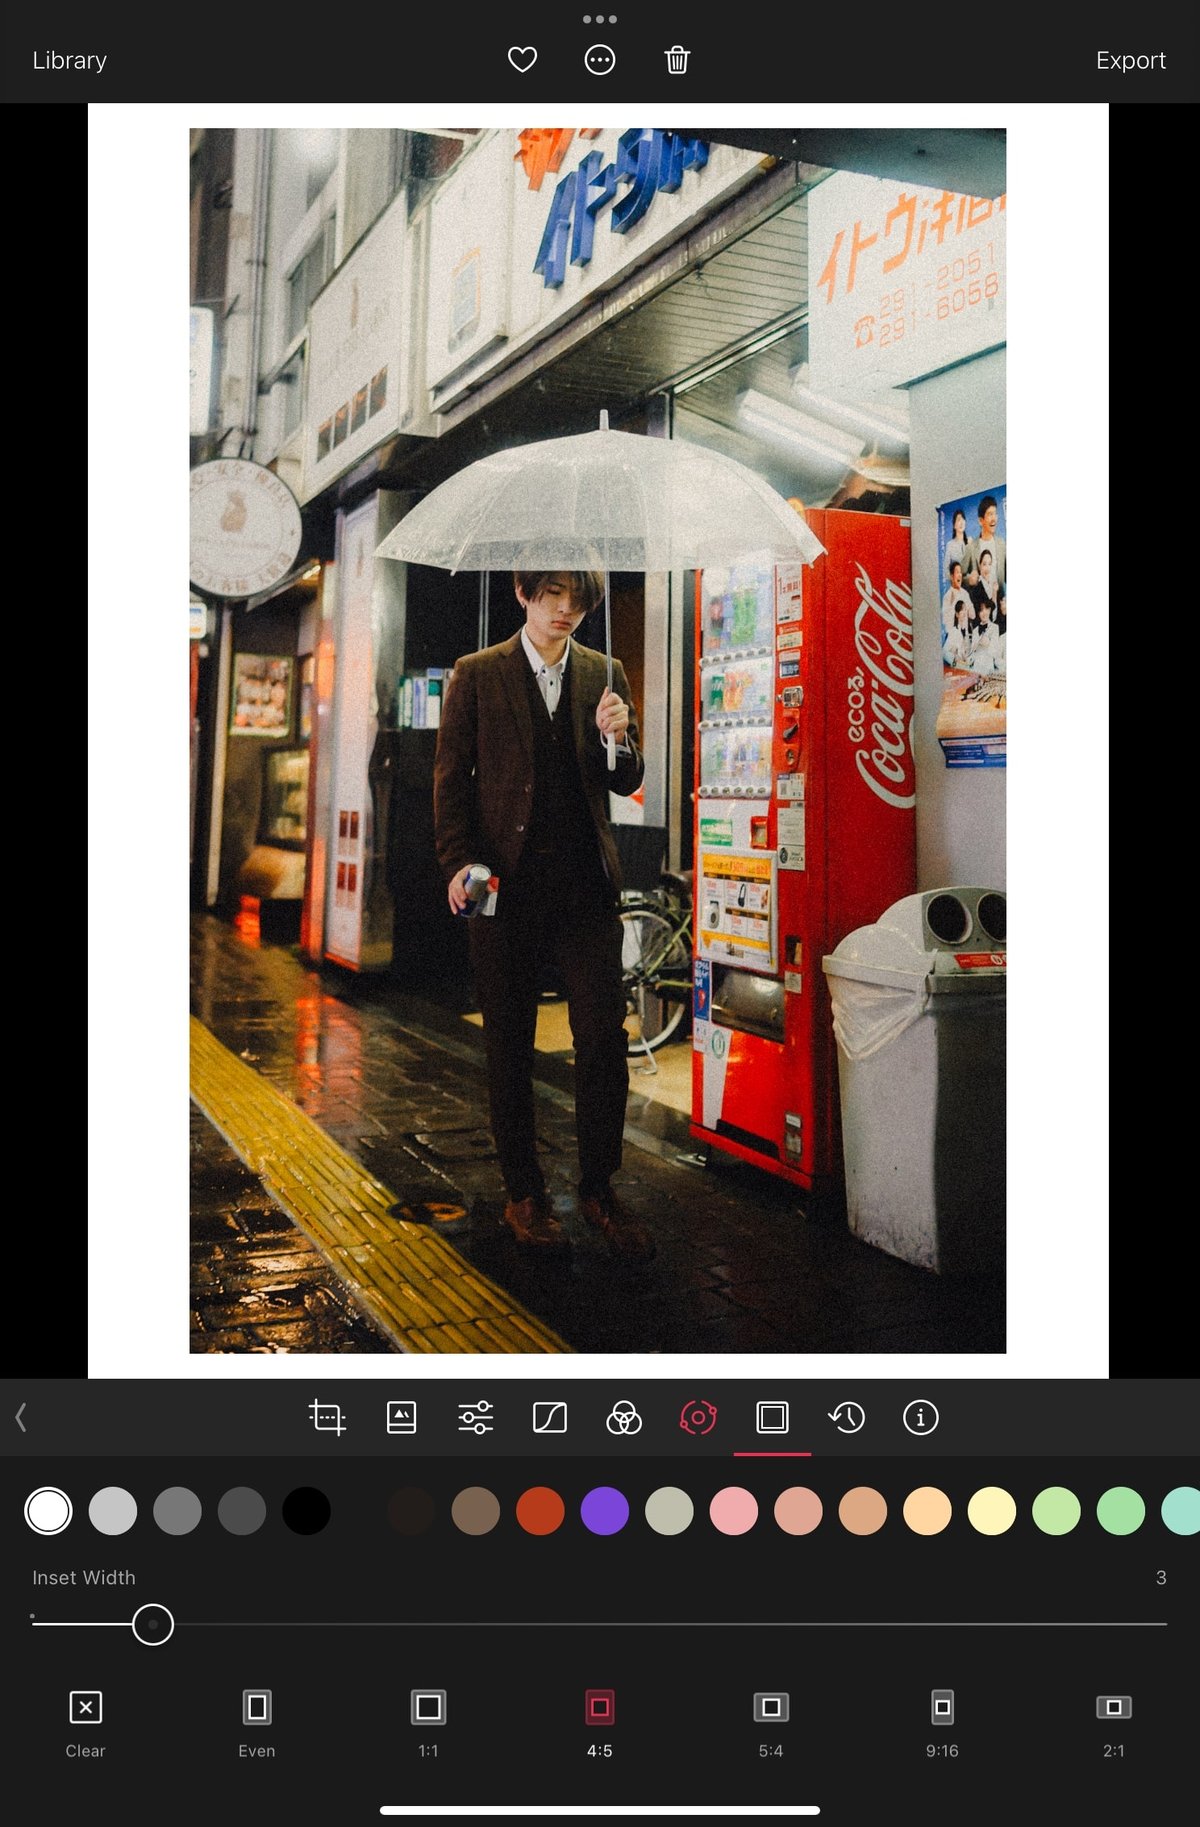
Unfortunately, I have not yet found a good Android option. So before I had an iPad, I built an Action in Photoshop that would automatically add borders to my images in the 4×5 or square crop.


Leave a Reply