This is a great Photoshop technique I picked up a few years ago. I’m always trying new things, new plugins, and new software, but I always seem to come back to the High Pass filter as my favorite sharpening trick. It works well on Landscape and HDR Photography.
Lately, my two combo punches as been to use Define 2, part of the Nik Collection, to remove noise, and then the High Pass filter to sharpen.
Since using Dfine 2 is just pushing one button, I won’t go over that.
Sharpening With The High Pass Filter
You can do this technique at any stage in your process. A lot of people like to do it towards the end.
If I’m just coloring with basic curves and nothing destructive, I might do it first so I can have a better look at the details of my photo.
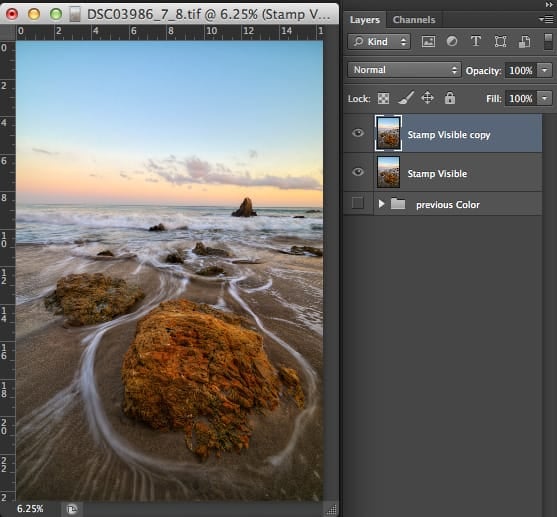
Step 1) Create a Stamp Visible Layer And Duplicate
So the first thing you want to do in Photoshop is create a Stamp Visible Layer.
Do this by selecting your topmost layer and pressing Command+Option+Shift+E. (Ctrl+Alt+Shift+E on PC)
If you’re doing this technique first, then ignore that first part, as you’ll just be duplicating your background image.
Then, you can duplicate that layer. (Command+J) or (Ctrl+J on PC).

Step 2) Use The High Pass Filter
Now we’ll go up to Filters->Other and set the High Pass Filter.
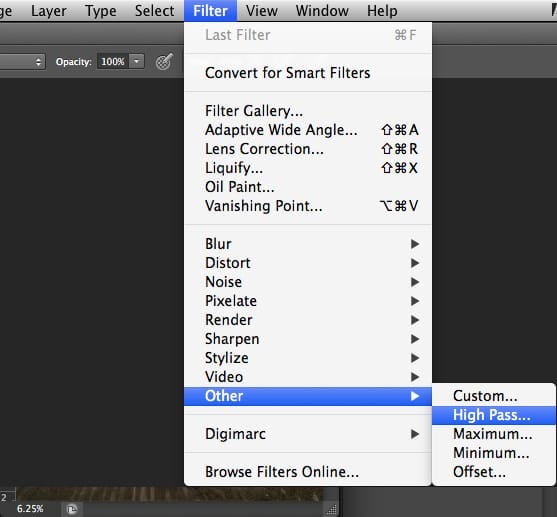
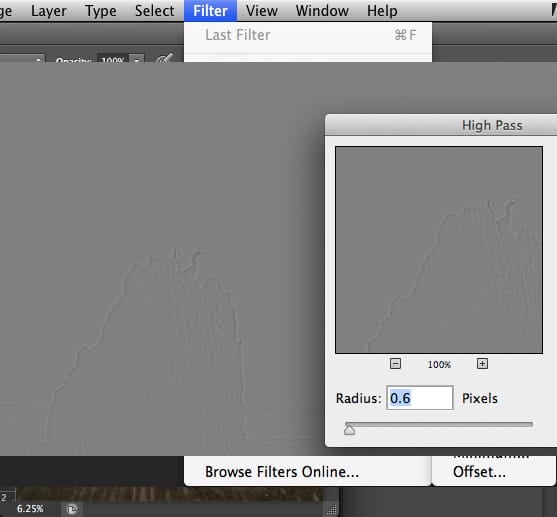
Step 3) Adjust Radius
Now, you’ll adjust the radius of the High Pass filter so that the edges and details are barely visible. If you do this too much, you’ll get that halo-sharpening effect around your edges. So keep it low if you can. This will also depend on how sharp your images are to begin with.
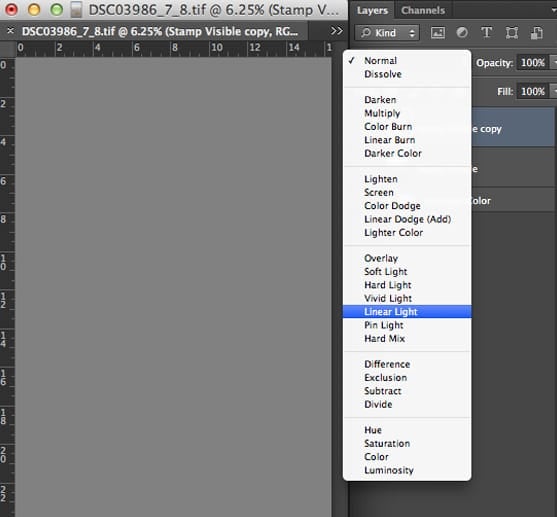
Step 4) Set The Blending Mode To Linear Light, Overlay, or Soft Light
Once you’ve created this grayed-out-looking layer, you’ll want to set the blending mode to Linear Light, Overlay, or Soft Light. Whichever you prefer.
The difference is that linear Light will give you the most detail, sometimes too much detail. You can dial it back by using Overlay or Soft Light. It’s really up to you.
Our Before And After
This is a 100% crop on the image, so you can see the difference. Try to look past the web compression.
Before
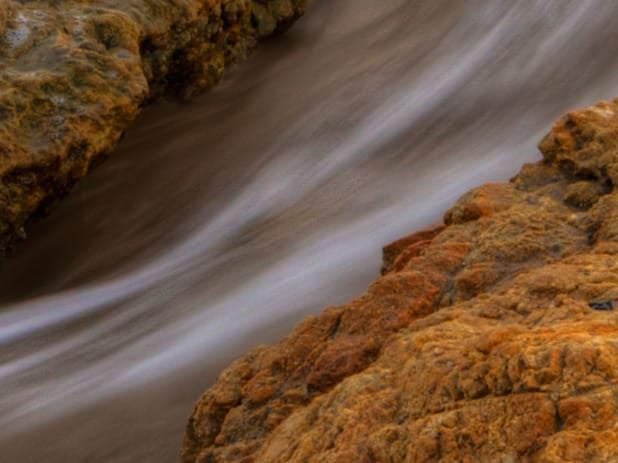
After

The effect works great.
Step 5) Stop Here Or Duplicate Layer
If you’re happy with the results, you can stop here. But usually, I like to duplicate this layer at least once, sometimes twice. But duplicating too much can reveal some noise and grain.
Command+J (Ctrl+J) To Duplicate.
On this second layer, I’ll often set it to Overlay or Soft Light so the sharpness isn’t too exaggerated. But it’s up to you, and every image is different.
Here is what that looks like: 100% Cropped.
That’s It!
In the image above, a bit of grain appears in the water. That’s because this was an HDR photo, so you’ll see more of that tone-mapped grain. Usually, doing a noise reduction pass before using the High Pass filter will fix this. But if it doesn’t, you can throw these layers into a group and apply a layer mask. Then, you can brush out all the areas on the layer mask that you don’t want sharp. It works really well. However, using Layer Masks will be a completely different tutorial.
Final Landscape Photo – ‘Good Promises’

Camera Used: Sony A7r
Lens: Rokinon 14mm
ISO: 100
Aperture: 16mm
Shutter: 1/4
Bracketed -+2EV 3 Shots


Leave a Reply