
I’ve been shooting a bit with the 35mm f1.4 lately and am already in love with the lens. It’s not perfect; it’s not an S lens, which in this case means it’s missing the ED elements, the Nano Crystal coating and has a different rendering (which I will demonstrate in this comparison), but for the casual or lifestyle/street photographer, it’s exactly what I wanted – kind of a beater lens.
Nikon Z 35mm f1.4 – Amazon / B&H
Nikon Z 35mm f1.8 S – Amazon / B&H
Quick Overview: I would take the 35mm f1.8 S lens if I could only have one lens. It’s just better. But considering the price, the 35mm f1.4 is good enough if I was on a budget. If I had the 35mm f1.4 first, I probably wouldn’t upgrade to the 35mm f1.8.
There are some technical differences, but the biggest difference is that the 35mm f1.4 has a classic bokeh rendering, while the 35mm f1.8 S is more modern with the flat field curvature. This makes a huge difference in the way they render bokeh and the focus falloff, and ultimately, it might be fun to own both lenses: the 35mm f1.4 if you want more of an old-school film look and the 35mm f1.8 if you want a modern cine look.
Because these lenses produce different artistic stylings, it’s a bit of an apples-to-oranges comparison. So buy the lens that has the look you like more, and if your budget only allows you to buy the f1.4 lens, that’s fine; it’s still a really good lens—weather-sealed, dual focus motors, Super Integrated Coatings, and all internal focus design. The 35mm f1.8 S is also supposed to be sharper, but mine is softer.
Nikon Z 35mm f1.4 vs Nikon Z 35mm f1.8 S
Let’s look at the build and technology before examining the optical characteristics.
Technology
There are some minor differences here, and the S lens has slightly better tech, like ED elements and the nano crystal coating. These improvements don’t always come into play in every shooting situation, but the S lens would show an advantage in some tough shooting conditions.
| Technology | Nikon Z 35mm f1.4 | Nikon Z 35mm f1.8 S |
| ED Element | No | Yes |
| Aspheric Lenses | Yes | Yes |
| Nano Crystal Coating | No | Yes |
| Super Integrated Coating | Yes | Yes |
| Multi-Focus Method | Yes | Yes |
| Stepping Motor | Yes | Yes |
| Internal Focus Method | Yes | No |
| Rear Focusing Method | No | Yes |
| M/A | Yes | Yes |
| Elements | 11/9 | 11/9 |
| Aspherical | 2 | 3 |
| ED | 0 | 2 |
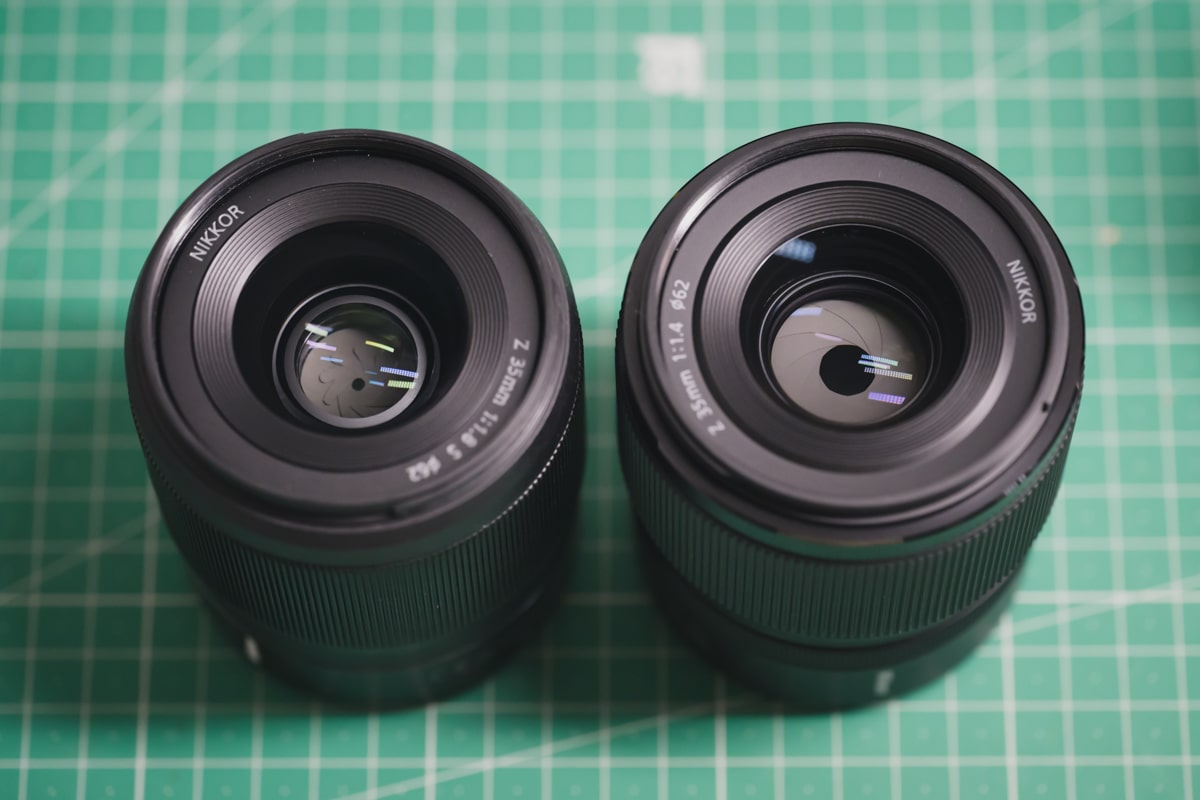
| Iris | 9 | 9 |
| Focus Distance | 0.27m | 0.25m |
| Weight | 415g | 370g |
The 35mm f1.8 S doesn’t get the IF (internal focus) badge on its specification page. Since it is a rear-focusing lens, it looks like only the element at the rear moves, but I can’t test or see this in action since it takes the lens being mounted to the camera to focus. So you won’t have to worry about the lens sucking in dust from the front, but you’ll want to keep that rear element clean.
The only real advantages of the S lens are the nanocrystal coating and the ED element. The lack of the ED element is likely why the f1.4 lens exhibits a little more CA. I haven’t noticed the lack of the Nano Crystal Coating on the F1.4 lens having much of an effect, but I’m sure it saves the day in some situations. Nikon likely left the Nanocoatings off the f1.4 lens to allow for a little more flare since it seems the goal of this lens was to keep it classic with a bit more character.
The Nikon Z 35mm f1.4 lens has an Internal Focusing design, a nice feature.
Both lenses have very little focus-breathing.
Build Quality
Nikon used the rubberized grip on the f1.4 lens and removed the AF—M switch.
Both lenses feel solid, but the f1.4 exterior shell is mostly rubber and plastic and does feel a little cheaper than the f1.8 if you hold them side by side. The f1.4 lens is also a little heavier.
The f1.8 uses only a small amount of textured plastic for grip around the focus ring. The rest of the exterior is mostly aluminum.
Just by looking at this photo, you can see the build on the 35mm f1.8 is more premium, but I also like the rubber grip on the f1.4 lens and the control ring, which the 35mm f1.8 does not have.
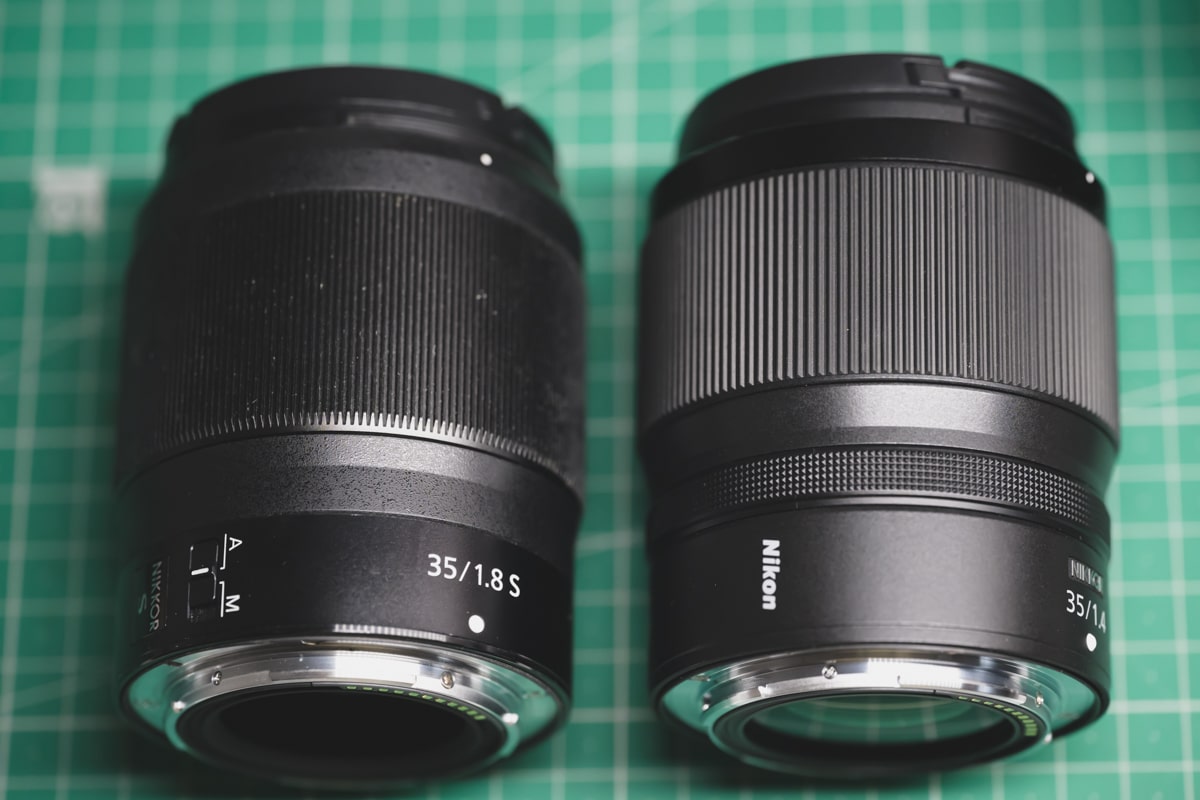
In the above comparison, the f1.4 lens really takes that real aspherical element as far back as possible, maximizing the advantage of those Z-mount dimensions. The only other company that could build a lens like this is Canon since they also have a large mount.
Sharpness Comparison
If you look at the MTF charts, you can see that the 35mm f1.8 is supposed to be much sharper.
How these charts work: Higher means sharper; the left is the center frame, and the right is the edges.
Based on the MTF charts alone, the 35mm f1.8 S should be the better choice for landscape, architecture, or any project that requires detail and consistency across the frame, especially when shooting wide open. This would be a better professional lens for situations where you just need a clean and consistent image, like when shooting groups of people.
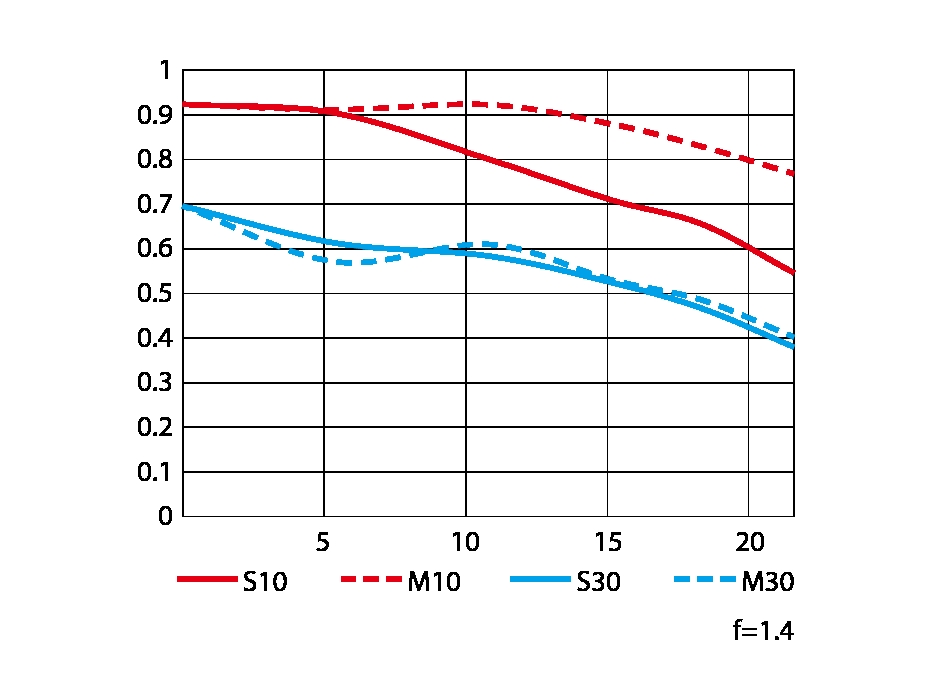
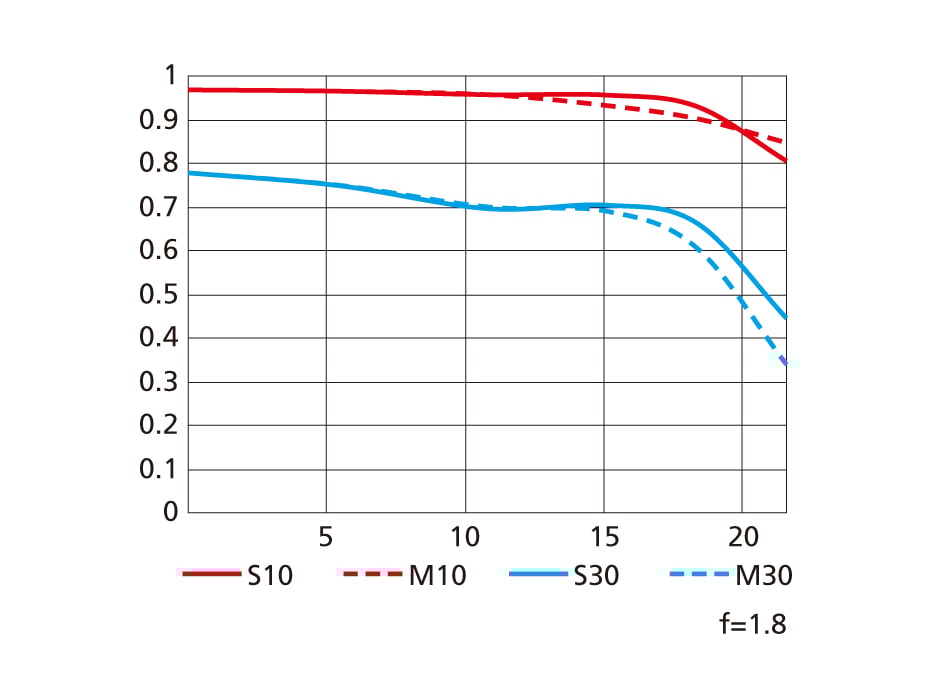
I have to show you MTF charts because I have a soft copy of the 35mm f1.8 – or it’s just old and fallen out of sharpness.
For wedding photographers, the S lens would be best for the group shots because of the great mid section and edge sharpness, but the f1.4 lens would work well for the bride’s shots.
While the F1.8 lens would be better for landscape photography due to the ED elements and Nano Crystal Coatings, the f1.4 lens performs great when stopped down.
Real World AF & Sharpness Test
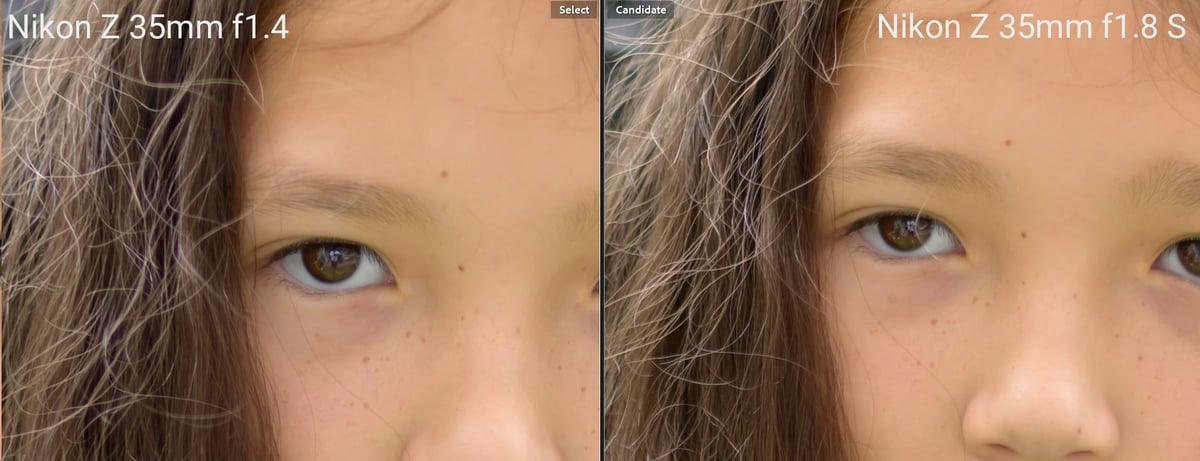
When testing in the real world, I noticed that my 35mm f1.8 is softer than the 35mm f1.4. It shouldn’t be this way. I have a soft copy of the 35mm f1.8, and I never knew it when I first got the lens since I was on a Z6, and had nothing to compare it against. Or it’s gotten softer over time. It should be sharper, so pay attention to the MTF charts when looking at sharpness.
When ordering your lenses, cross your fingers and hope you get a good copy if you care about sharpness above all else. But some of the softness is why I’ve loved this 35mm f1.8 so much. It has a smoother, softer cinematic feel, which even comes out in the side-by-side below.
I’ll see if I can swap out my 35mm f1.8 S lens somehow and post some more comparisons in the future.
Art & Character
The next big difference is how these lenses render bokeh and the focus fall-off.
Bokeh Comparison – Focus Falloff & Depth Of Field
This f1.4 lens has a more classic bokeh profile, with a shallower center area that falls off toward the edges. This gives almost a cone of bokeh or radial bokeh effect.
Here is a sample of the Nikon 35mm f1.4 showing how the depth of field works. Most of the shallow depth is happening in the center of the image, and the depth feels very unbalanced when I have two subjects. In this situation, the Nikon Z 35mm f1.8 would show a very even and consistent bokeh throughout the frame instead of this ghosty blob of bokeh in the center. This is also why some feel like the f1.8 lenses are actually shallower than f1.8, because along the edges they are compare to our traditional f1.4 lenses.

Slider Comparison
In this slider comparison below, we can see the difference in how the background blur is rendered between the two lenses.
Notice that in the F1.8 sample, the edges actually have a shallower depth compared to the f1.4 lens. For the majority of the shallow depth, the f1.4 magic of the f1.4 lens happens only in the center to mid-frame of the lens. You’ve maybe often heard people say these Nikon S lenses feel like they have a shallower depth than what we’re used to with f1.8 lenses or f2.8 if you’re shooting on the zooms; this because you’re maybe not used to seeing an f1.8 depth throughout the whole frame, which traditionally is not how our lenses were designed beyond this last decade – this new field curvature is a very modern look and kind of a new look, and I think it’s actually really cool.


Also, what’s interesting about this sample is that they are the exact same exposure: ISO 100, f1.4 or f1.8 at 1/800 shutter. The f1.4 lens is only a hair brighter.
In this next sample, the 35 mm f1.8 S lens has better bokeh smoothness.
Notice that little tire on the bike in the background—how much better it looks on the 35mm f1.8. Also, CA is a bit more edgy and intense on the 35mm f1.4. This is likely what the 2 ED elements on the f1.8 lens are fixing.


I like the classic feel and how the bokeh works on the f1.4 lens when dealing with a single subject center frame. It creates this halo of bokeh around them.

However, I also find that the 35mm f1.8 has a unique 3d cut-out effect that is sometimes really nice.
I really can’t decide which lens I like more here. I’ll probably use the f1.4 lens more because I like the classic wild bokeh for street photography and lifestyle photography, but I think I would always use the 35mm f1.8 for events and family portraits where I would feel a little more comfortable cropping in with that extra sharpness.
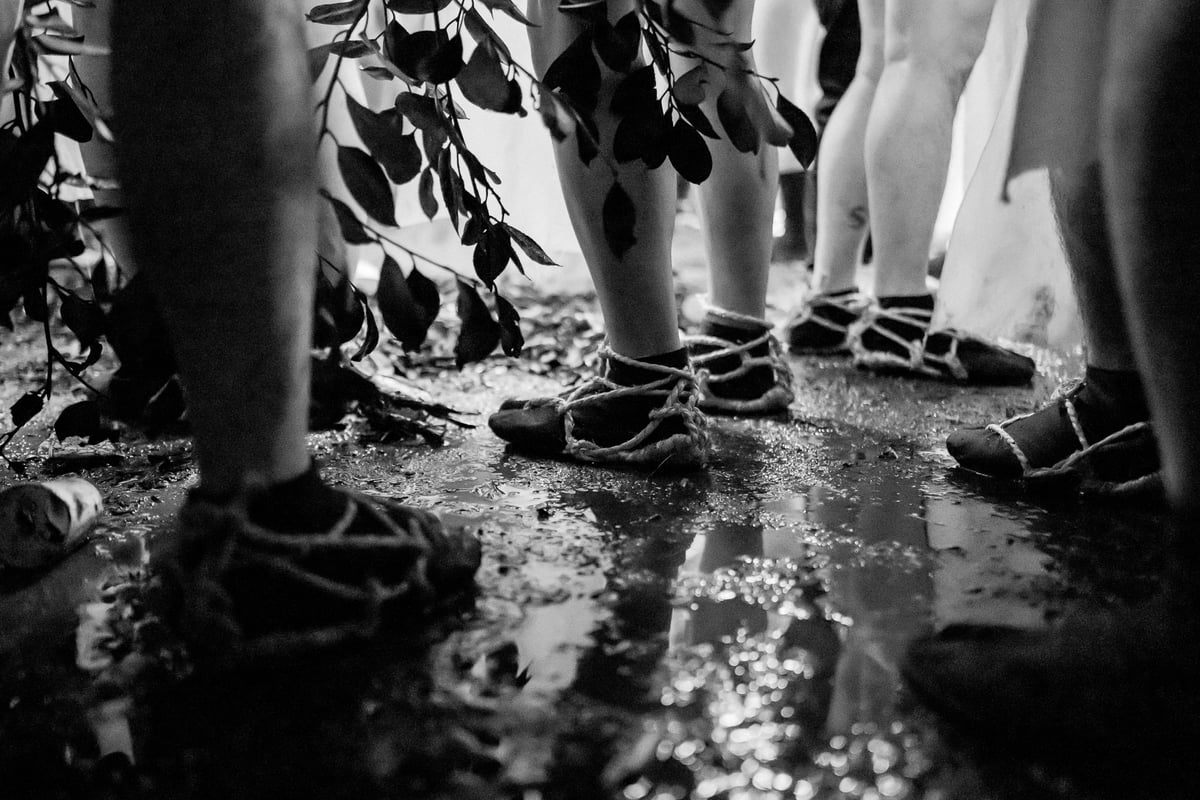
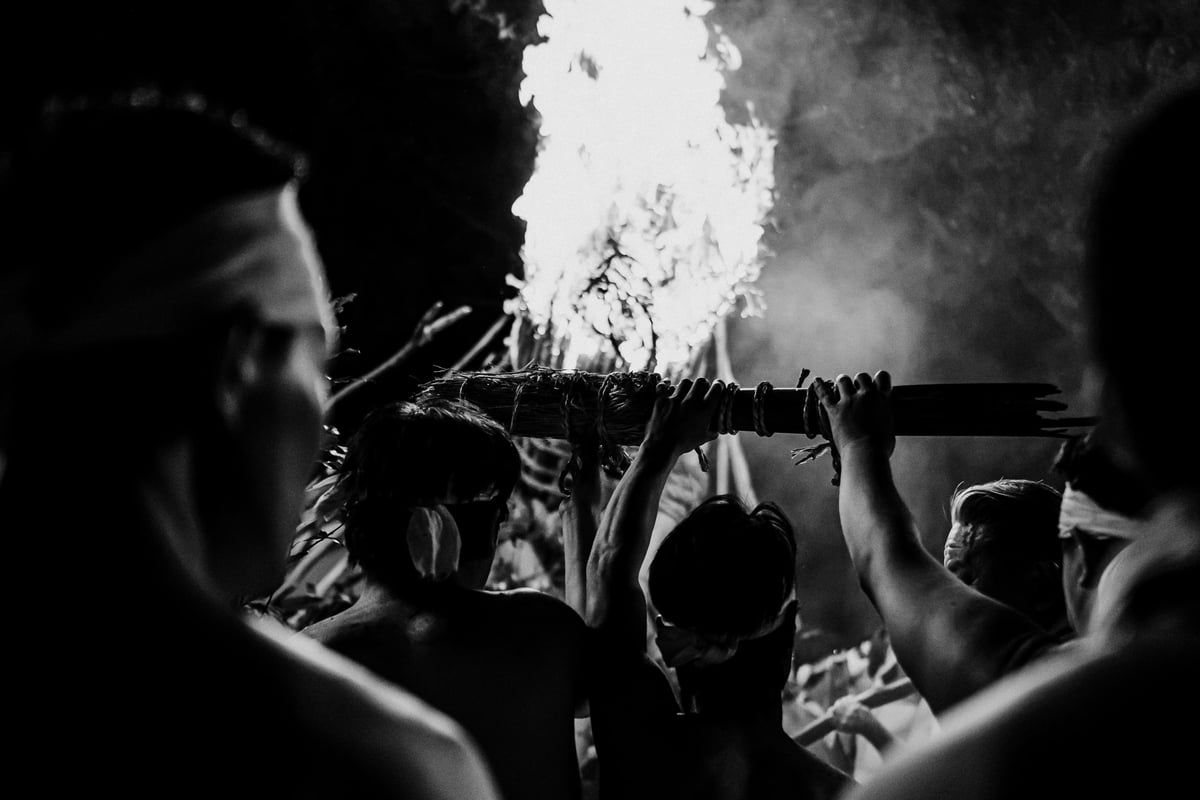
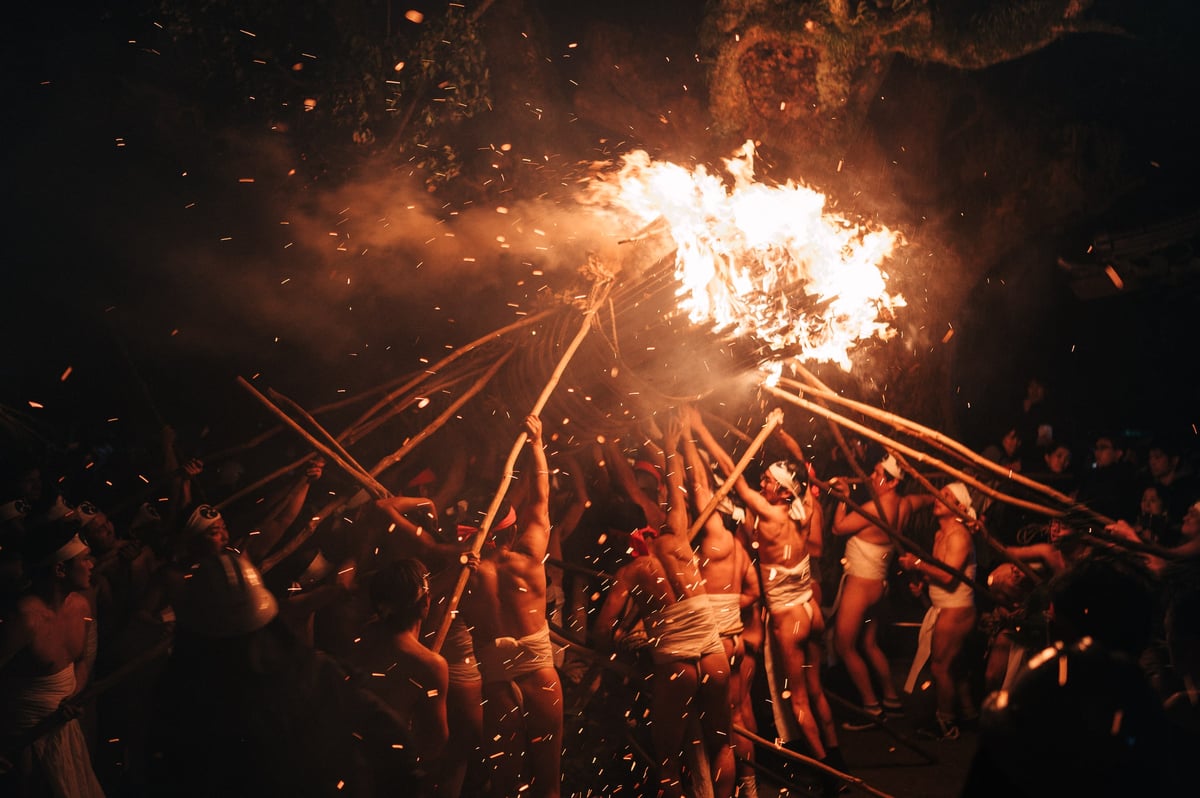
For example, with this type of event below, I think I would use the S lens. Honestly, it’s one of my favorite lenses, and the look of it is absolutely amazing.
More Chromatic Aberrations on The 35mm f1.4
The biggest negative characteristic of this f1.4 lens compared to the f1.8 S lens is that you get a lot more CA, especially in the background bokeh. However, the 35mm f1.8 S lens was known for having a bit of that green fringing in the background bokeh, but on the f1.4 lens, it’s even worse.
You can see it in his hair in this sample. You can kind of see how the bokeh gets sloppy around the trees.

Quick note: For all these exterior mud shots, I’m using a Tiffen Pro-Mist (Not Black Pro-Mist) filter with 1/4 power. I was rushing out the door and just needed a 62mm filter to protect my lens, so I quickly grabbed this since it was on my desk. I’m glad I ended up with this filter because it really helped with this high-contrast setting. But I’ll update it with more samples without the filter, as I will use this lens more in the future.

Although I color a lot with a more faded classic look in this sample set, the color rendering with this lens is fantastic.
Looking at those skin tones on Luka here, there is very good detail and amazing tonality, even with a soft mist filter on an 11-element lens.

In this next image, you can see the Soft Mist filter doing its thing. However, this is a nice sample to show the foreground and background bokeh at f1.4. It really looks great, although the bokeh balls do start to lose some of their round shape along the edges of the frame.


Another Note: These images look extra crisp compared to older articles because I now export my images from Lightroom at 2048px long edge and click the “sharpen for screens” option. Before, I scaled in Caesium or ImageOptim on Mac.
Then we have the 35mm f1.8.
With its buttery bokeh.

Nikon Z 35mm f1.4 vs Nikon Z 35mm f1.8 S Bottom Line
Both are amazing lenses. Since I got it, the Nikon 35mm f1.8 S has been one of my all-time favorite primes. Its bokeh is so smooth, and its rendering is just like butter, even though mine is softer. However, I always wanted a good, faster classic 35mm. The best I had before this lens was the Voigtlander 35mm f1.7, but now I think this Nikon 35mm f1.4 nails it. I think it’s maybe the best fast 35mm lens with a classic rendering, all things considered, weather-sealed, dual focus system, no focus breathing, etc.
If you’re a pro, it’s probably better to get the 35mm f1.8 S., but if you do a lot of portrait work and want a bit more of that wild bokeh, especially around the center frame where you’re doing a lot of single-subject shoots, then the f1.4 lens can be a lot of fun.
I like the 35mm f1.4 for street photography, maybe a little more, but something about the f1.8 almost feels a little more cinematic; I think the smoother bokeh helps.
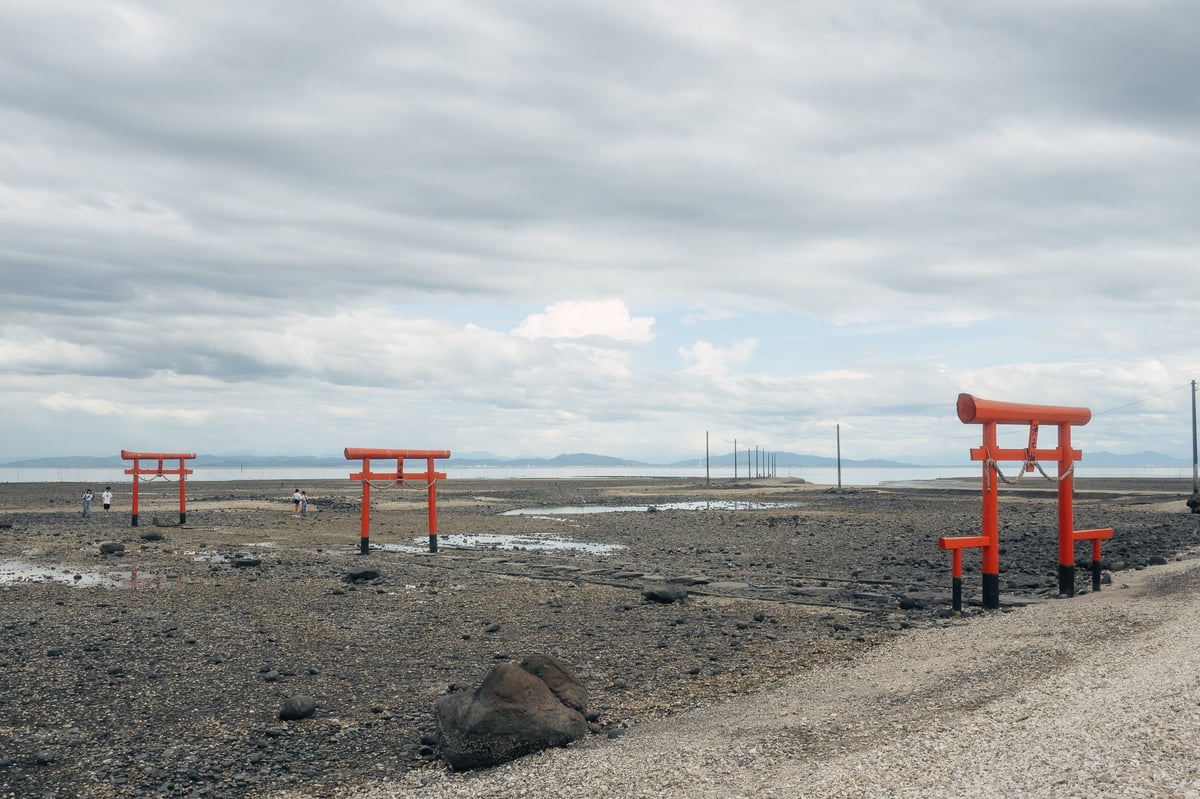
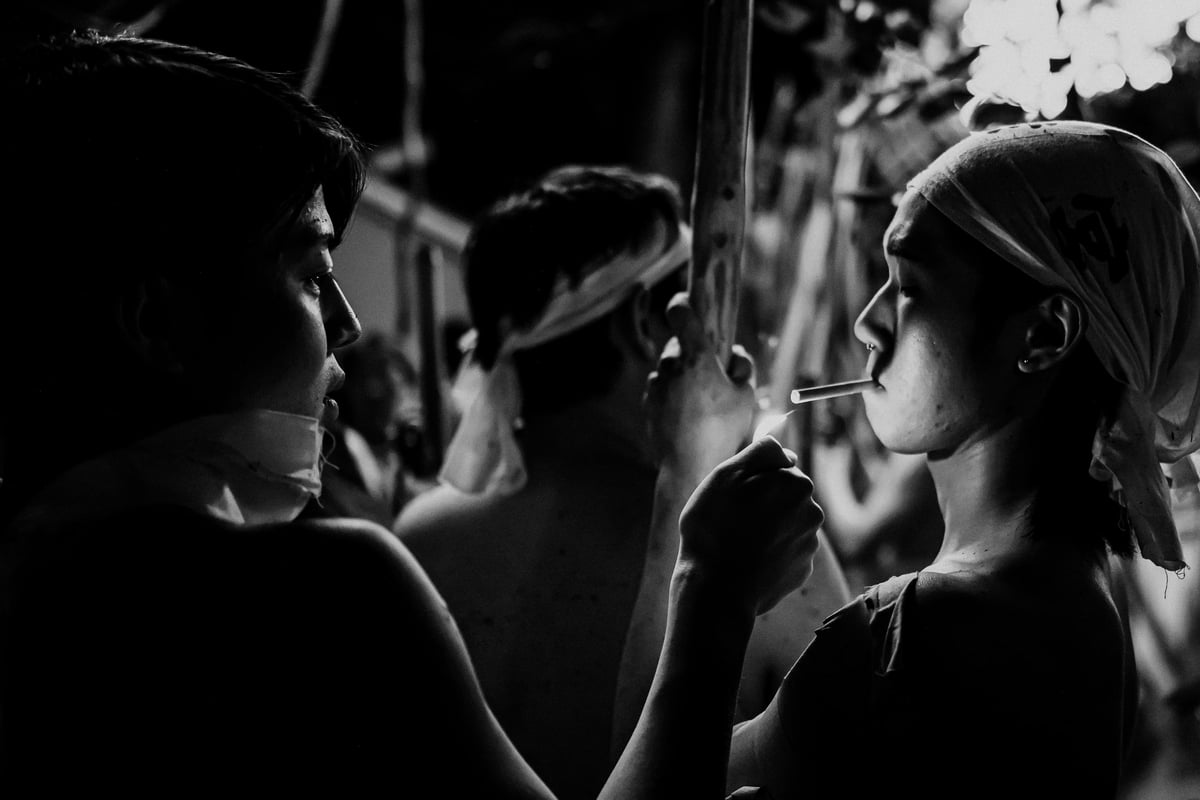
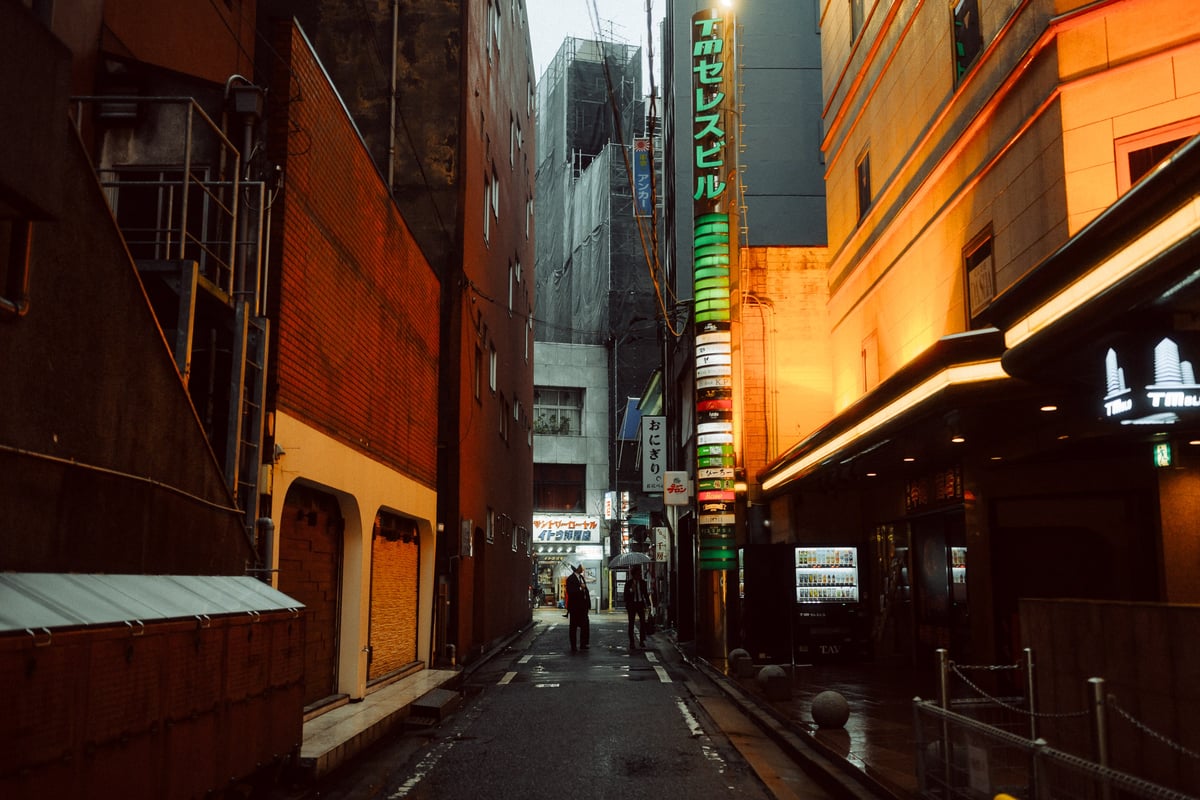
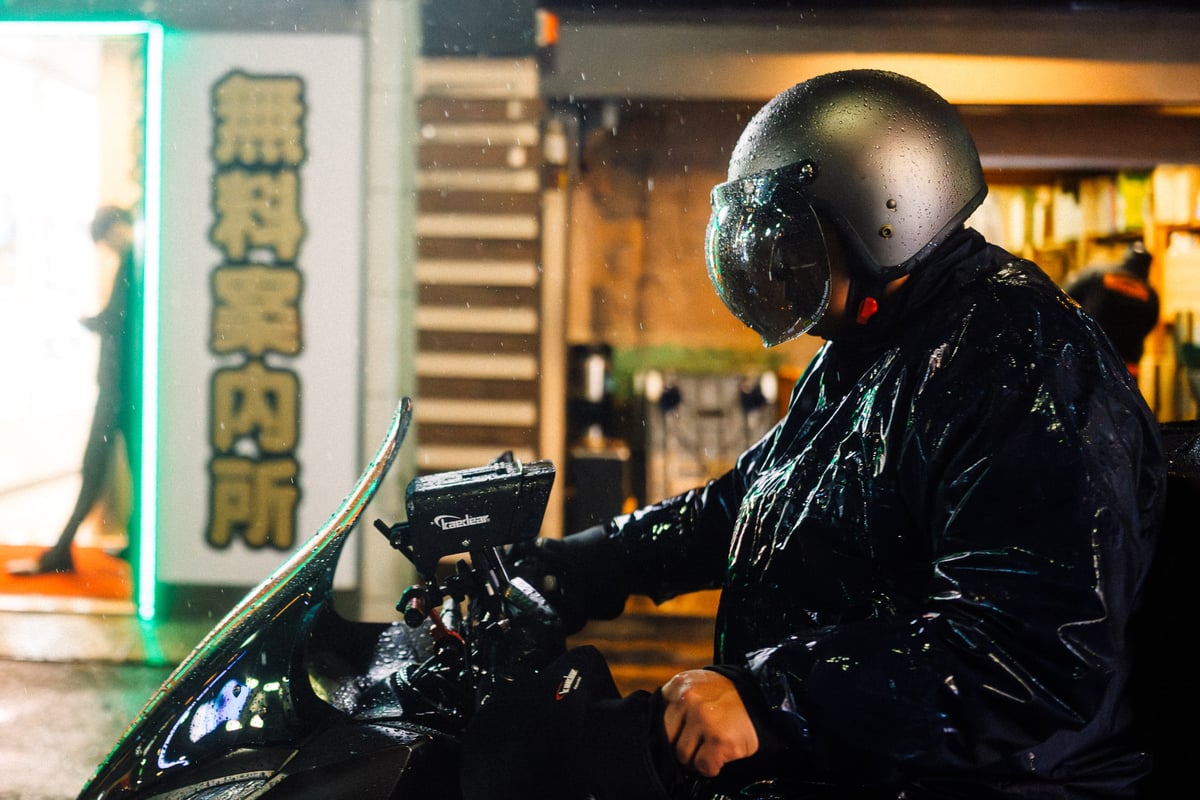
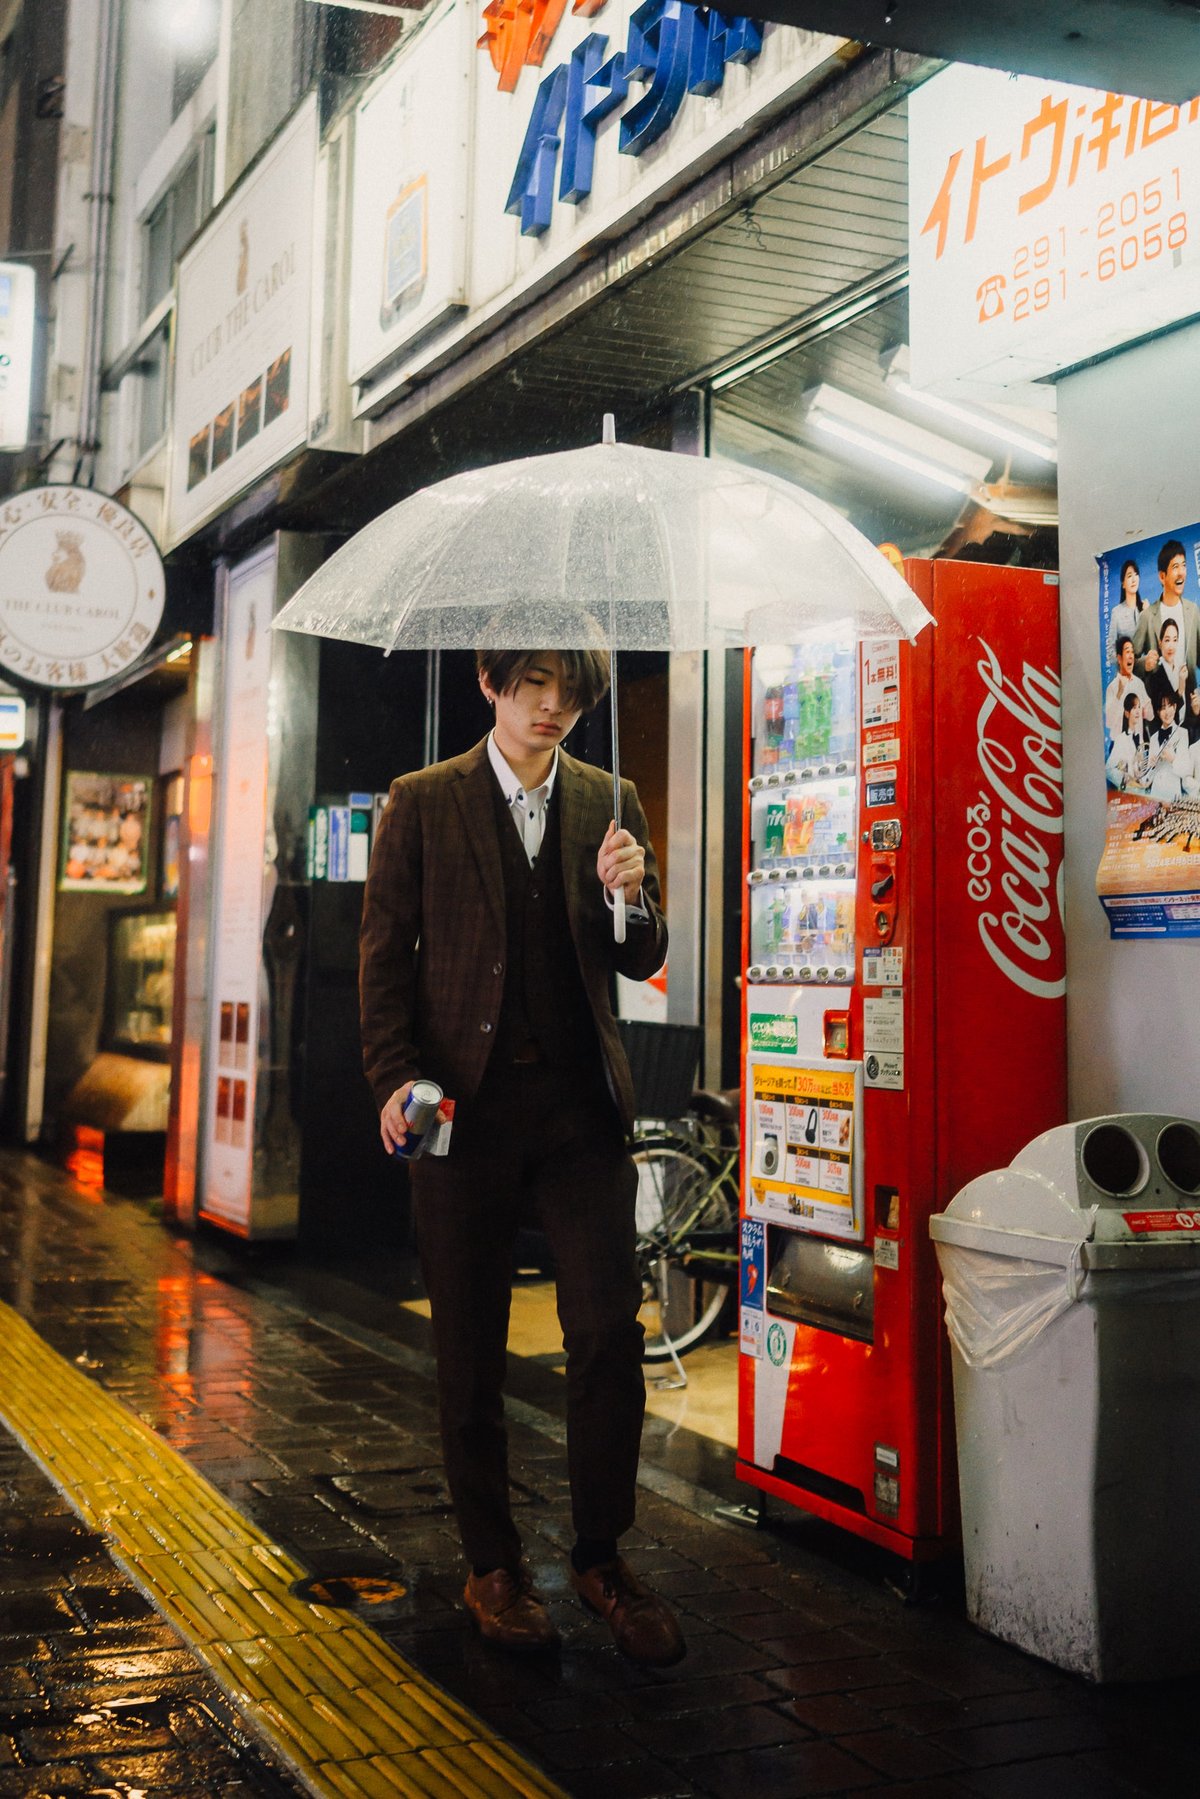
Nikon Z 35mm f1.4 Street Photography Samples
Try to look past the Shimmer Glass 1 and Pro-Mist filter I’m using in these samples. The bokeh is what really separates these lenses’ characteristics, and it still comes through in these samples.


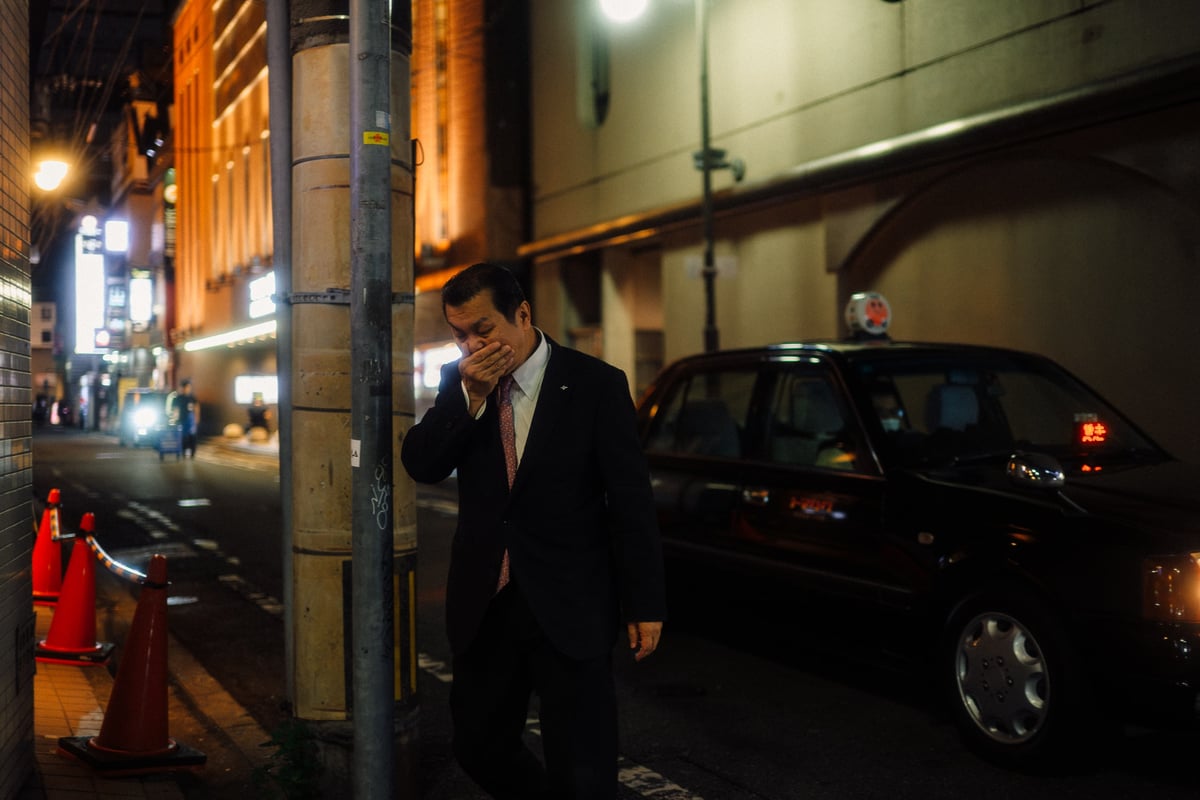
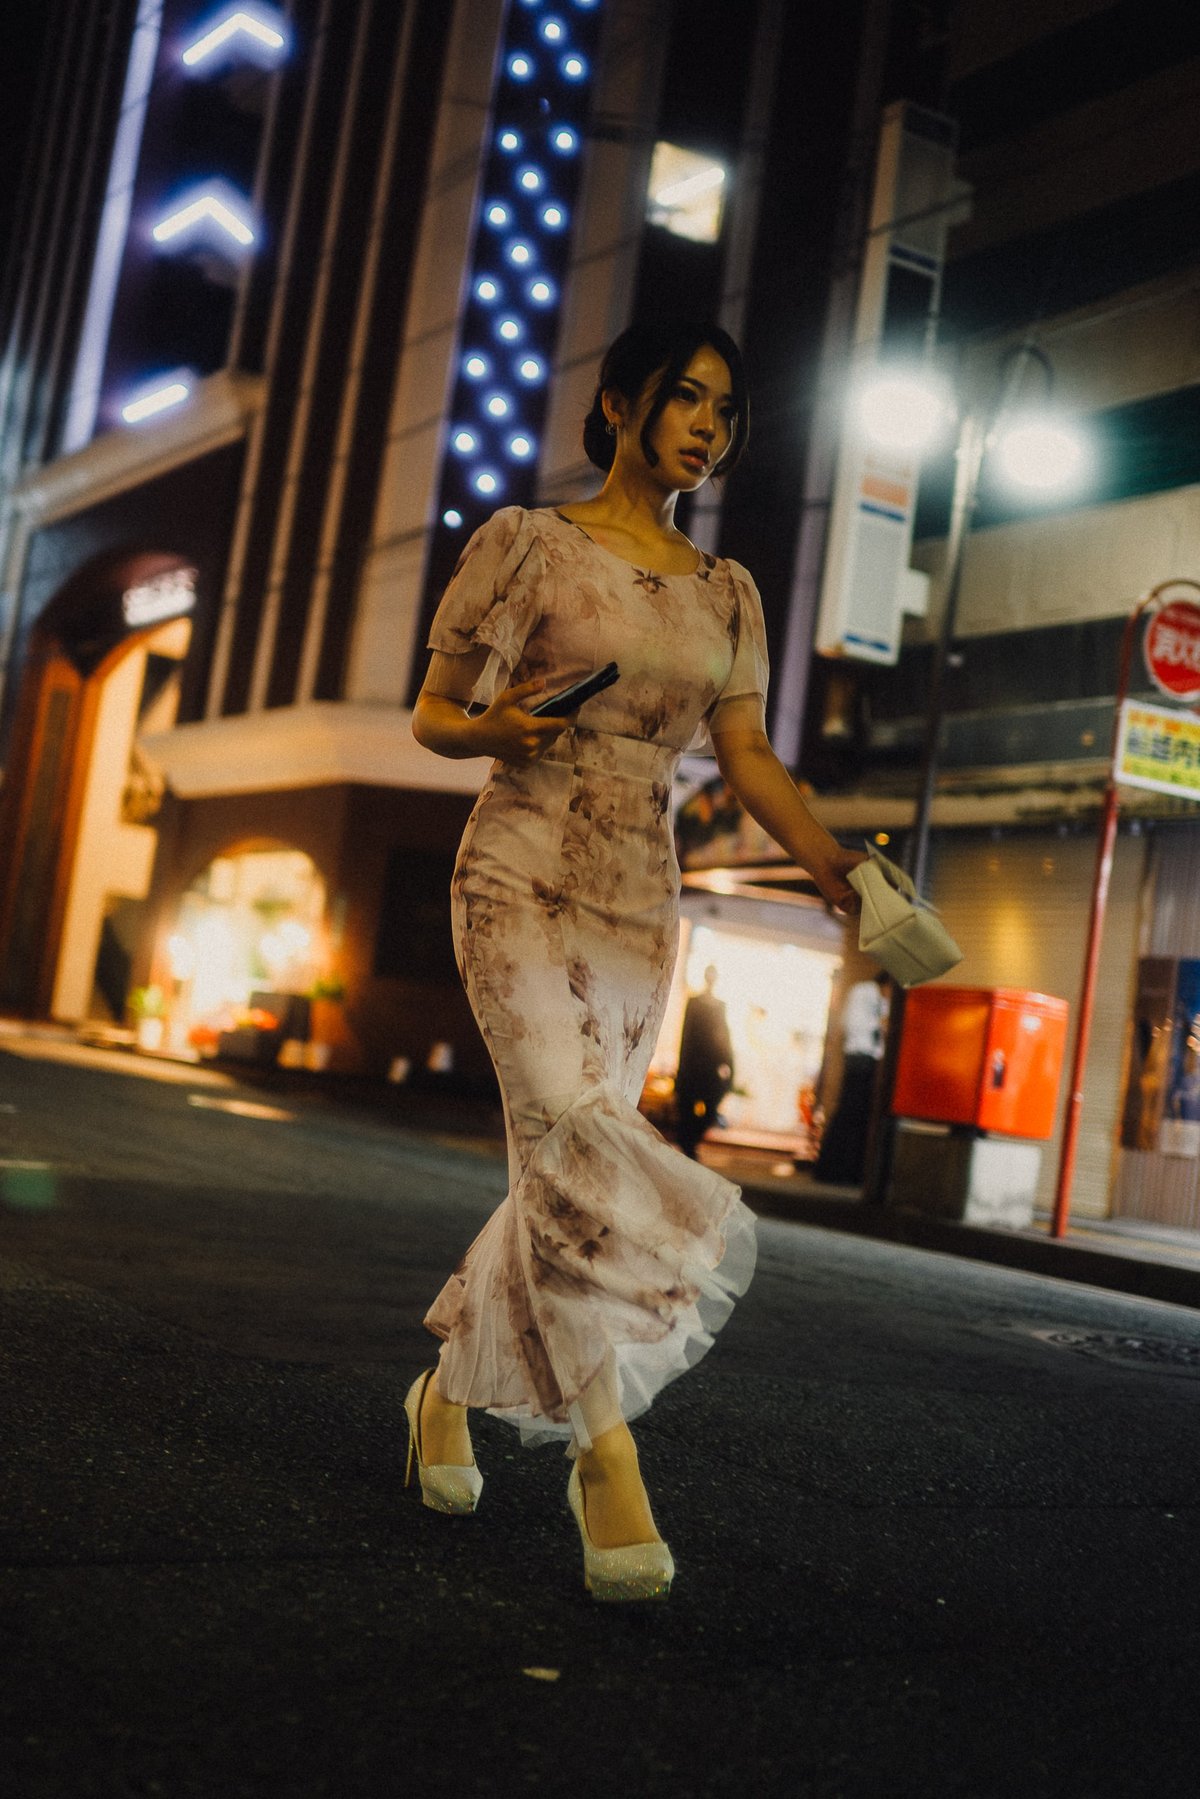
These are shot with the Nikon Z8, and I’ve been testing out the Tiffen Pro-Mist 1/4 for most of them. Sorry I don’t have cleaner samples without these filters, but I often shoot for fun and use the gear I want to use then write about the experience as a byproduct and I like using mist filters.


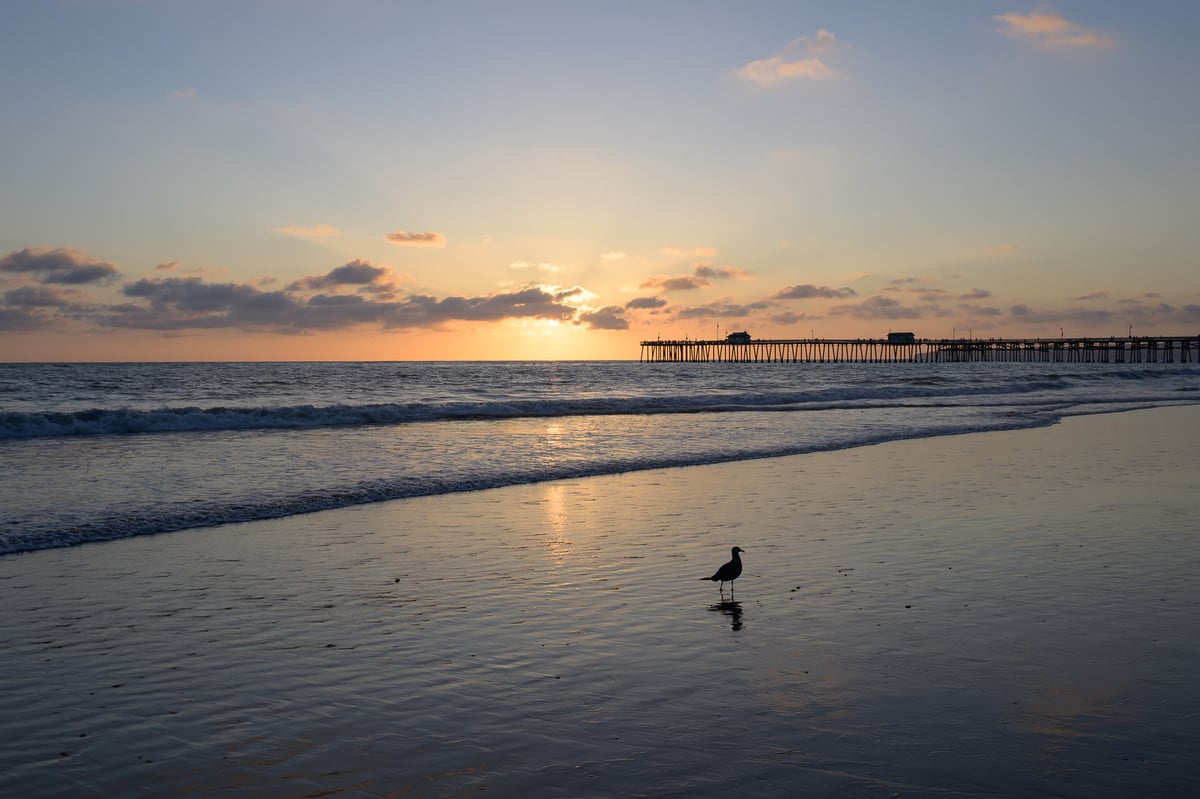
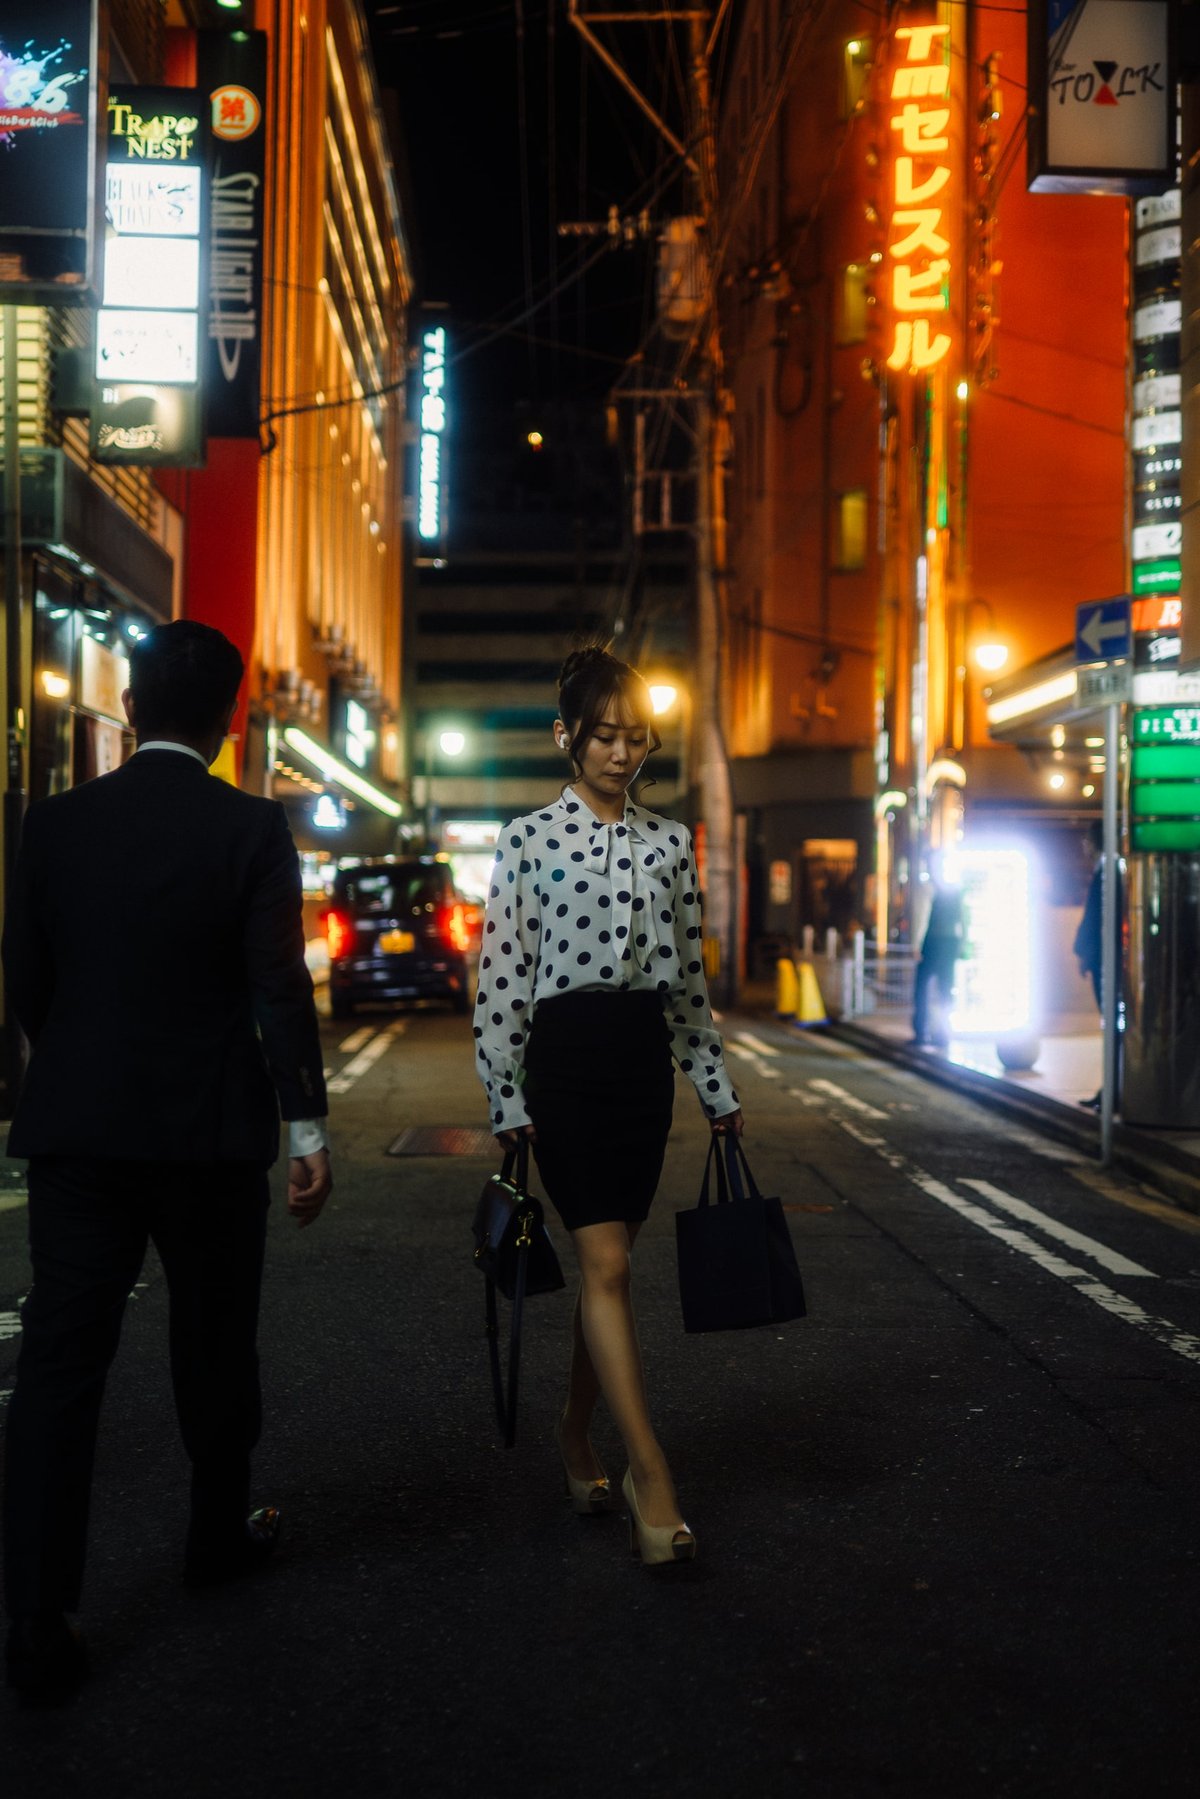
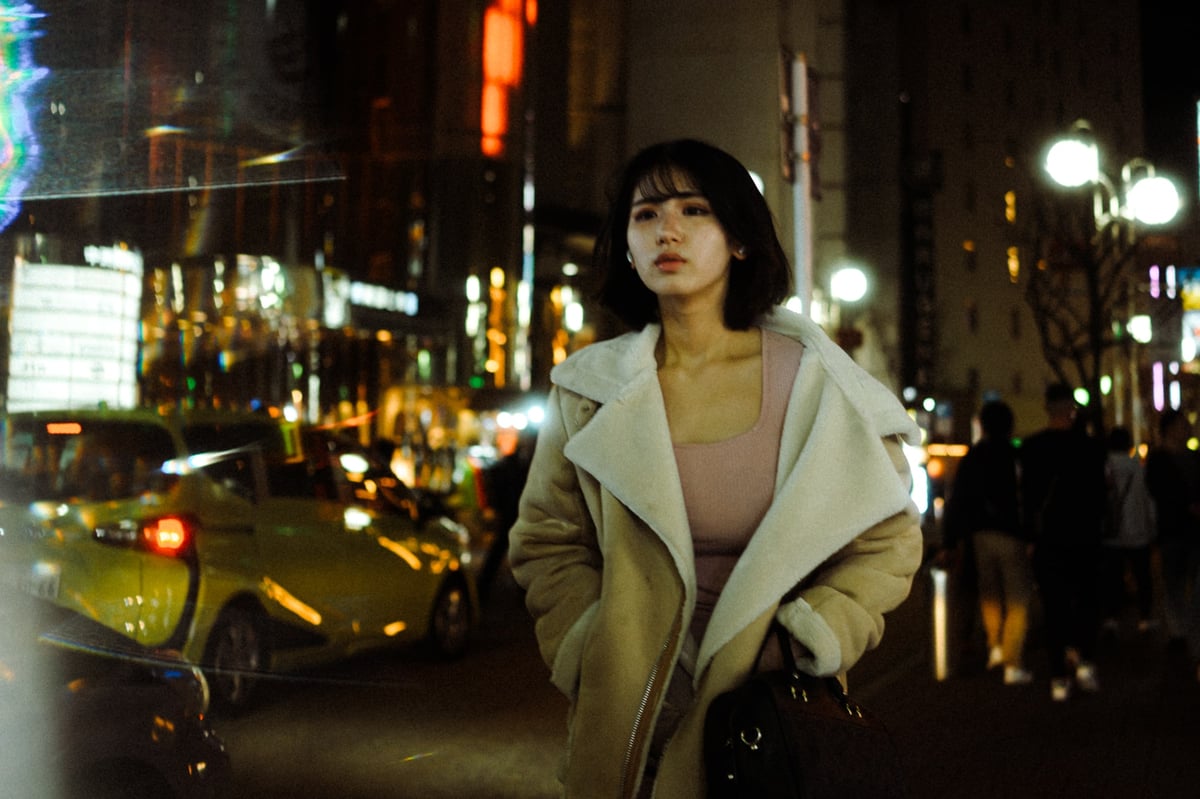
Nikon Z 35mm f1.8 Sample Photos
Some of these were shot using the Omni Creative Filter System by Lensbaby, and I often use the Shimmer Glass 1. If you’re still deciding on focal length, here’s a list of all available Nikon Z lenses — both native NIKKOR options and third-party glass.


Leave a Reply