You can spend hundreds or even thousands on landscape photography tutorials, or . . . you can just shoot with Fujifilm.
Here is all I did to get these results.
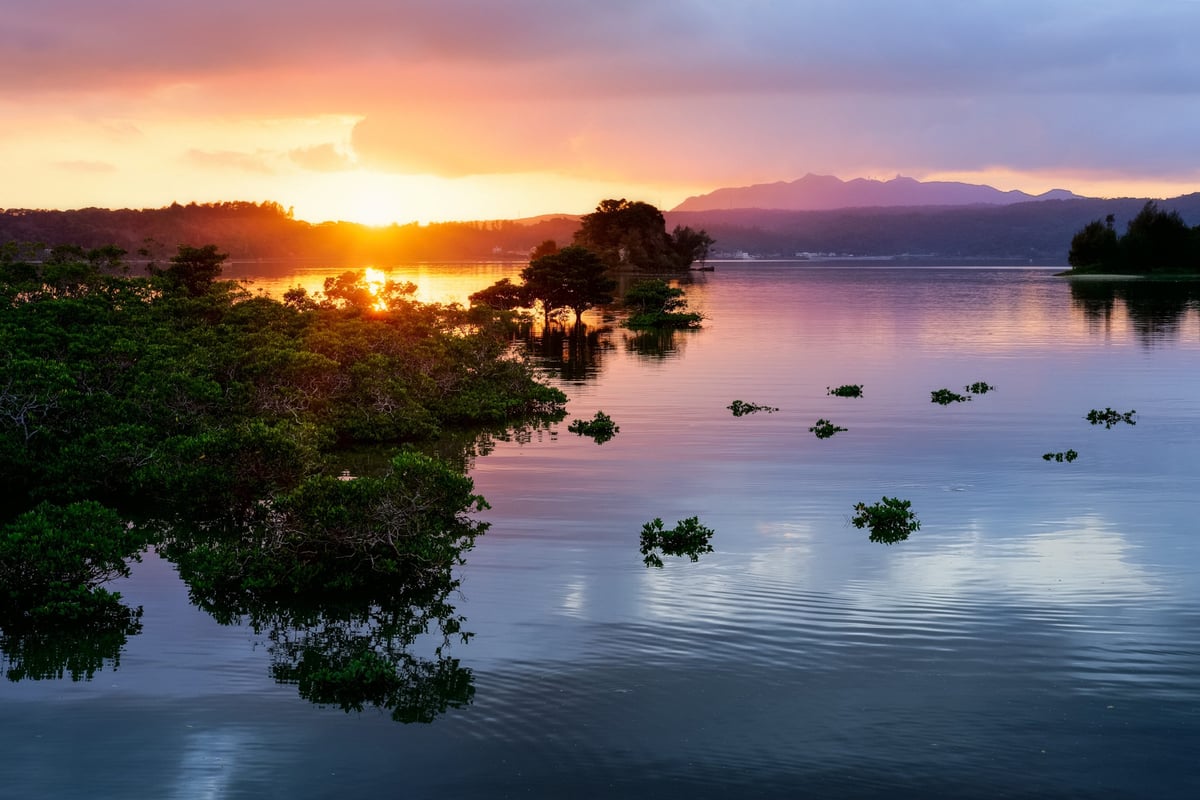
Okinawa Mangroves – Fujifilm X-Pro 2
I aim to always do as little work in the post as possible. It’s not always easy since the dynamic range of the shot, especially sunsets, is usually just more than what the camera can handle. But when everything just lines up, and you’re shooting with Fujifilm and have access to their film simulators, you don’t need to do much.
Here is all I did in Lightroom to enhance this shot.
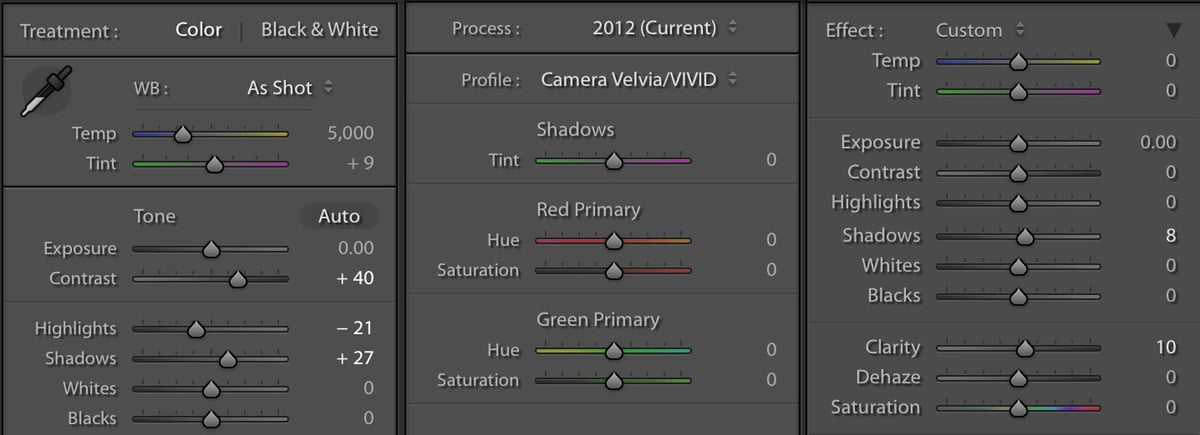
The first thing I did, shown in the middle column, is turn on the Velvia profile. These also come in-camera but will only bake in the effect when shooting JPEG. If you have a shot that doesn’t require a lot of dynamic range, your ‘look’ will usually come out much better if you let your camera make the JPEG. I was shooting RAW in this case, so I converted it to Velvia in Lightroom. You can also quickly convert your RAWs into JPEGs in the camera by pressing Q twice and then hitting OK.
Next, I adjusted some basic tone controls shown in the left column. I added some contrast, then raised the shadows highlighted, and undid some contrast. Sometimes, when raising the contrast, you’ll also have to reduce the saturation a small amount since the contrast punches the colors harder.
The last thing I did was a little local brush, shown in the far right column. I just added some clarity on the mangroves and lifted their shadows slightly.
I’m pretty happy with the above results. I could tweak the colors and saturation more, but the image is pretty much there.
But of course, it’s always possible to do more.
Because You Can Always Do More
To take the shot a step further, I only needed to clean up those highlights. Since I knew I would be going to Photoshop, I decided to use Iridient Developer for the initial RAW conversion. Iridient produces a significantly cleaner image than Lightroom, but their film profiles, such as Velvia, don’t handle the highlights either. I was using Velvia v3.3.
In this case, this was fine because I knew I would be rebuilding the highlights from a different exposure anyway.
So I processed two RAWs in Iridient, the RAW shot above and a shot that was -2EV darker. I combined them in Photoshop, added a few enhancements to the sunset, some local sharpness, and a couple of little tweaks, and that was about it.
Total time was maybe 15 minutes. And part of that was spent hunting down my MacBook Pro power cable in the other room since my battery was at 4%.


Leave a Reply