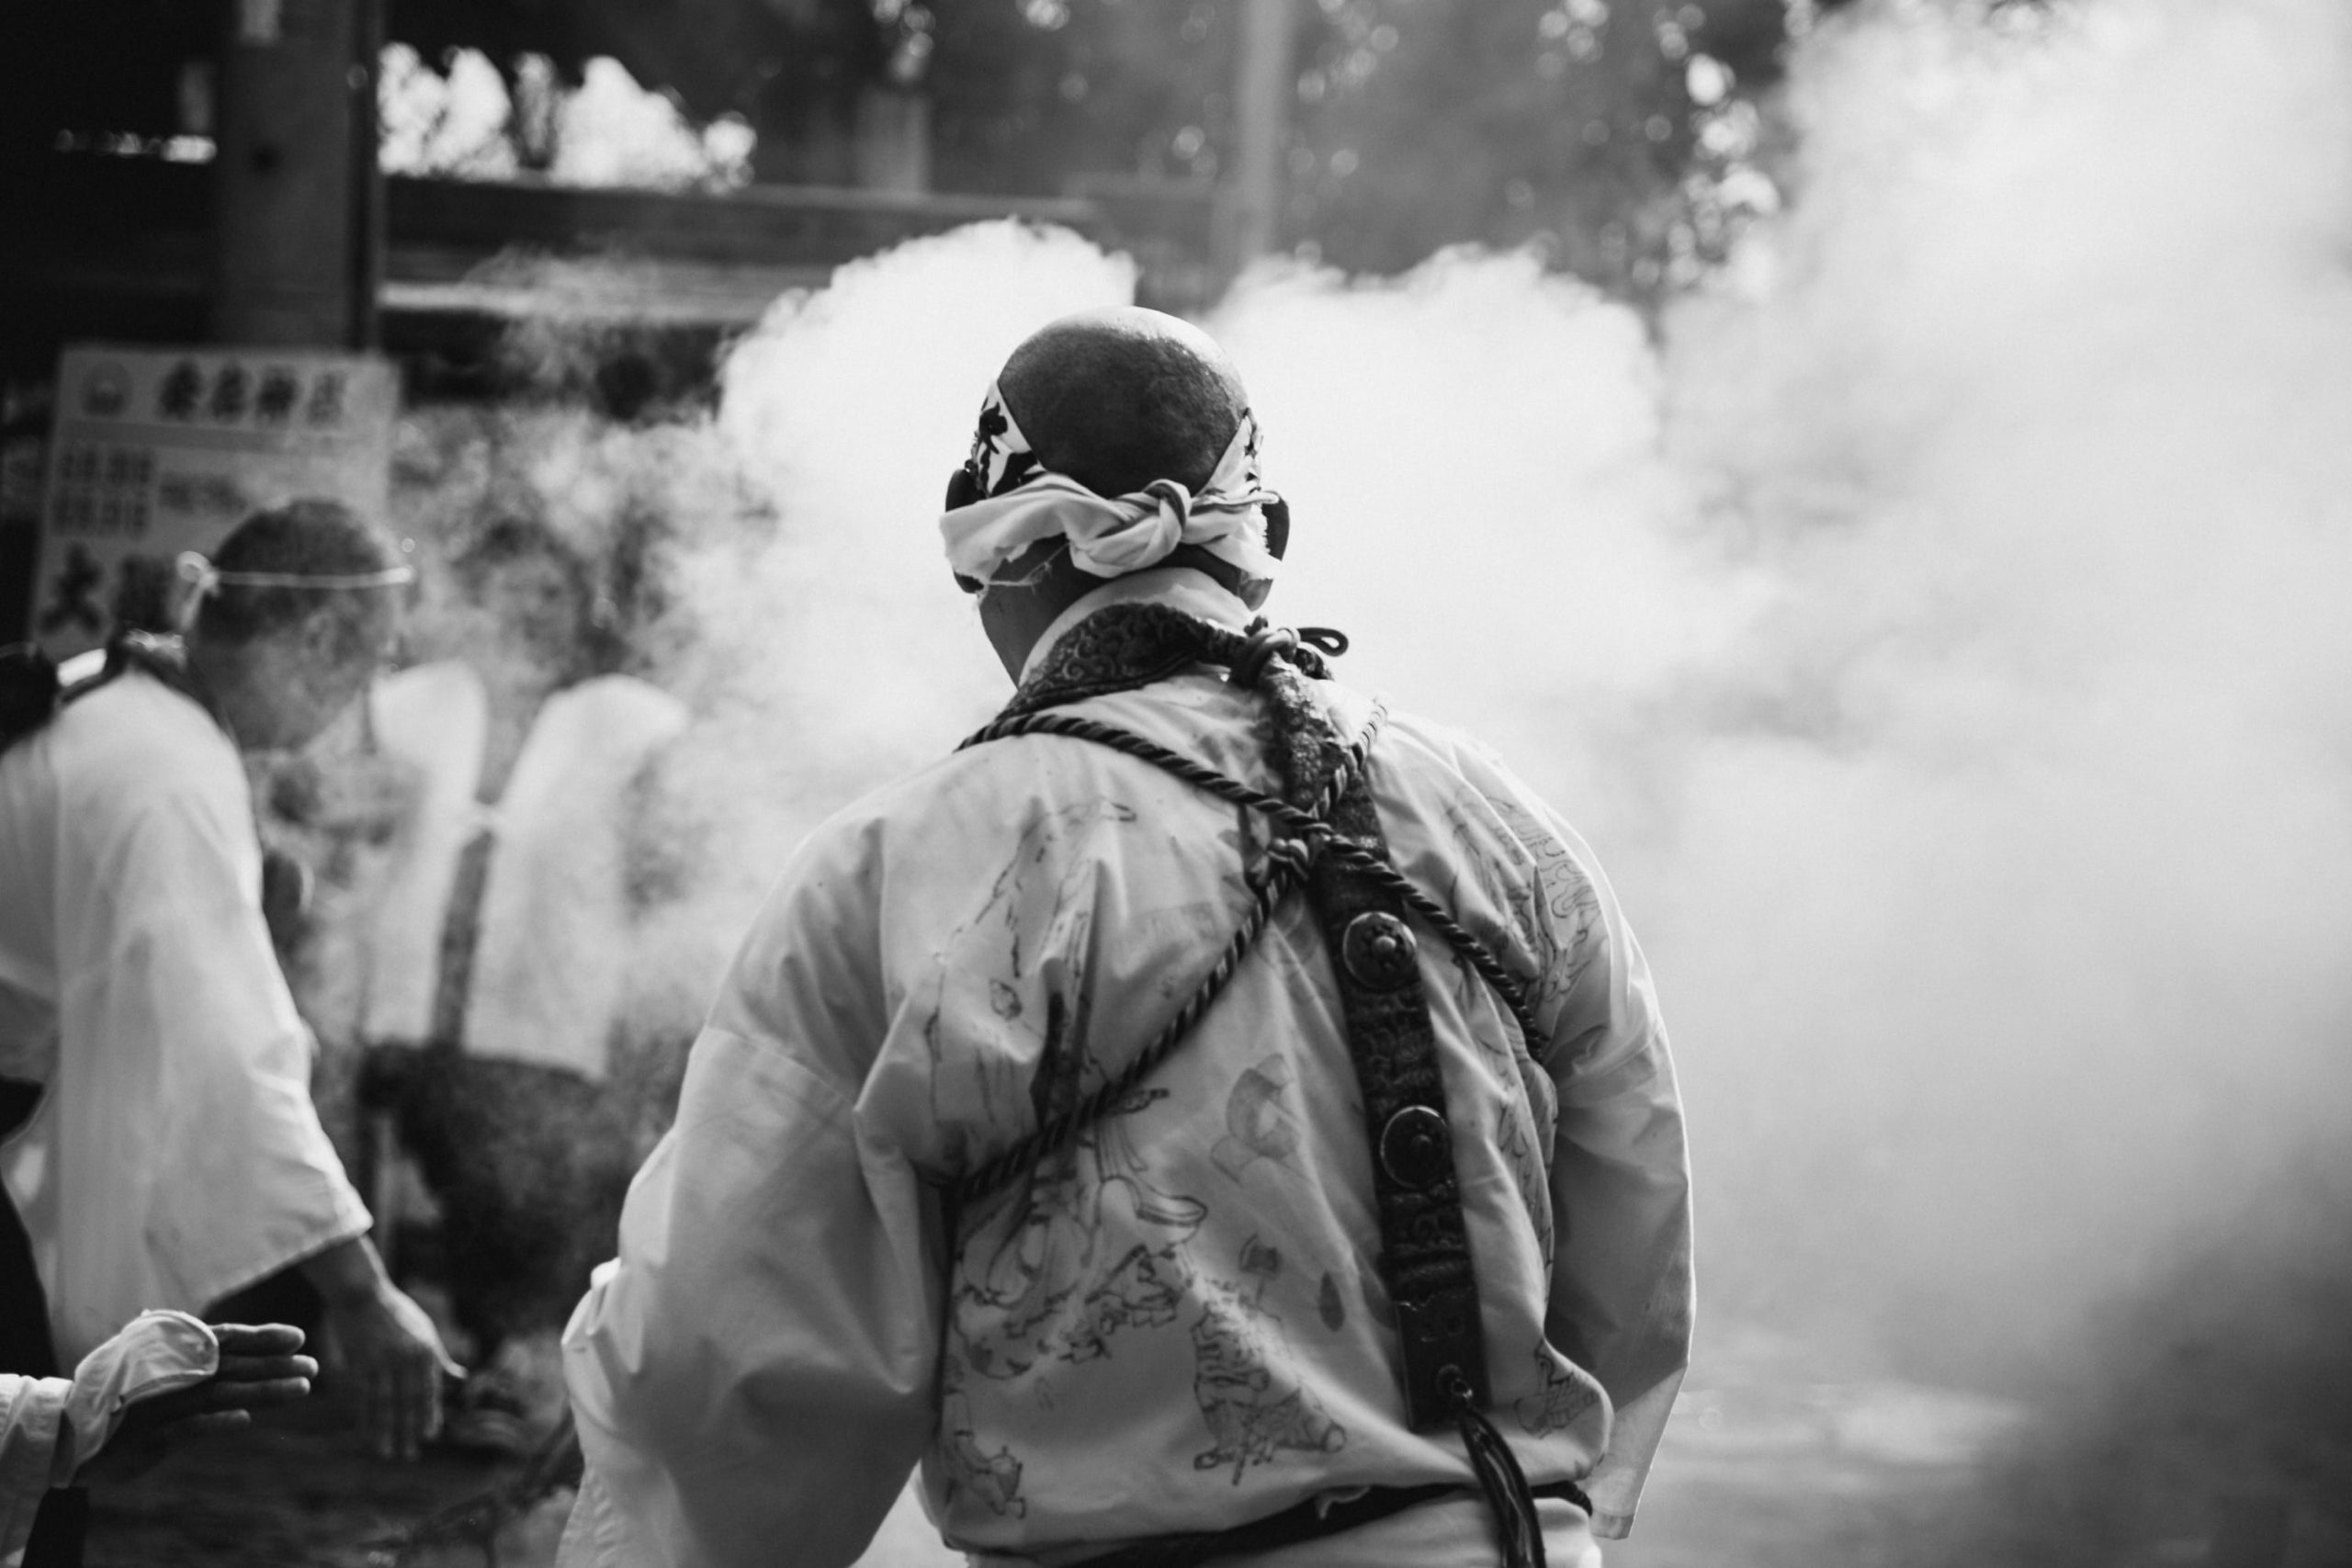
Once a year, at the temple Atago in Fukuoka Japan, visitors gather together to begin the celebration of the coming new year in an annual fire festival.
A tradition with a series of rituals rooted in Shintoism and celebrated by both the Buddhists and Shintos of Japan.
In Japan there is no real separation of Buddhism and Shintoism, rather it’s all tied together to practice and preserve Japanese culture and heritage.
To photograph this event, I used the Canon R with the RF24-105mm f4L and processed the photos with Lightroom. I’ll also share you some tips and tricks and the mental process I use to produce these photos.
The Fire Festival Of Atago Shrine
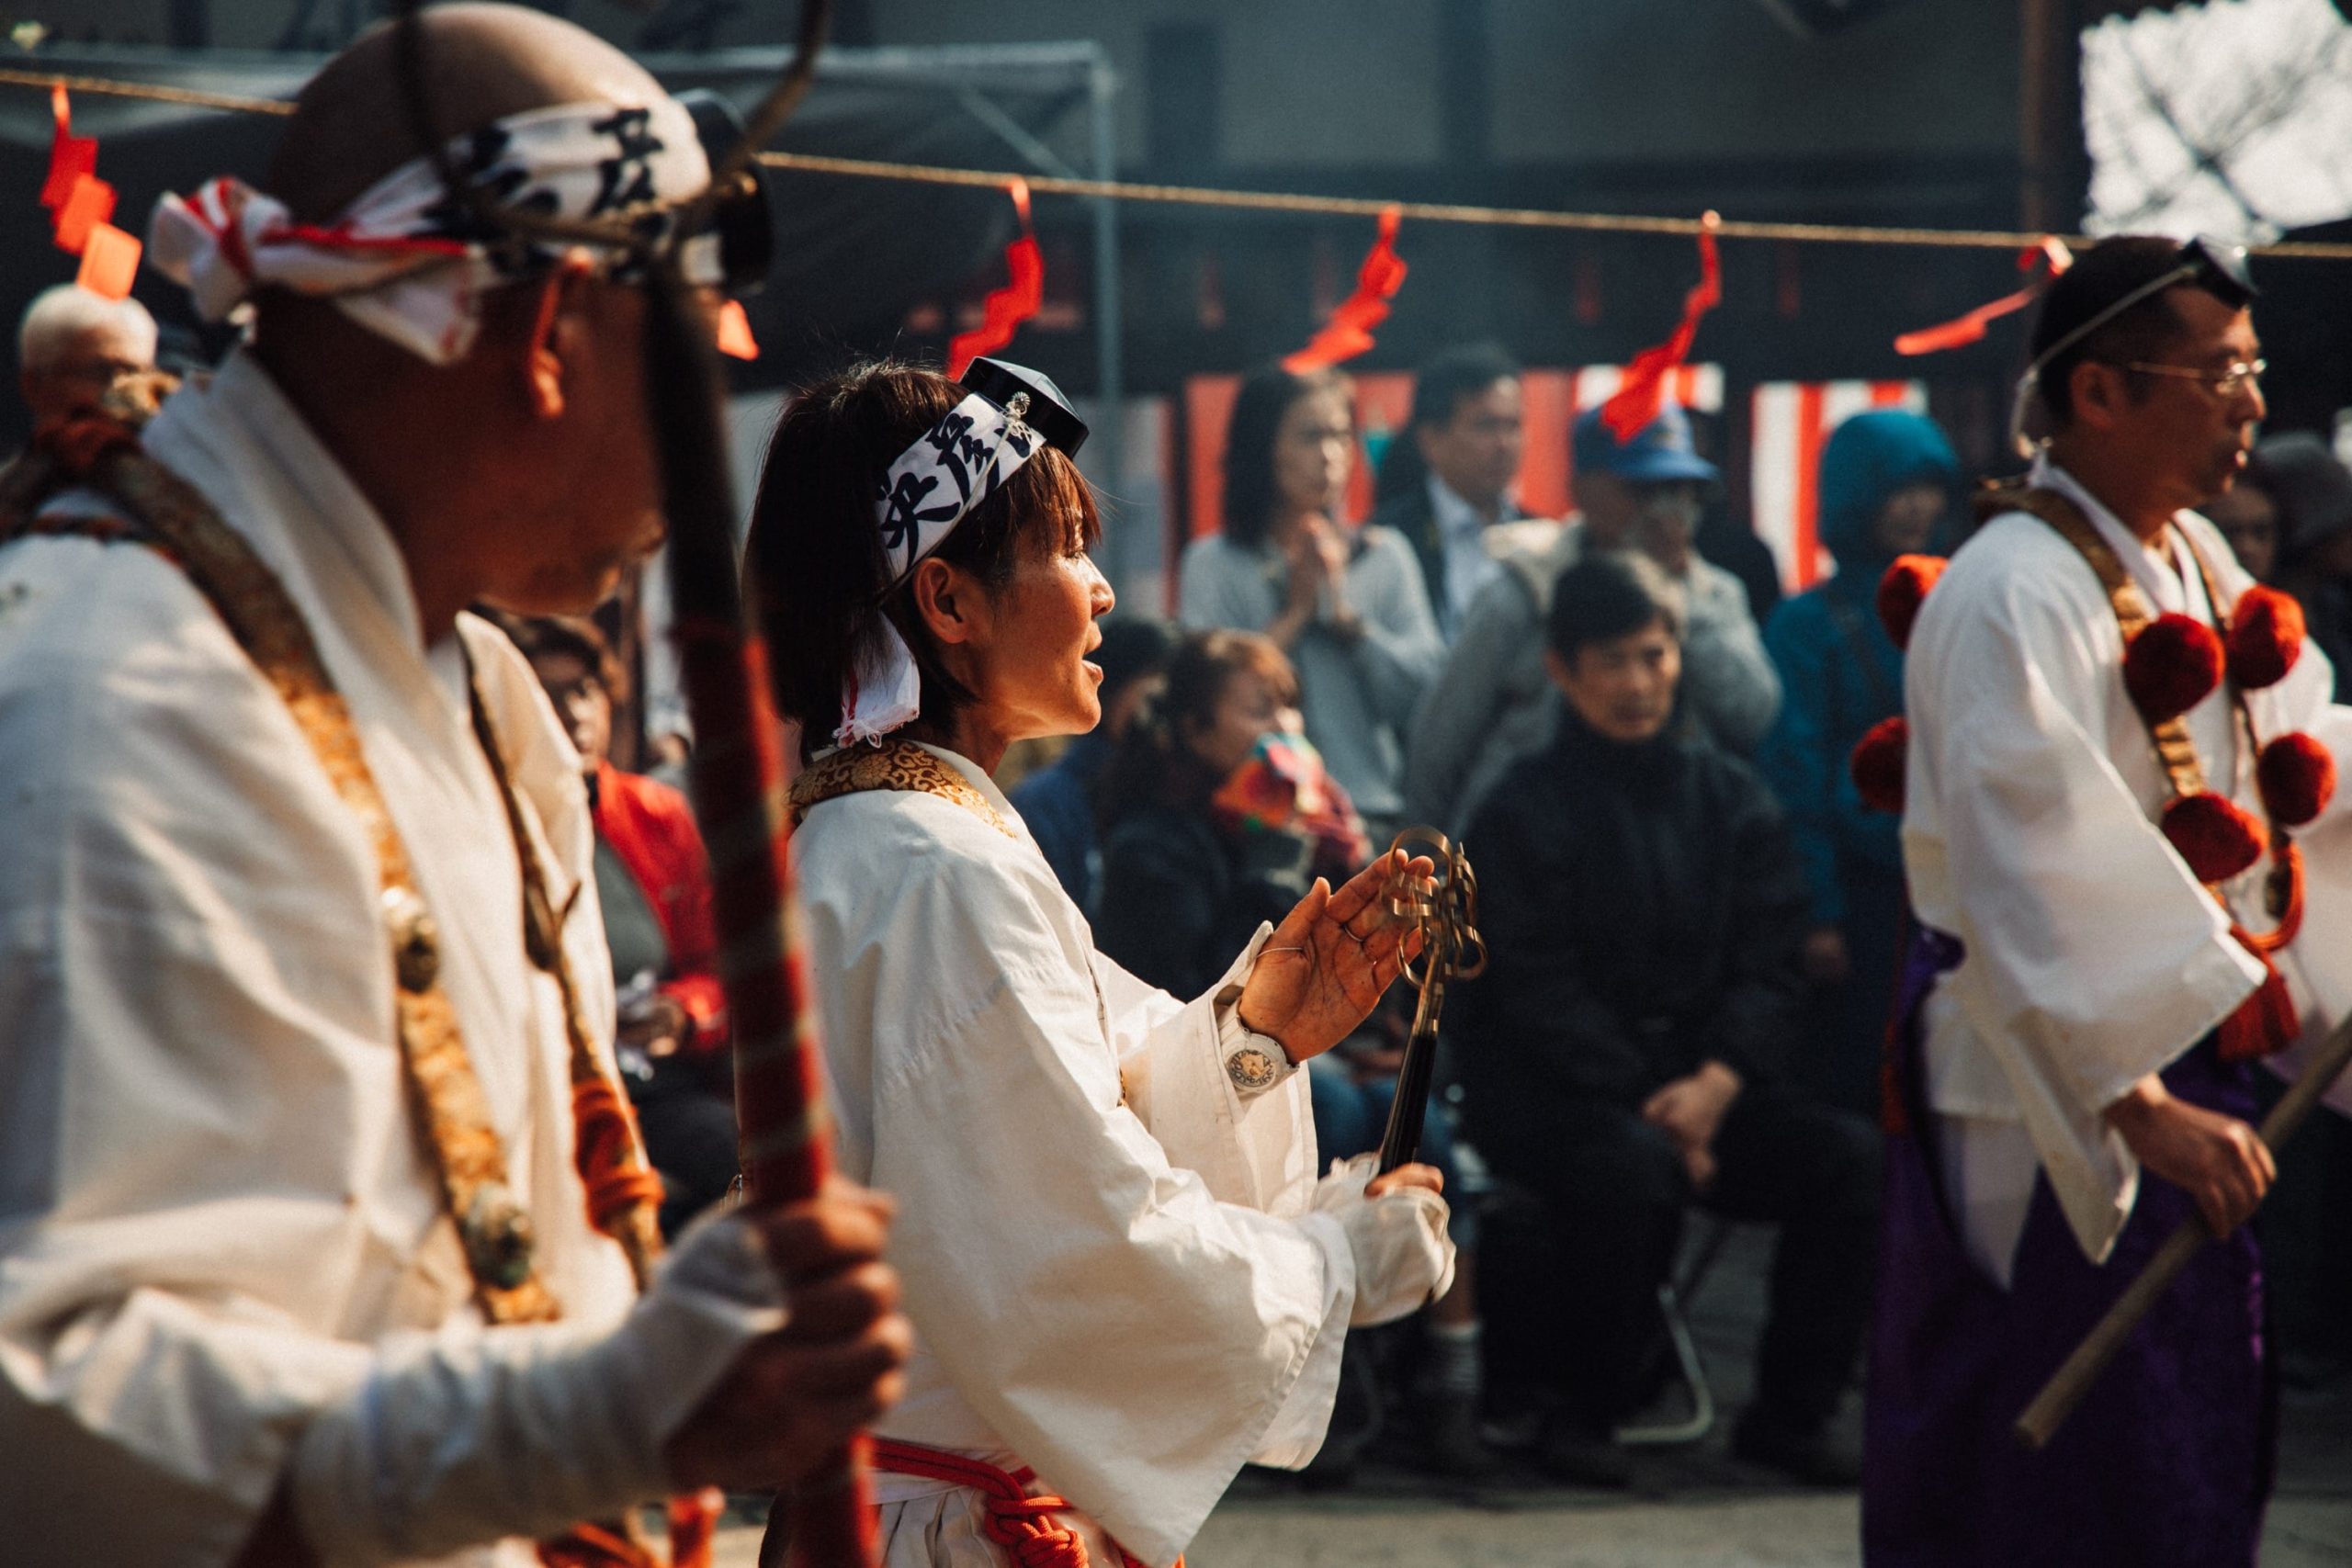
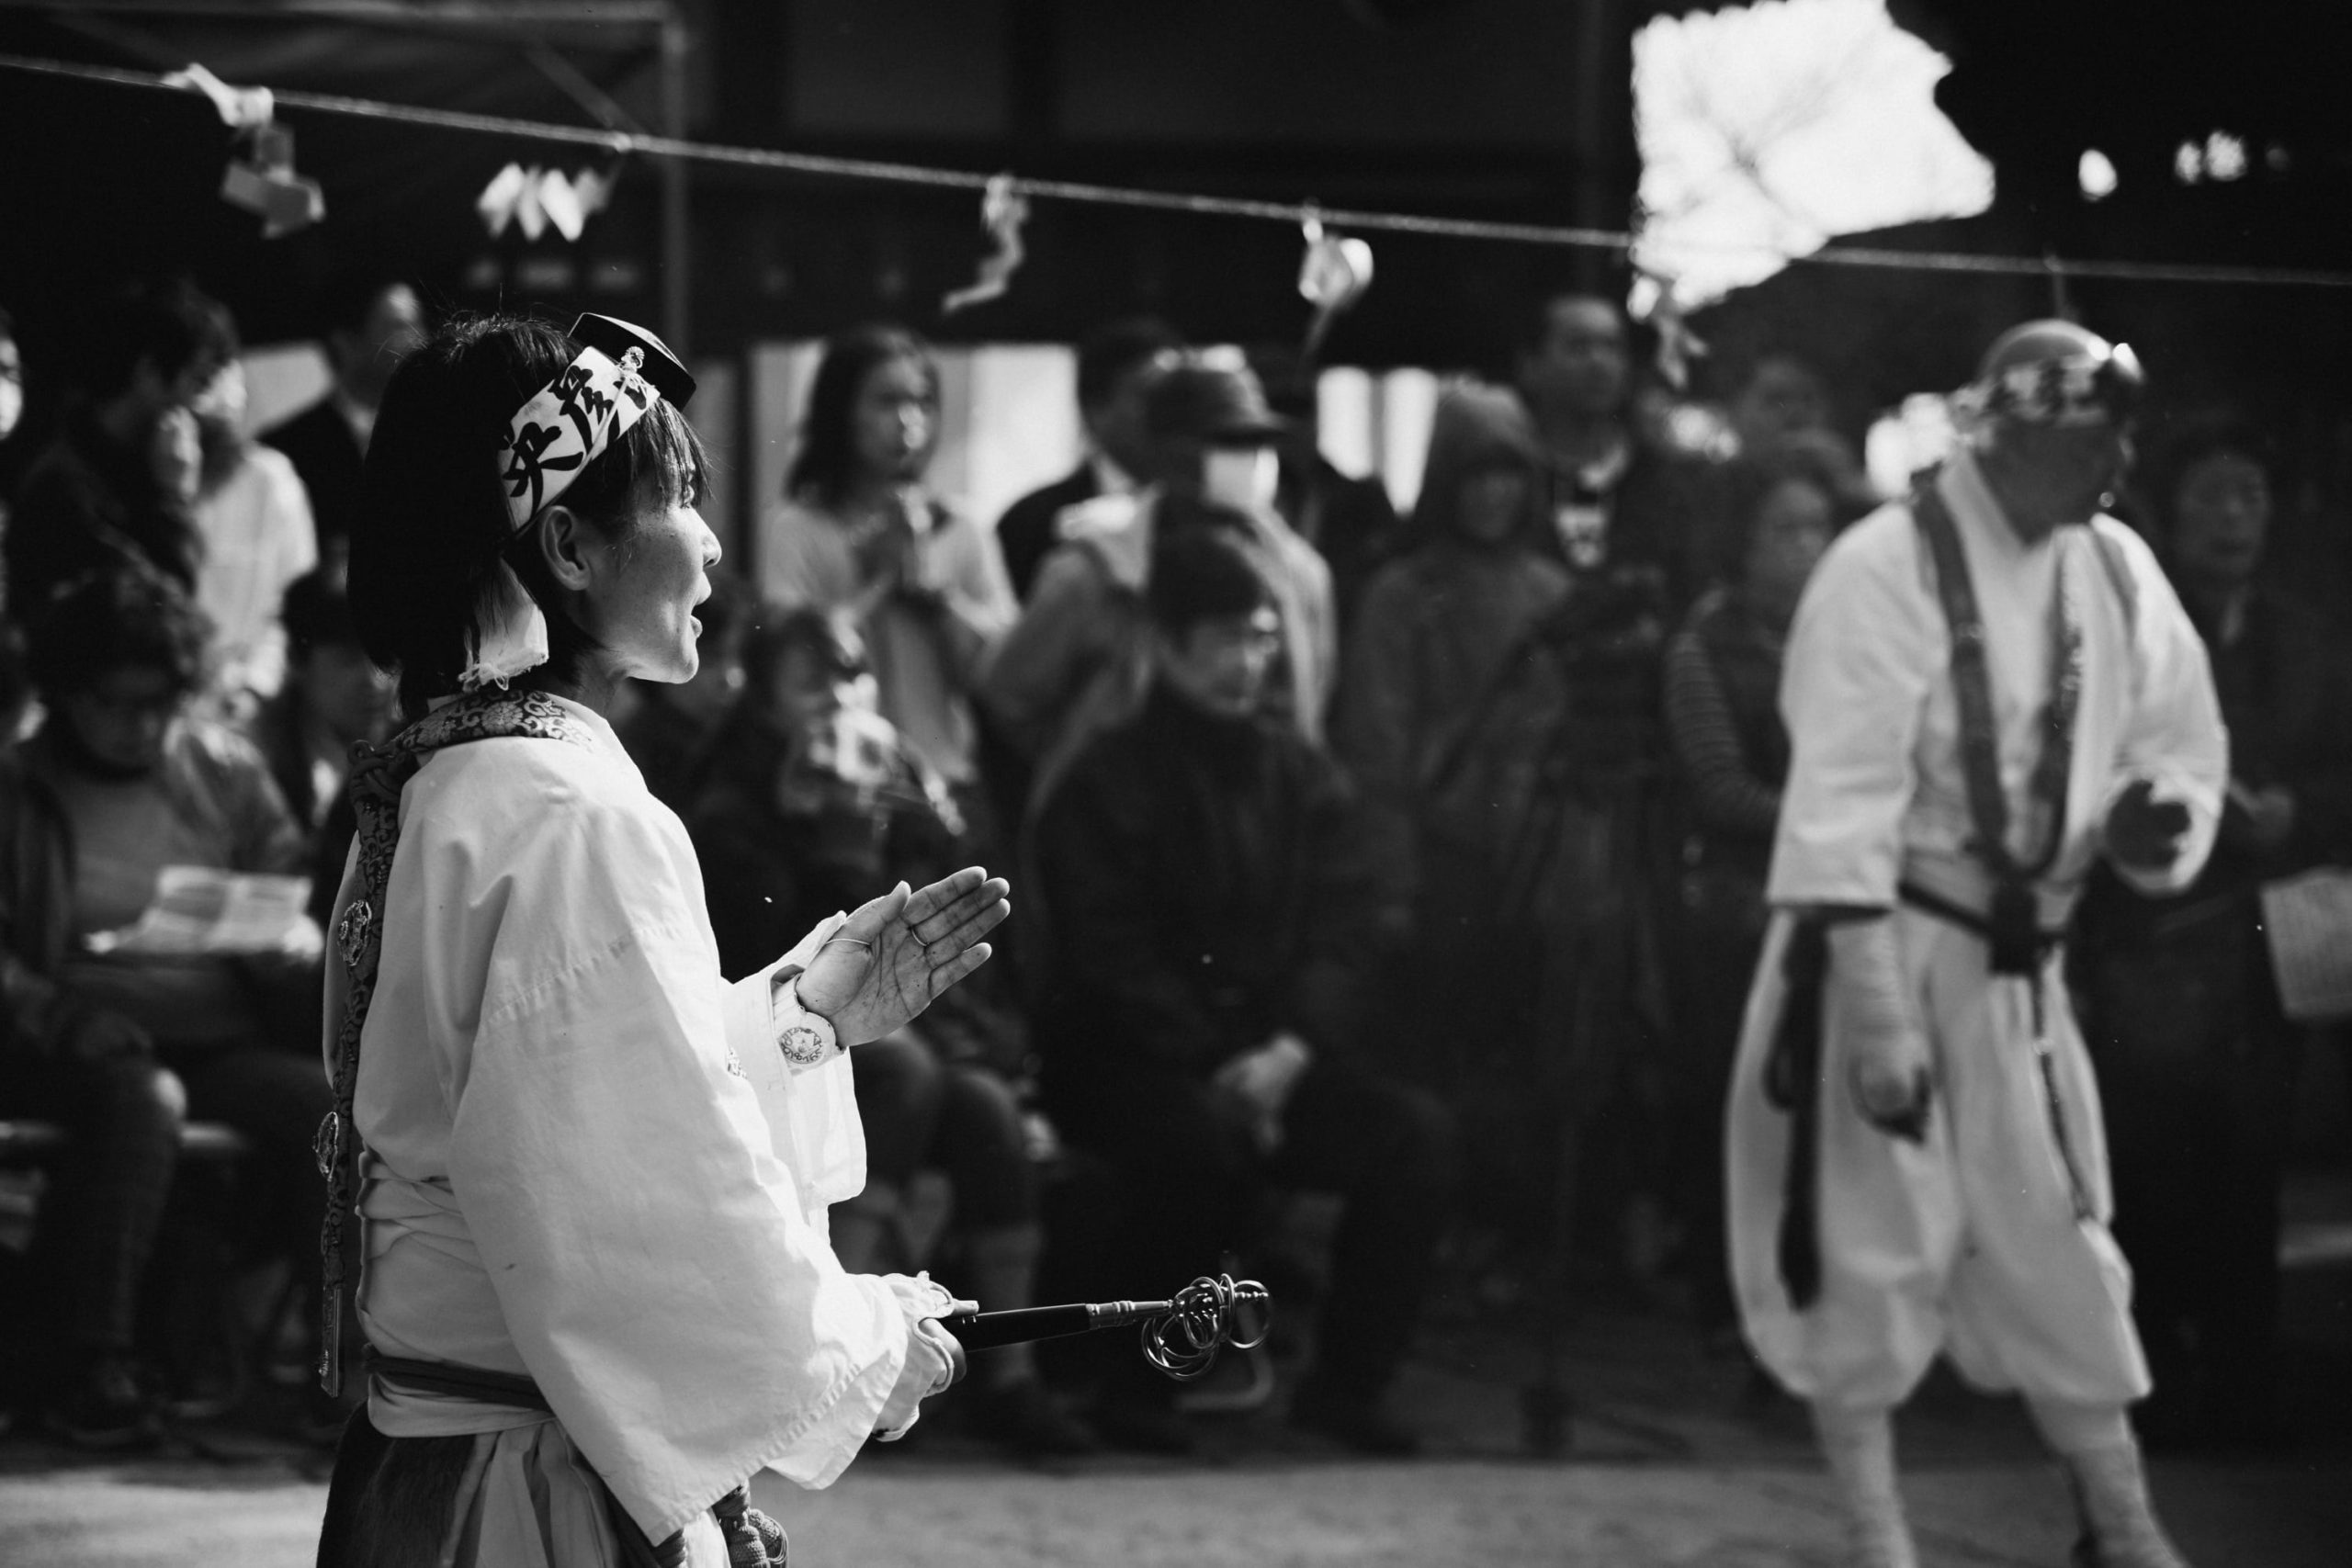
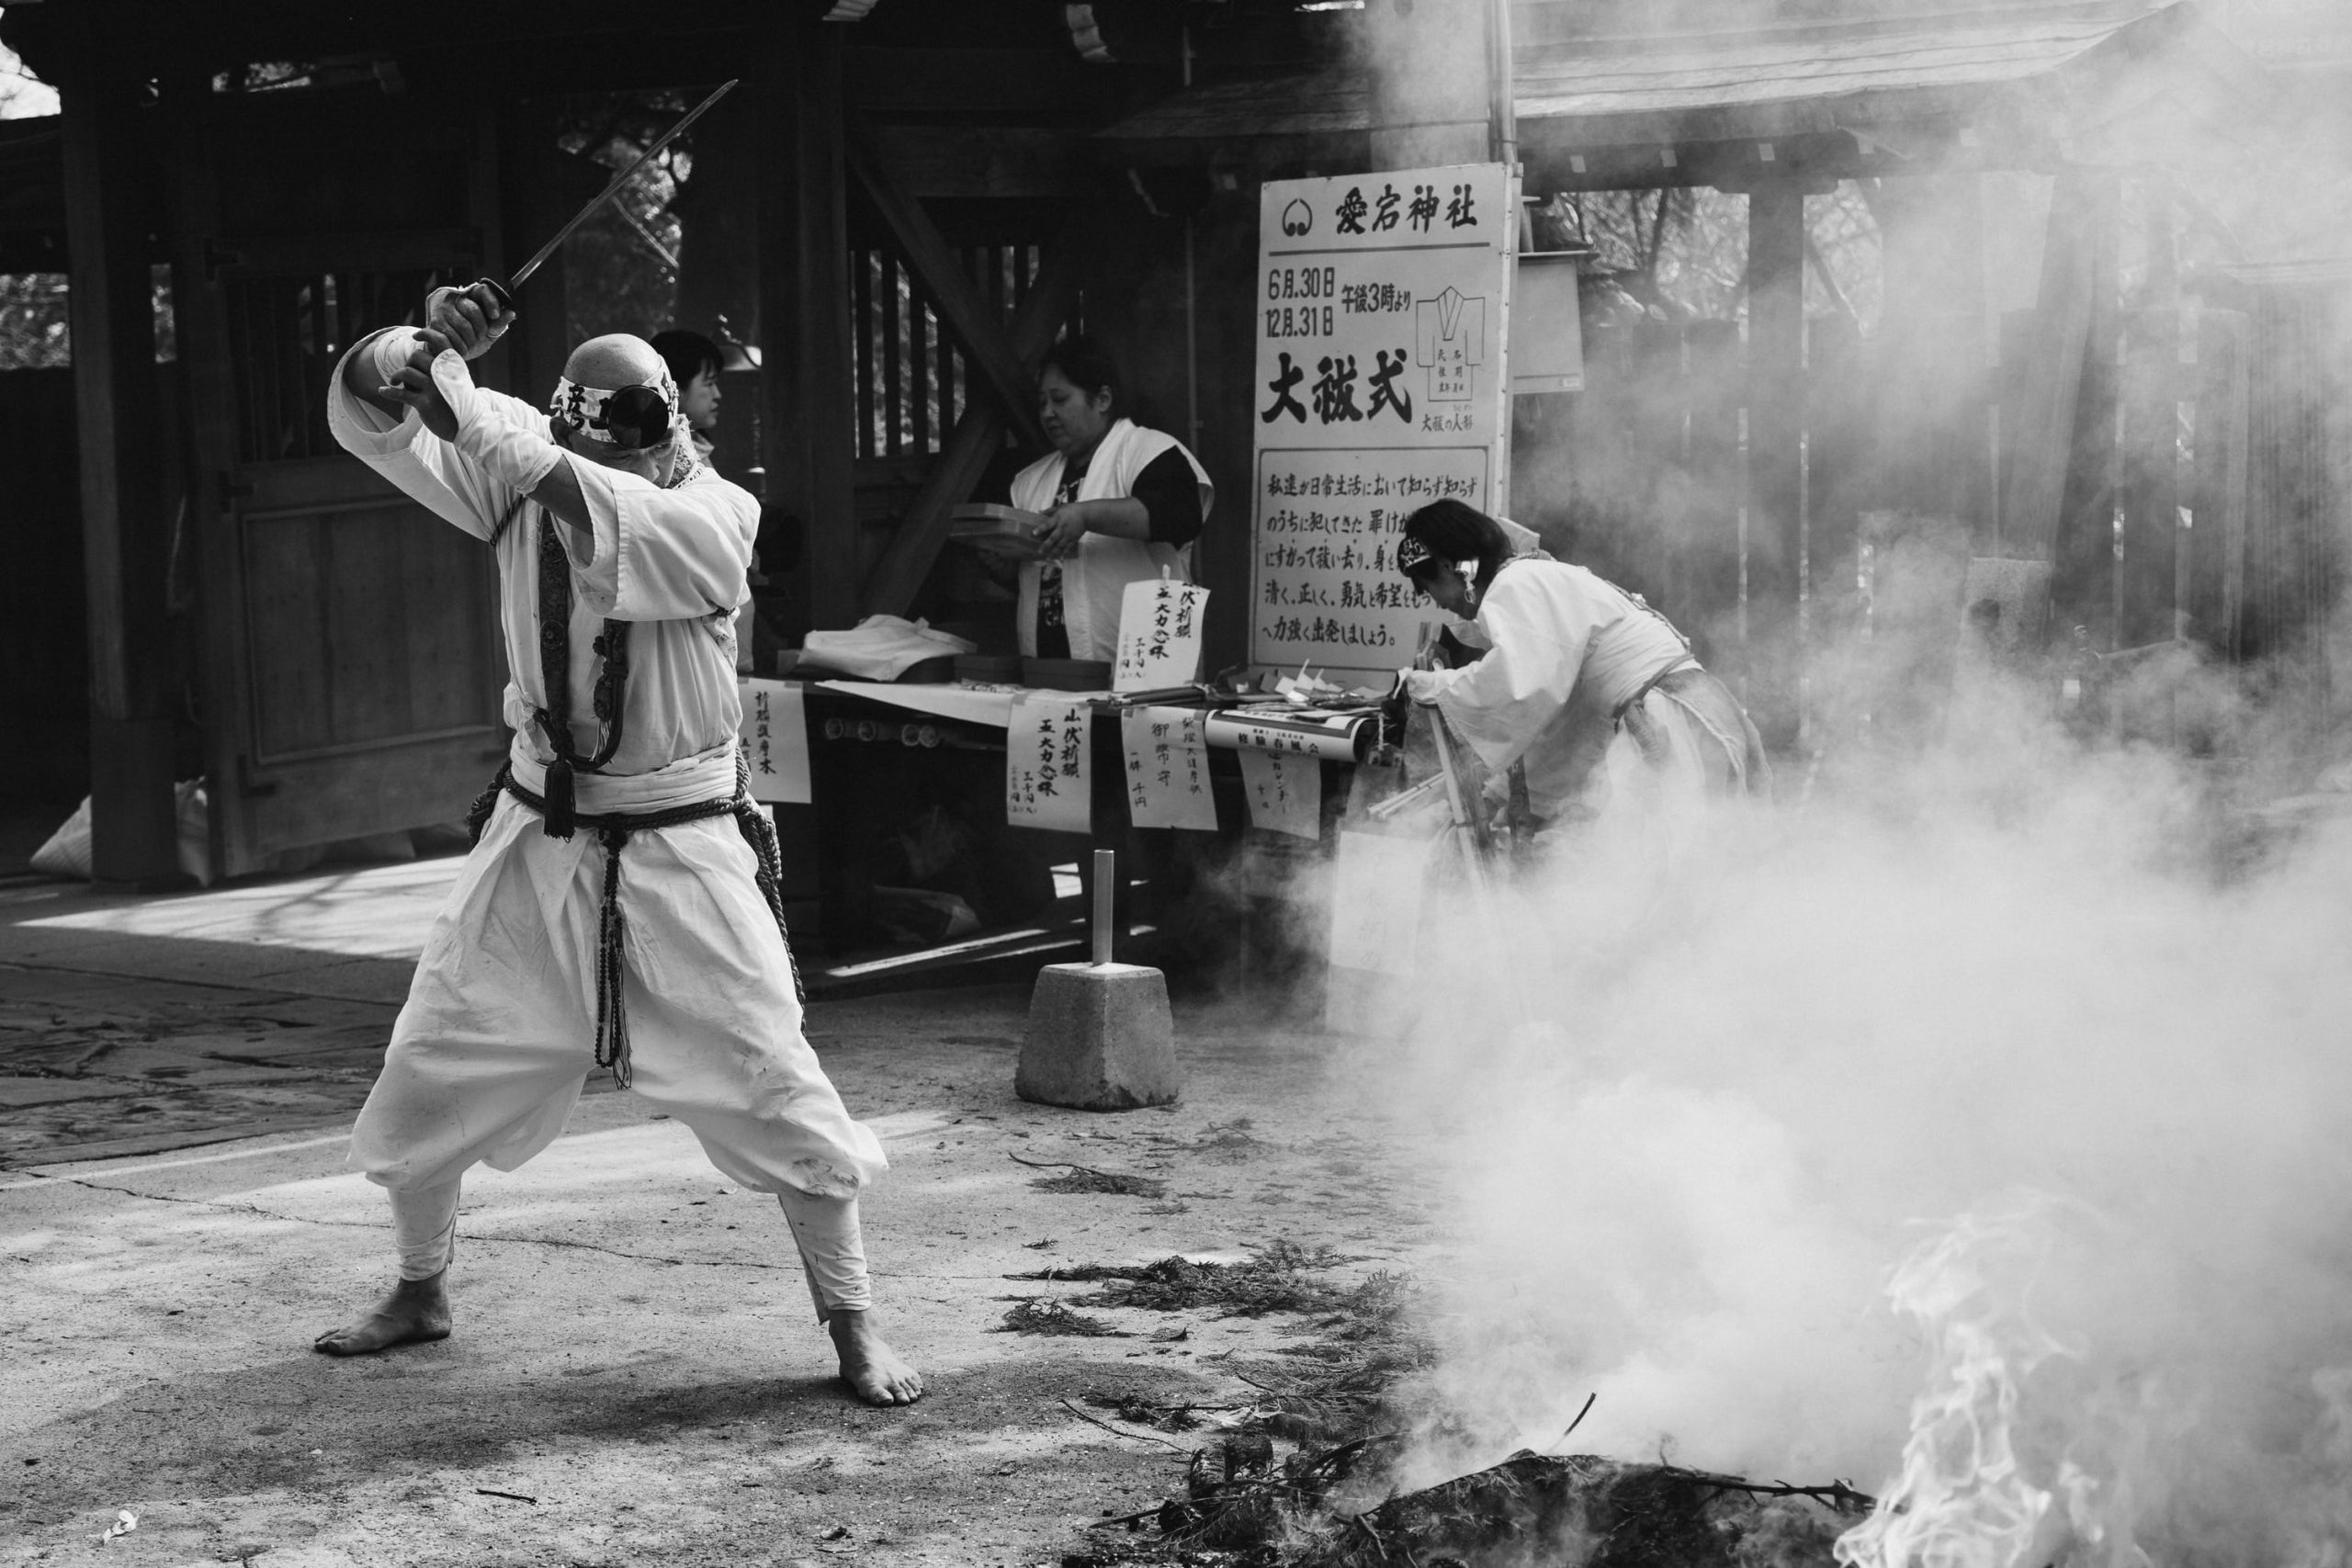
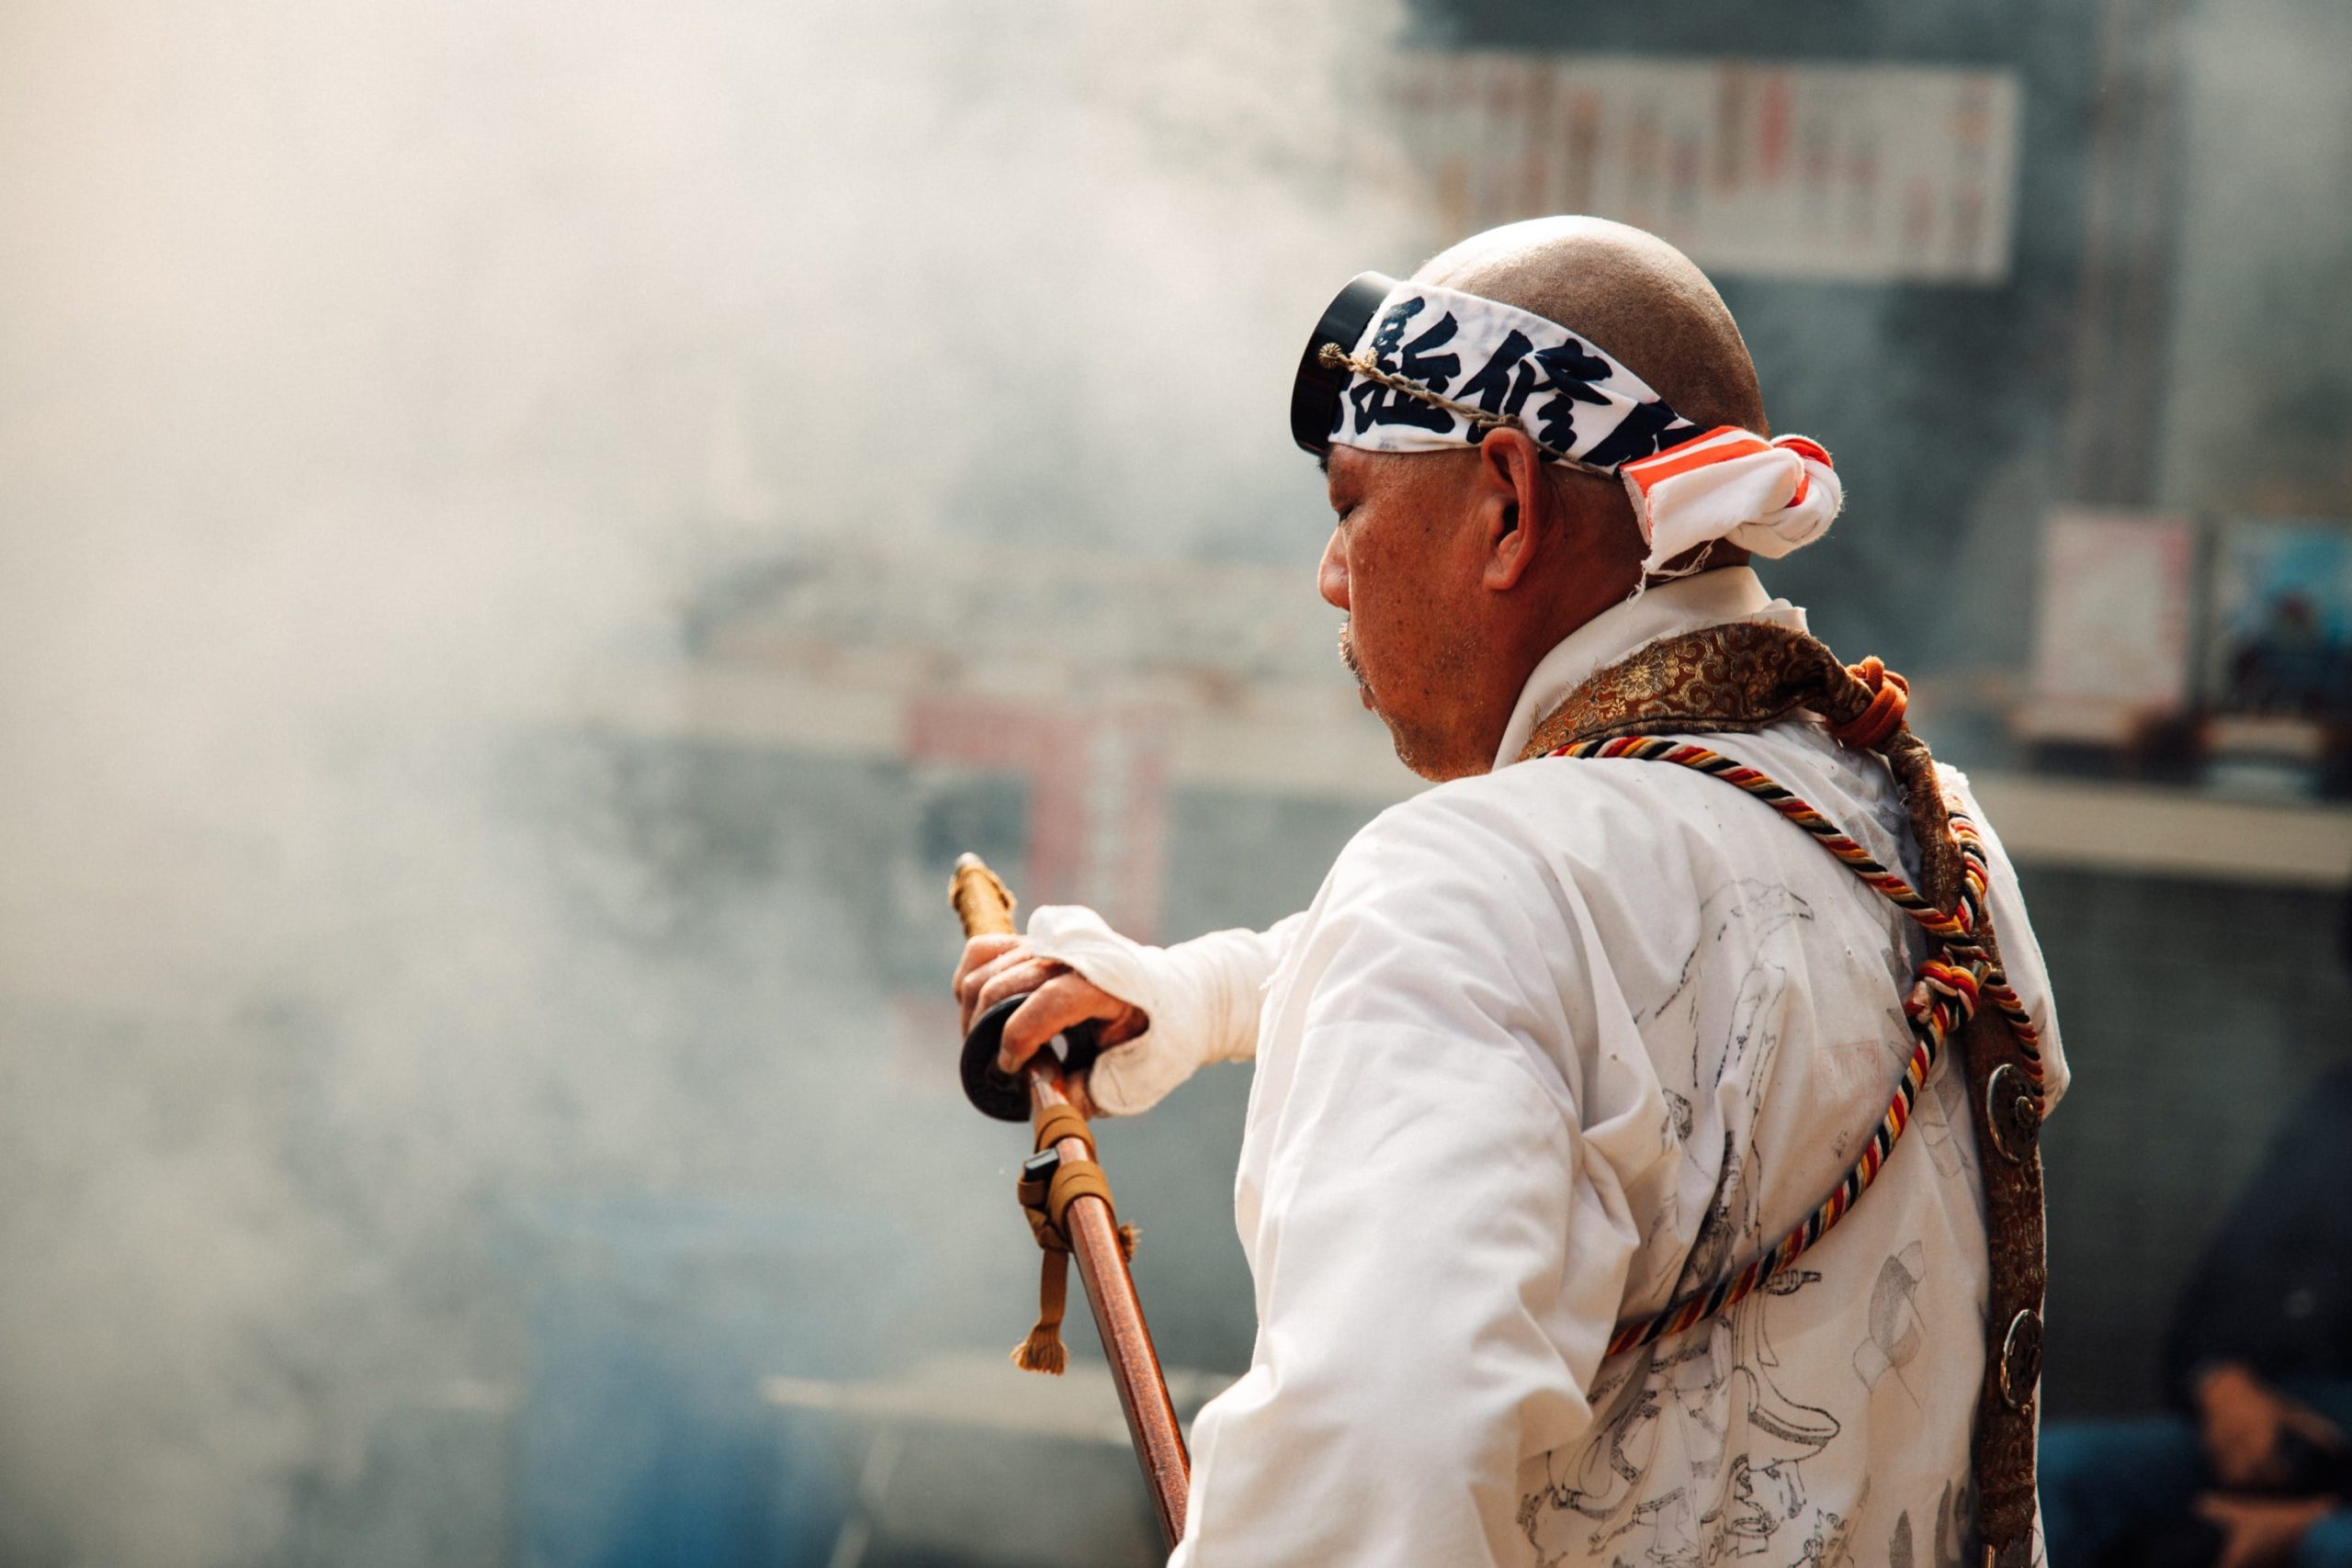
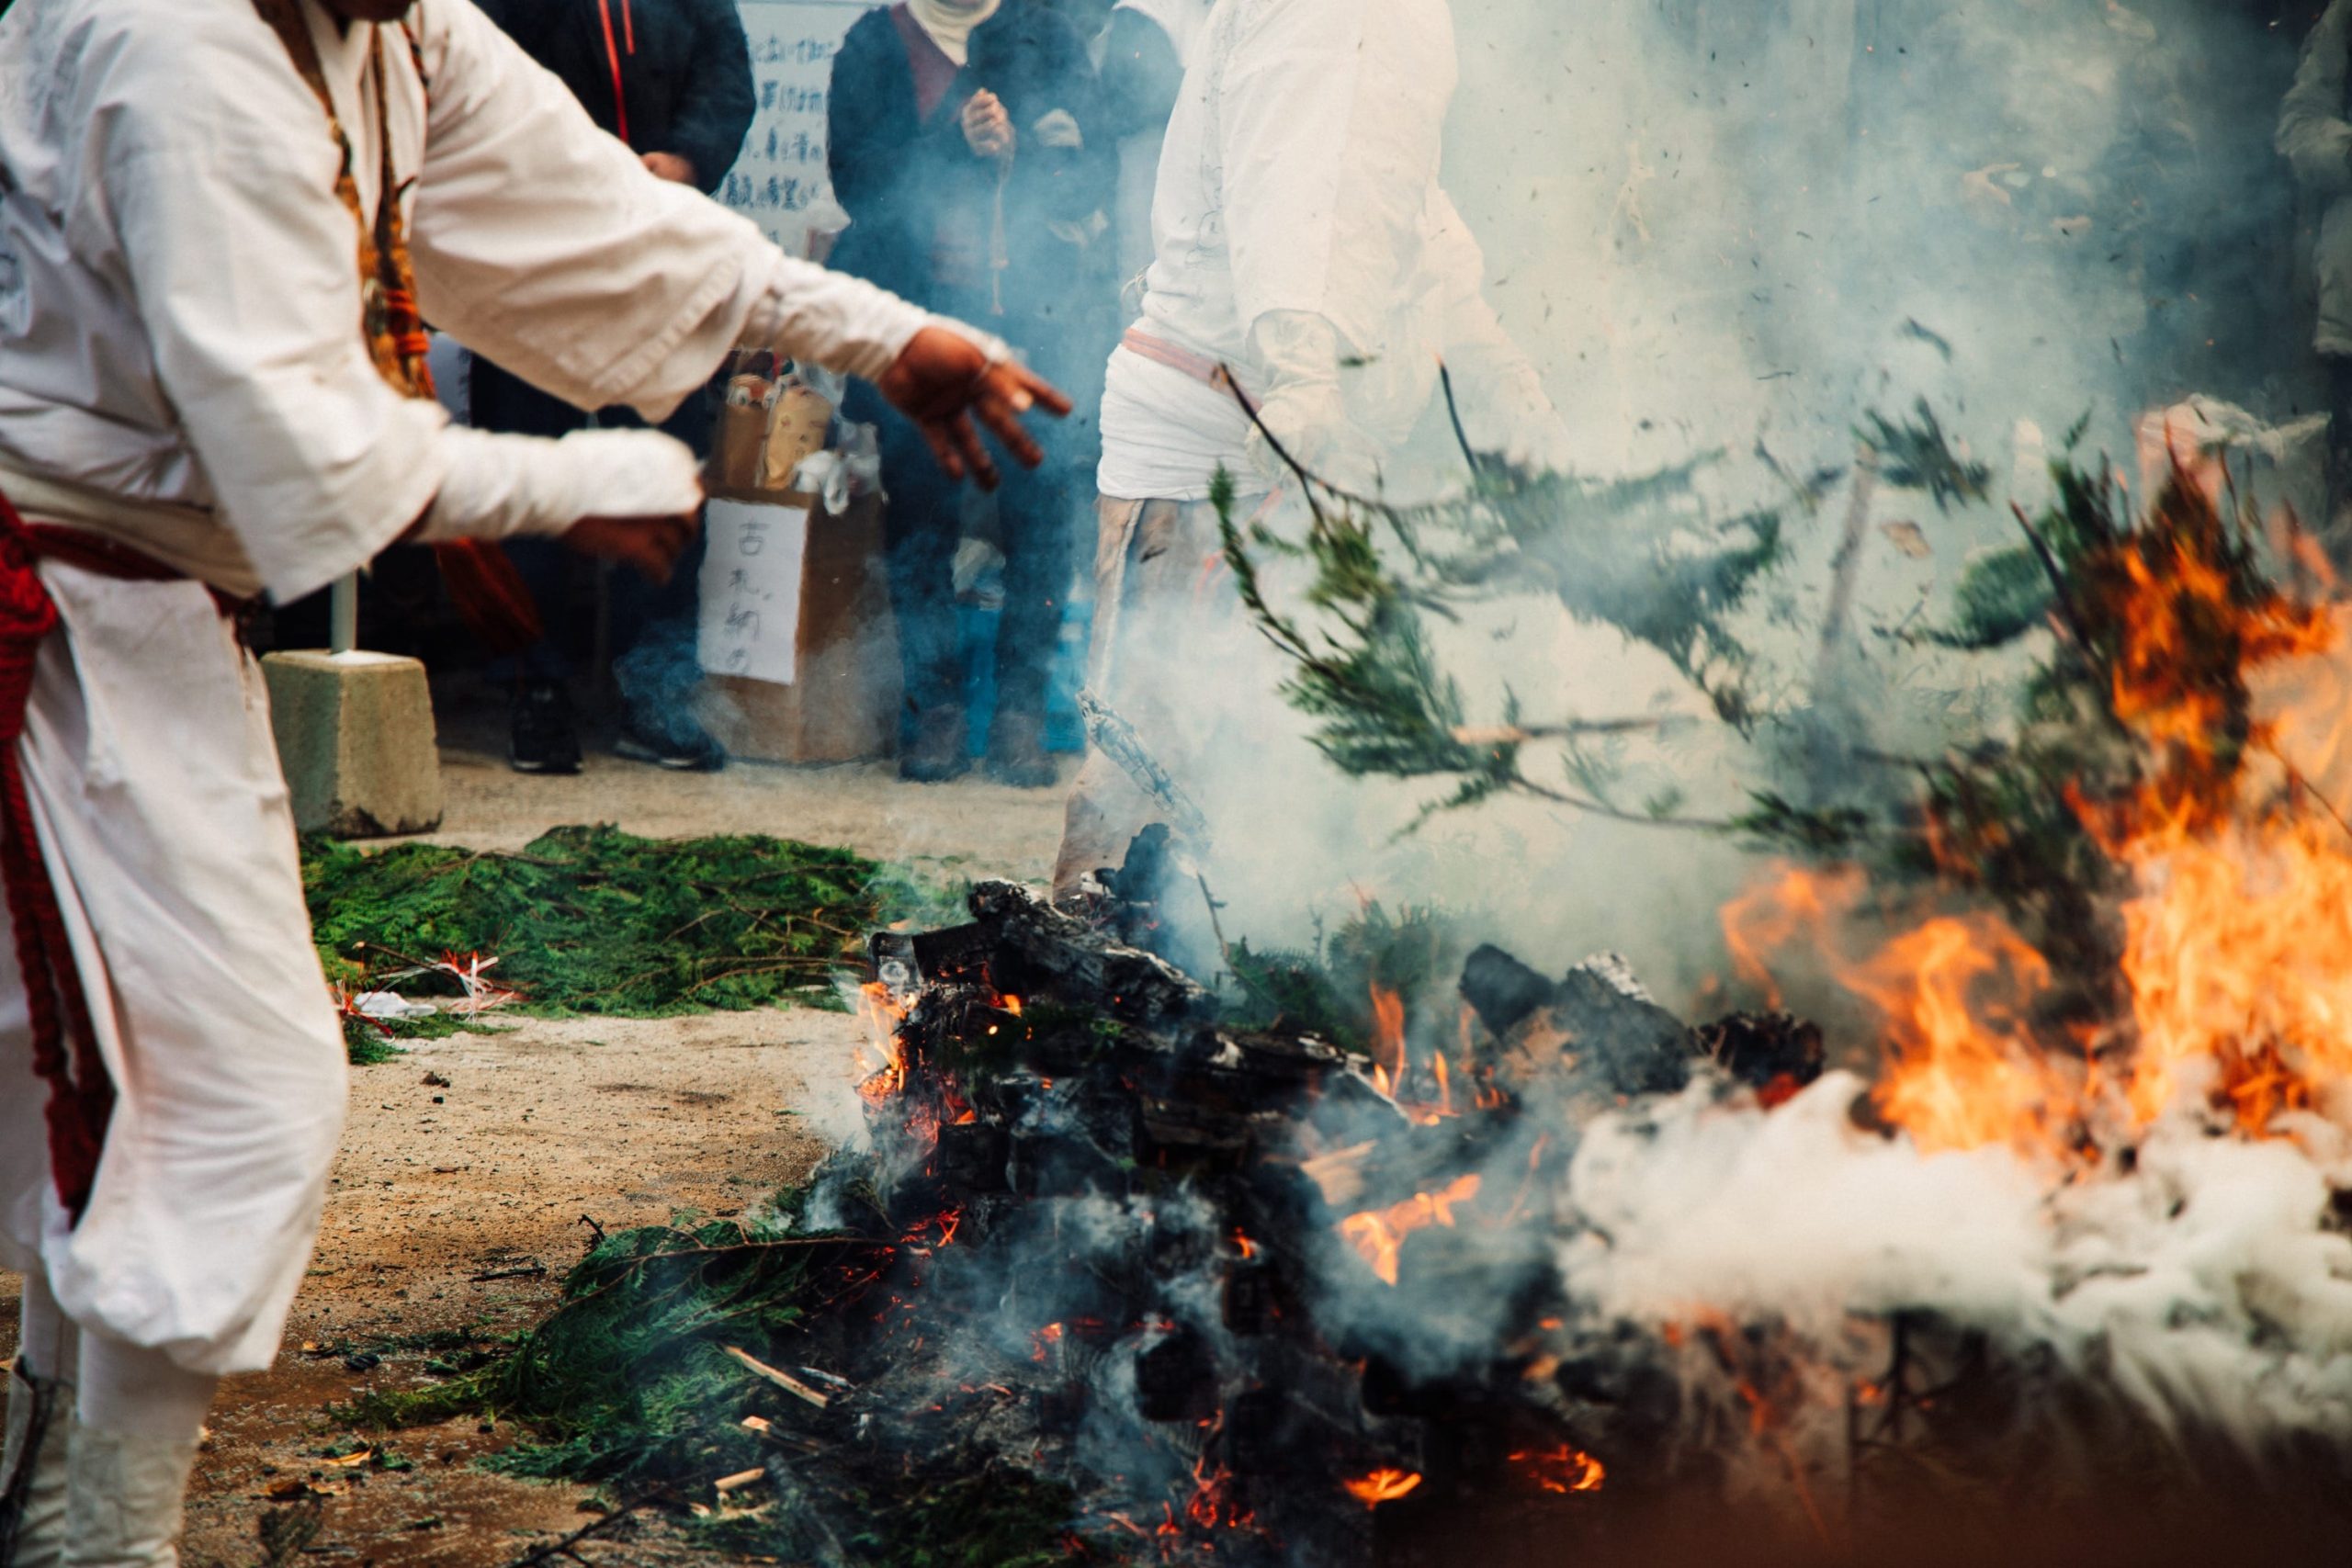
The fire festival has a series of rituals involving chanting, trumpets, rope-cutting sword and axe demonstrations that surround the centerpiece, a bon fire that is used to clean and purify as well as grant wishes.
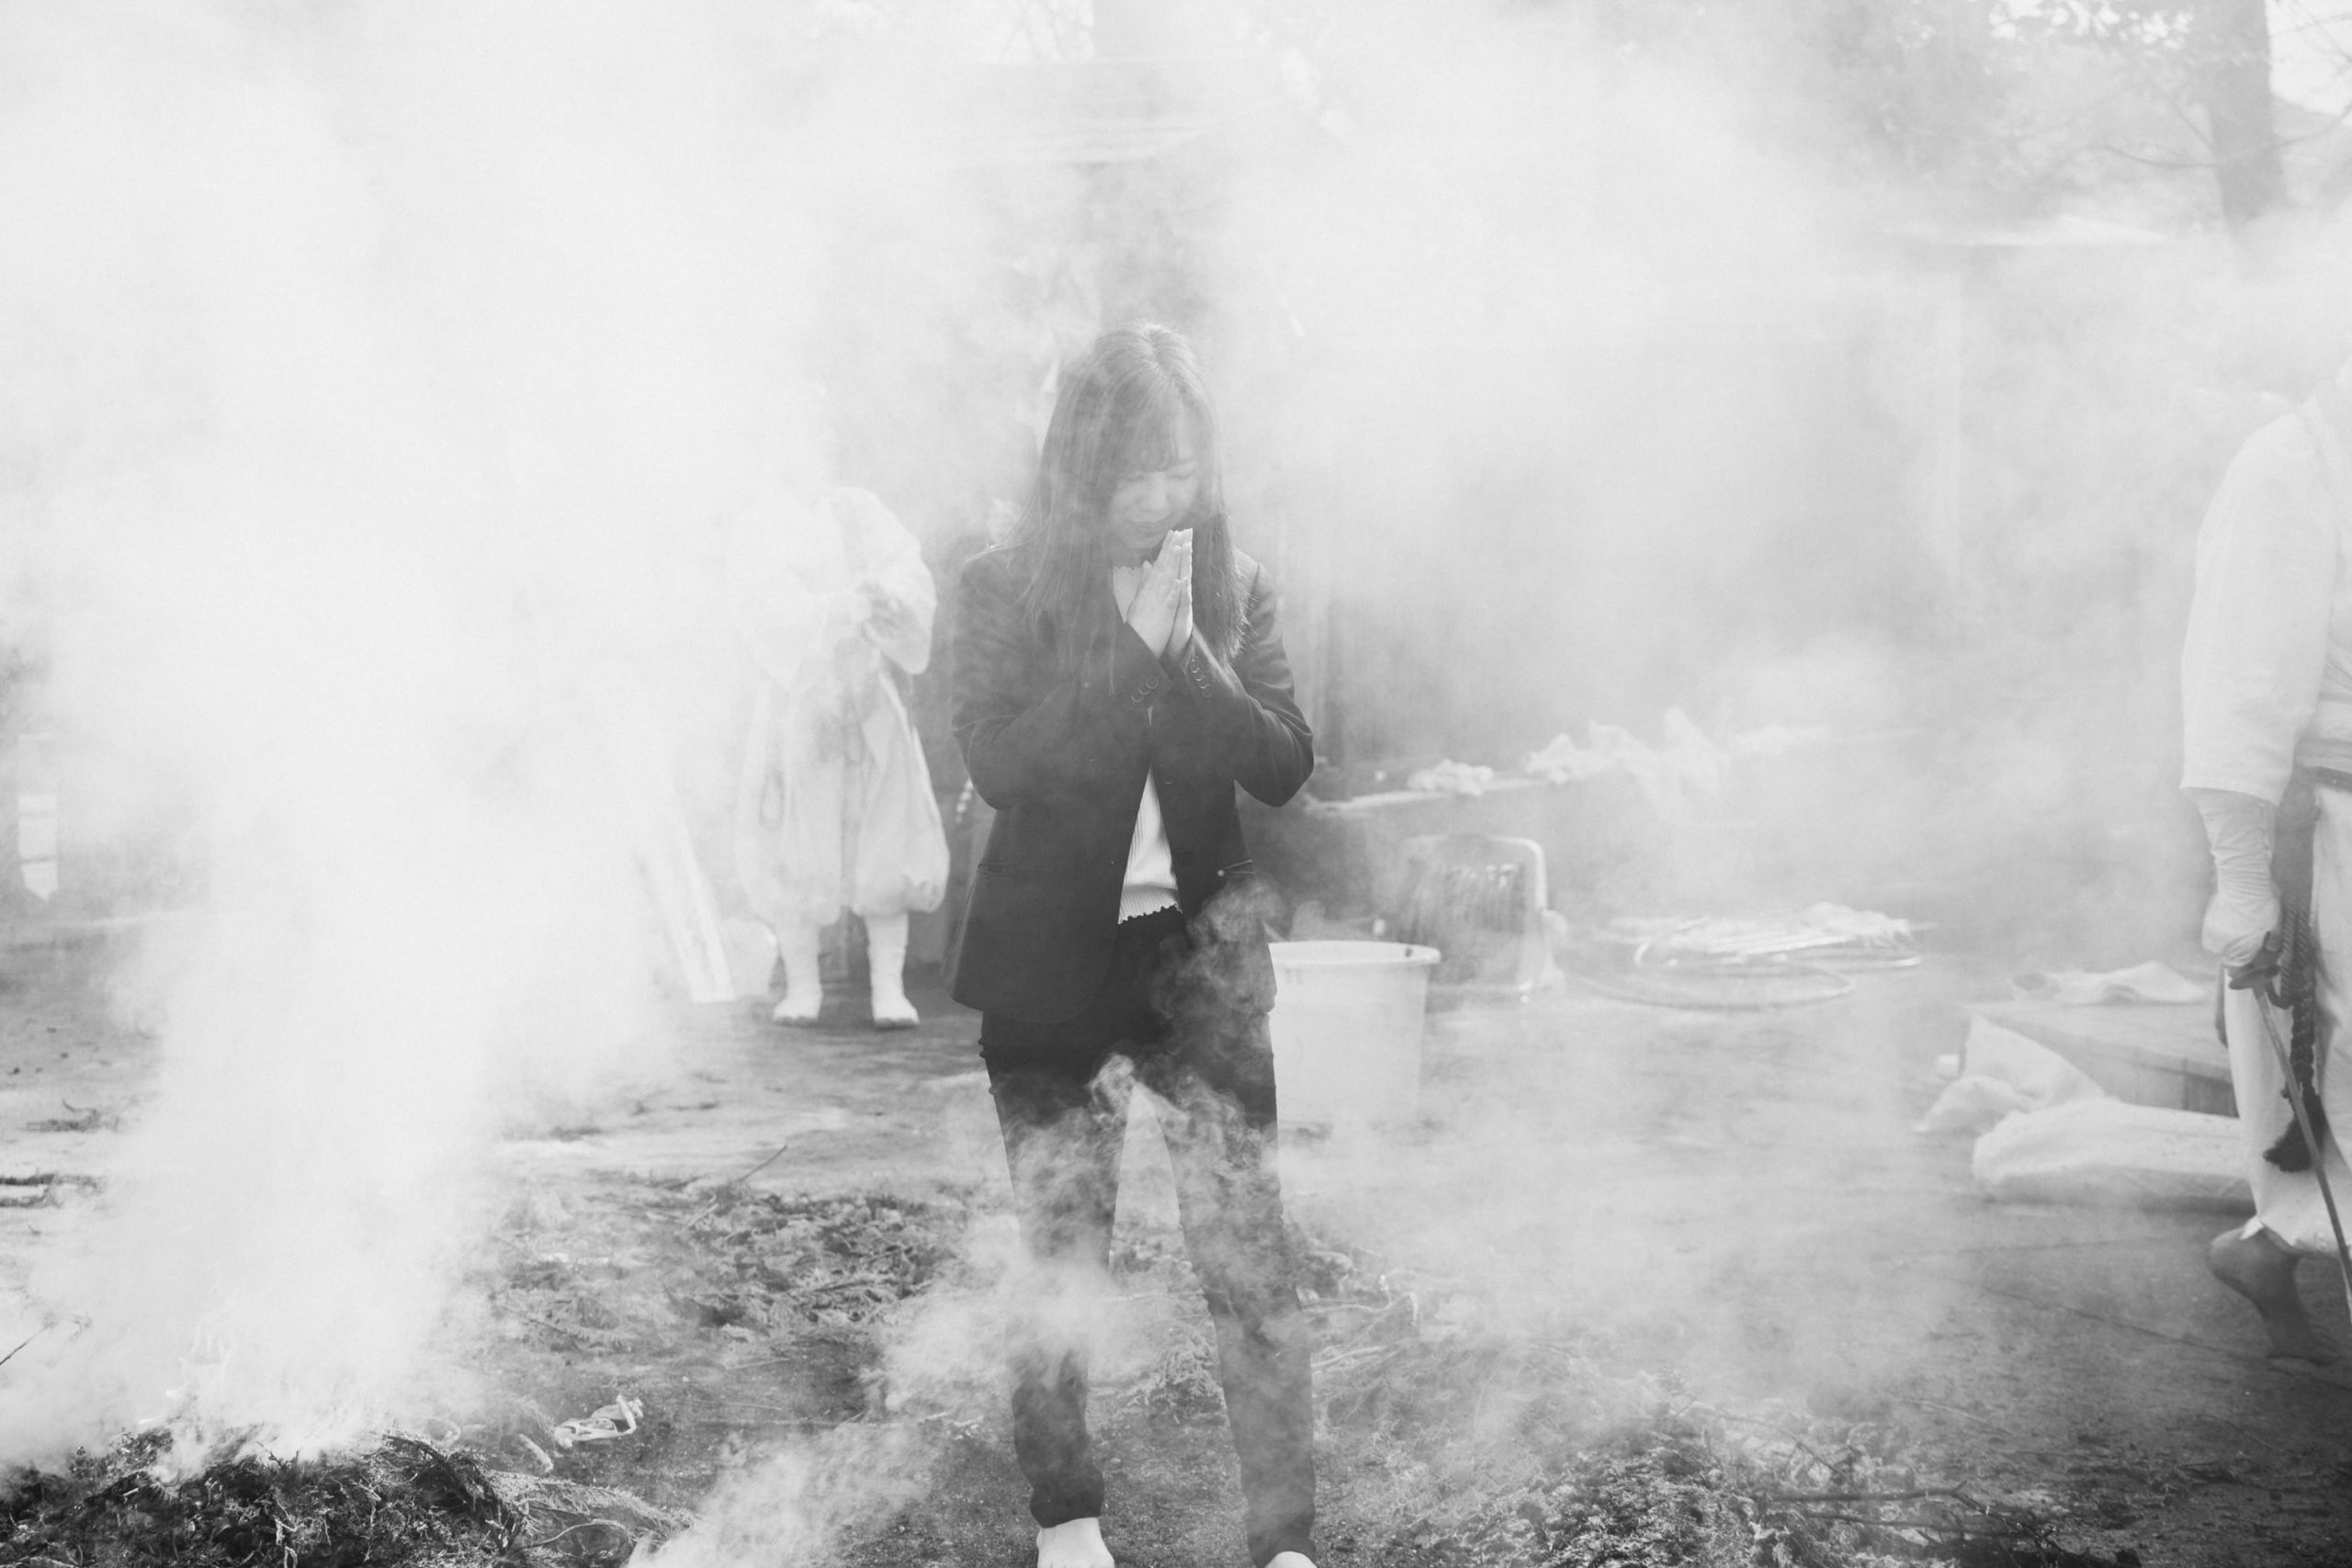
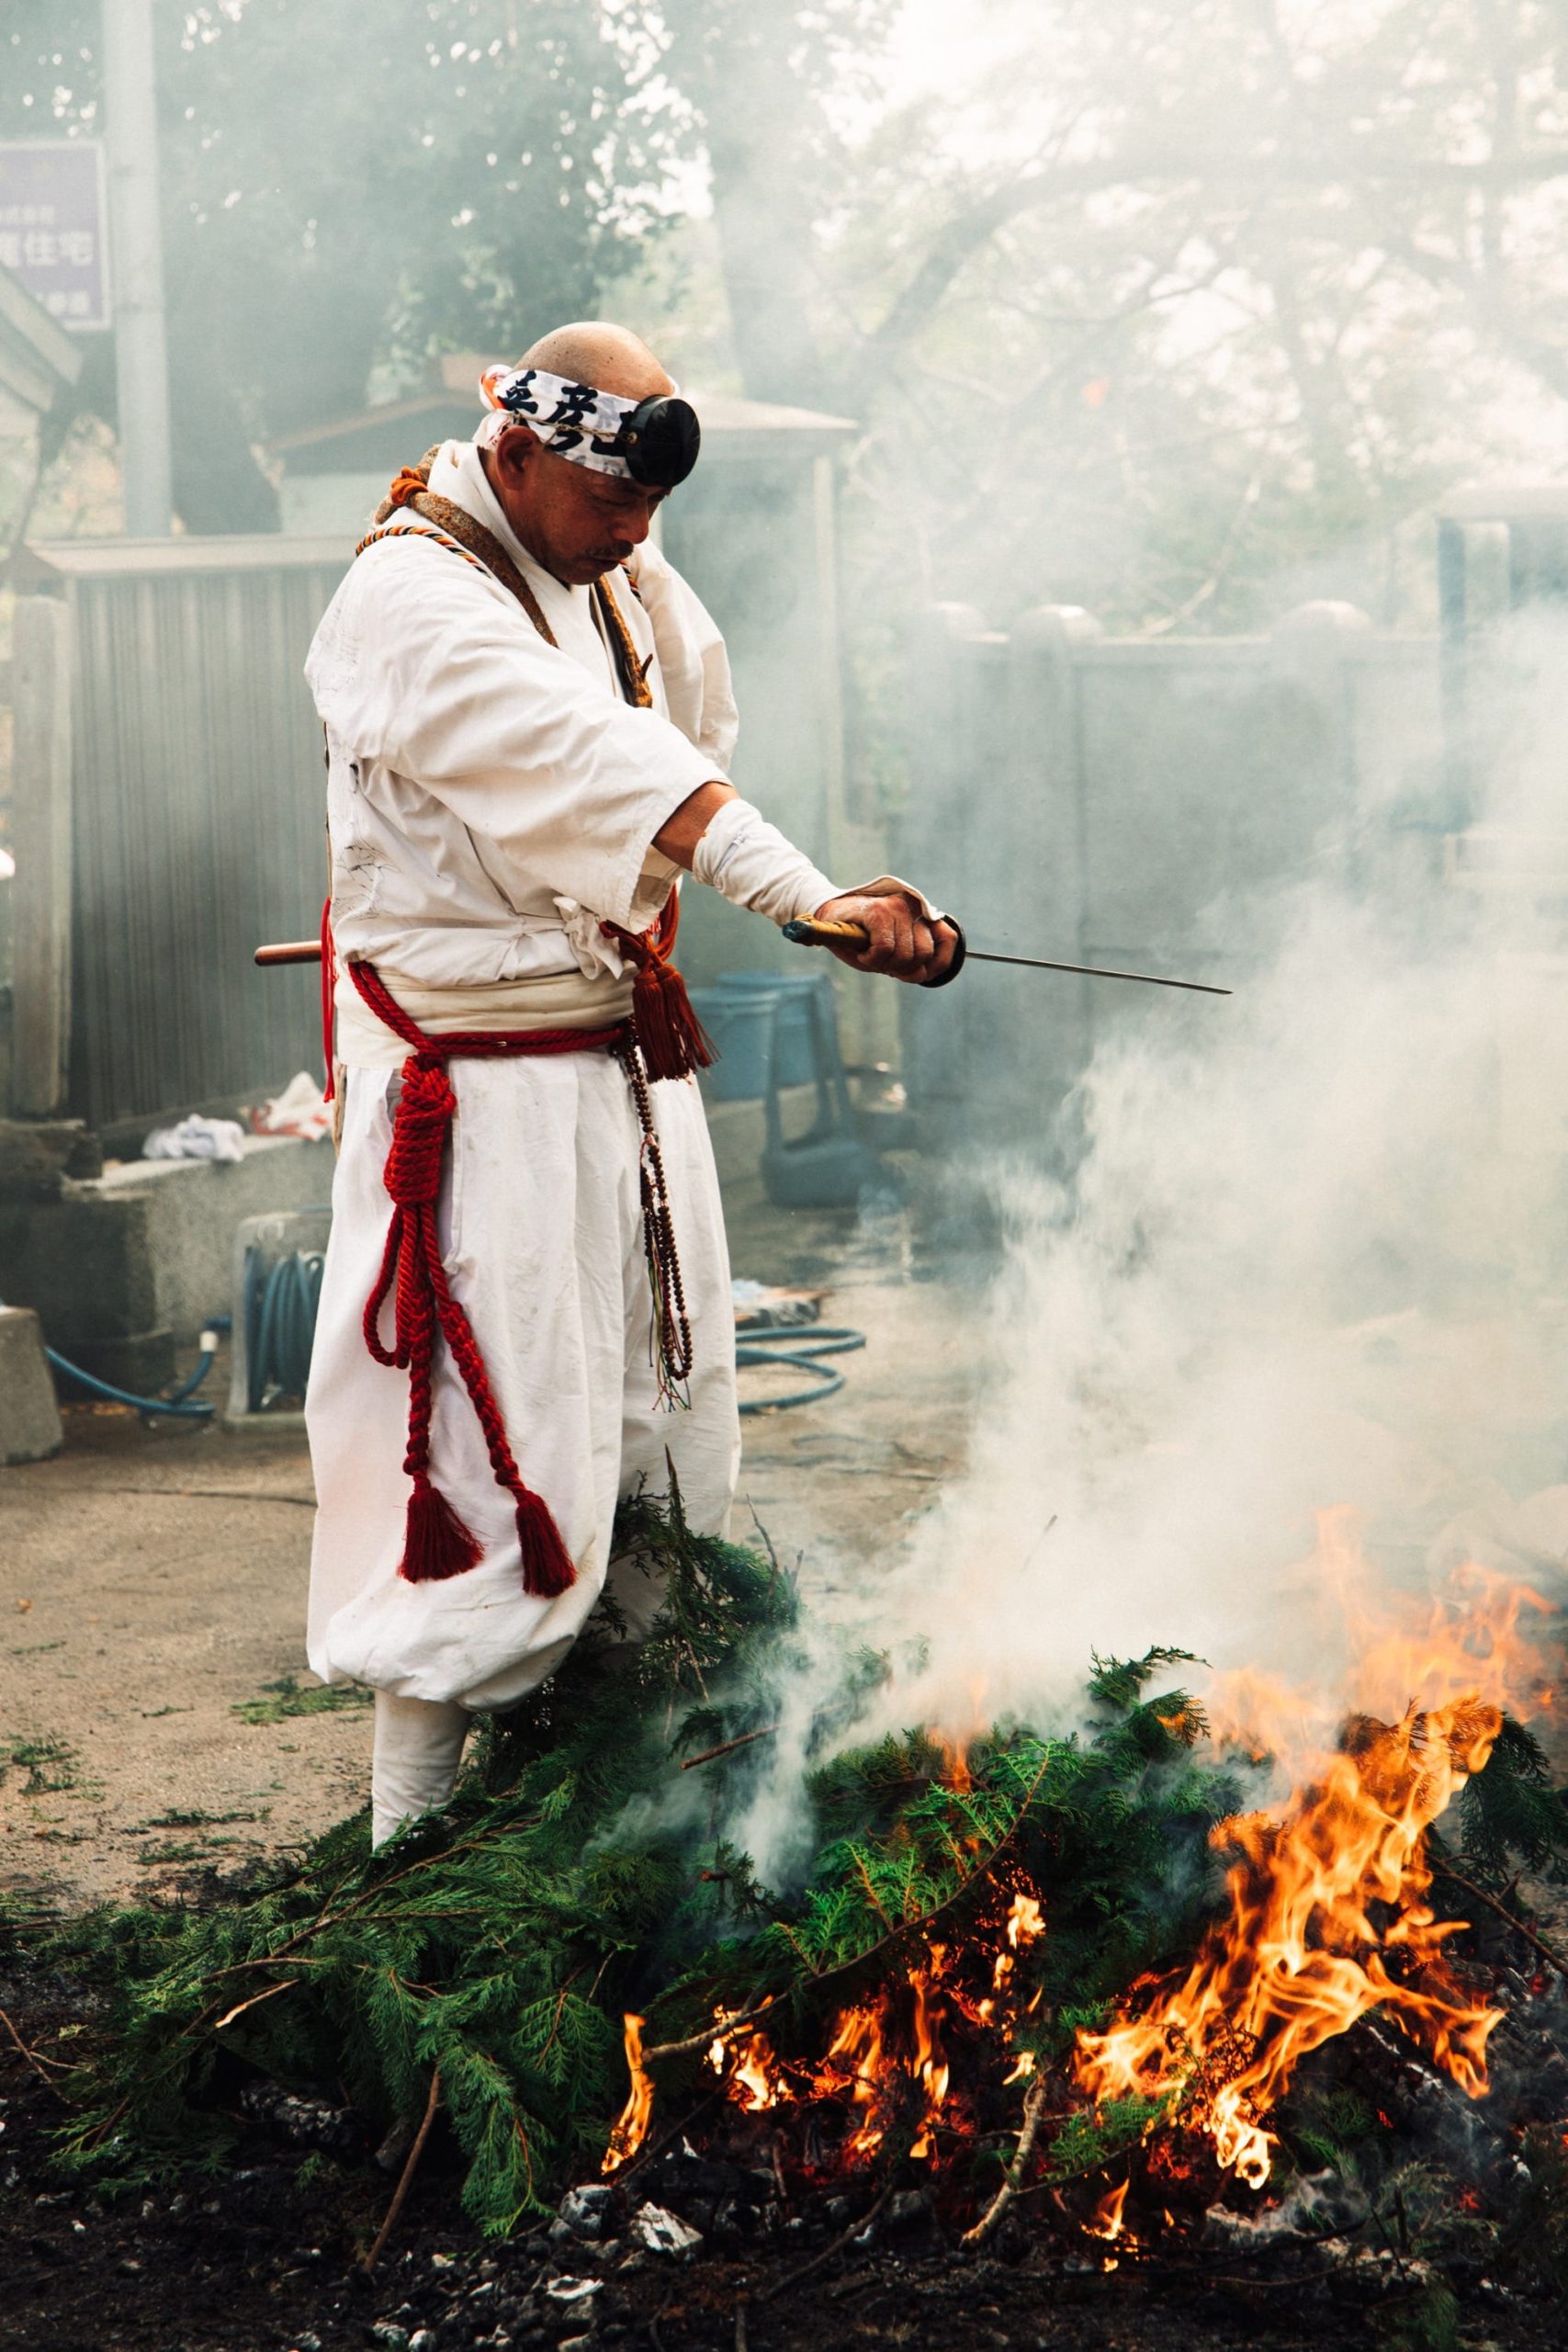
Participants will write a wish on a small wooden stick that is thrown into the fire. The fire gods are called upon the temple where they take the wishes as well as any bad luck up with them in the smoke, purifying and cleansing the participants.

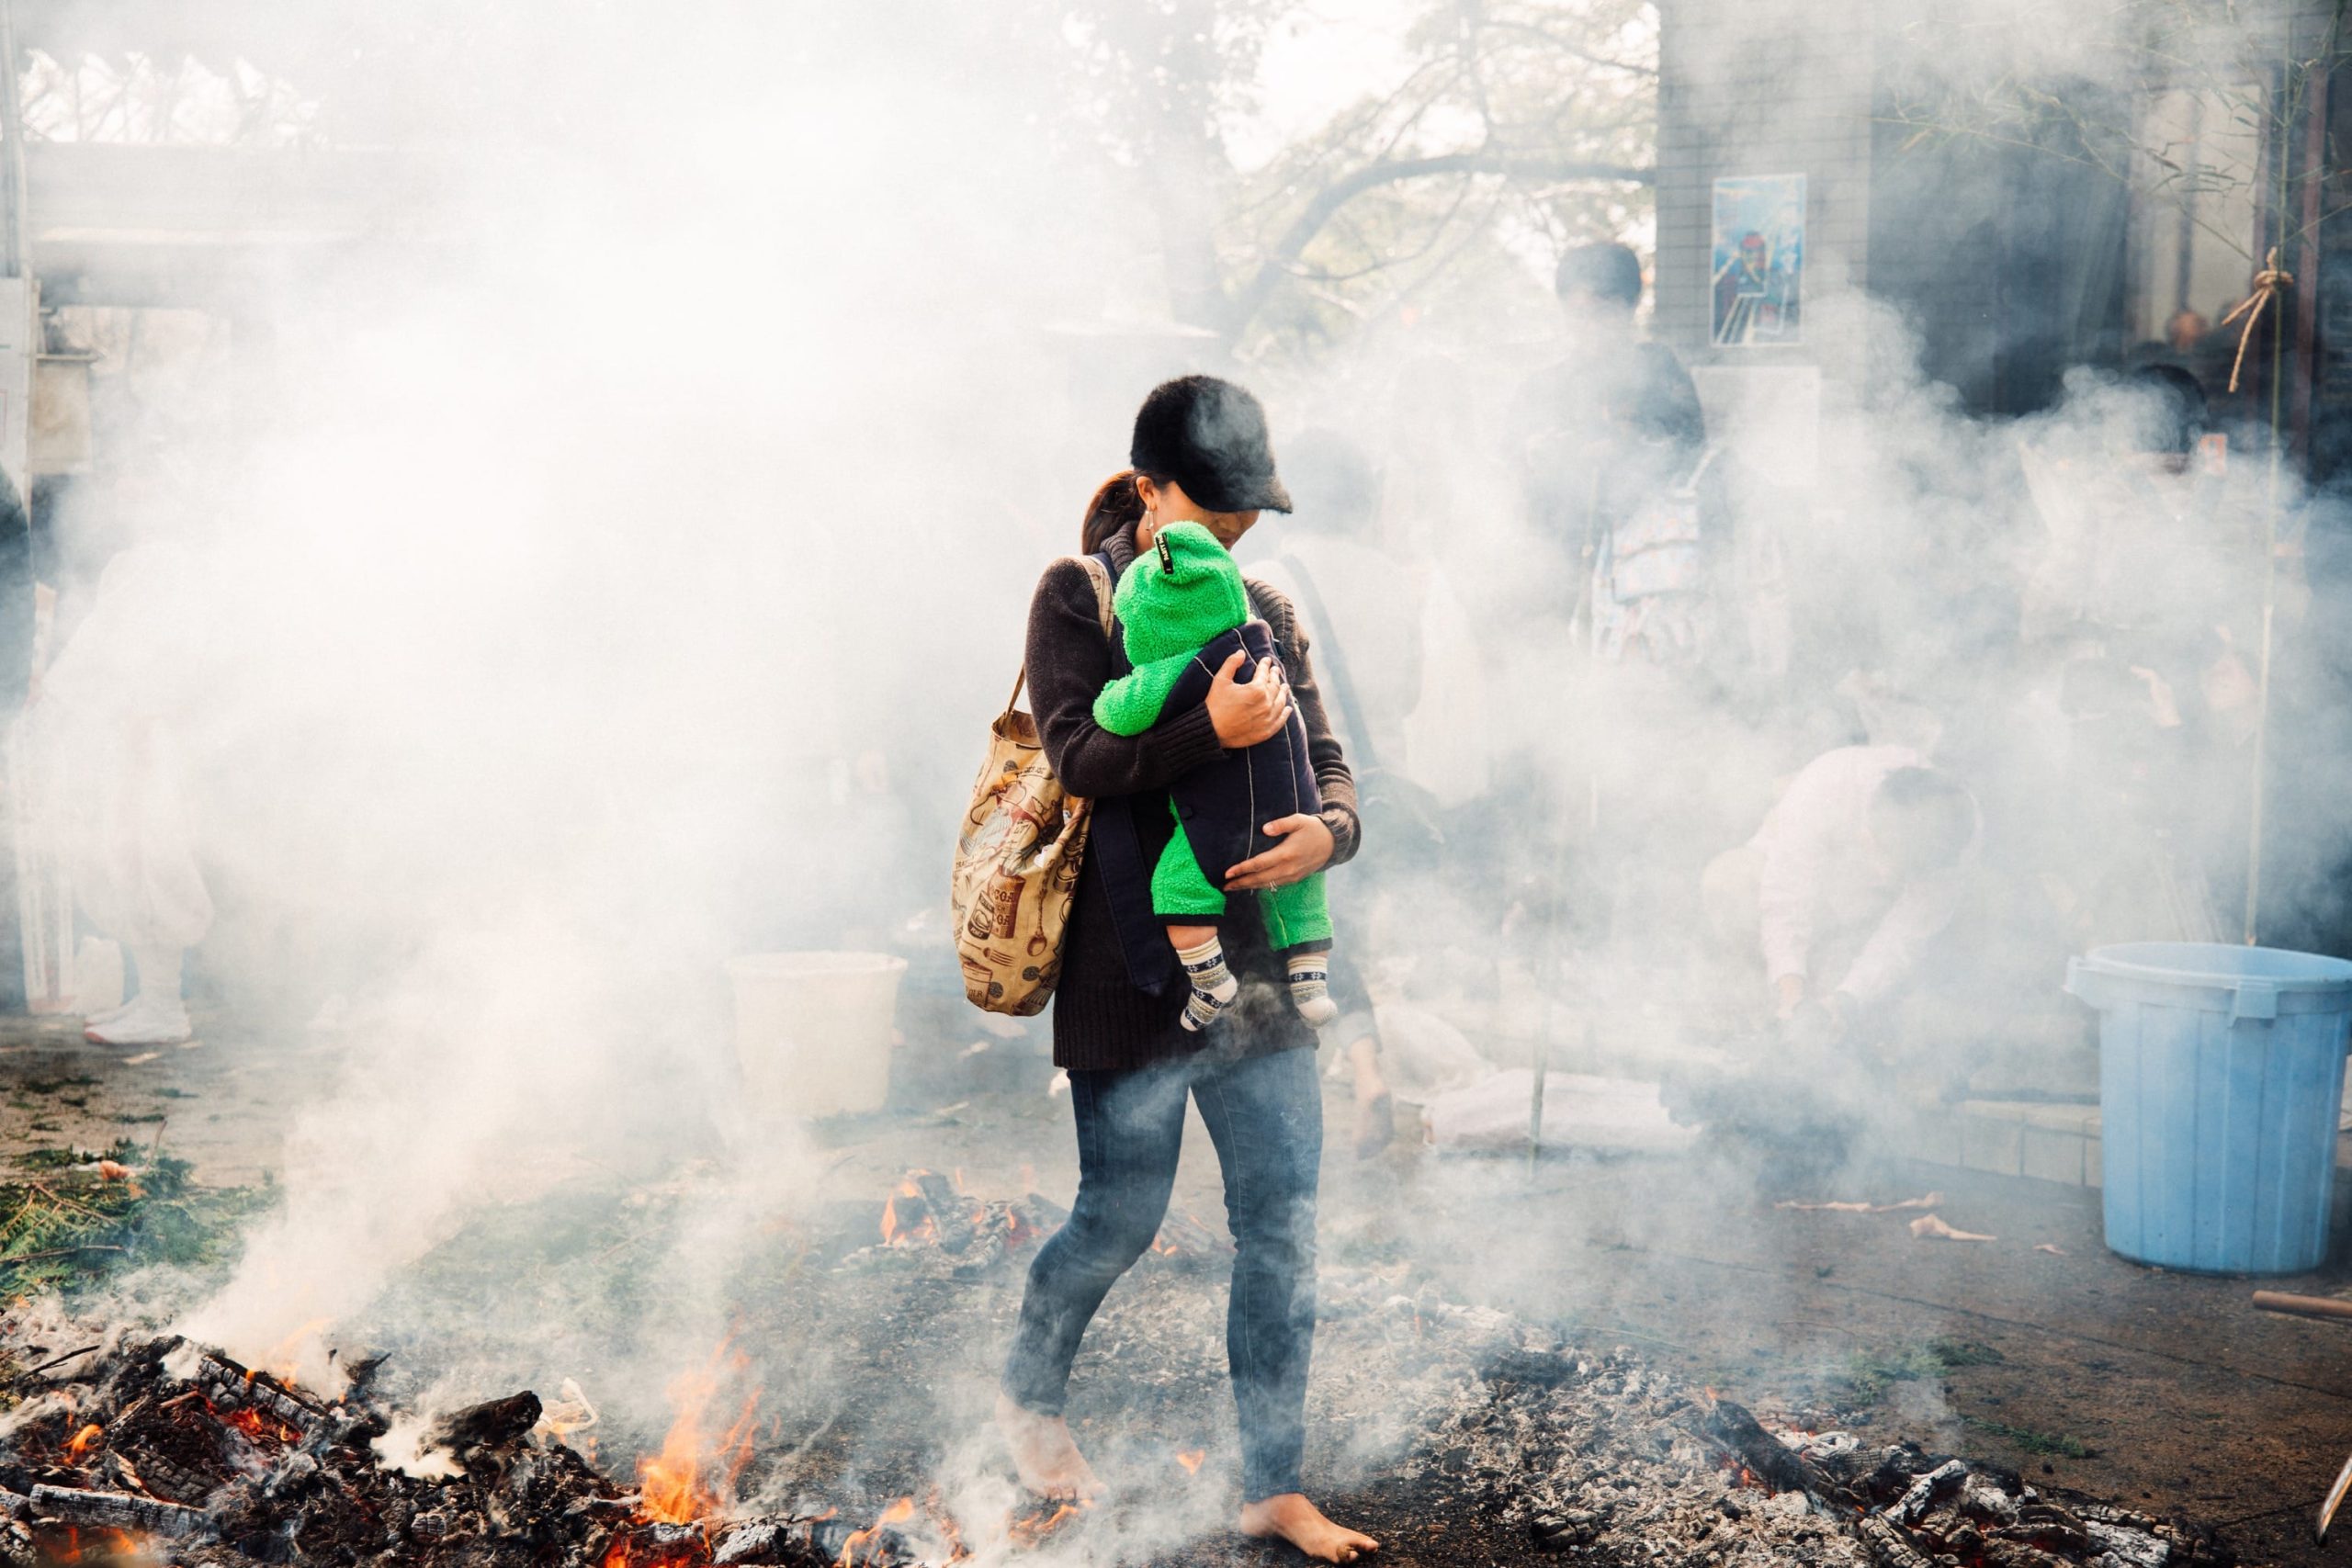
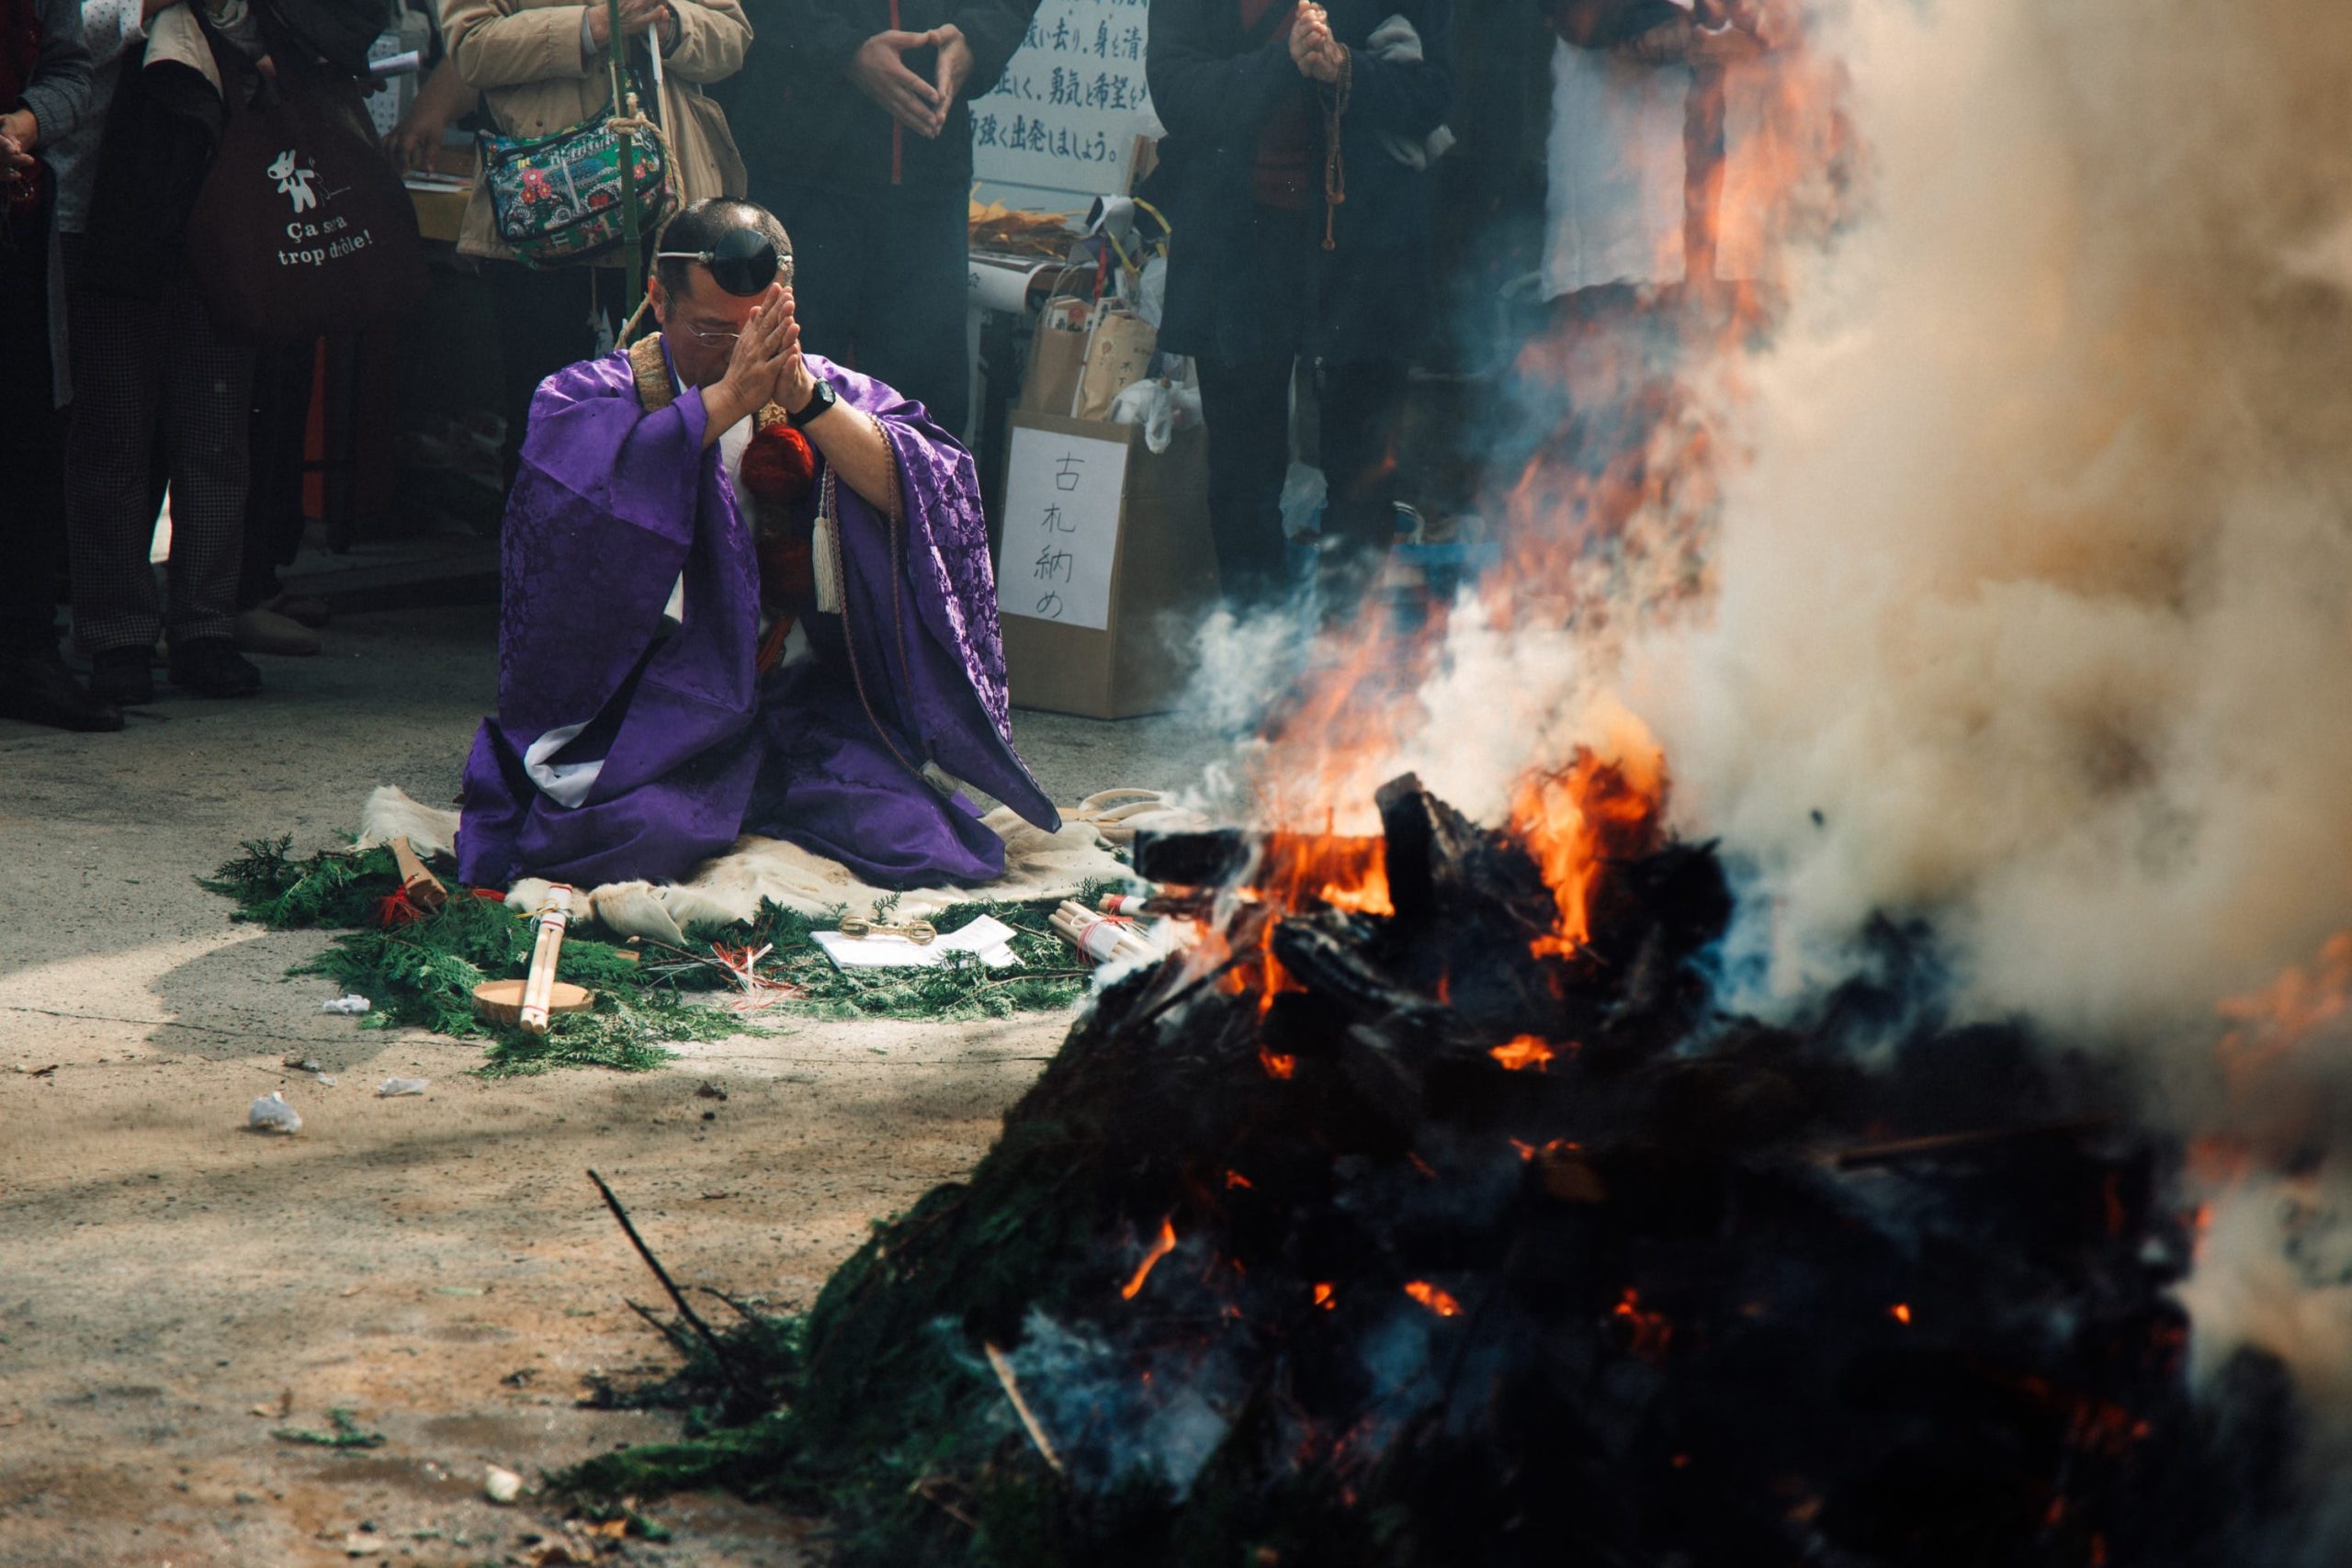
After the fire calms, it’s split into two rows and a path is prepared with salt and spruce tree branches. Visitors then walk through the bon fire following a cleansing ritual and blessing from the priest. My wife and son were blessed and a priest told little Luka was told he was capable of doing anything in life. I have to agree. He’s a very talented 4-month-old. He also made it on the news.

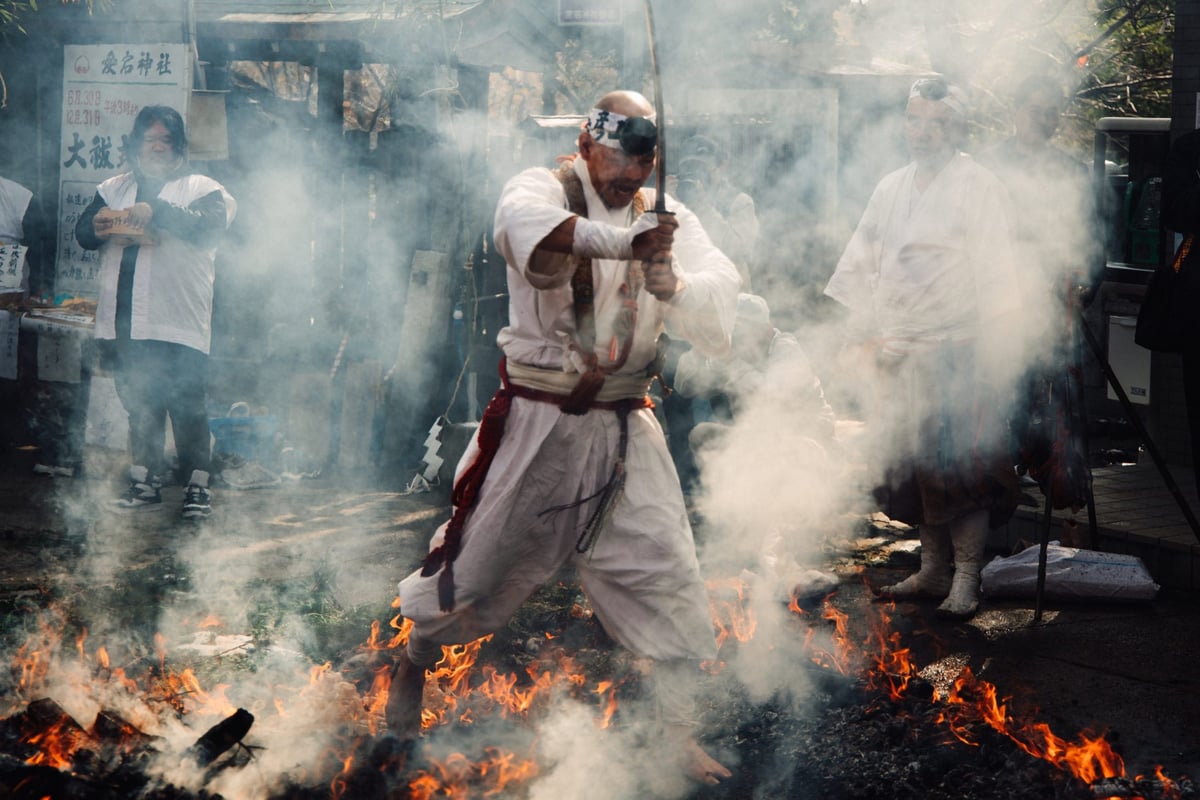
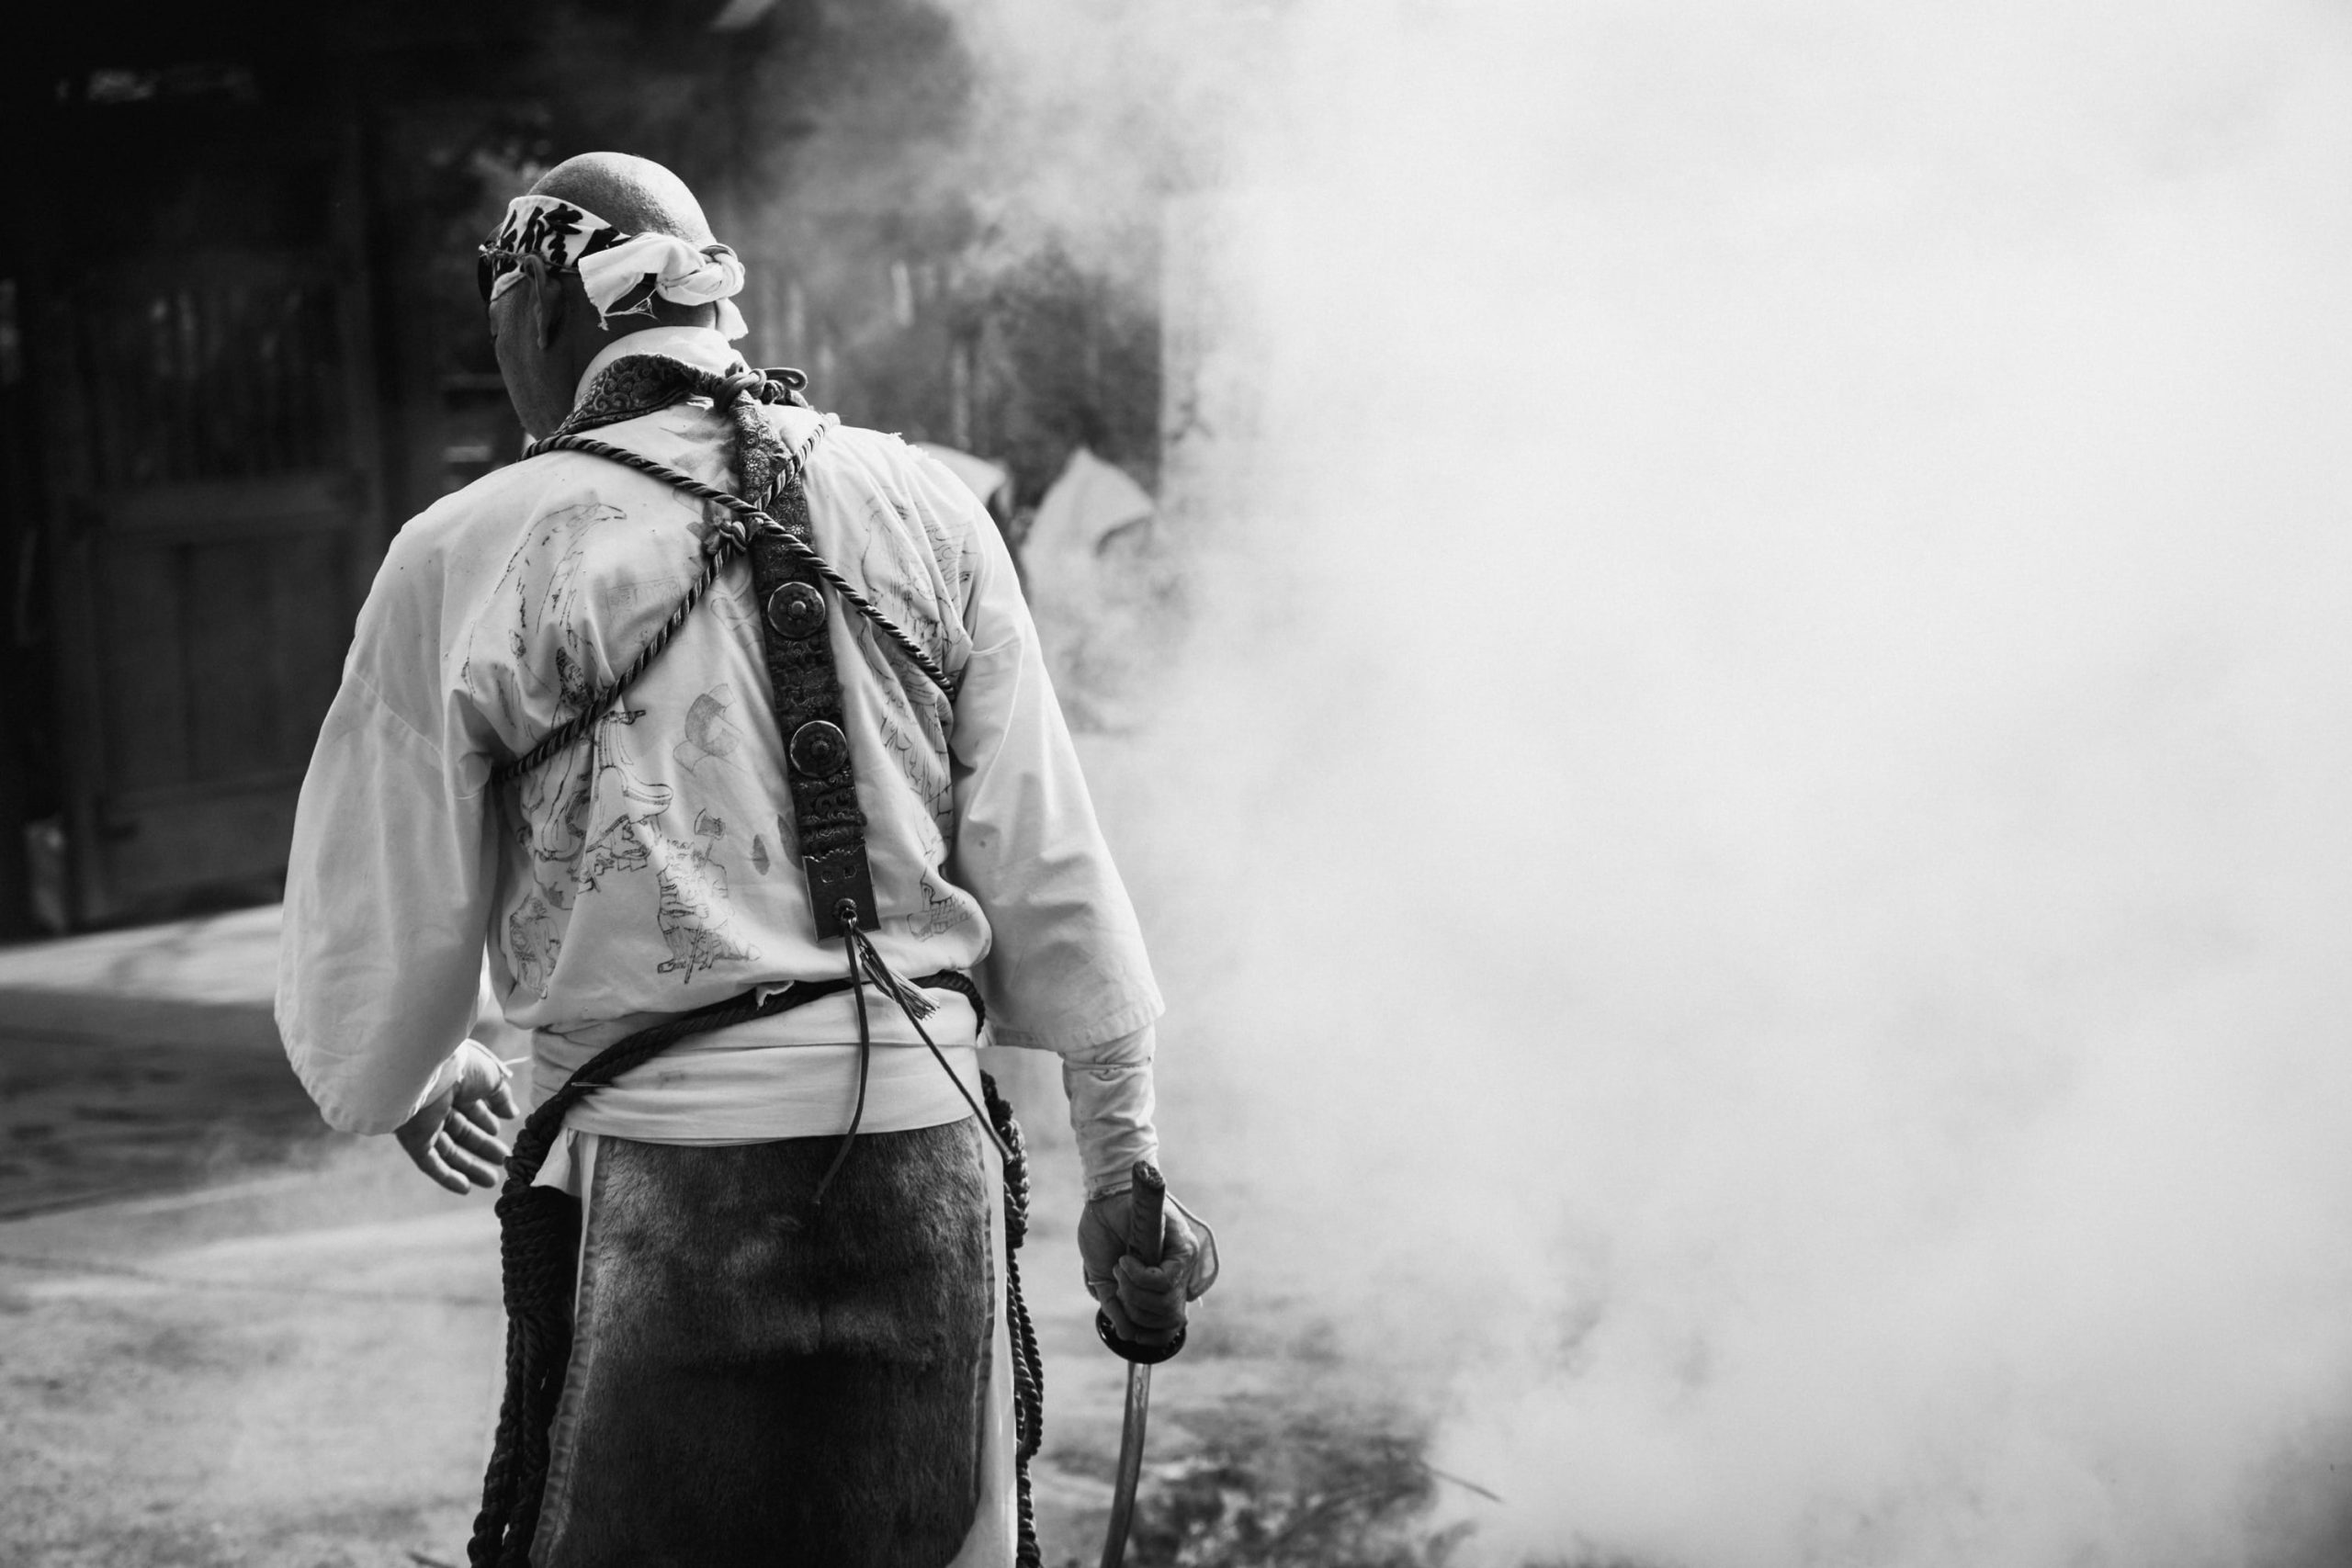
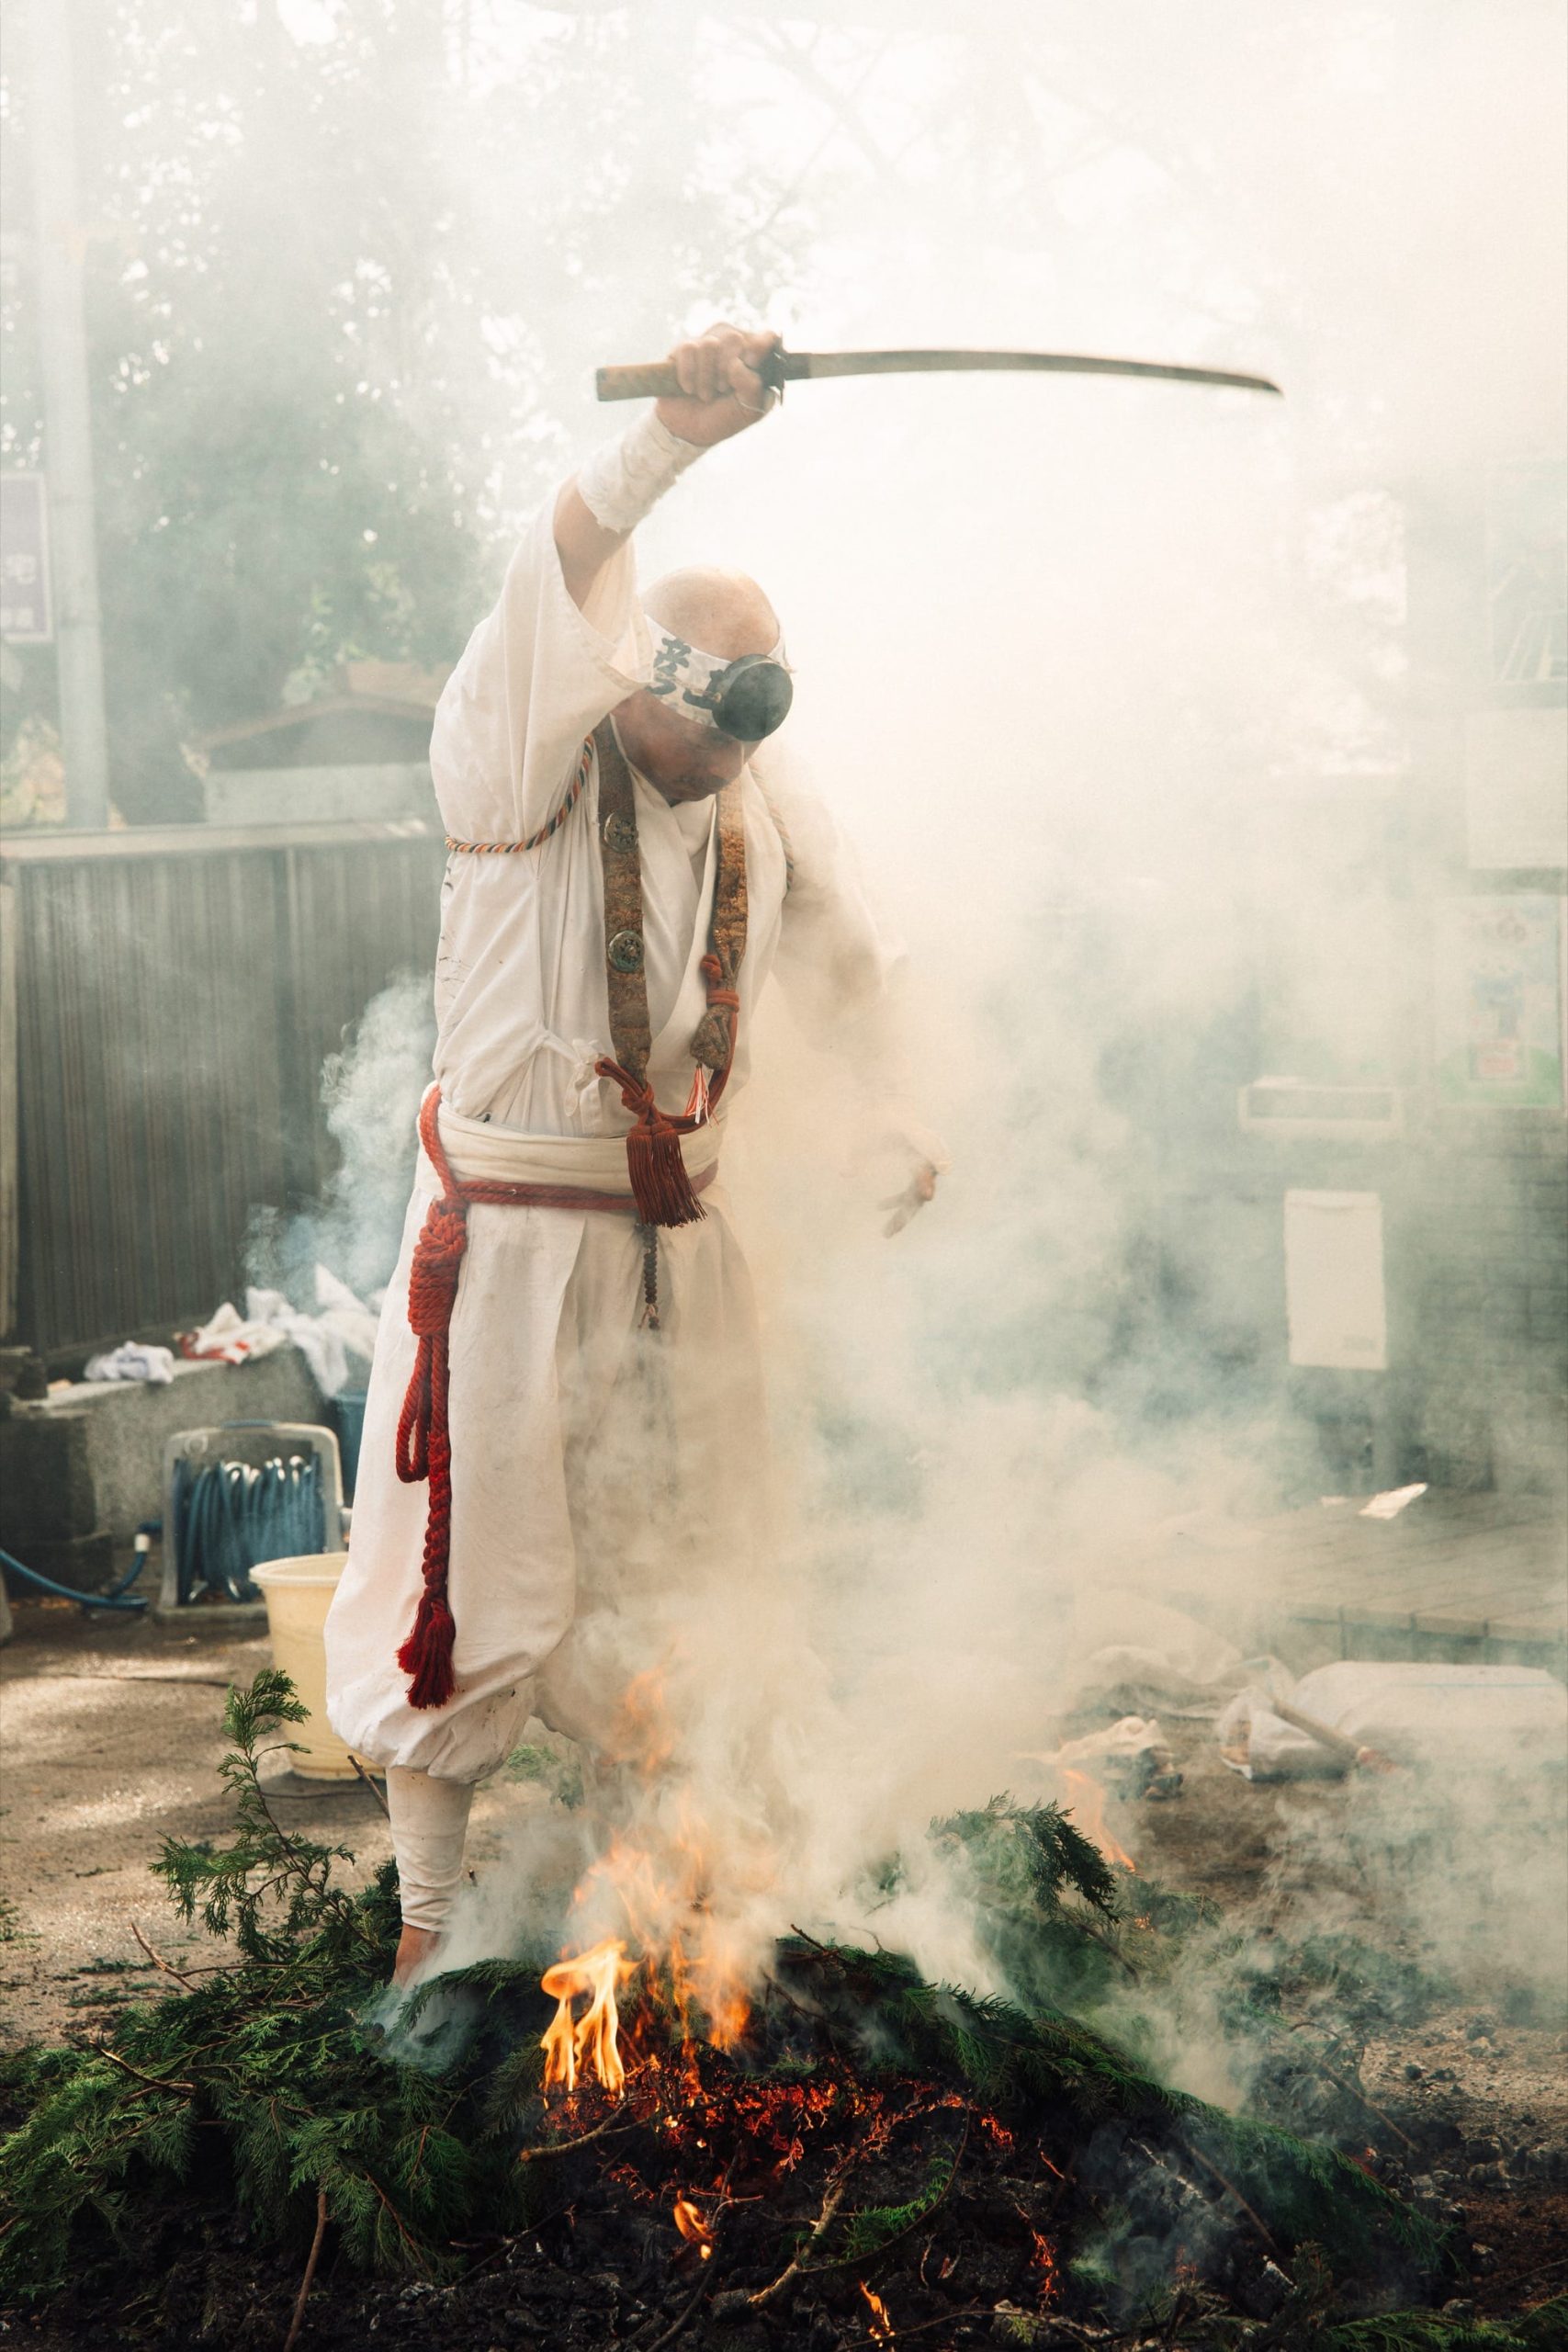
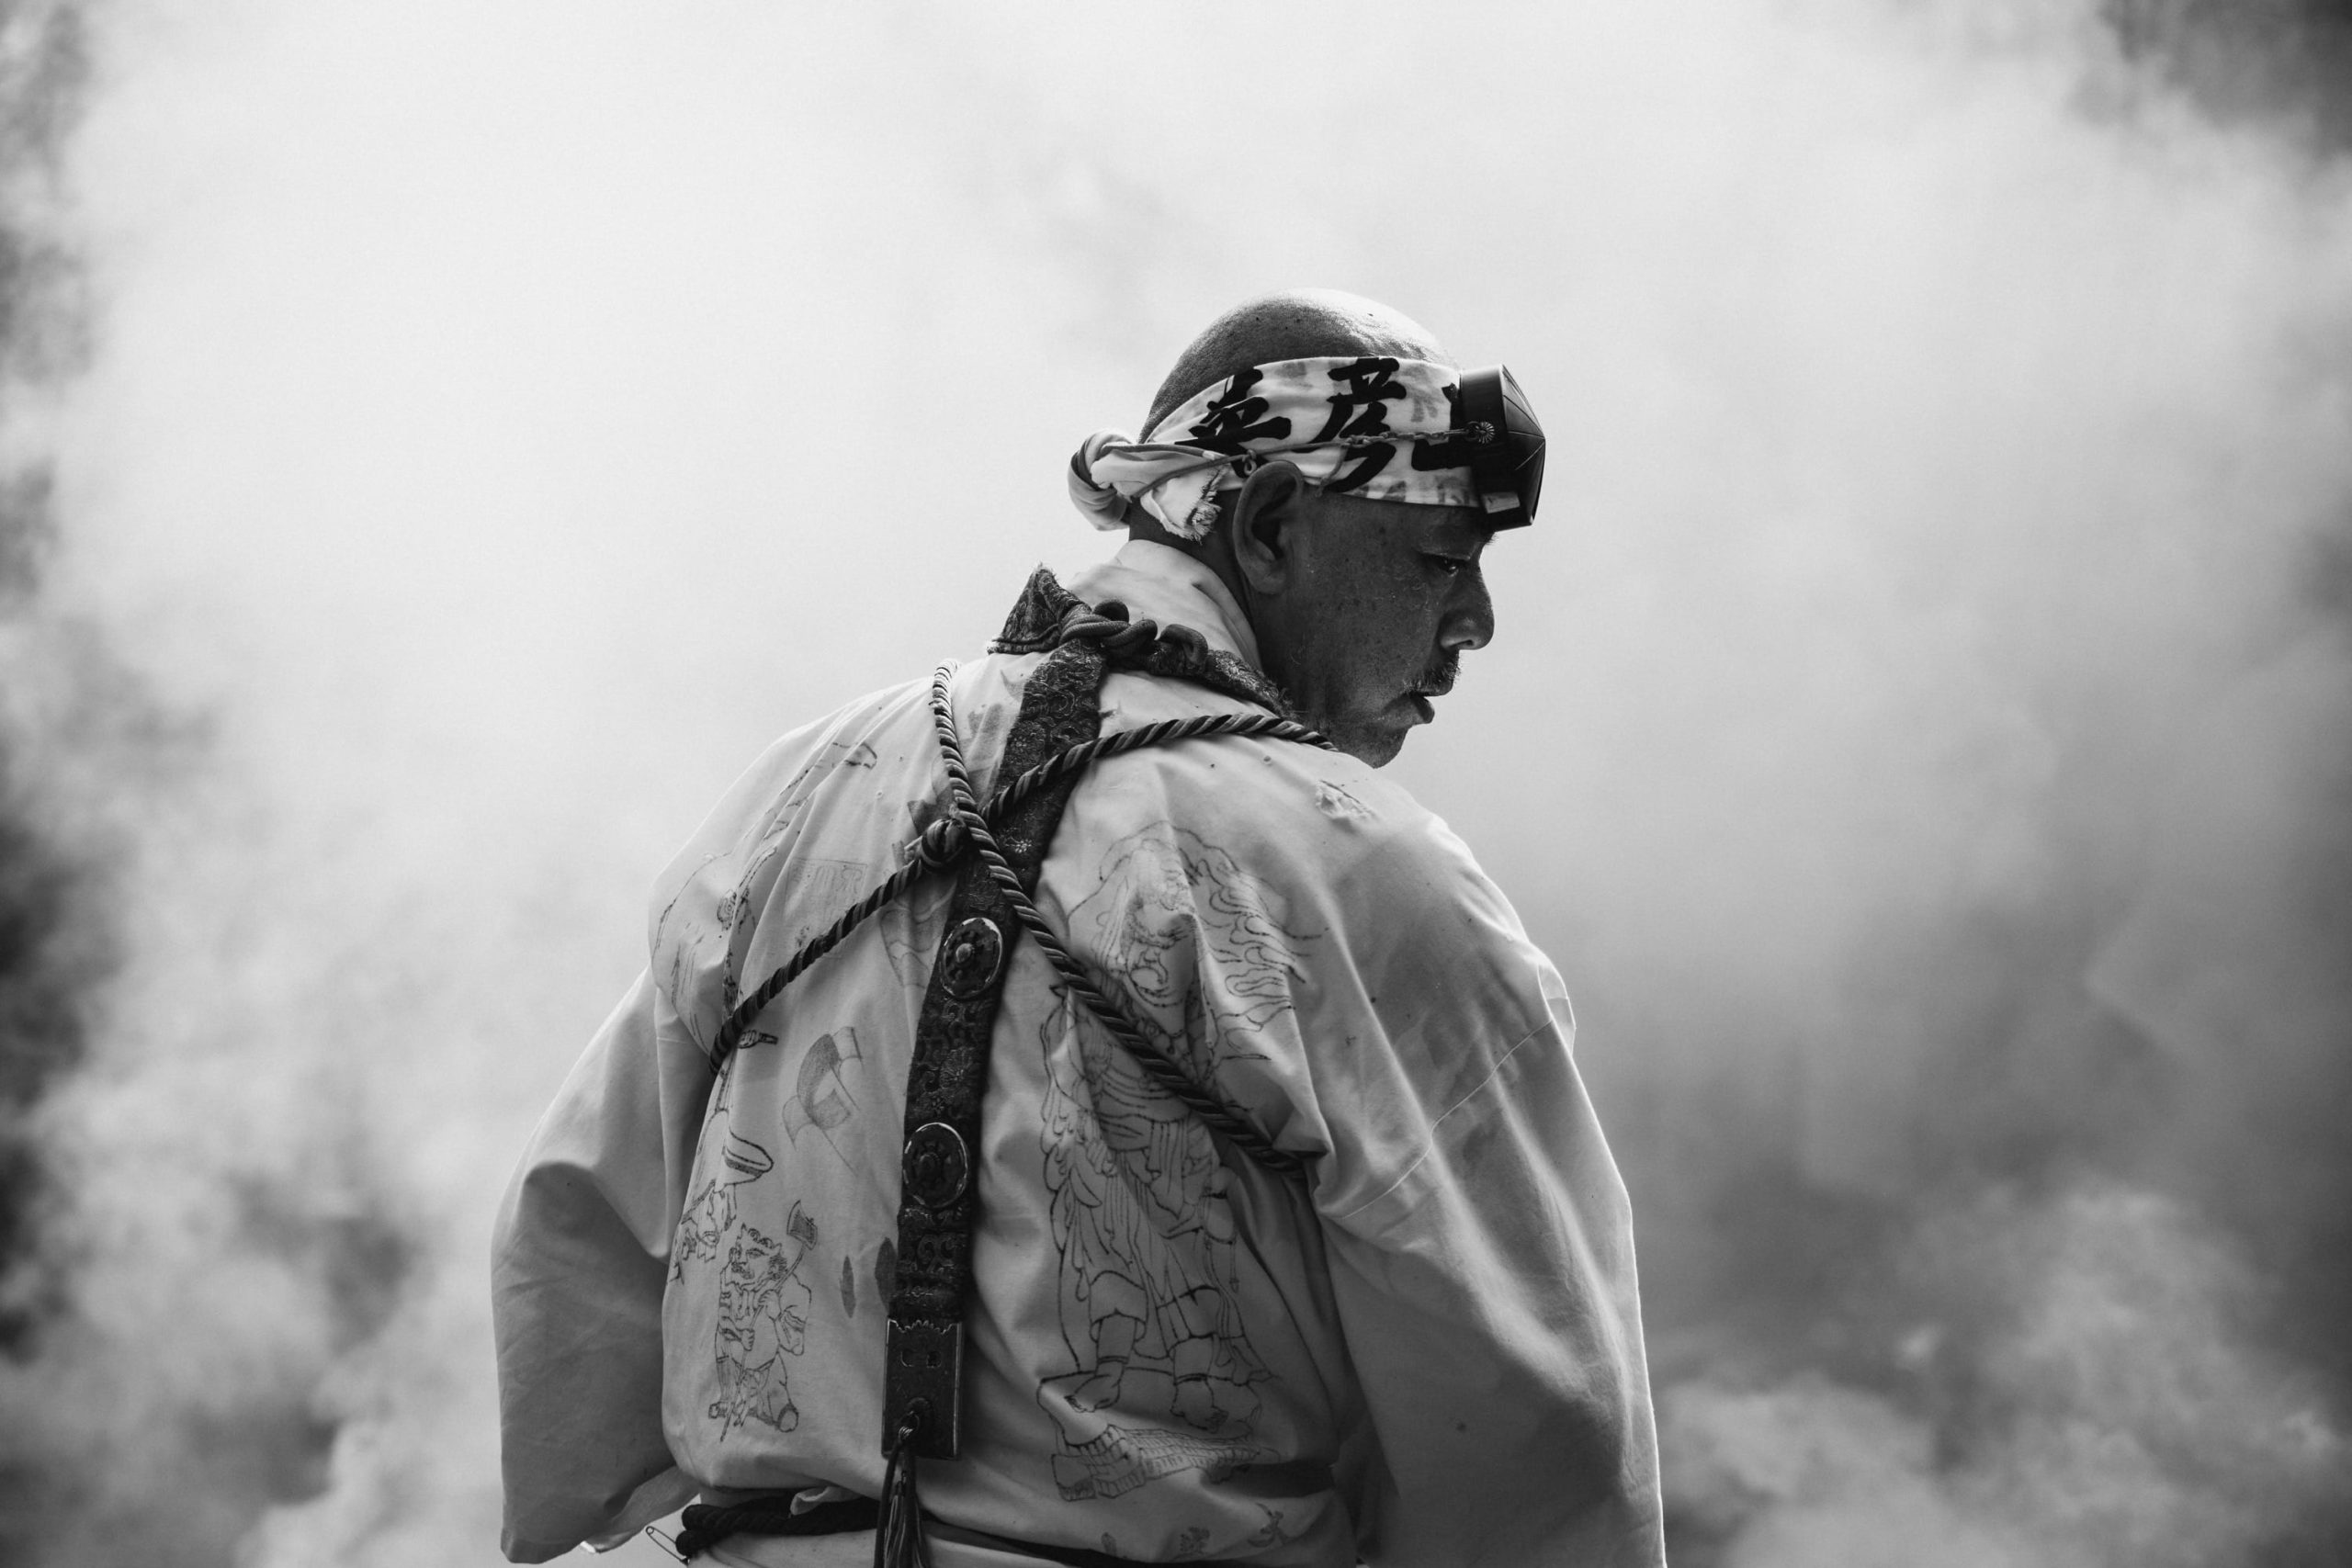
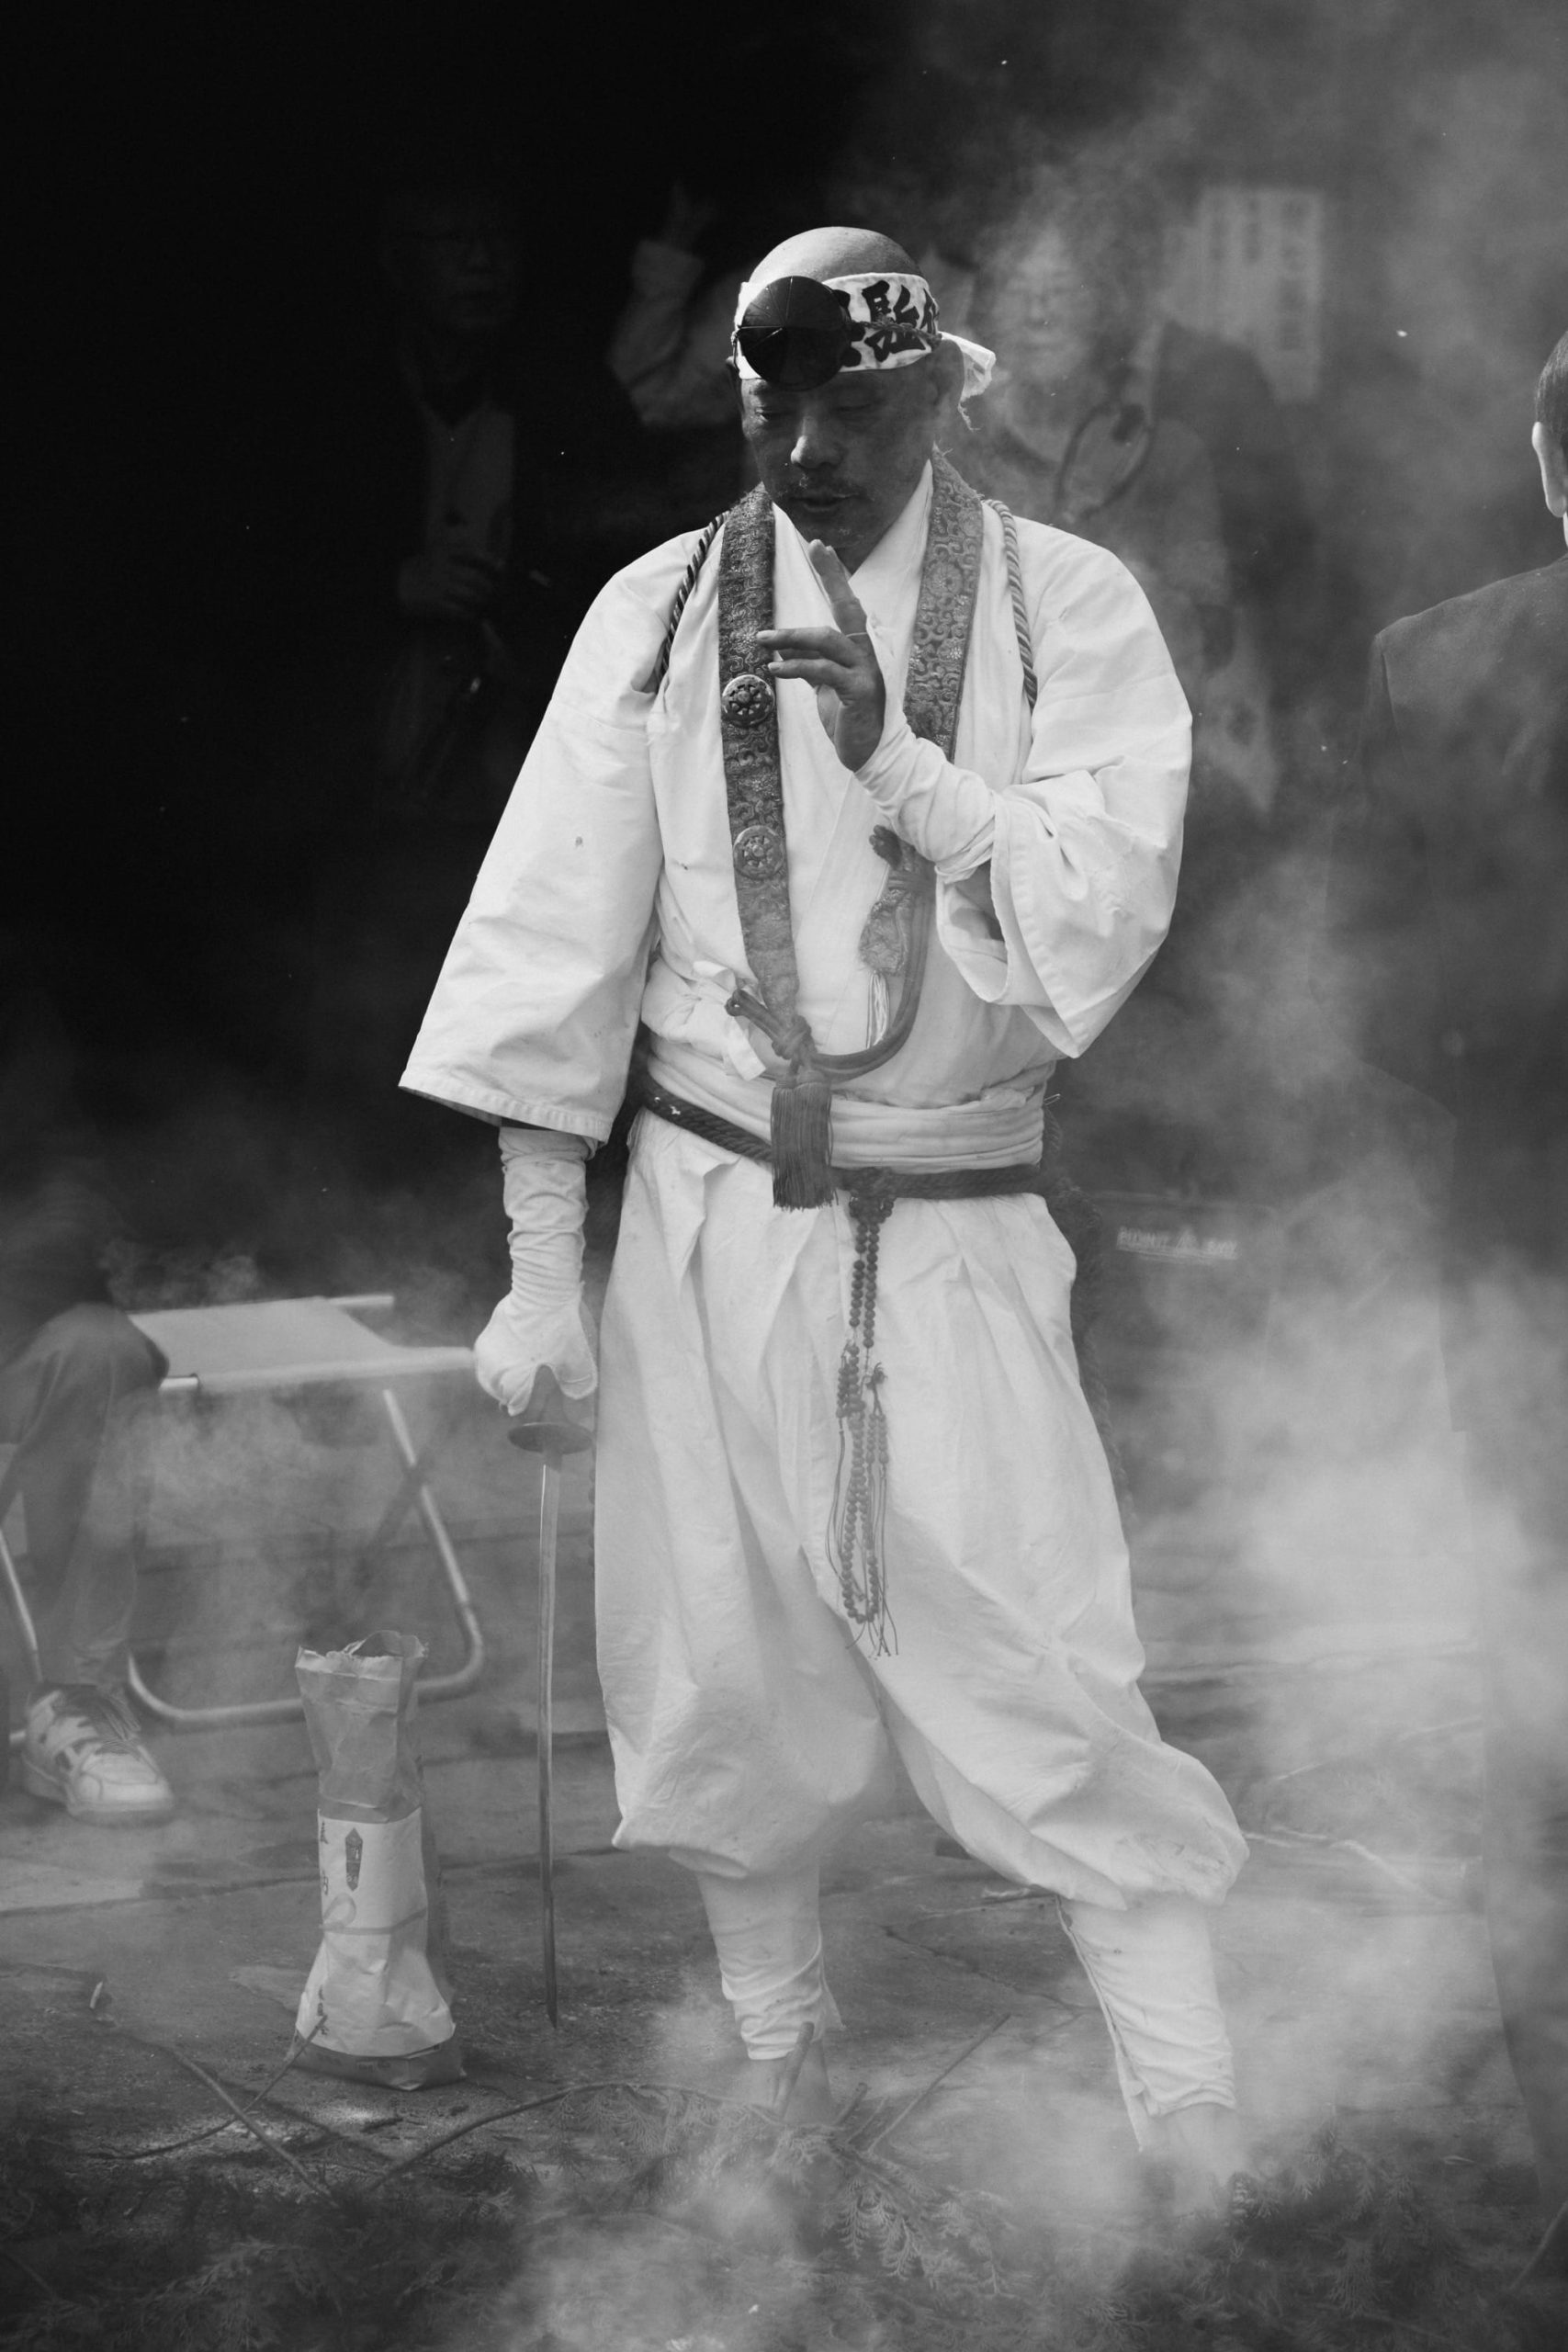
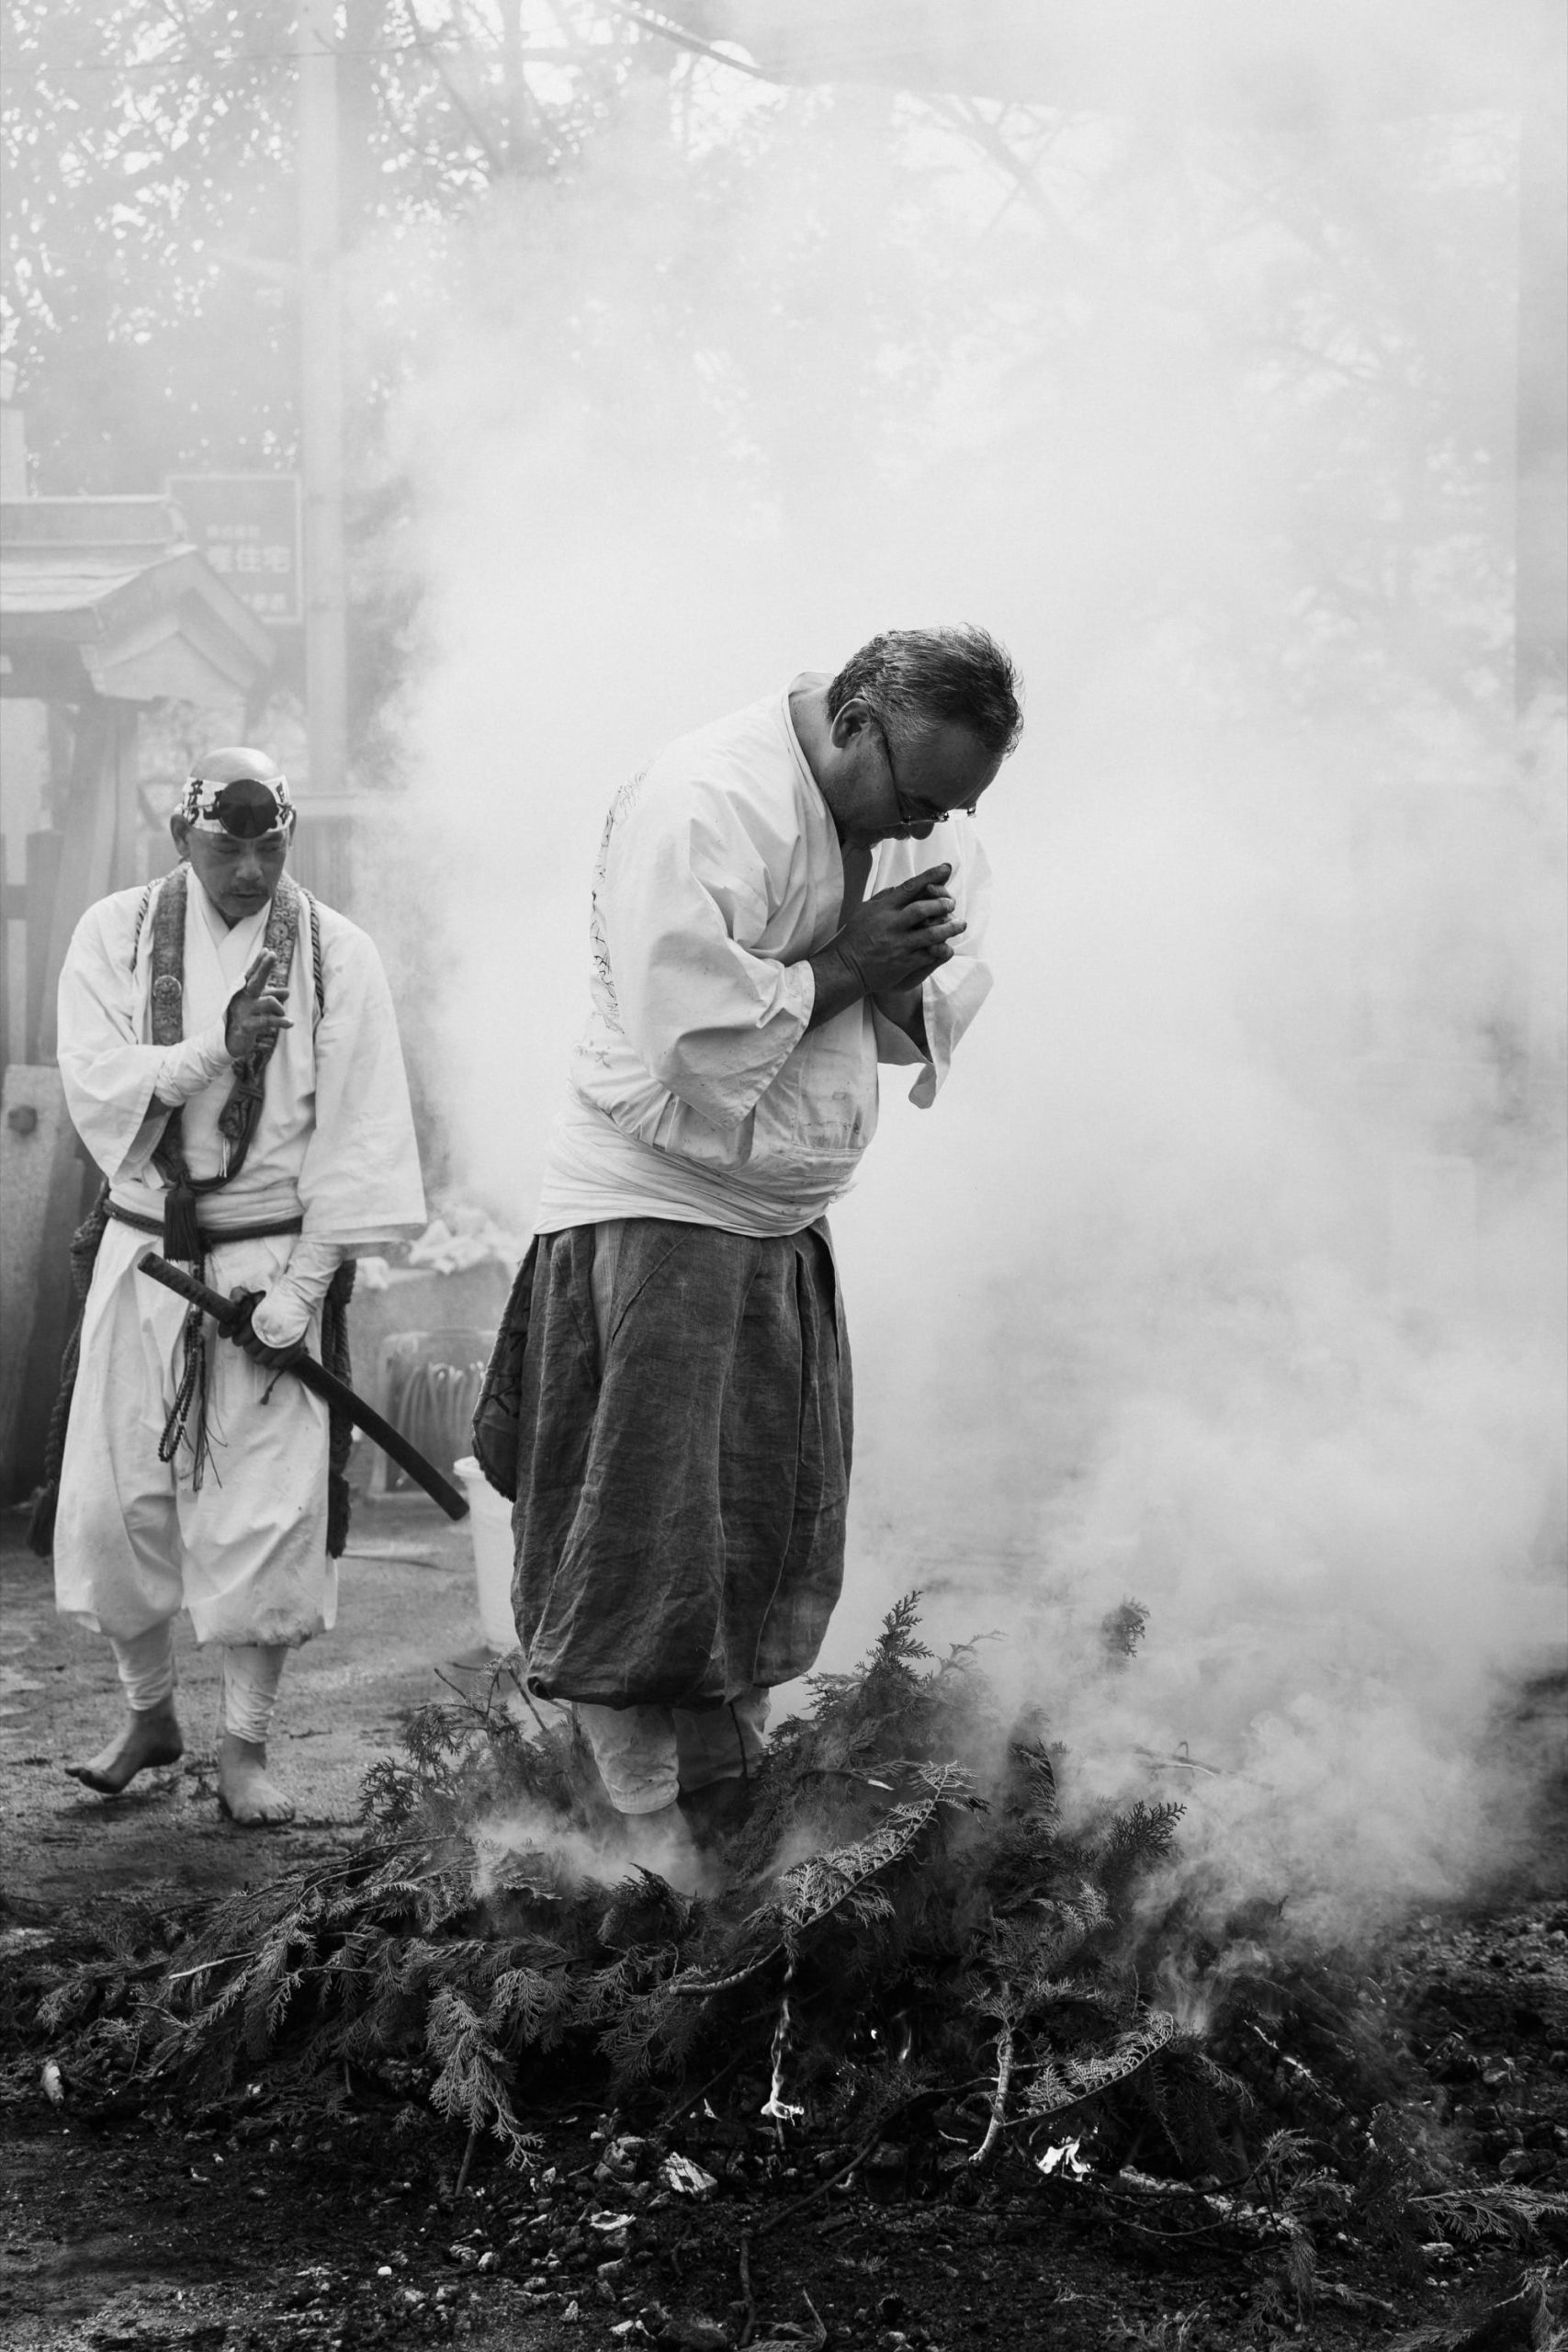
While I first thought the swords the warrior monks were using as part of the ritual were jump props, I later saw them cut through some rope to open up the bone fire to the visitors, and my god, they were sharp. They cut through rope and bamboo like it was butter.
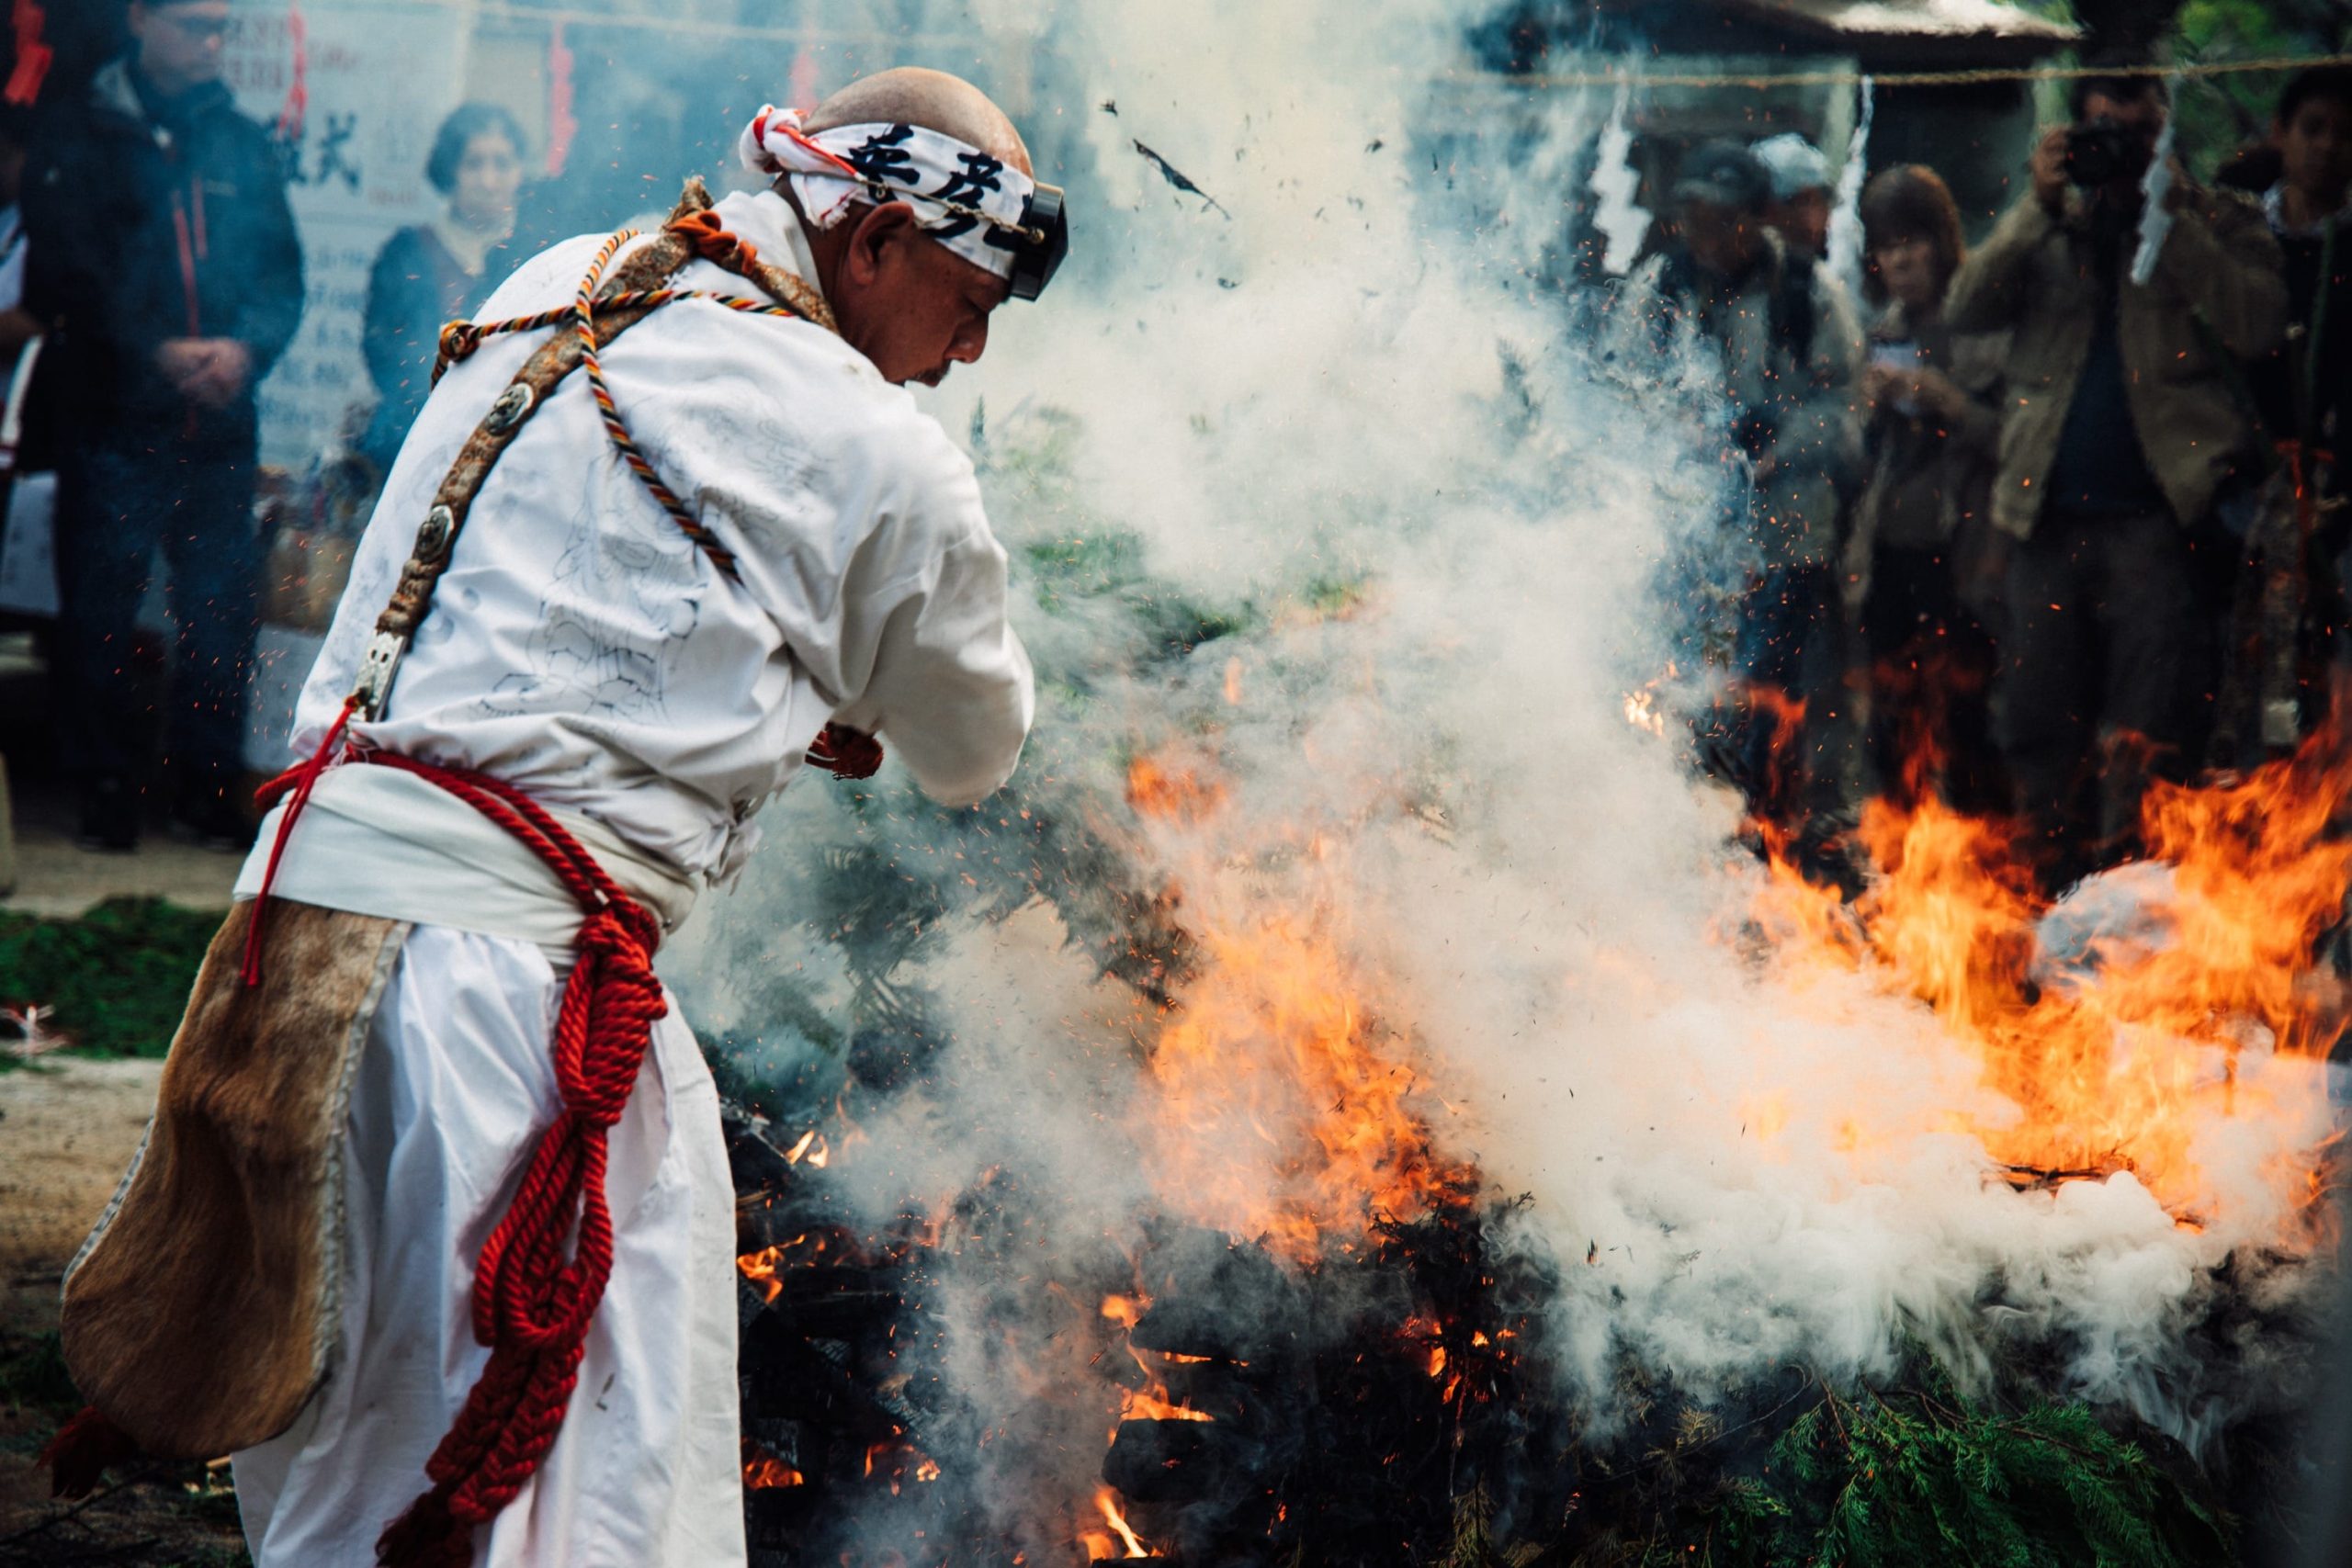
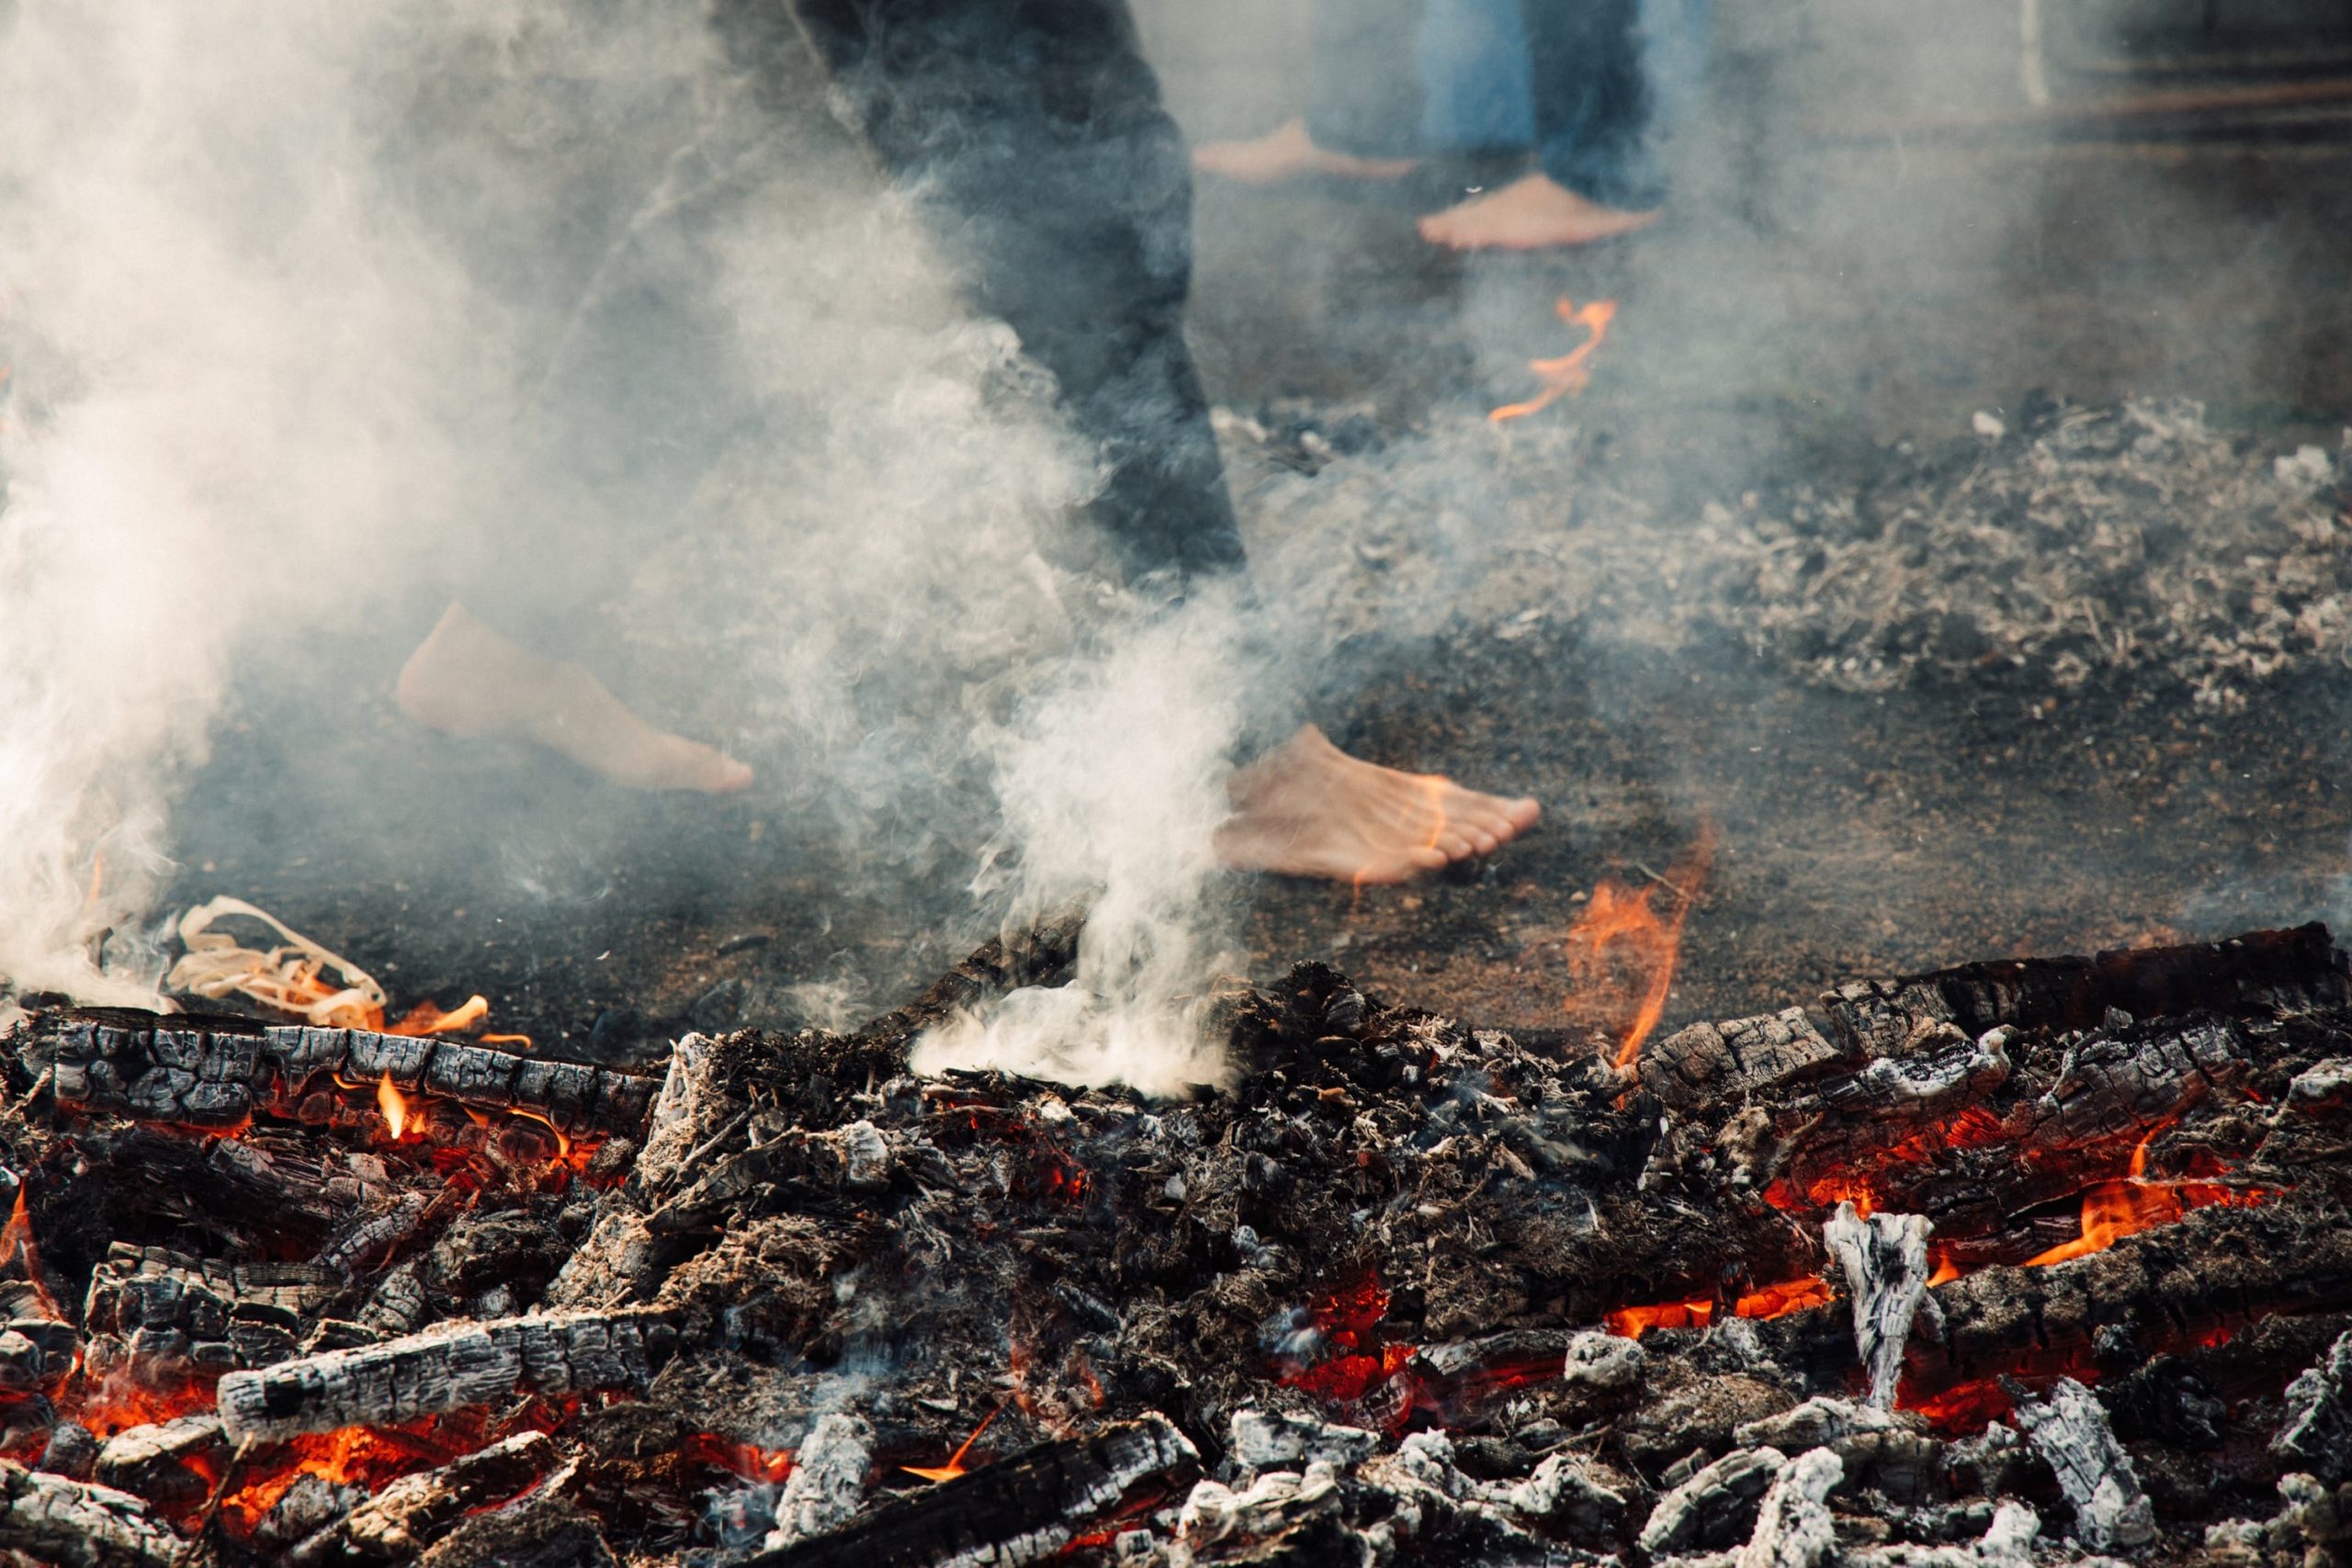
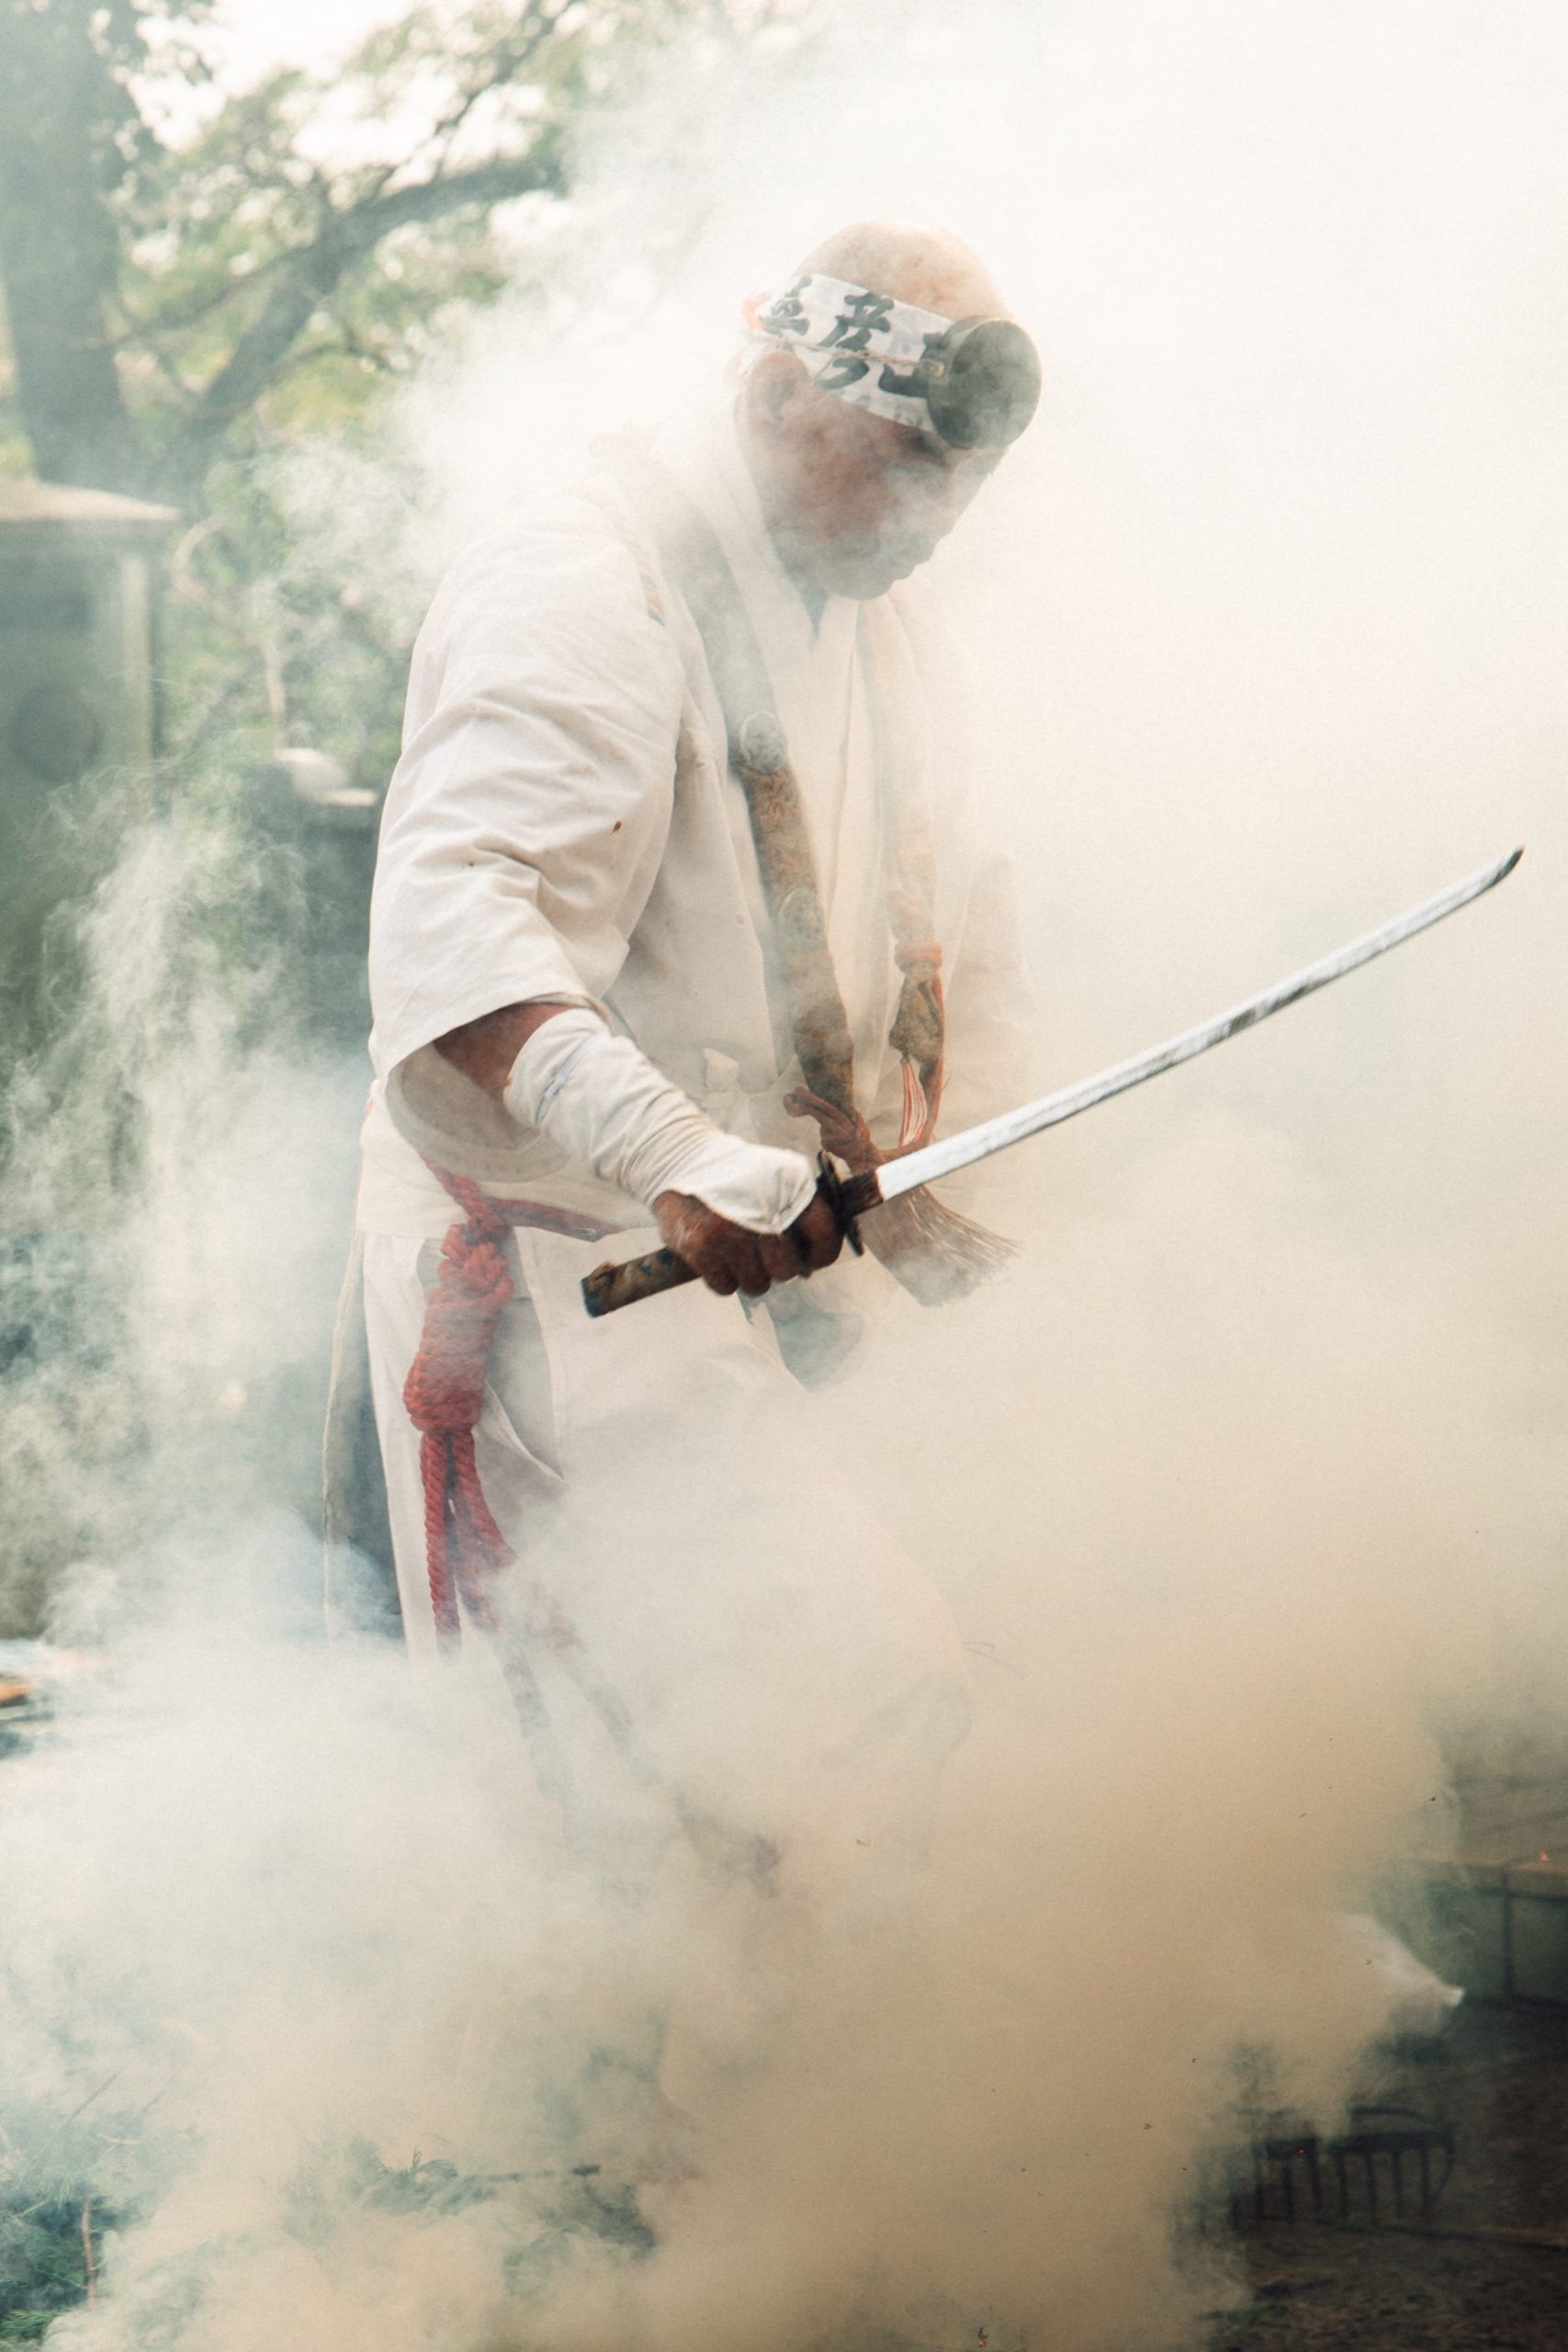
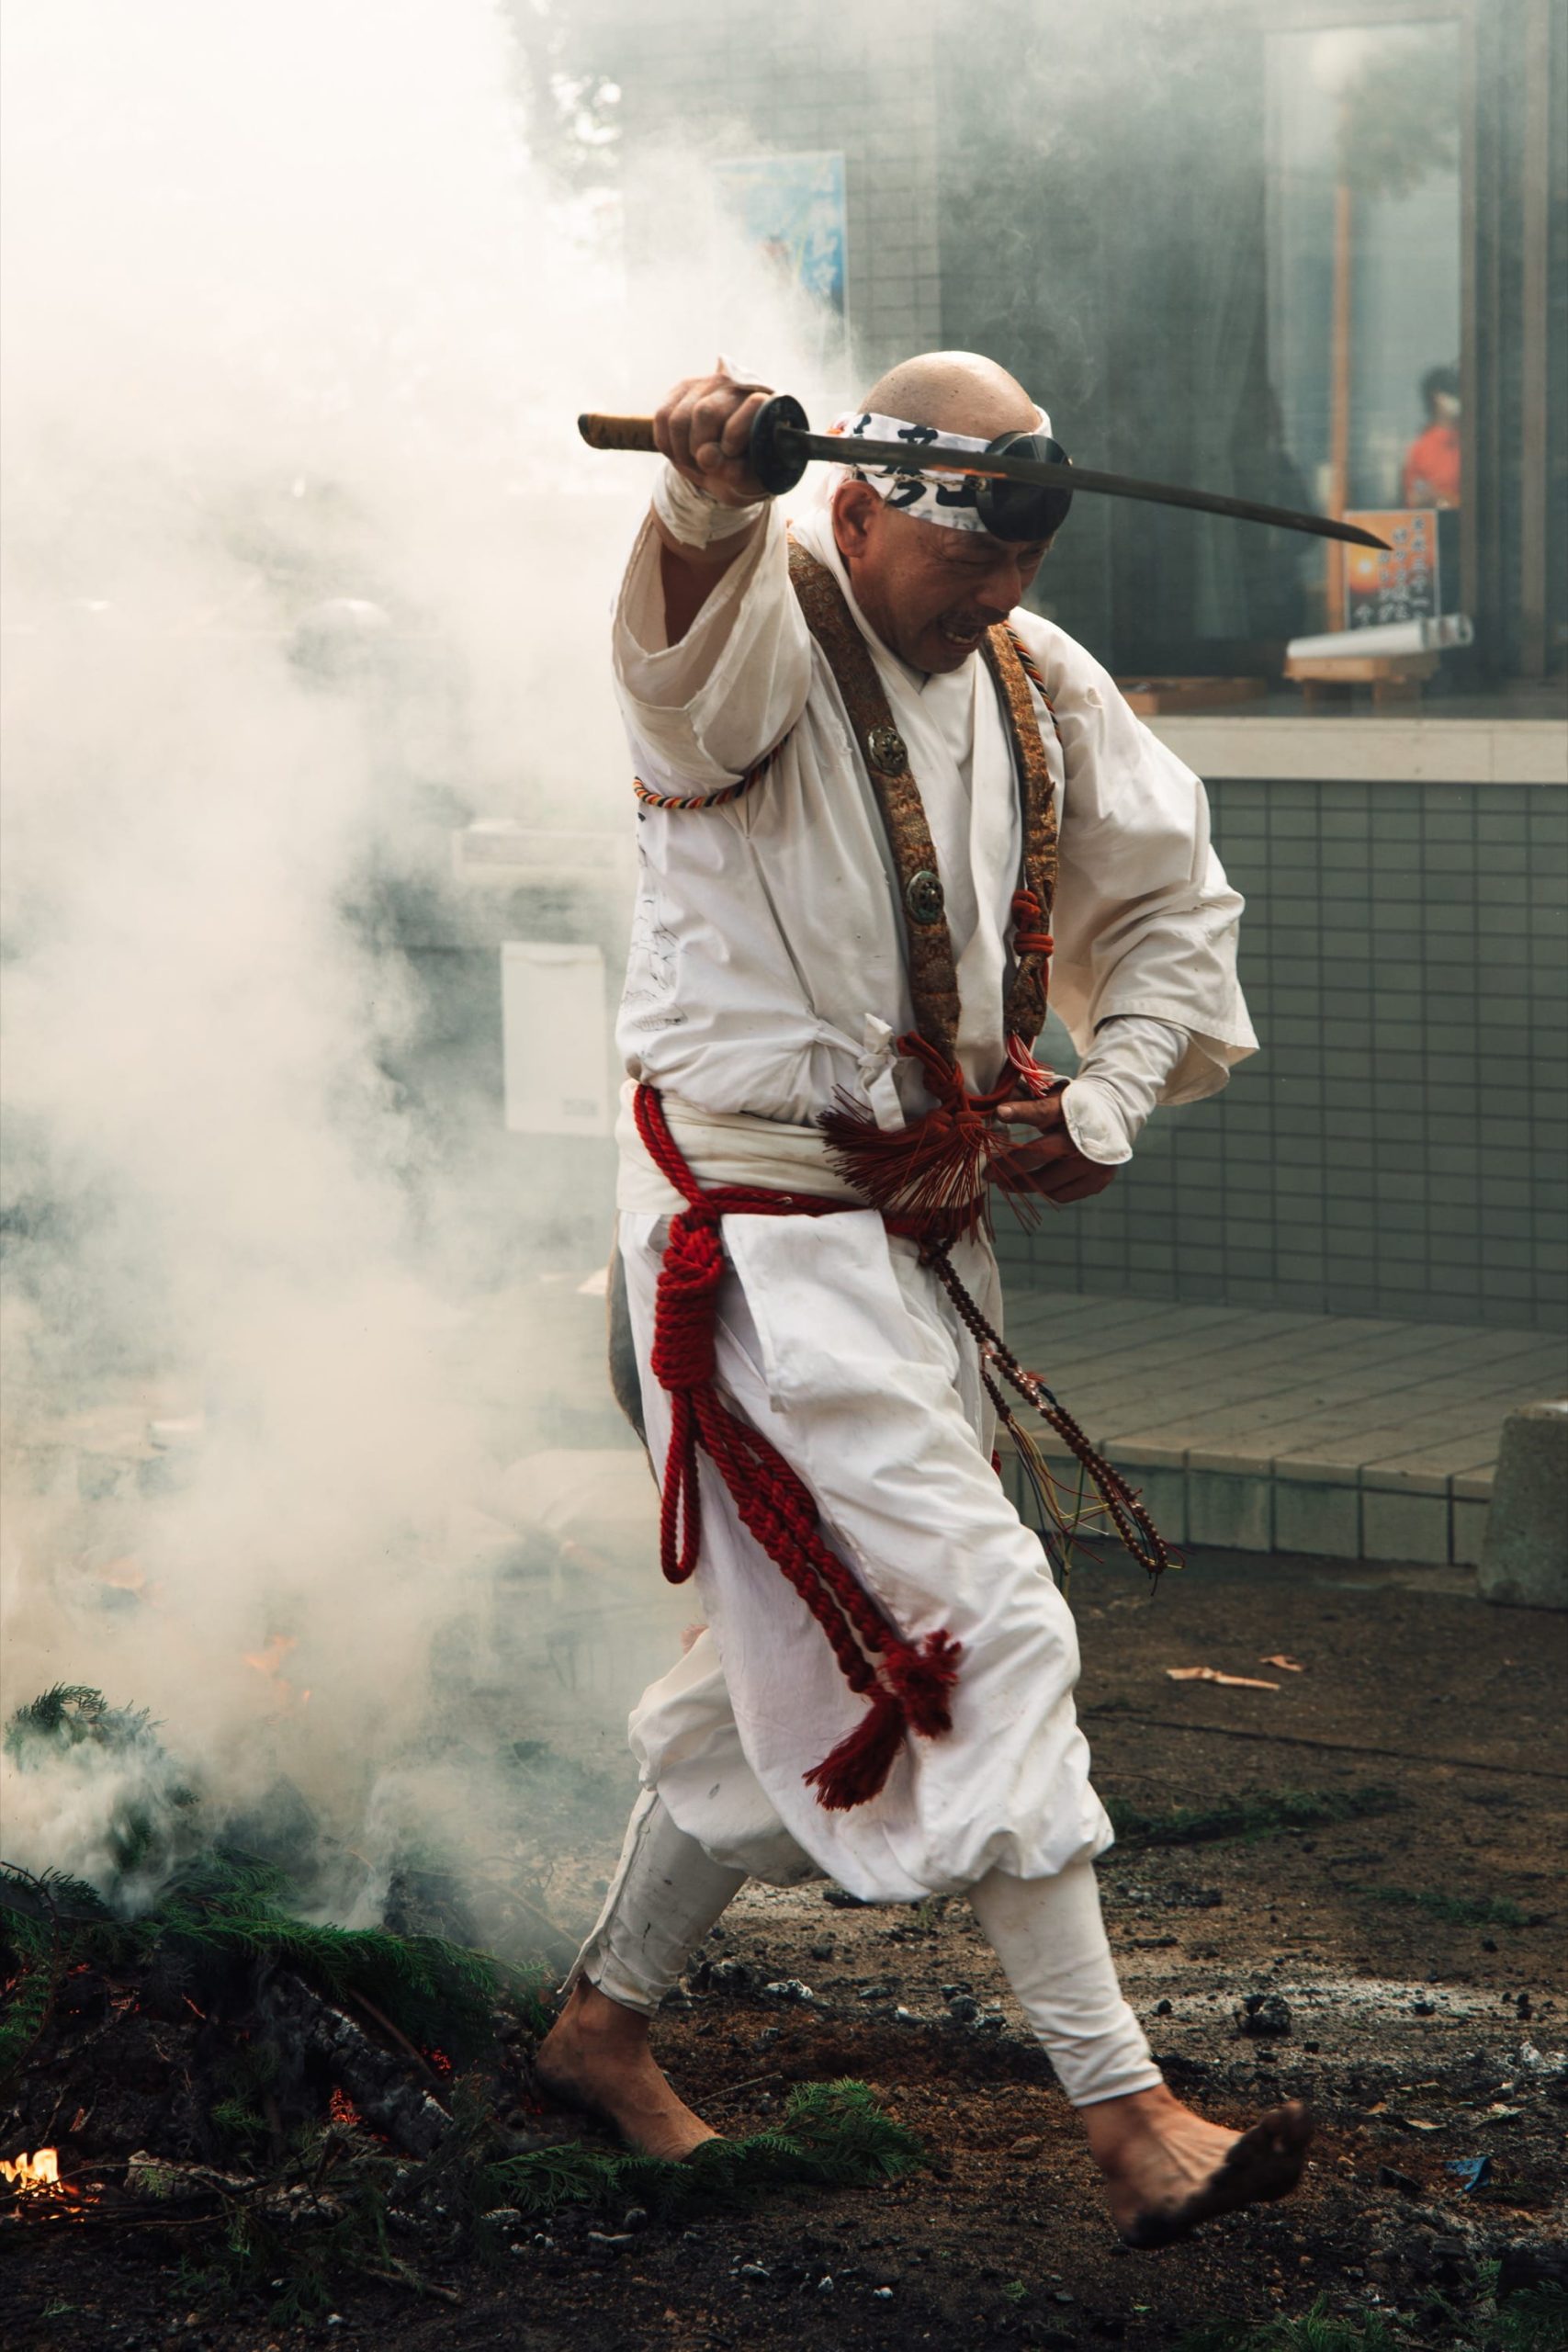
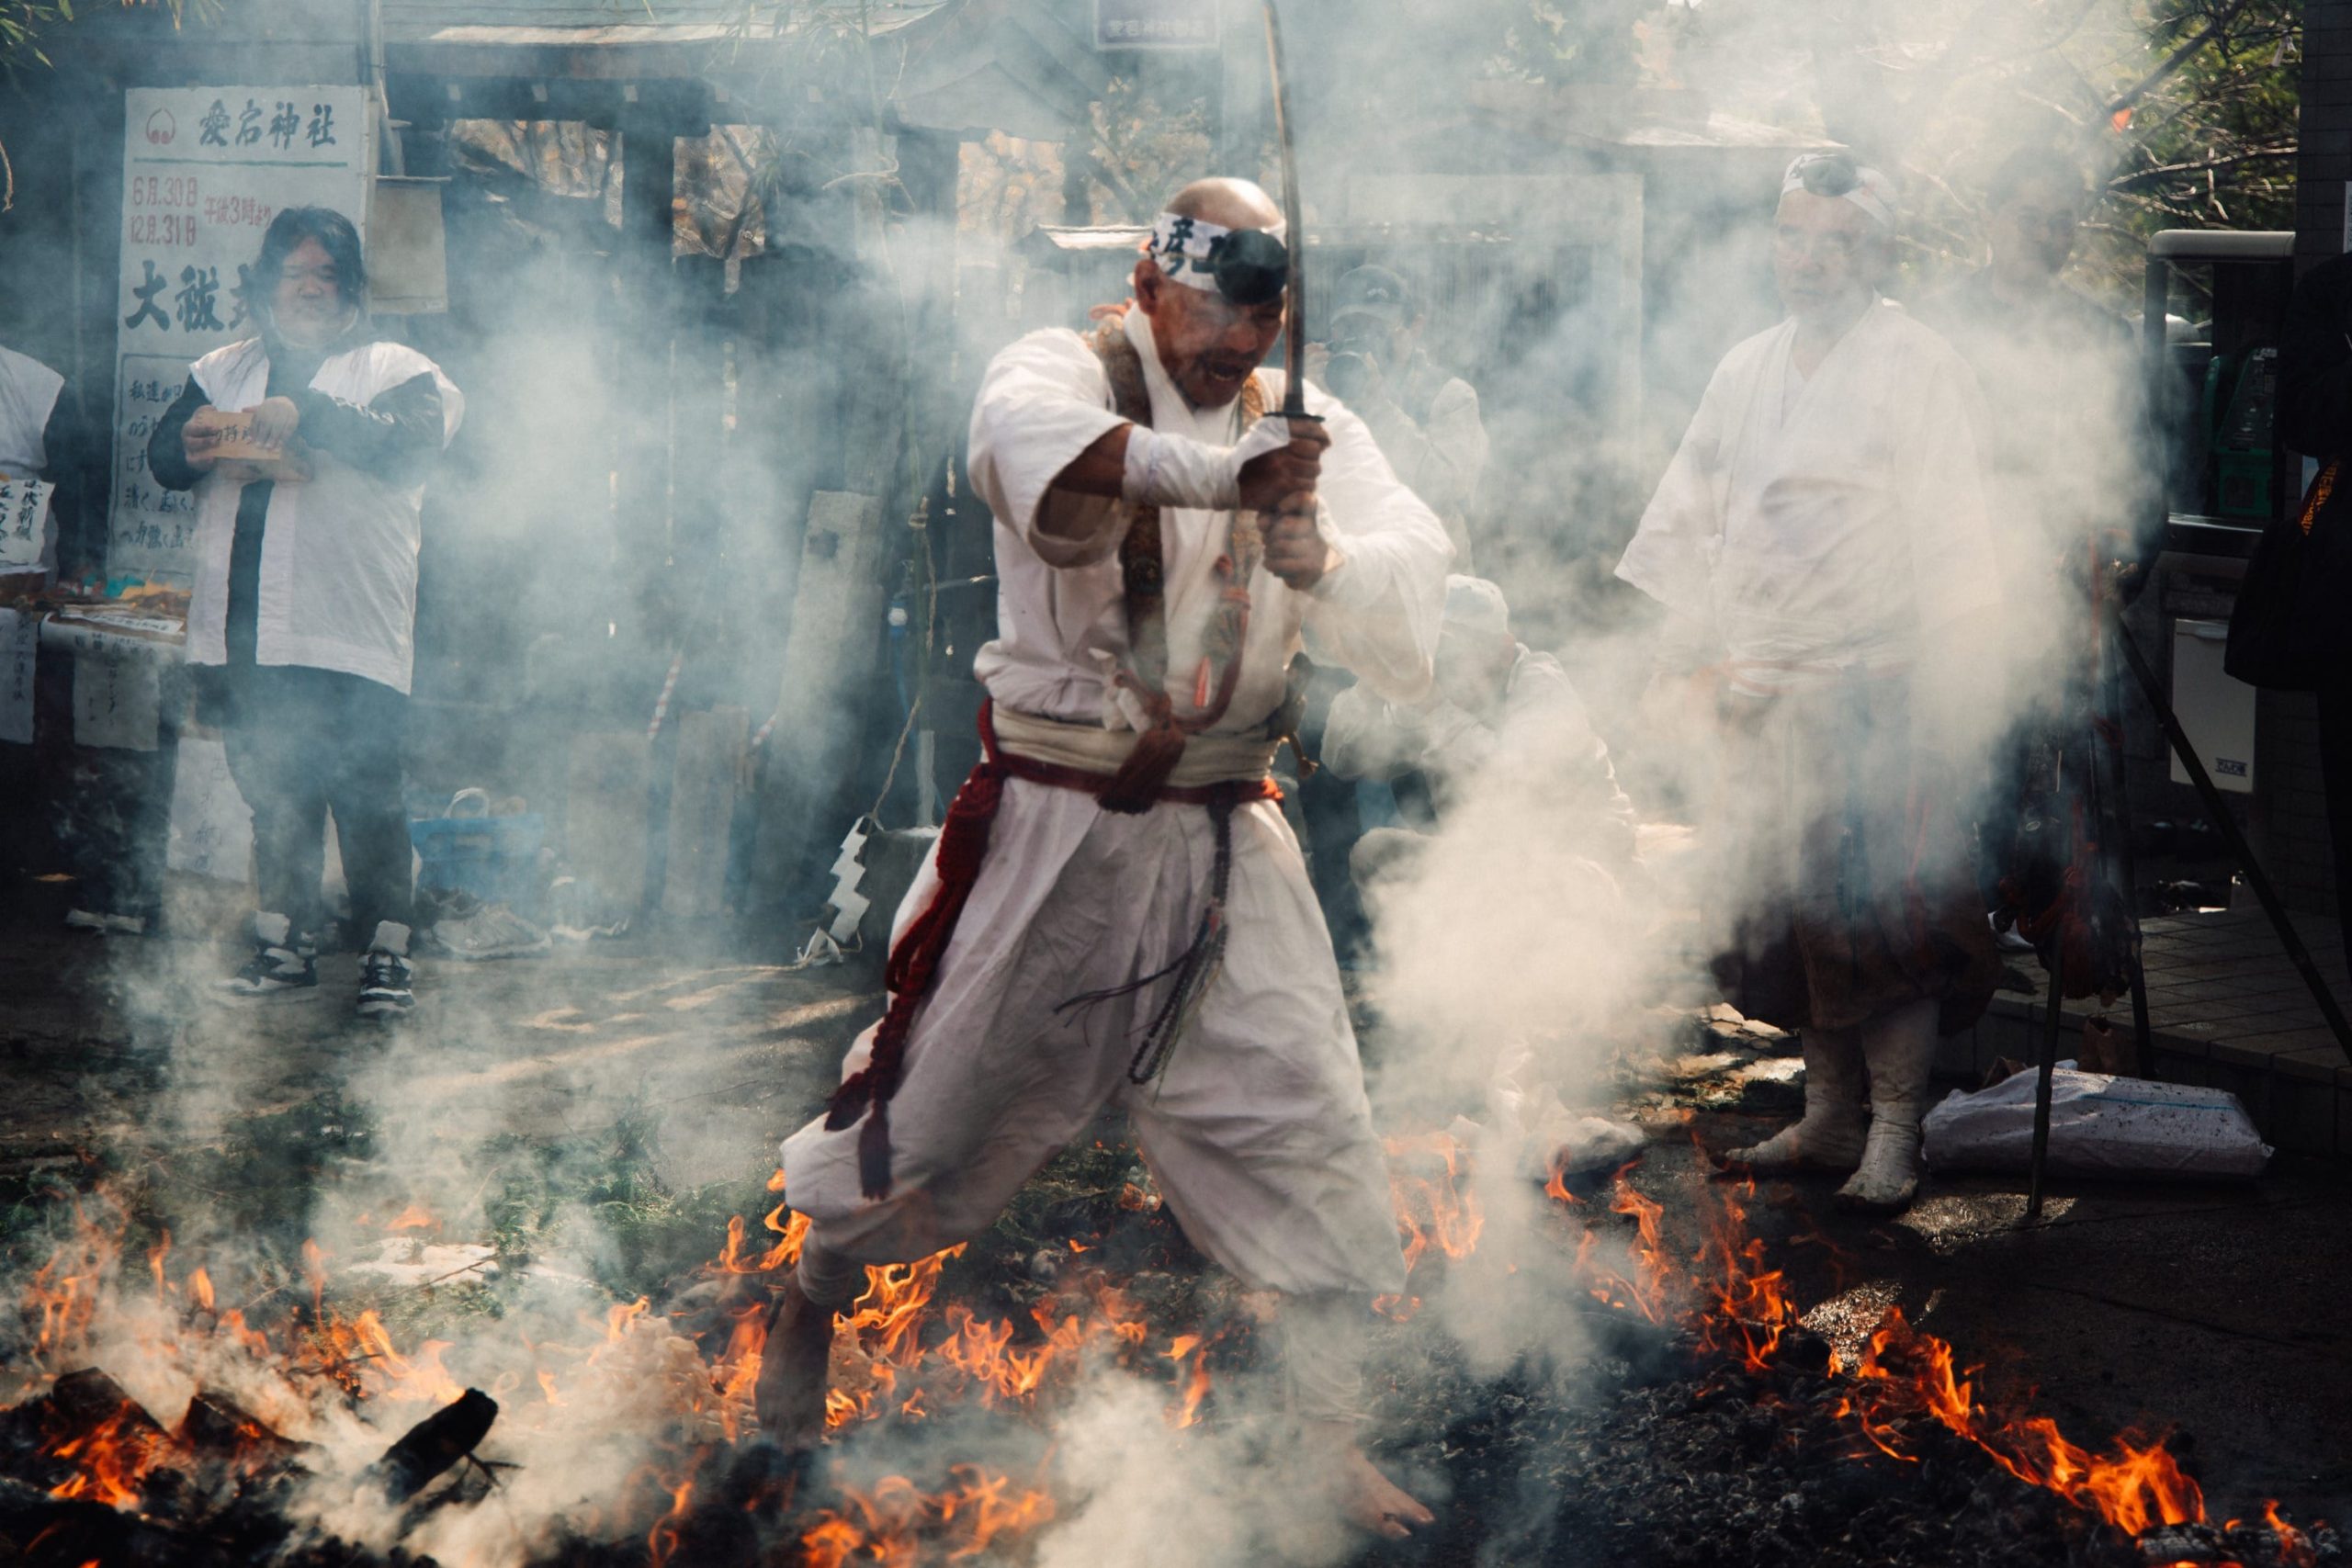
This warrior monk actually walked through the flames barefoot, yelling to cope with the heat. It was great watching him get pumped up. He did it several times and you could tell he was loving it. This guy was definitely the highlight of the event.
About The Photos – Tips & Tricks
The Gear
To document this event, I bought two cameras, my Fujifillm X-T3 and Canon EOS R, but since I don’t own any zoom lenses for the Fujifilm that work properly, I ended up using the EOS R with the 24-105mm lens almost the entire time. It was the perfect lens and camera combo for the event and the EOS R performed very outstandingly well.
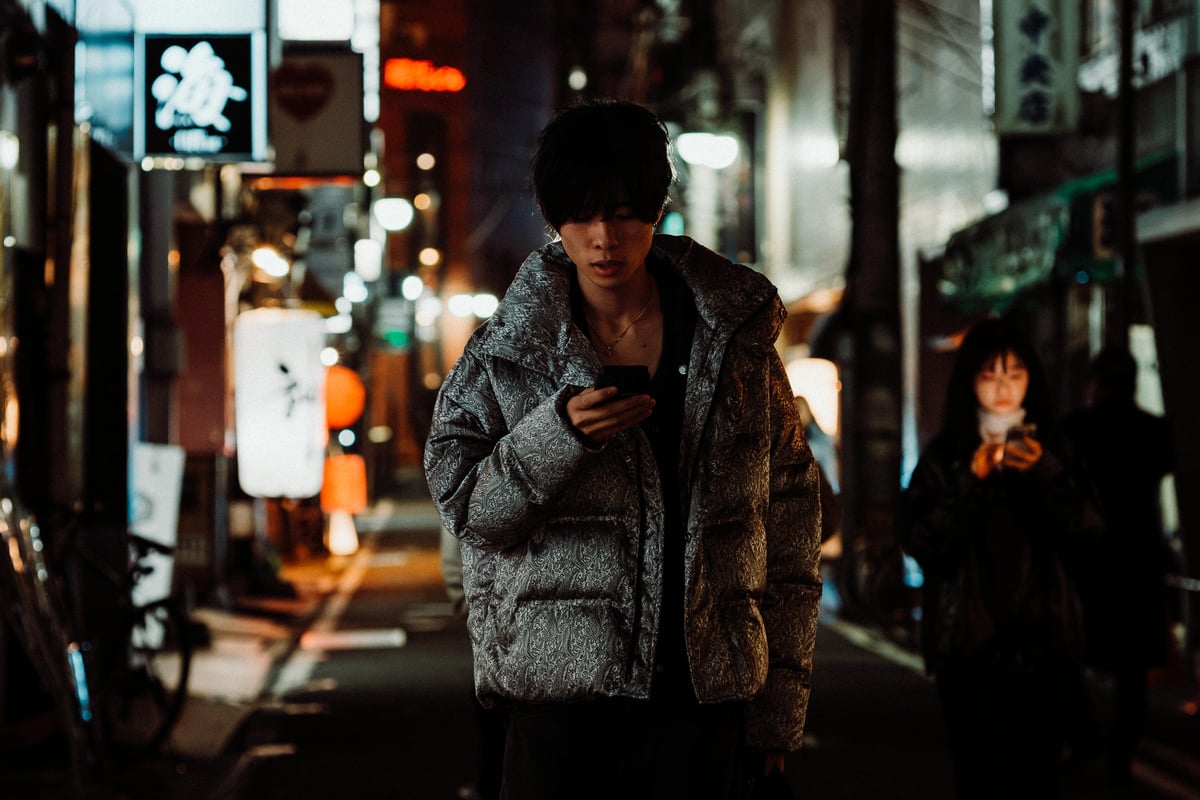
Although I really love my Sony A7rIII, I don’t use it for events like this because working through hundreds of massive 42MP shots is a nightmare. This is why you’ll often see me post A7rIII shots of street photography, with the 18MP APS-C crop. I love that the A7rIII is also an incredible APS-C camera.
For the most part, the camera shouldn’t matter in terms of its capabilities. Any camera built in the last 5 to 10 years should be able to handle a situation like this. The action was slow enough that you probably could have used a manual focus lens if you were good, although I wouldn’t recommend going with a manual lens in this situation because it was crowded and I was often poking my camera through openings in the crowd or lifting it above people to get the shot. There were a lot of distractions, people, and decorations I was having to shoot around.
New cameras are definitely nice, especially if they are incredible at autofocus like the EOS R or X-T3, or A7III since they will never let you down and focus becomes one less thing you have to worry about. I don’t think I had a single focus disappointment come out of this after 800 shots. Mirrorless cameras with tilting screens also help tremendously since you can raise your camera above your head and still be able to see your composition.
Camera Setup
For these events, I still like to set my camera in single-shot mode with a single focus point. I can then acquire focus, leave the shutter half pressed, and then John Wick the shutter to get a burst. Some cameras have focus joysticks, on the EOS R I set up my D-Pad to adjust the focus. This allows me to quickly move my focus point to frame with the rule of thirds. Honestly, I actually really like using the D-Pad instead of a focus joystick, I think it’s a little easier.
The EOS R also does this really cool thing, you push the trash button can and the focus point instantly returns to the center. I think it’s the only camera to do that and it’s incredibly awesome and useful.
I don’t like using face tracking or eye tracking in these situations, it’s just too risky and you will miss shots even if your camera has the best face or eye AF in the world. There are too many people and the camera doesn’t know what subject you thinking about. The same goes for tracking. Any camera will struggle to track someone moving in and out of smoke. So for the most part, single-point AF adjusted manually is the most reliable way to shoot. It’s also very fast to shoot this way.
Positioning, Composition & Framing
There are a few rules I try to follow regarding composition. It’s something I’m always thinking about as it can make or break a shot.
Always think of what you’re shooting like it’s a movie. Would a film director be happy with the angle and does the angle make sense? Are there distracting blown-out skies or strange items or colors stealing our attention?
If so, you have to move or zoom in or out to see if you can isolate your subject so that only they tell the story. You can’t be lazy about your positioning. You can’t just stand in the same spot the whole event unless you had to sort of reserve a spot in the mass of the crowd and there is no way to move in and out. This happens a lot and if I wasn’t 6’3″ (182cm) in Japan I probably wouldn’t have been able to get some of these shots. Some photographers and videographers working for the news brought step ladders.
When thinking about the framing, where is your subject? How is the scene weighted? Generally, you’ll want to stick with the rule of thirds or center framing. Some people don’t believe in cropping. The EOS R has a 30MP sensor so I often shoot with a plan to crop later. I like to shoot a little wider than I need for some shots so I don’t miss the action. There is nothing worst than getting the perfect shot, but then the person’s sword or foot or something is cut off by the frame.
The Story
Each shot needs to tell its own story.
In this situation you can look and ask, is it about the fire, the heat, the action, the uniforms, is it about the ritual, who are the characters, what is the drama?
Then you need to do your best to isolate, framing out all the distractions. Sometimes I shoot way tighter cutting off the subjects just because it does a better job of isolating the drama.
That’s really what it’s about, using your lens, your position, or a crop to remove as many distractions from the scene as possible. This can even mean shooting with a faster aperture to blur out your background as much as possible.
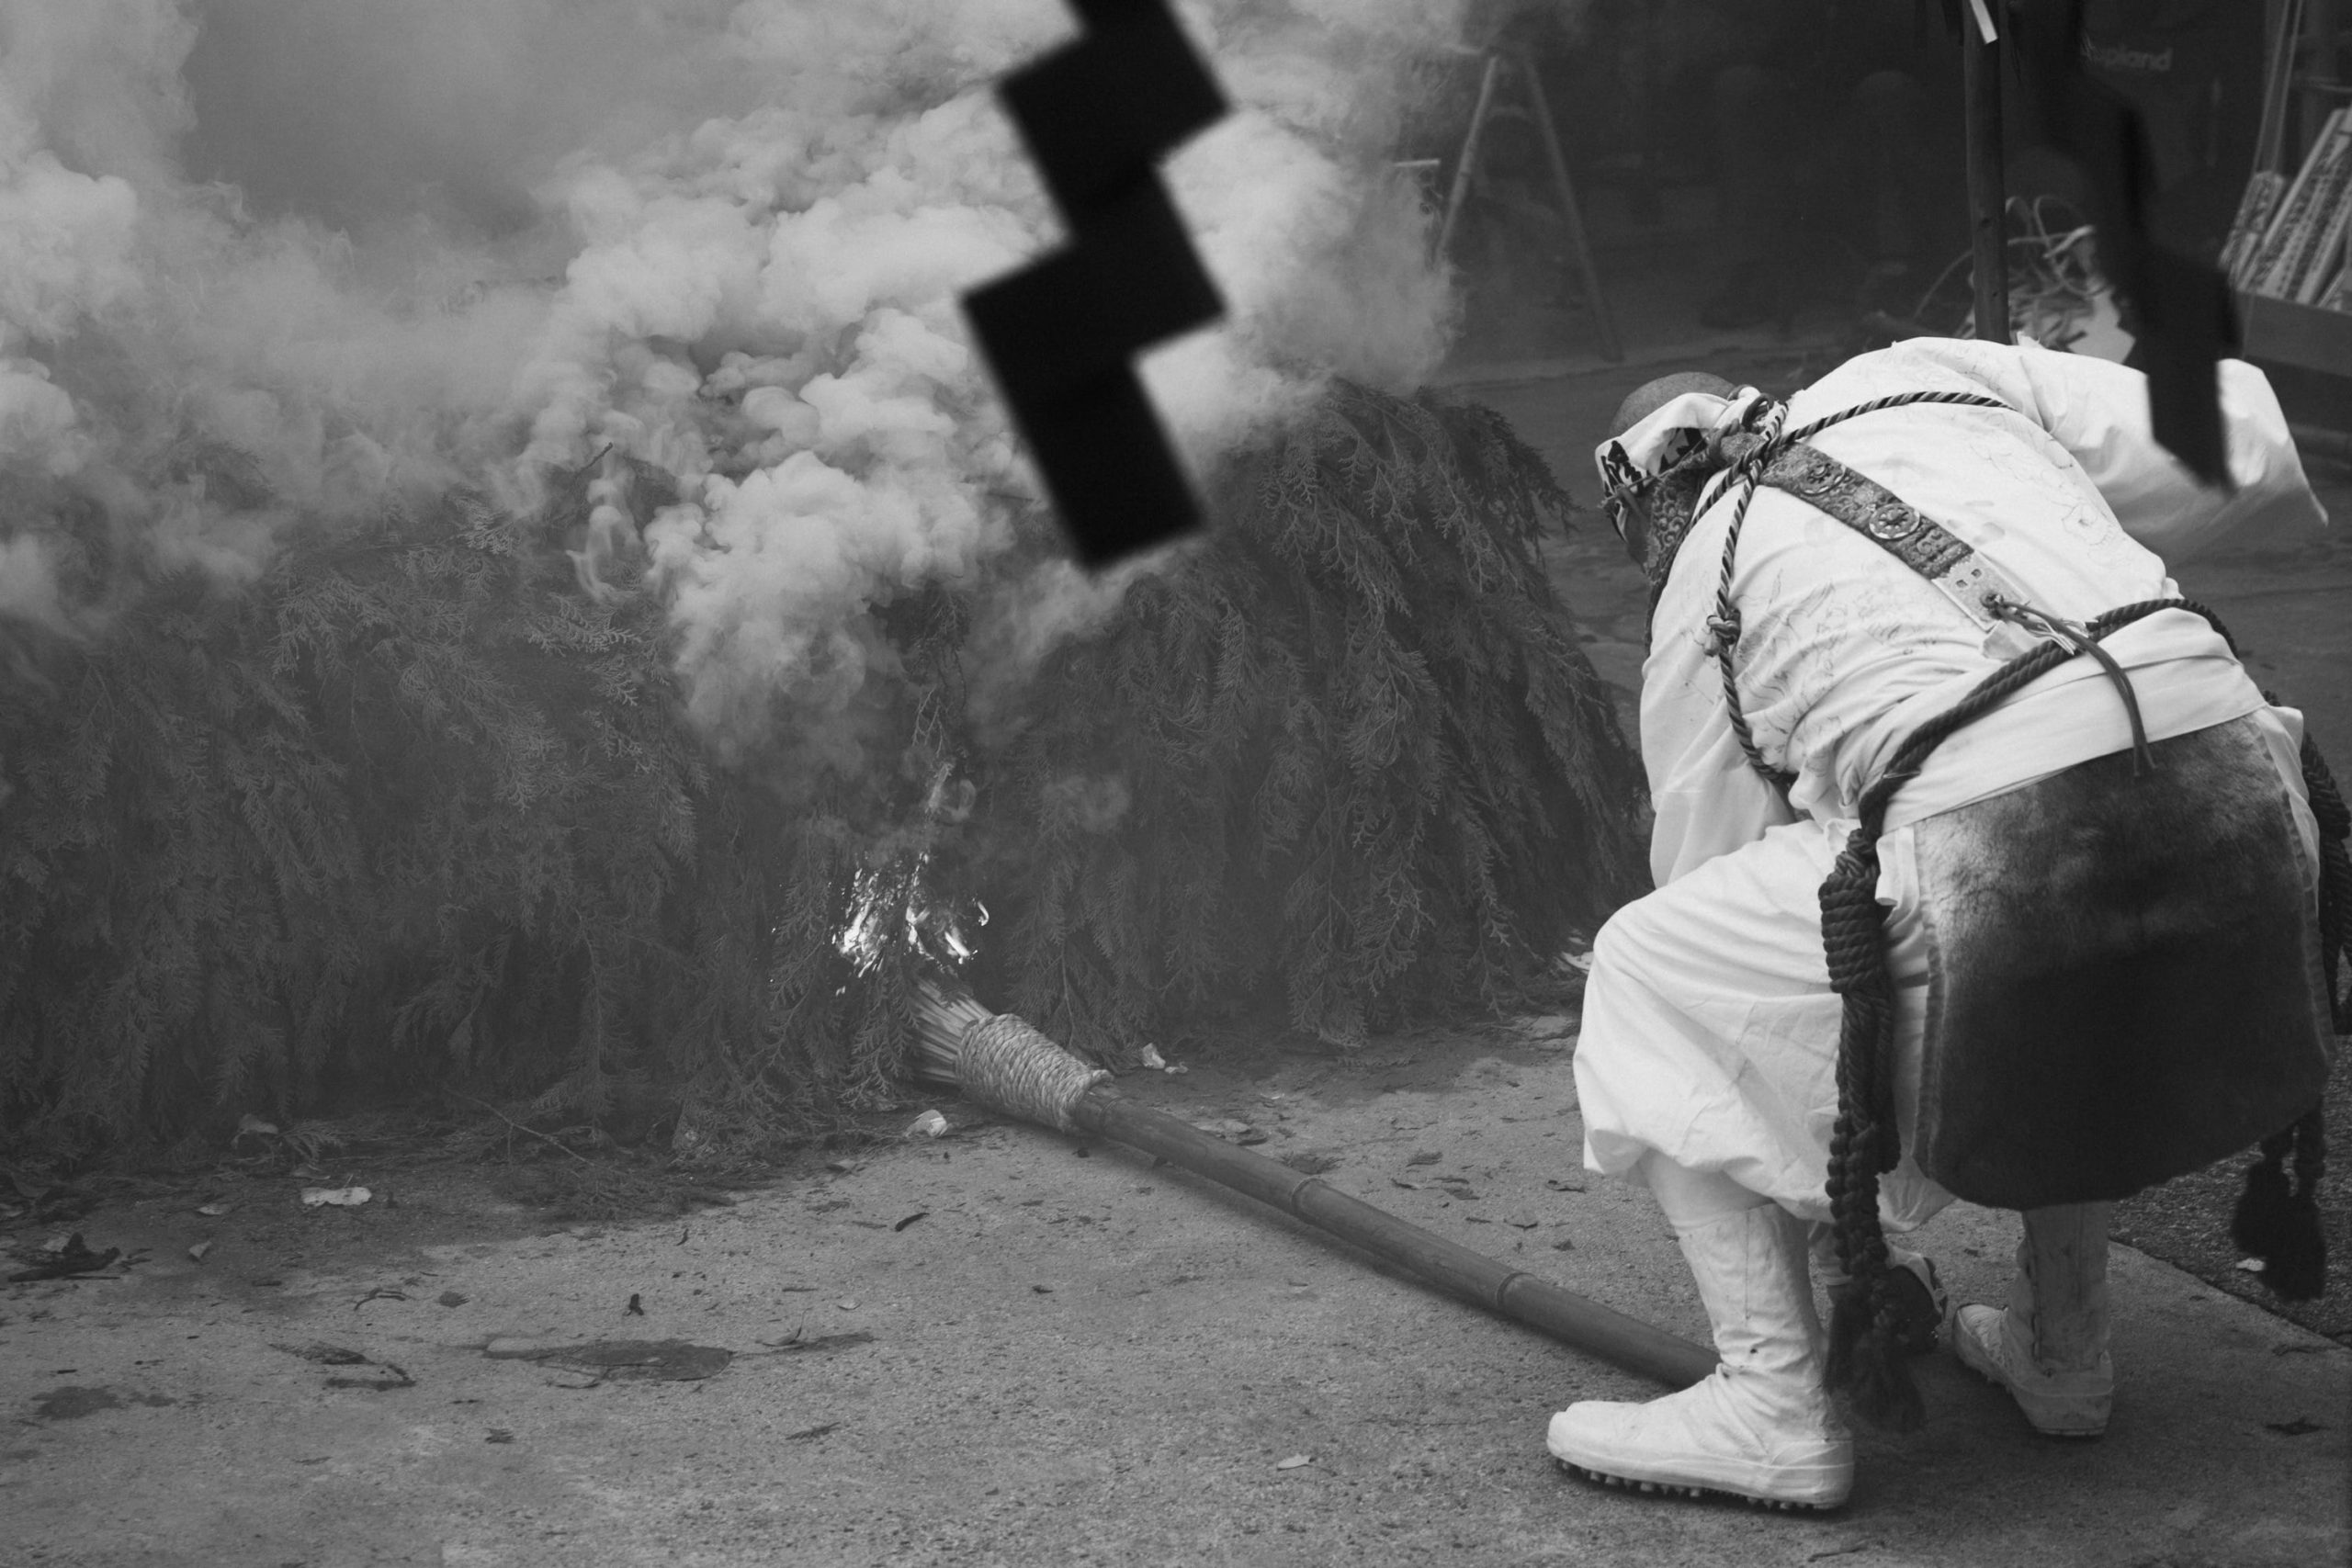
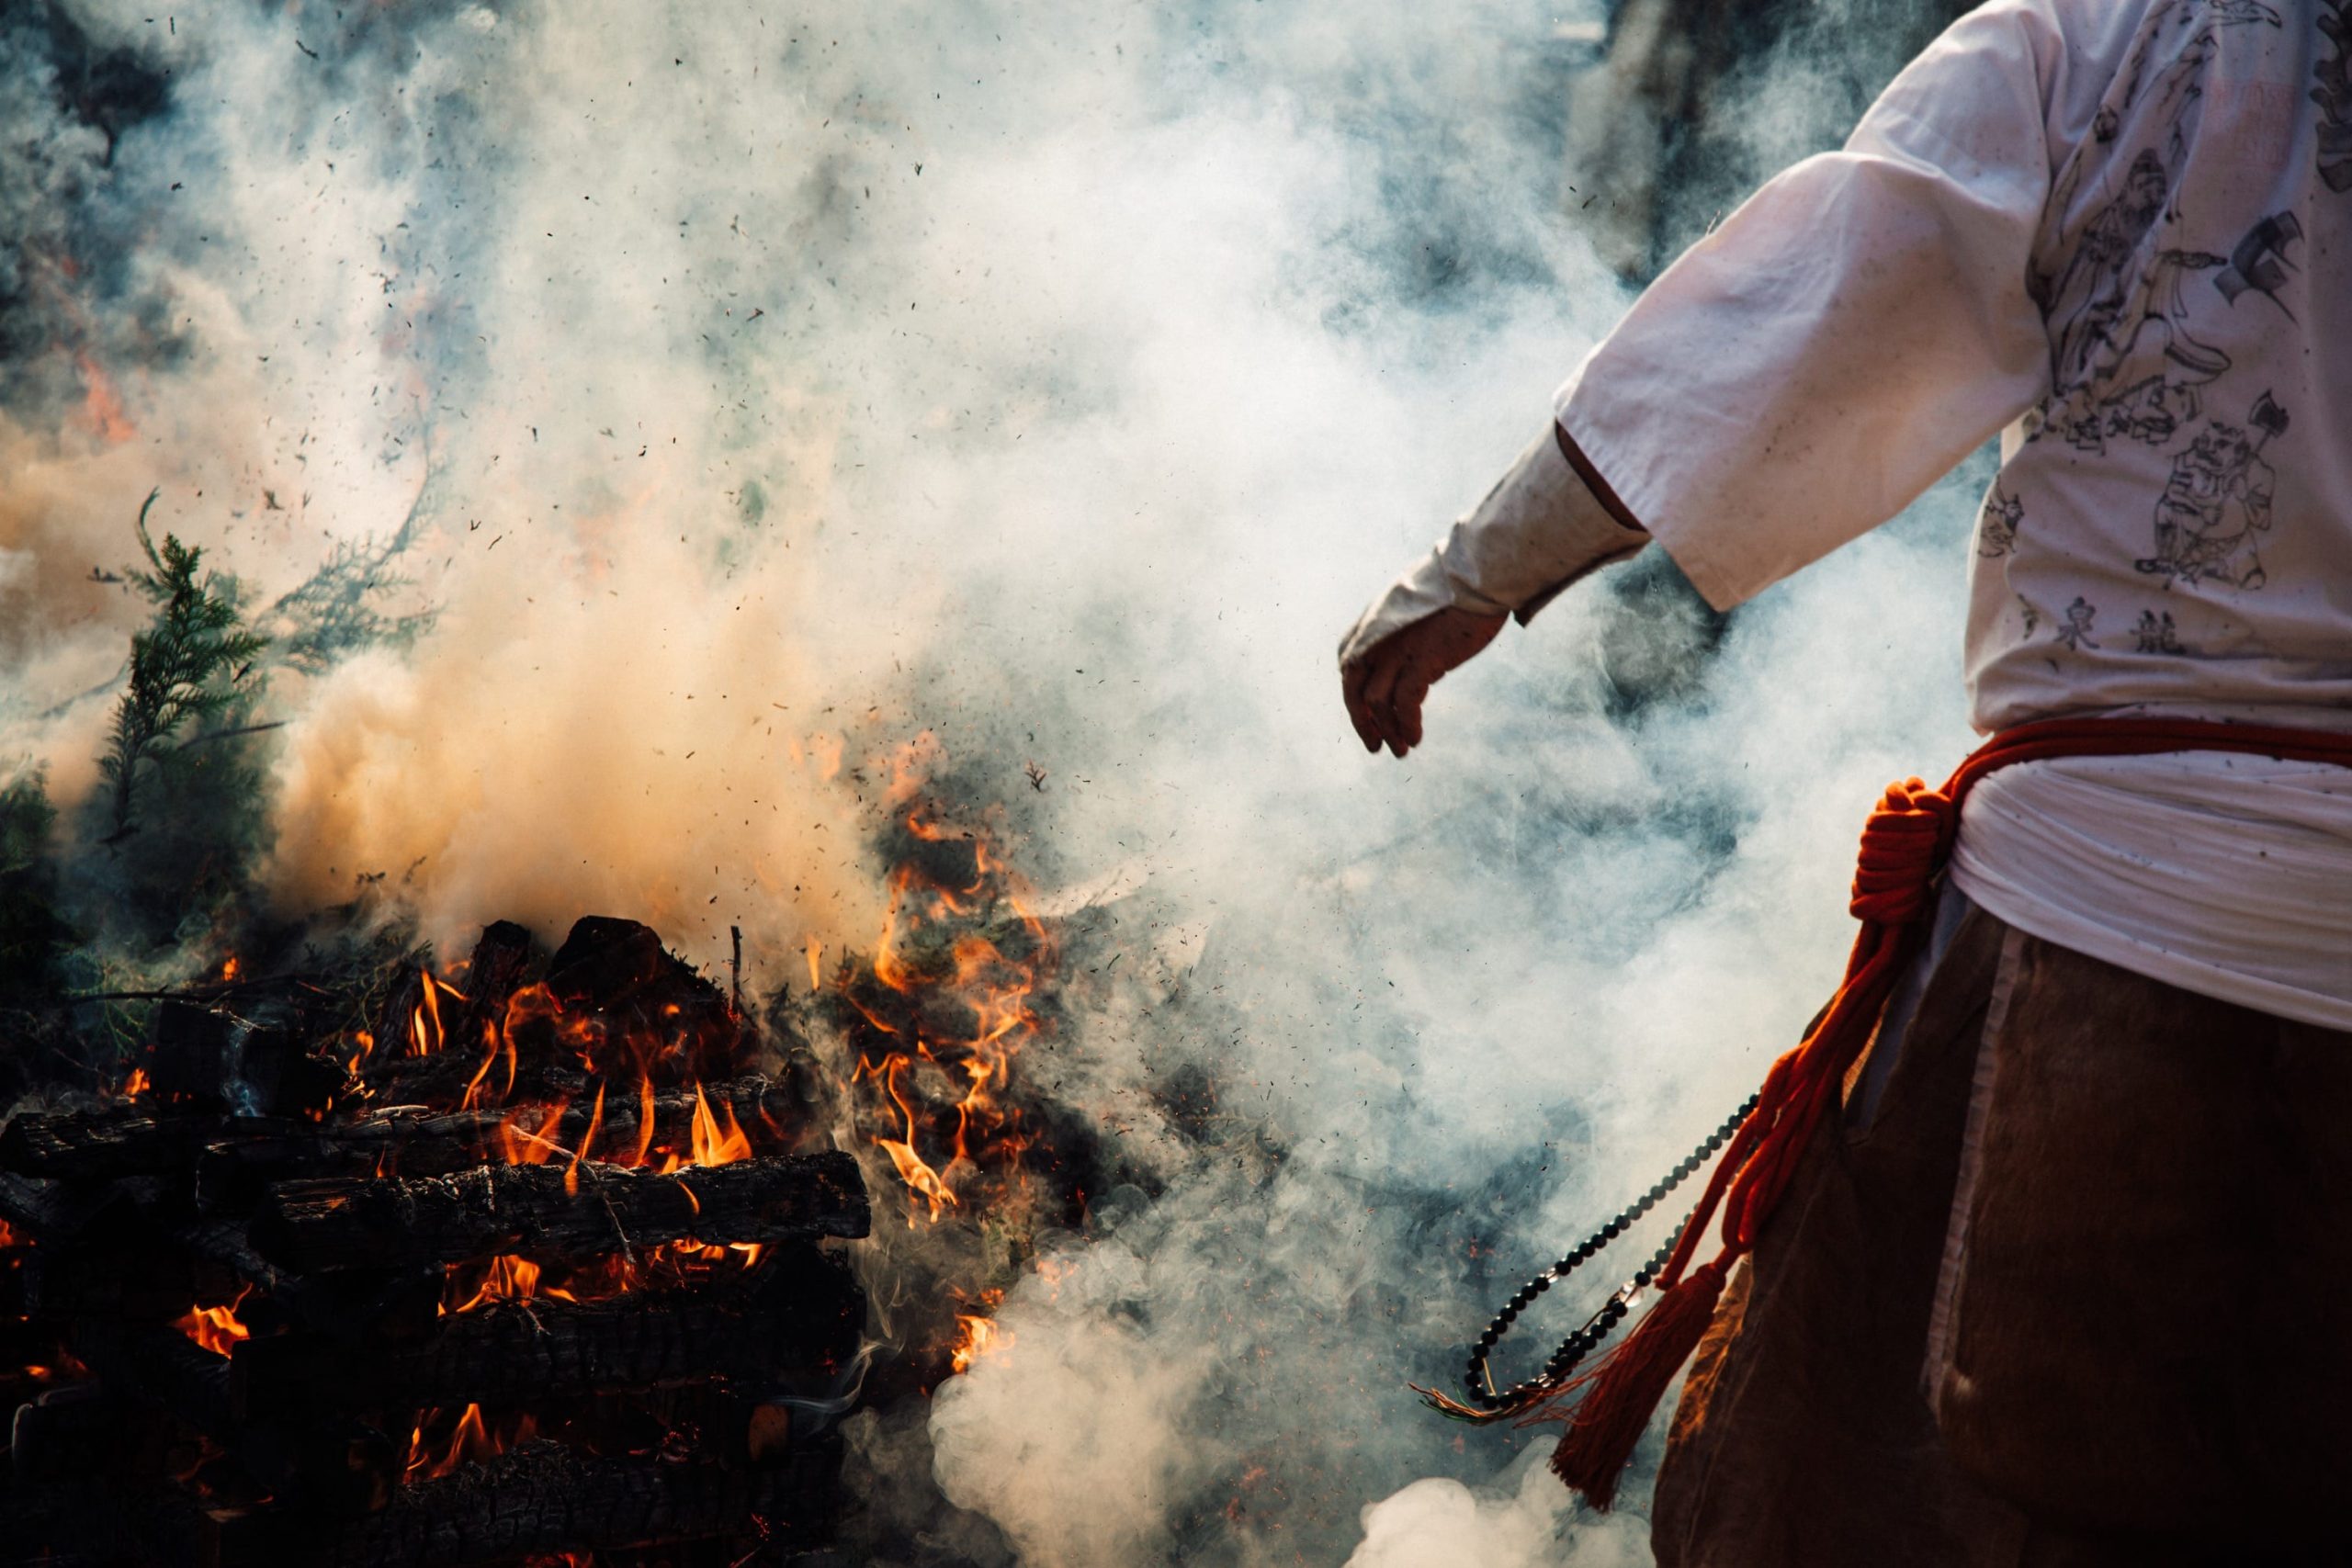
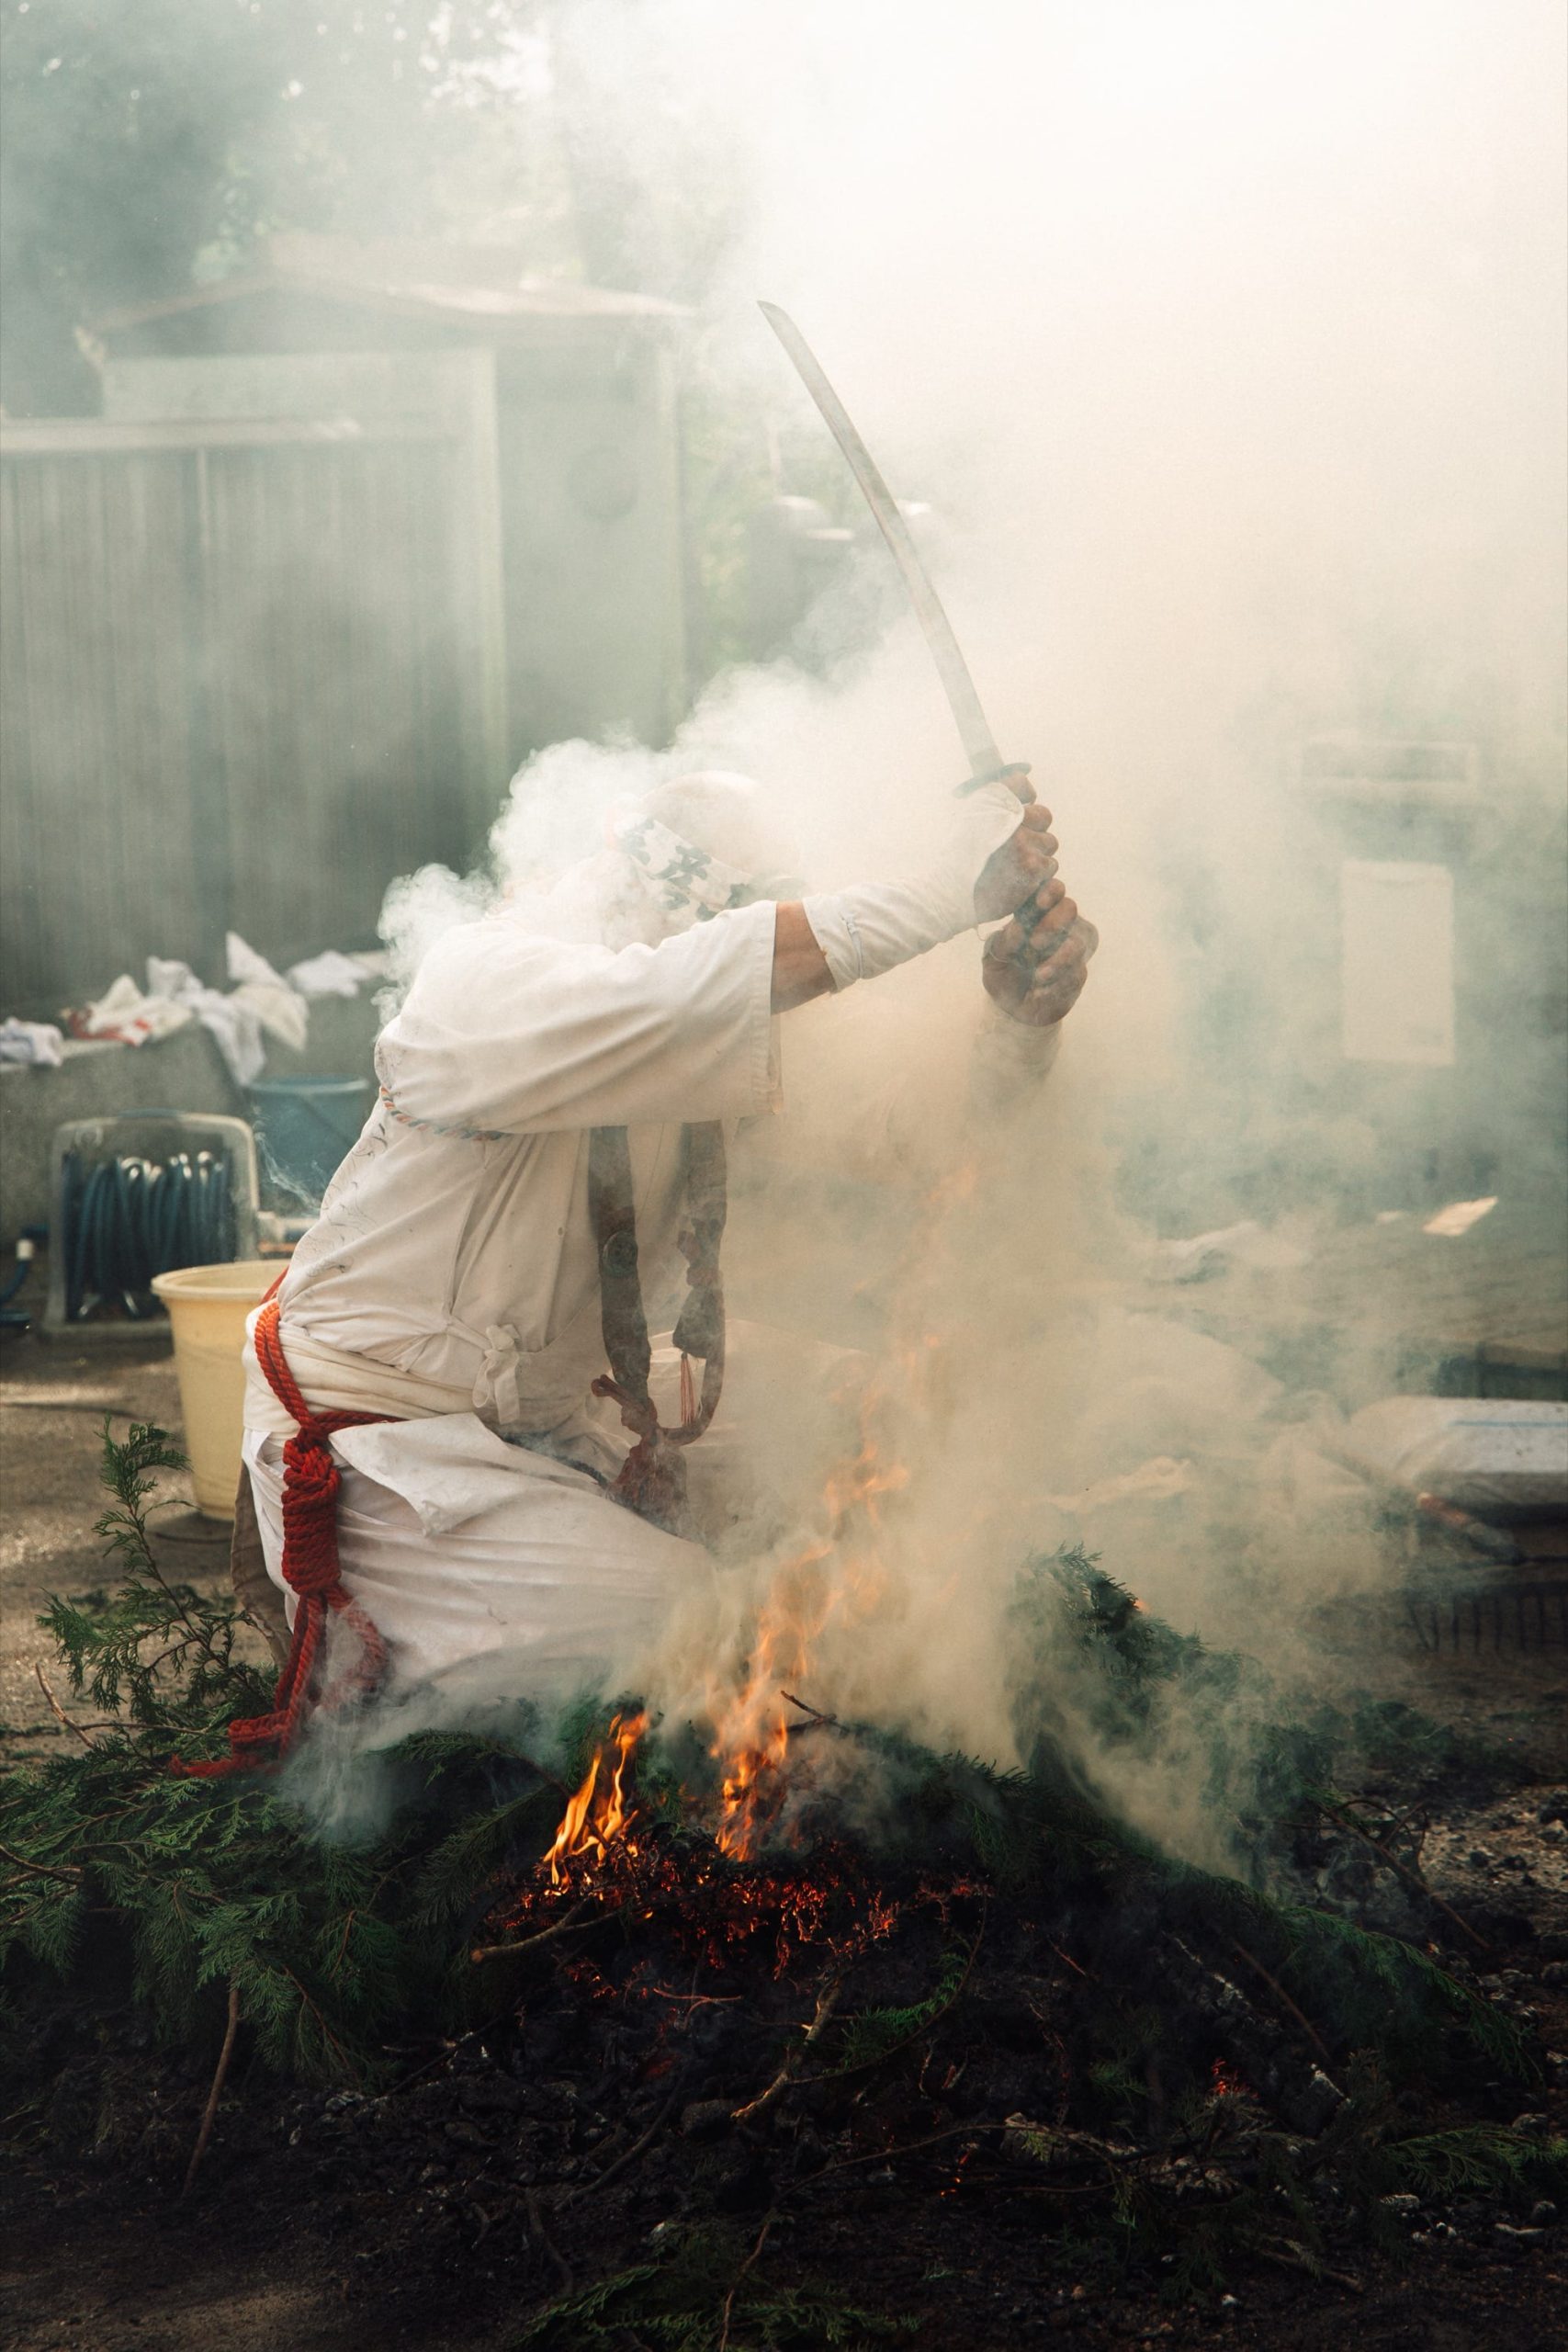
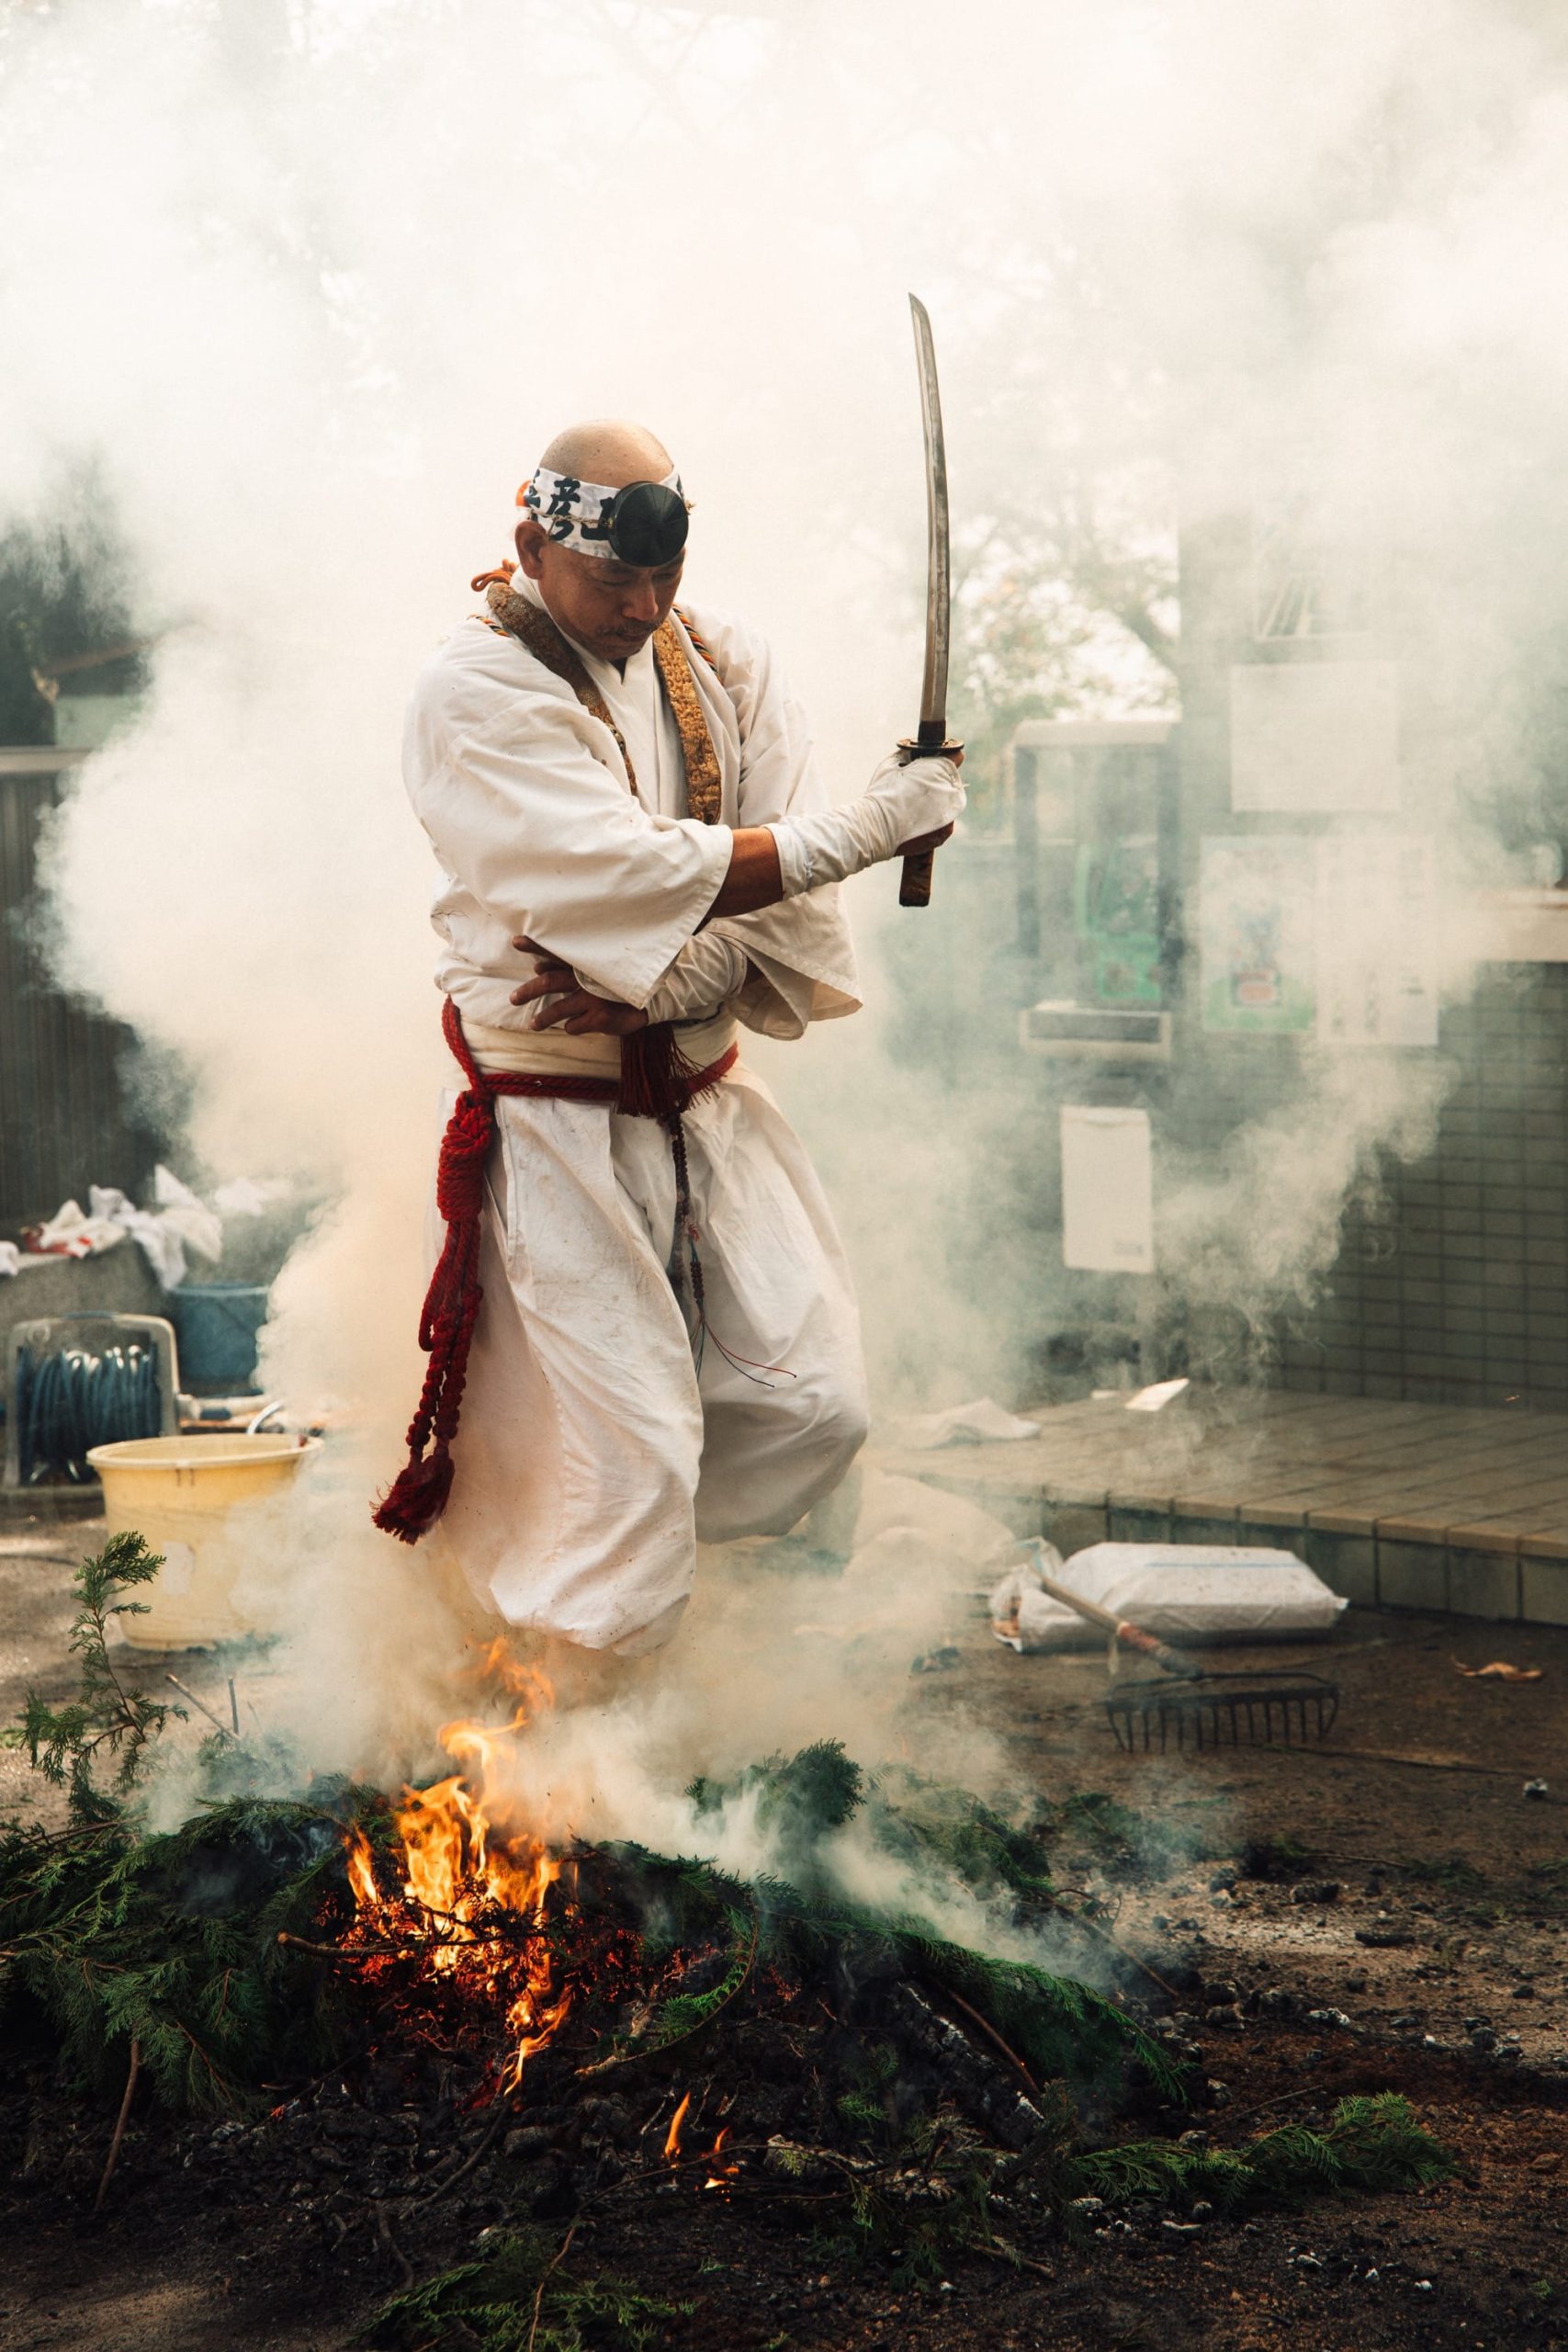
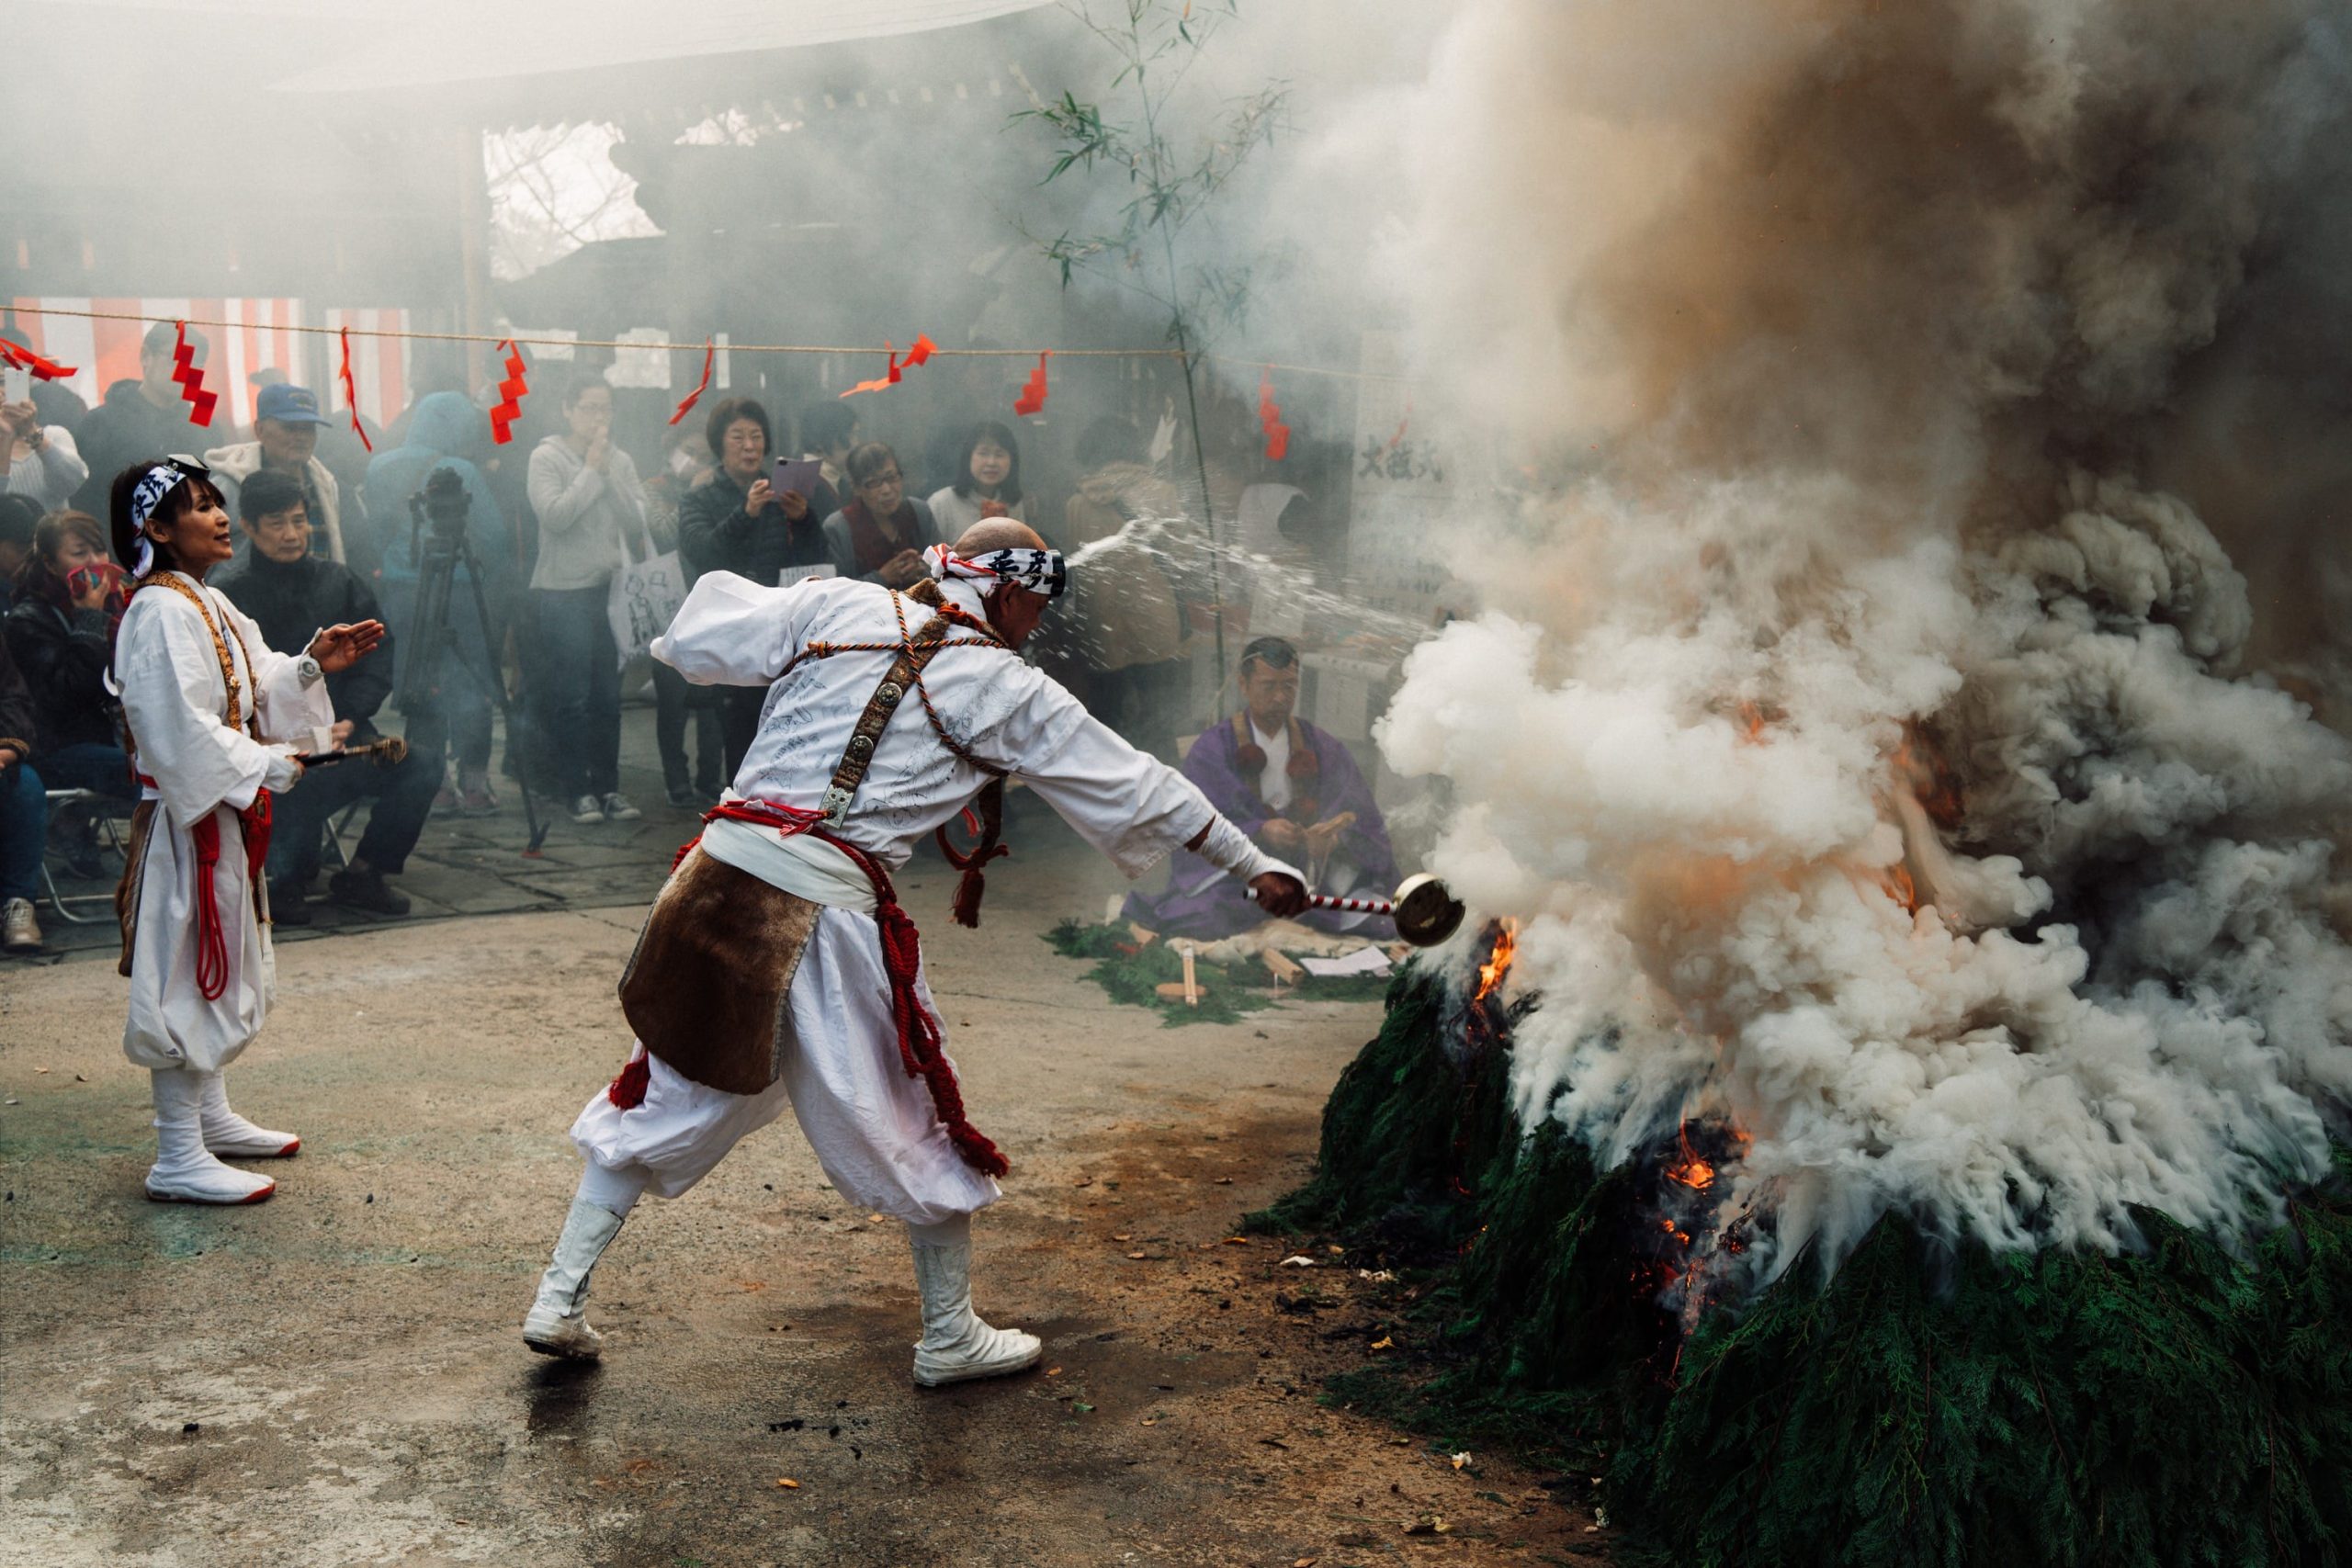
Here I am using a tight framing to show the story of the fire and the heat it creates. You can see the monk flinch back from the heat put off by the fire after he throws in some more spruce branches.

Post Processing
Post-processing wasn’t anything complicated. I’m using my own presets I’ve made that simulate old film and a lot of color theory is baked into them.
I sometimes use VSCO, Mastin Labs, or RNI and they all are great. Mastin Labs is probably the best out of the bunch. RNI has the best Kodachrome looks.
My favorite looks are Kodak Gold, Kodak Ektar, Portra 160, and 400H. With RNI I like Kodachrome but it doesn’t always work.
But you don’t need to do that. All you need to do is add a little mood and you can do that by adding or removing a little contrast or adding a little warmth with the split tones or curves. If you’re shooting with Fujifilm you’ll also have access to the film simulators in Lightroom, even if you shoot RAW.
It’s important to always pay attention to colors. Don’t be afraid to shift colors around so that the scene harmonizes. I often shift the greens to be a little blue, but the goal is to not have too many conflicting colors and you should shift them around to neutralize the scene or create contrast between harmonizing colors.
On most of the shots here, I apply the local brush tool to pump up the subject a little bit. I usually do this and set my brush with these settings.
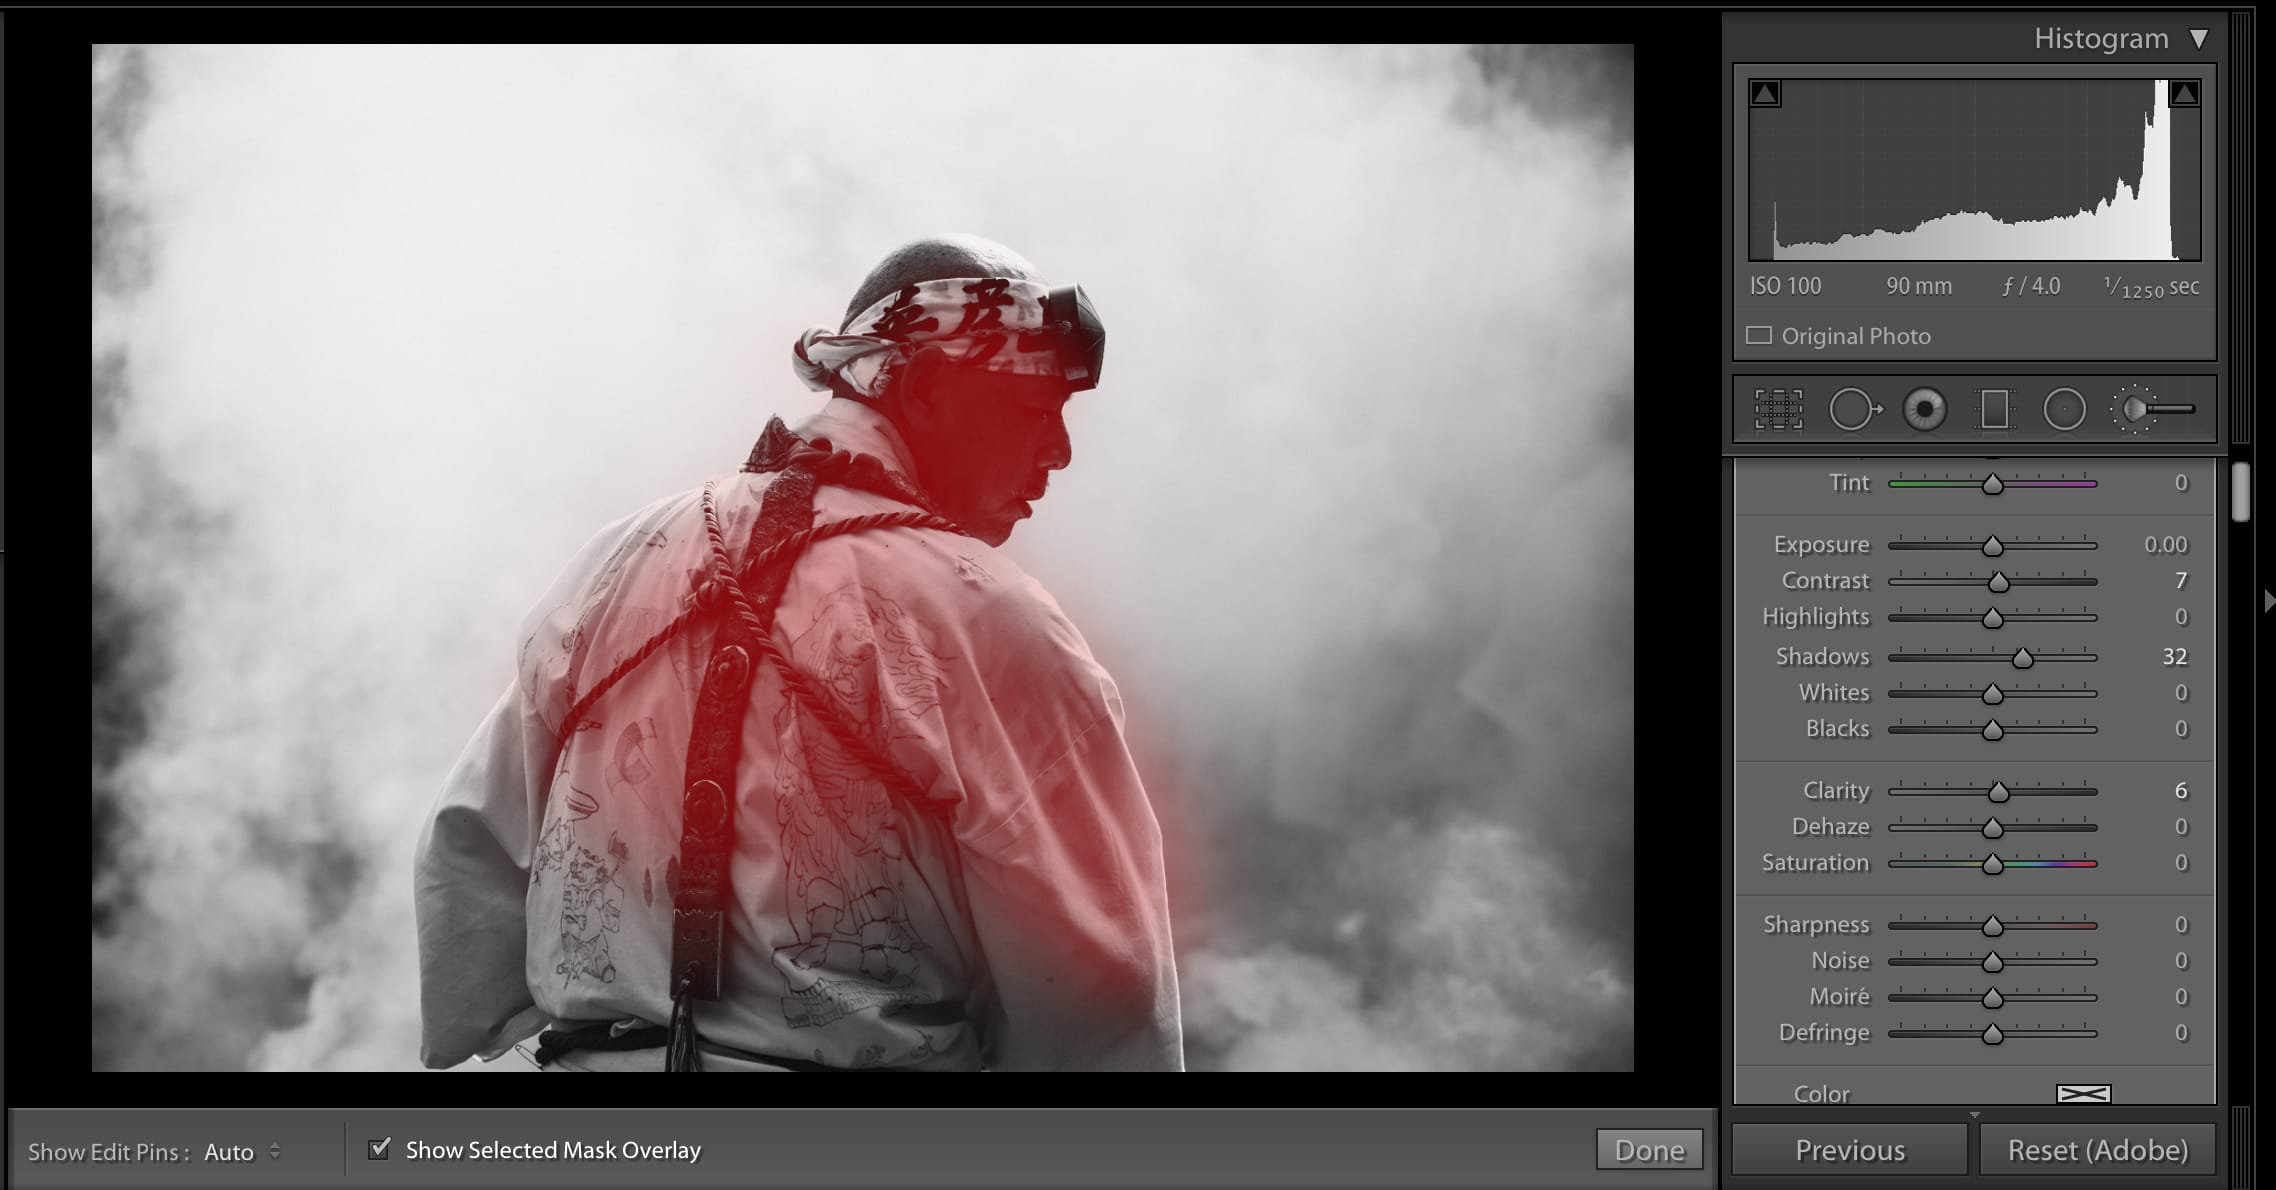
Sometimes I do a little more with the highlights or exposure, but it all depends on what’s happening in the scene or what the subject requires.
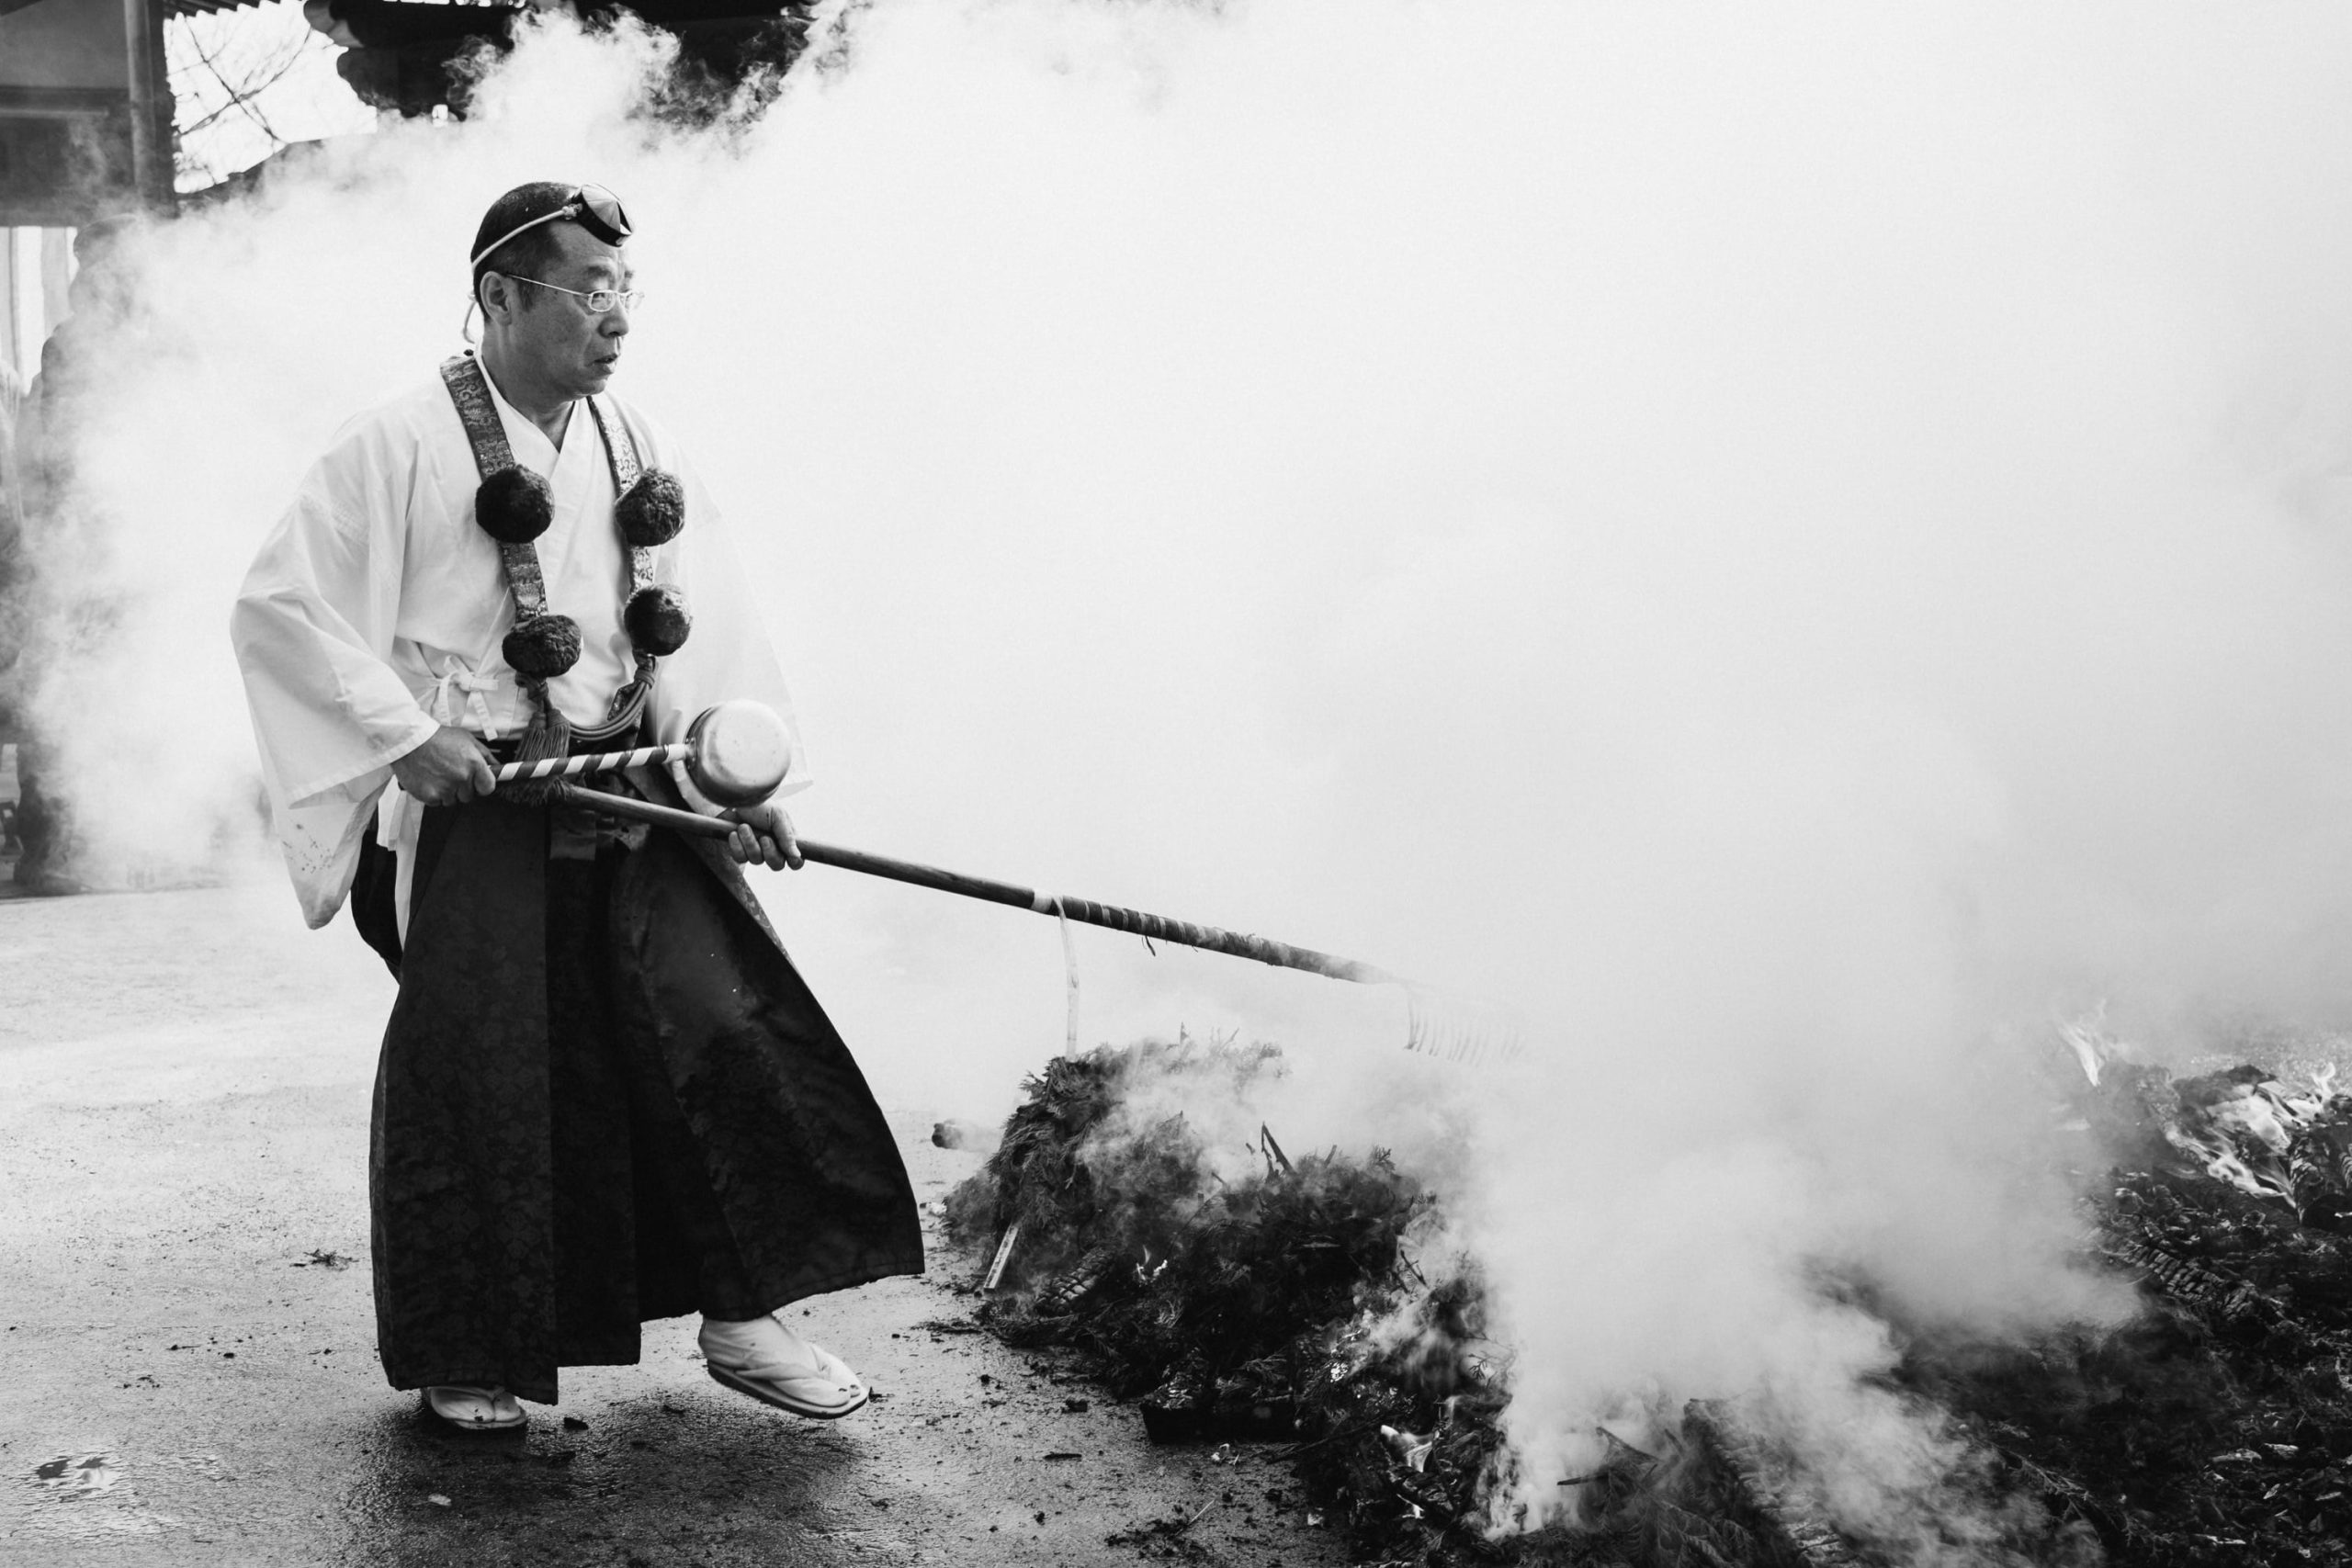
Going, Black & White
When making your photos black and white, it is important that you still shift the colors around. You can click the black-and-white tool in Lightroom, but you’ll still want to shift your color luminosity around in the B&W mix in Lightroom to isolate details and your subject.
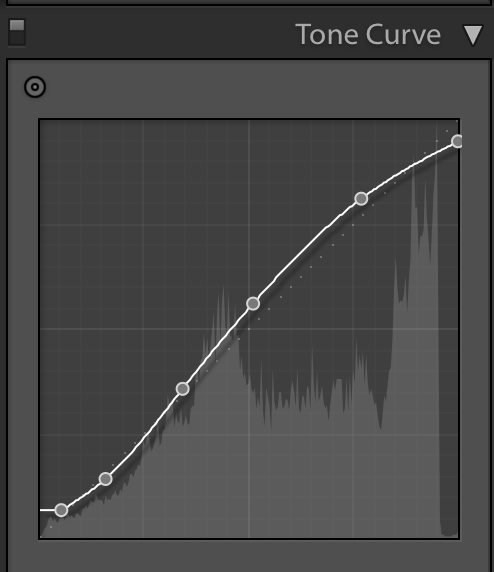
I also like to lift my black a little and bring down my highlights with the curves tool. This type of curve gives you a nice faded old look that’s really cool.
Removing Distractions
It’s always best to try to remove as many distractions as possible through framing or positioning, but sometimes that’s just impossible.
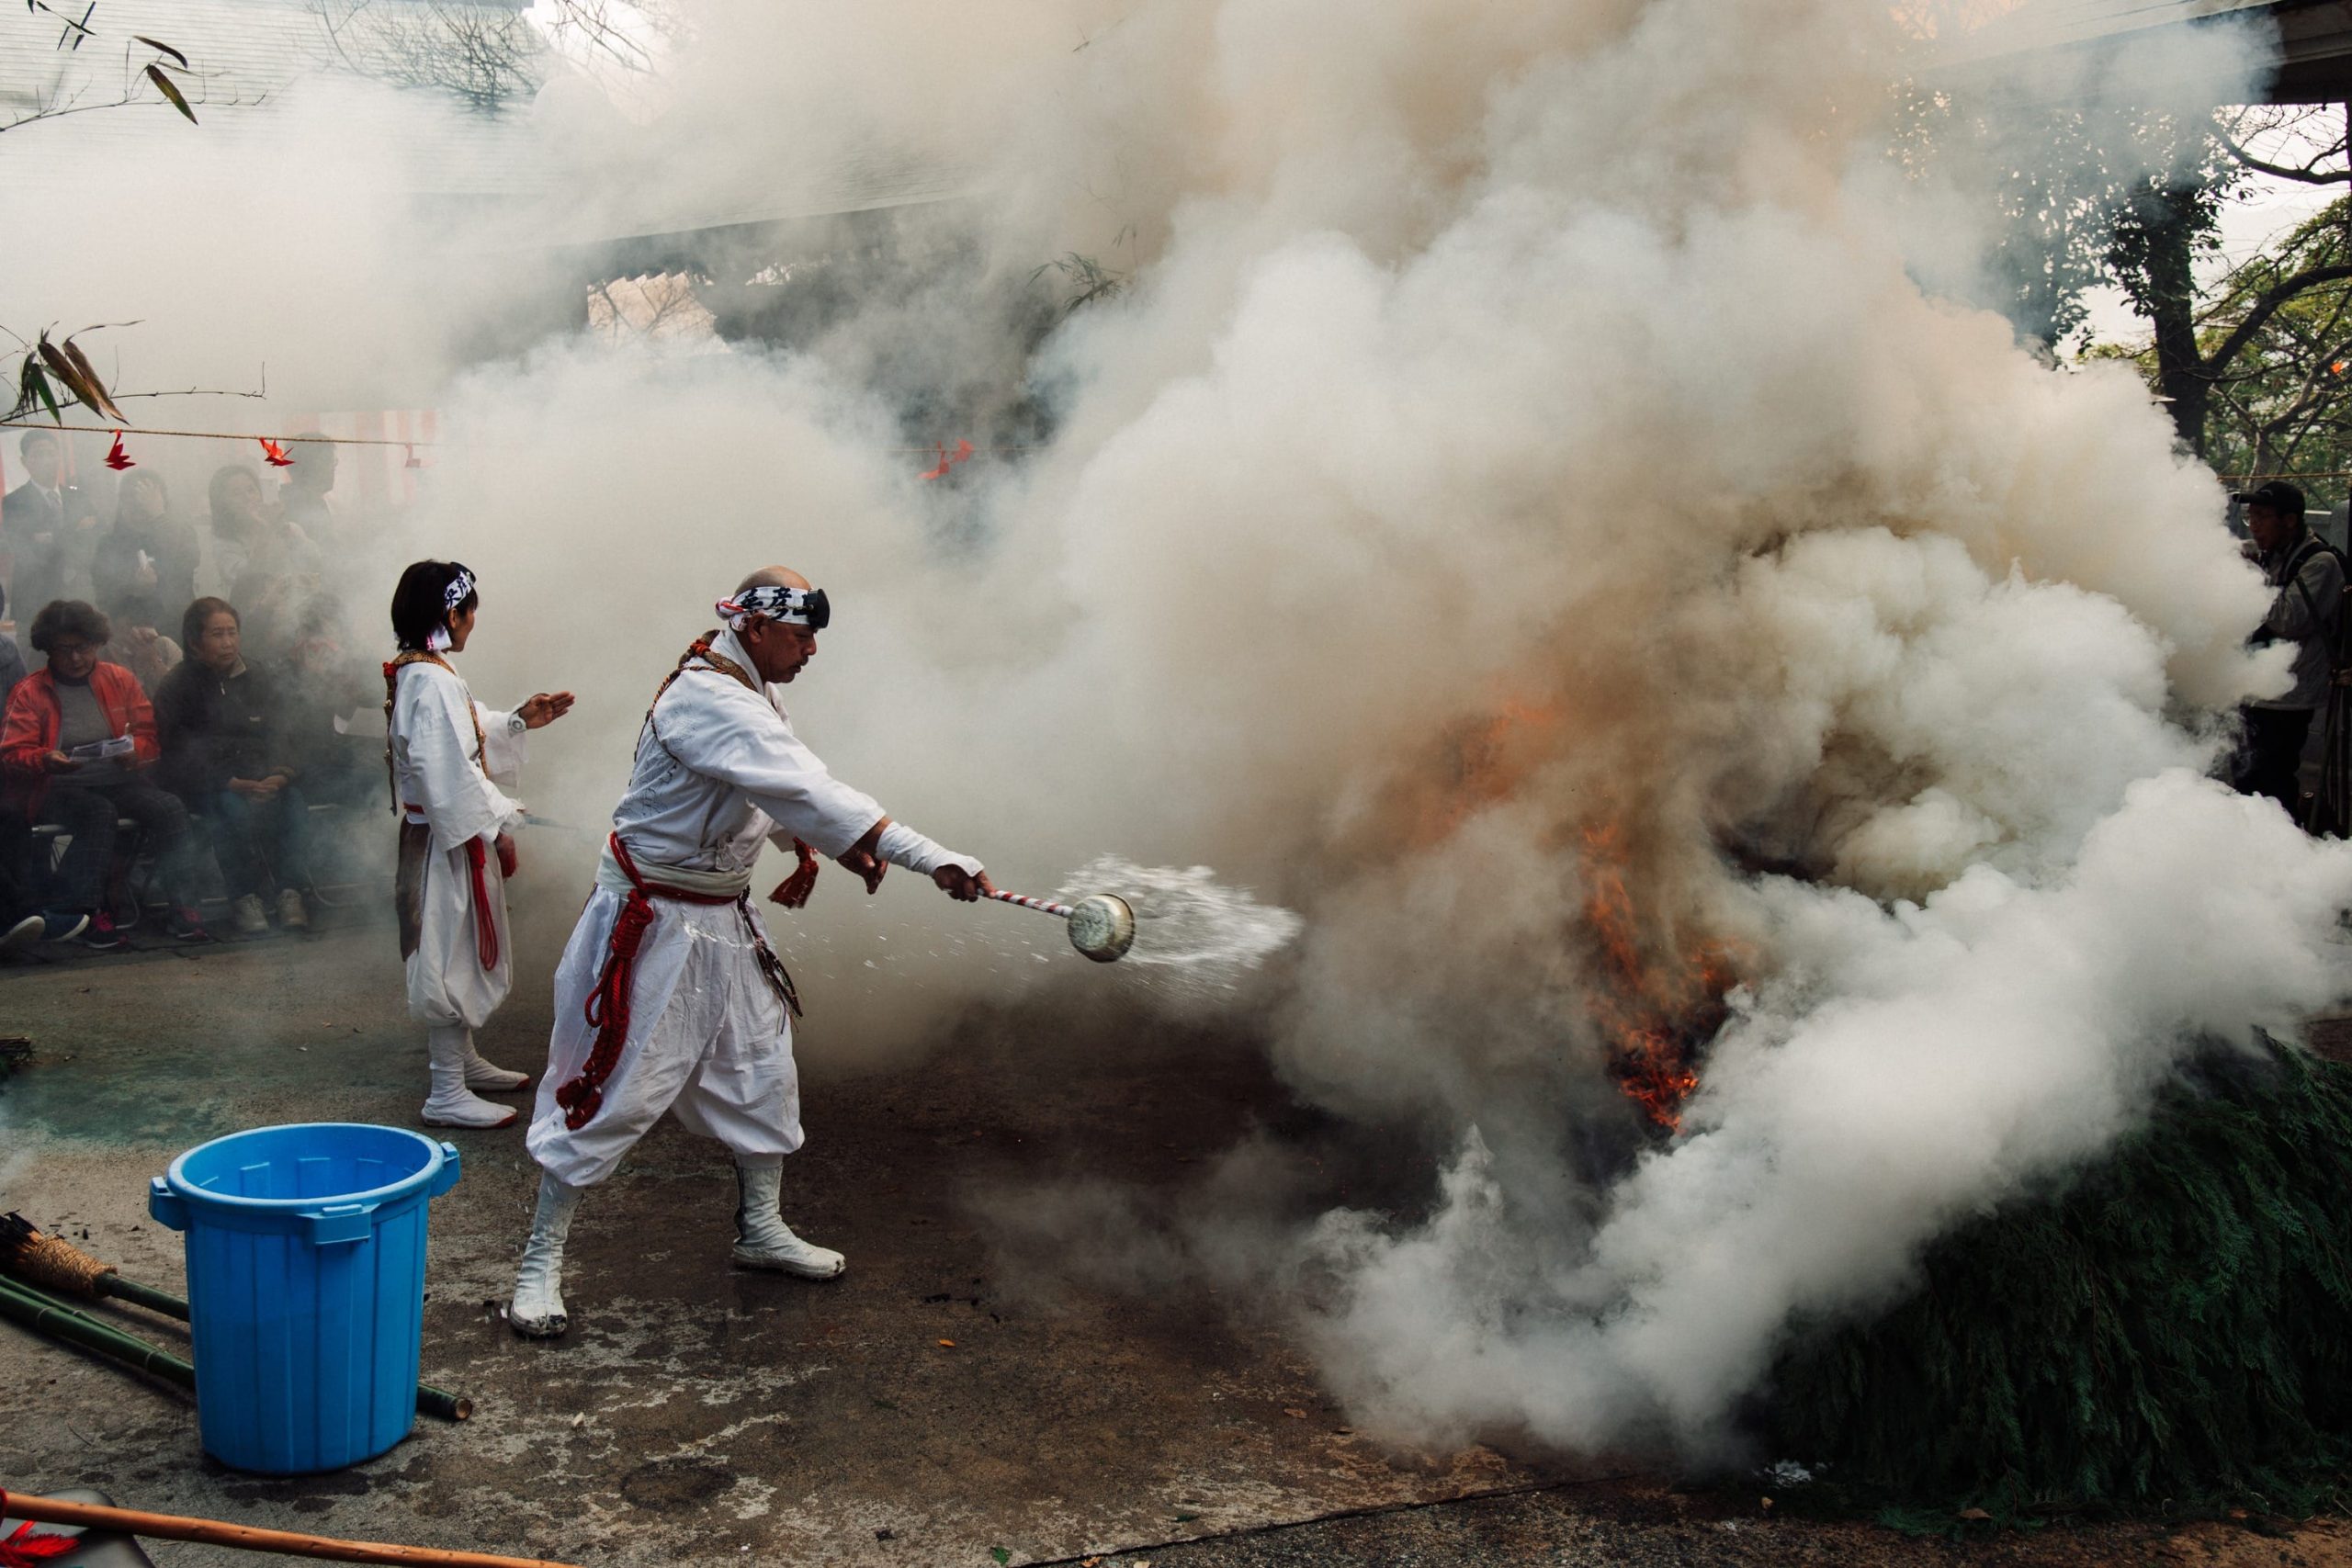
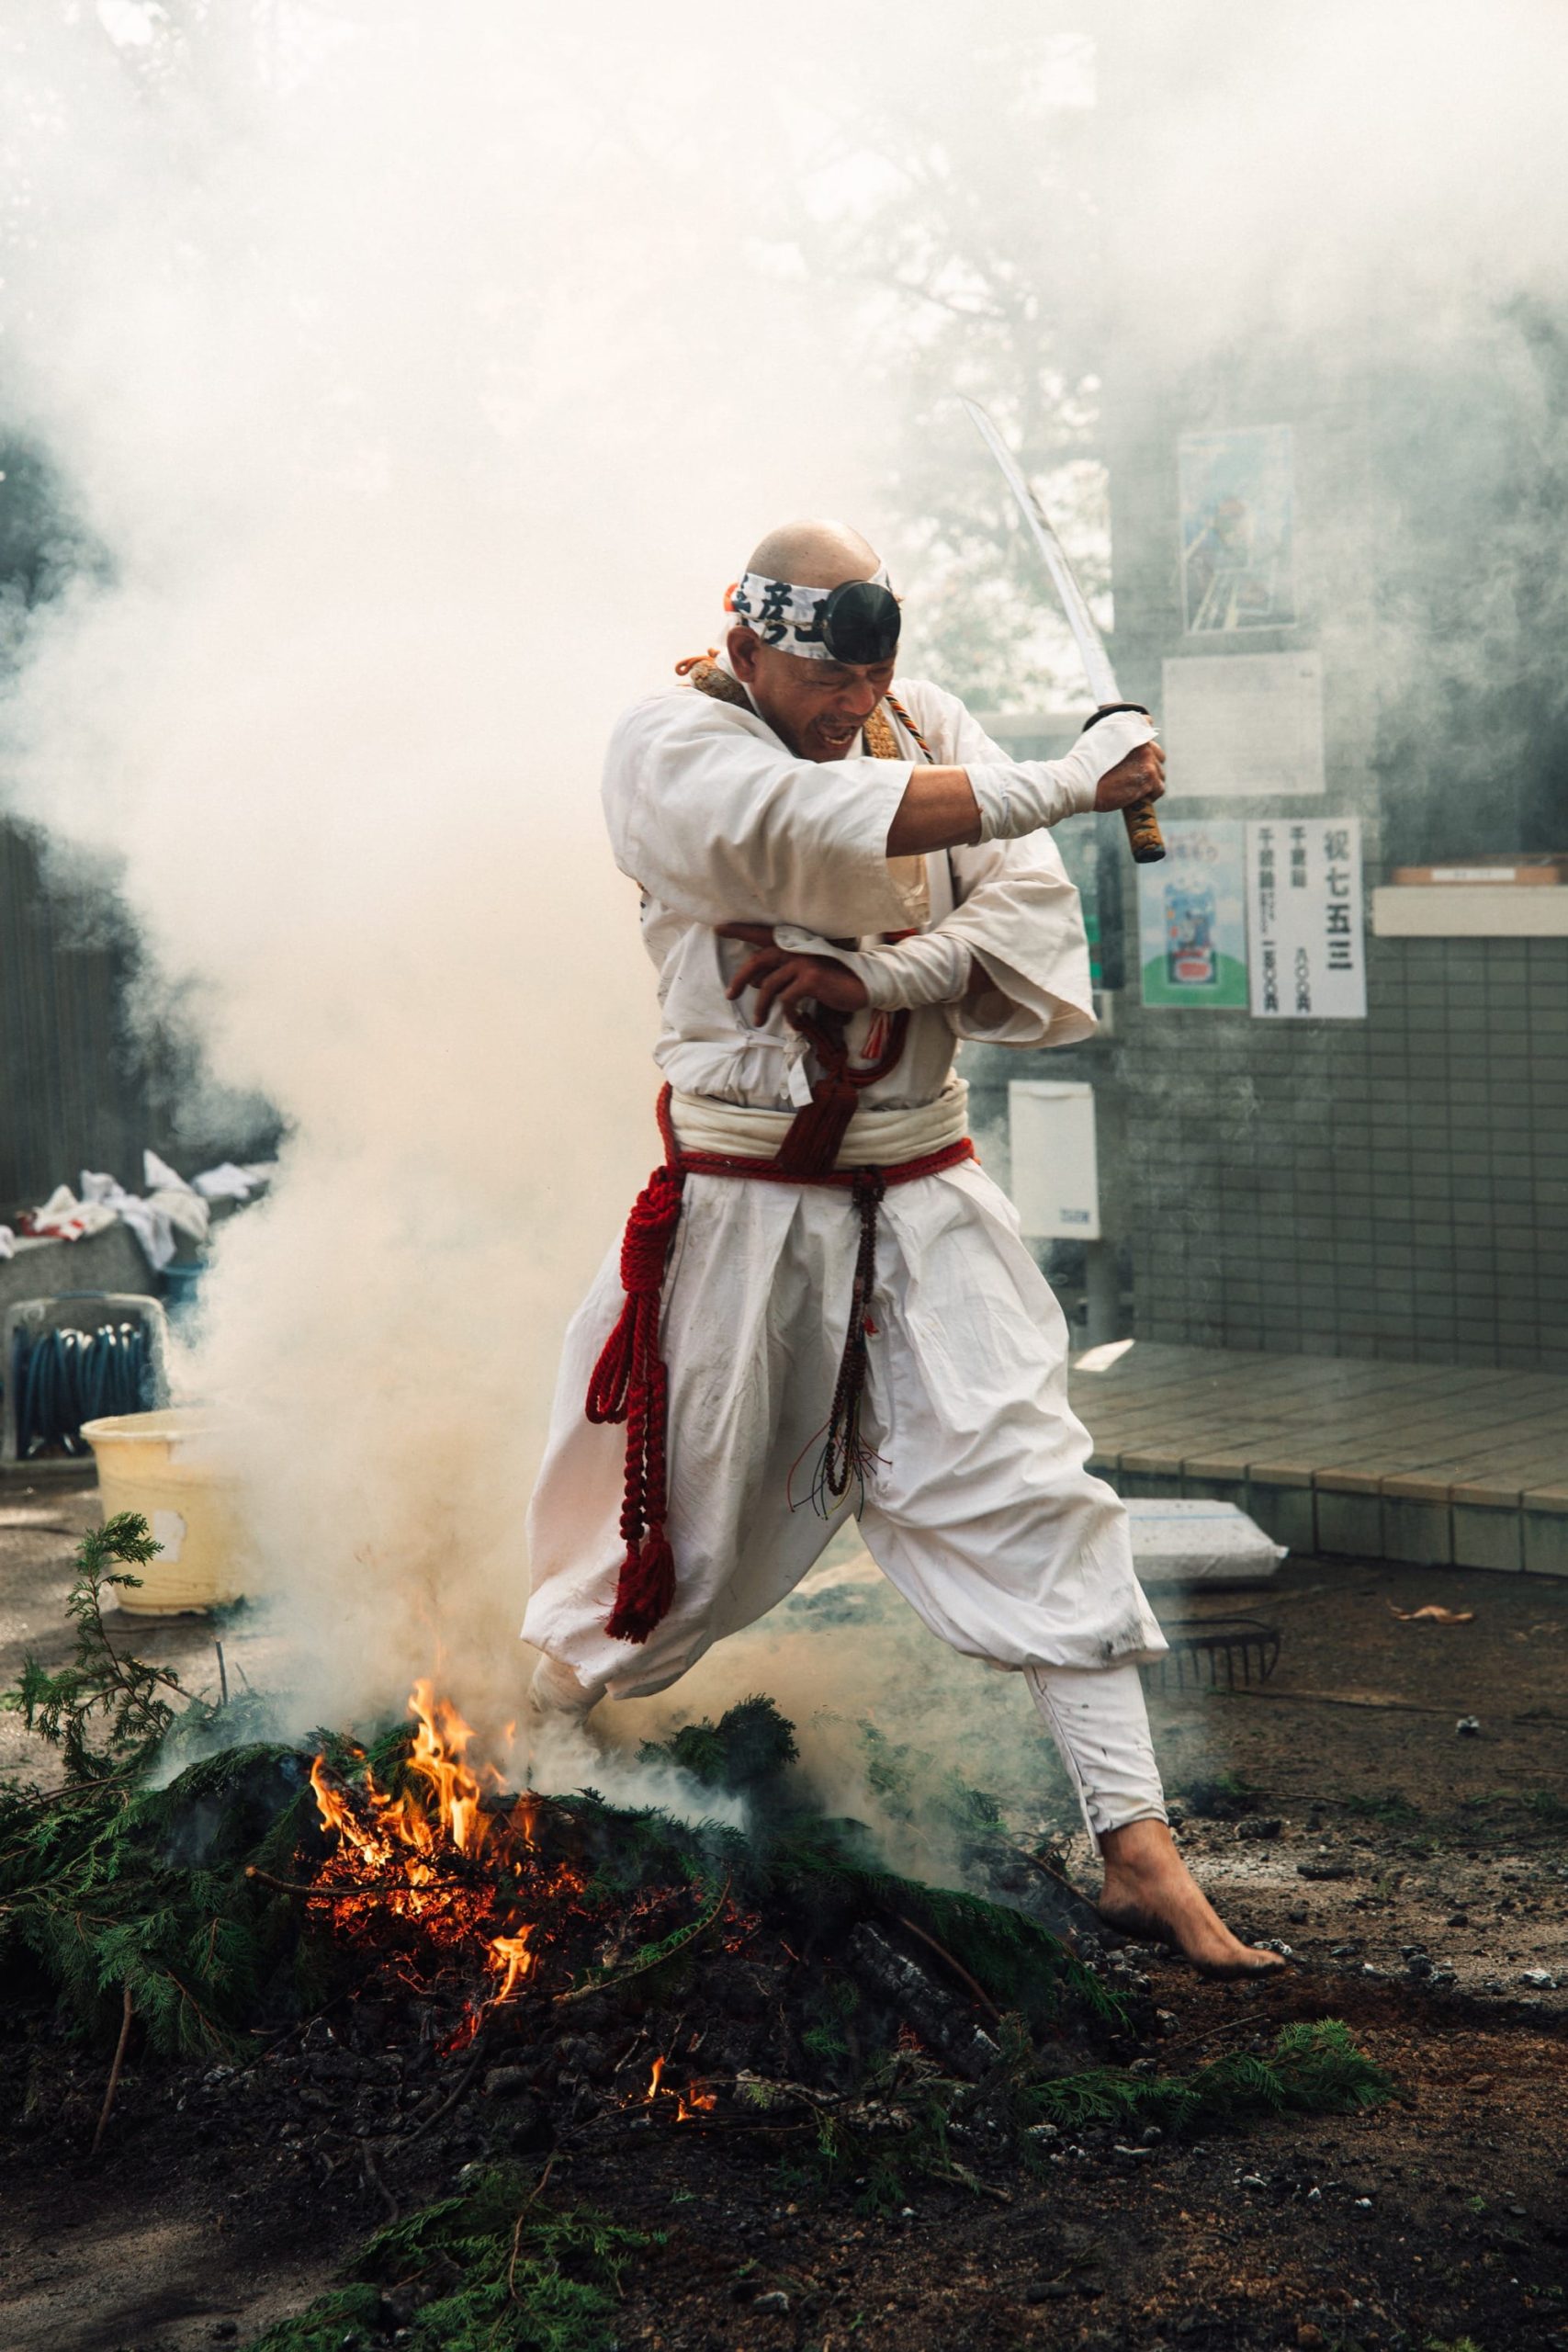
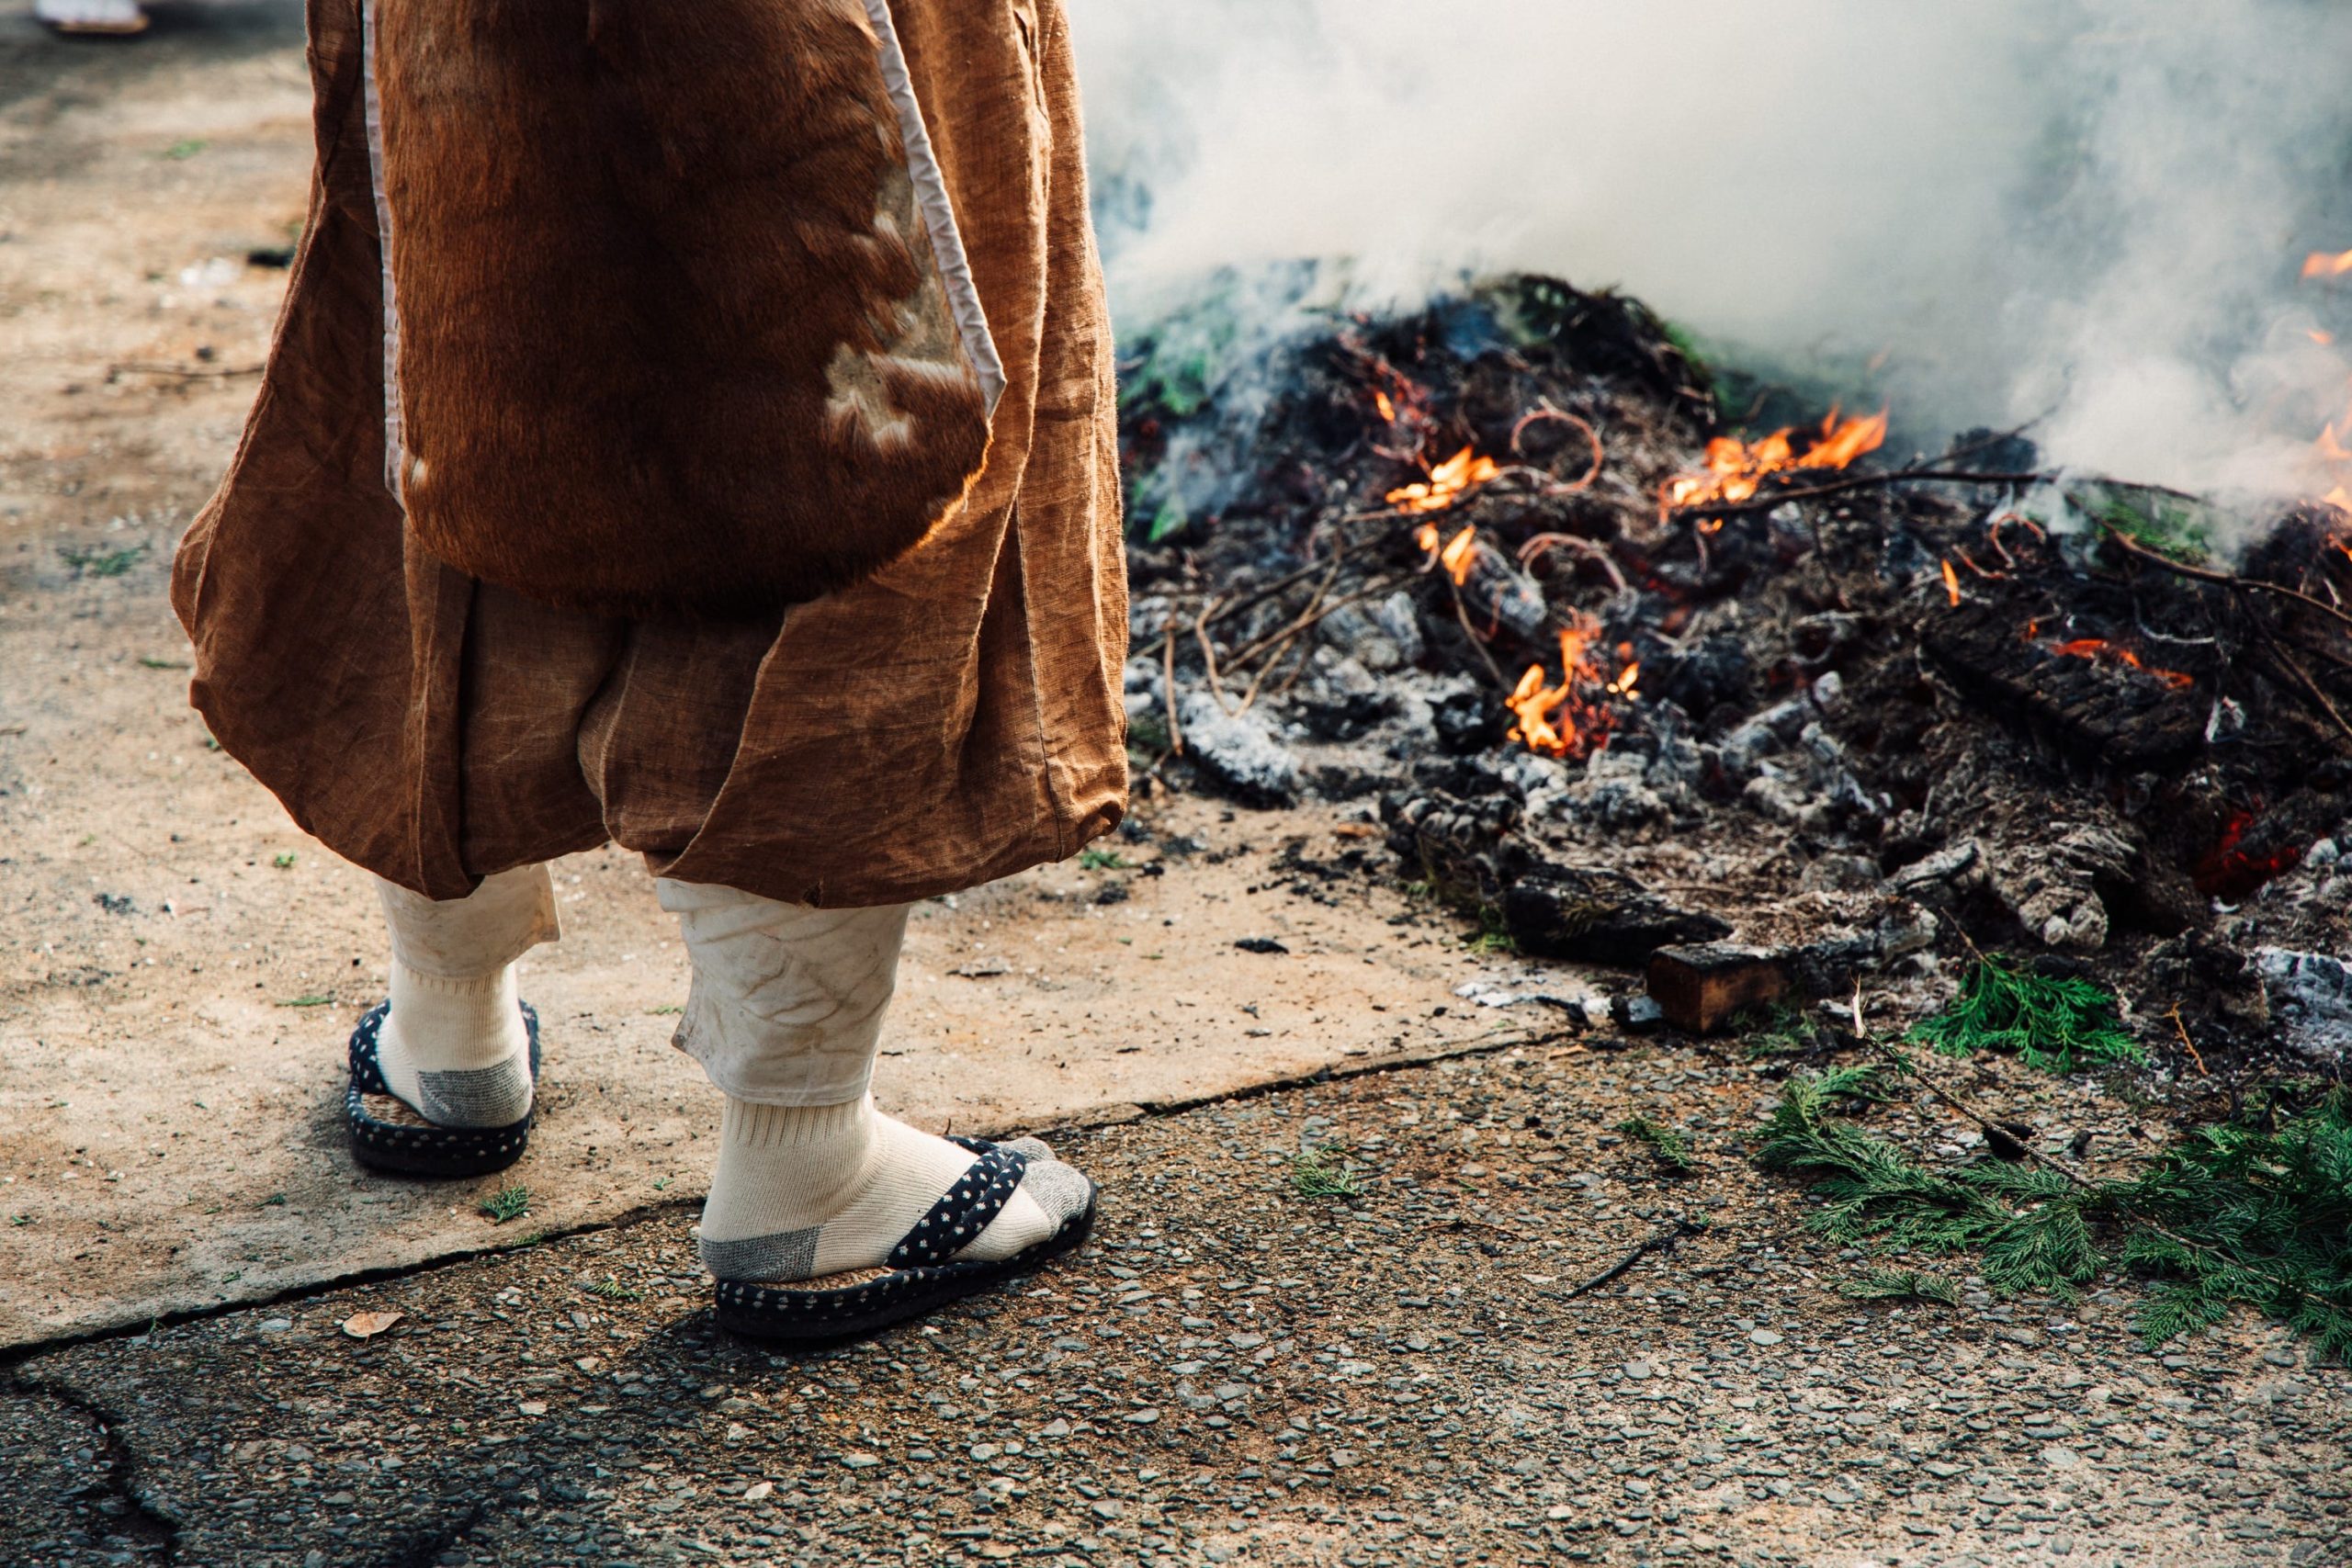
I almost never paint things out in photos like this, but in this next shot there was a blue plastic bucket right in the lower left side of the frame that I removed. This will sometimes disqualify you from a lot of NatGeo type photo contests. A way around that is to just make the image black and white to neutralize the blue. But in this case, fire and smoke really likes to be in color, and a bright blue bucket in this shot would have made it unusable. You can actually see I left it in the first few shots of this article.
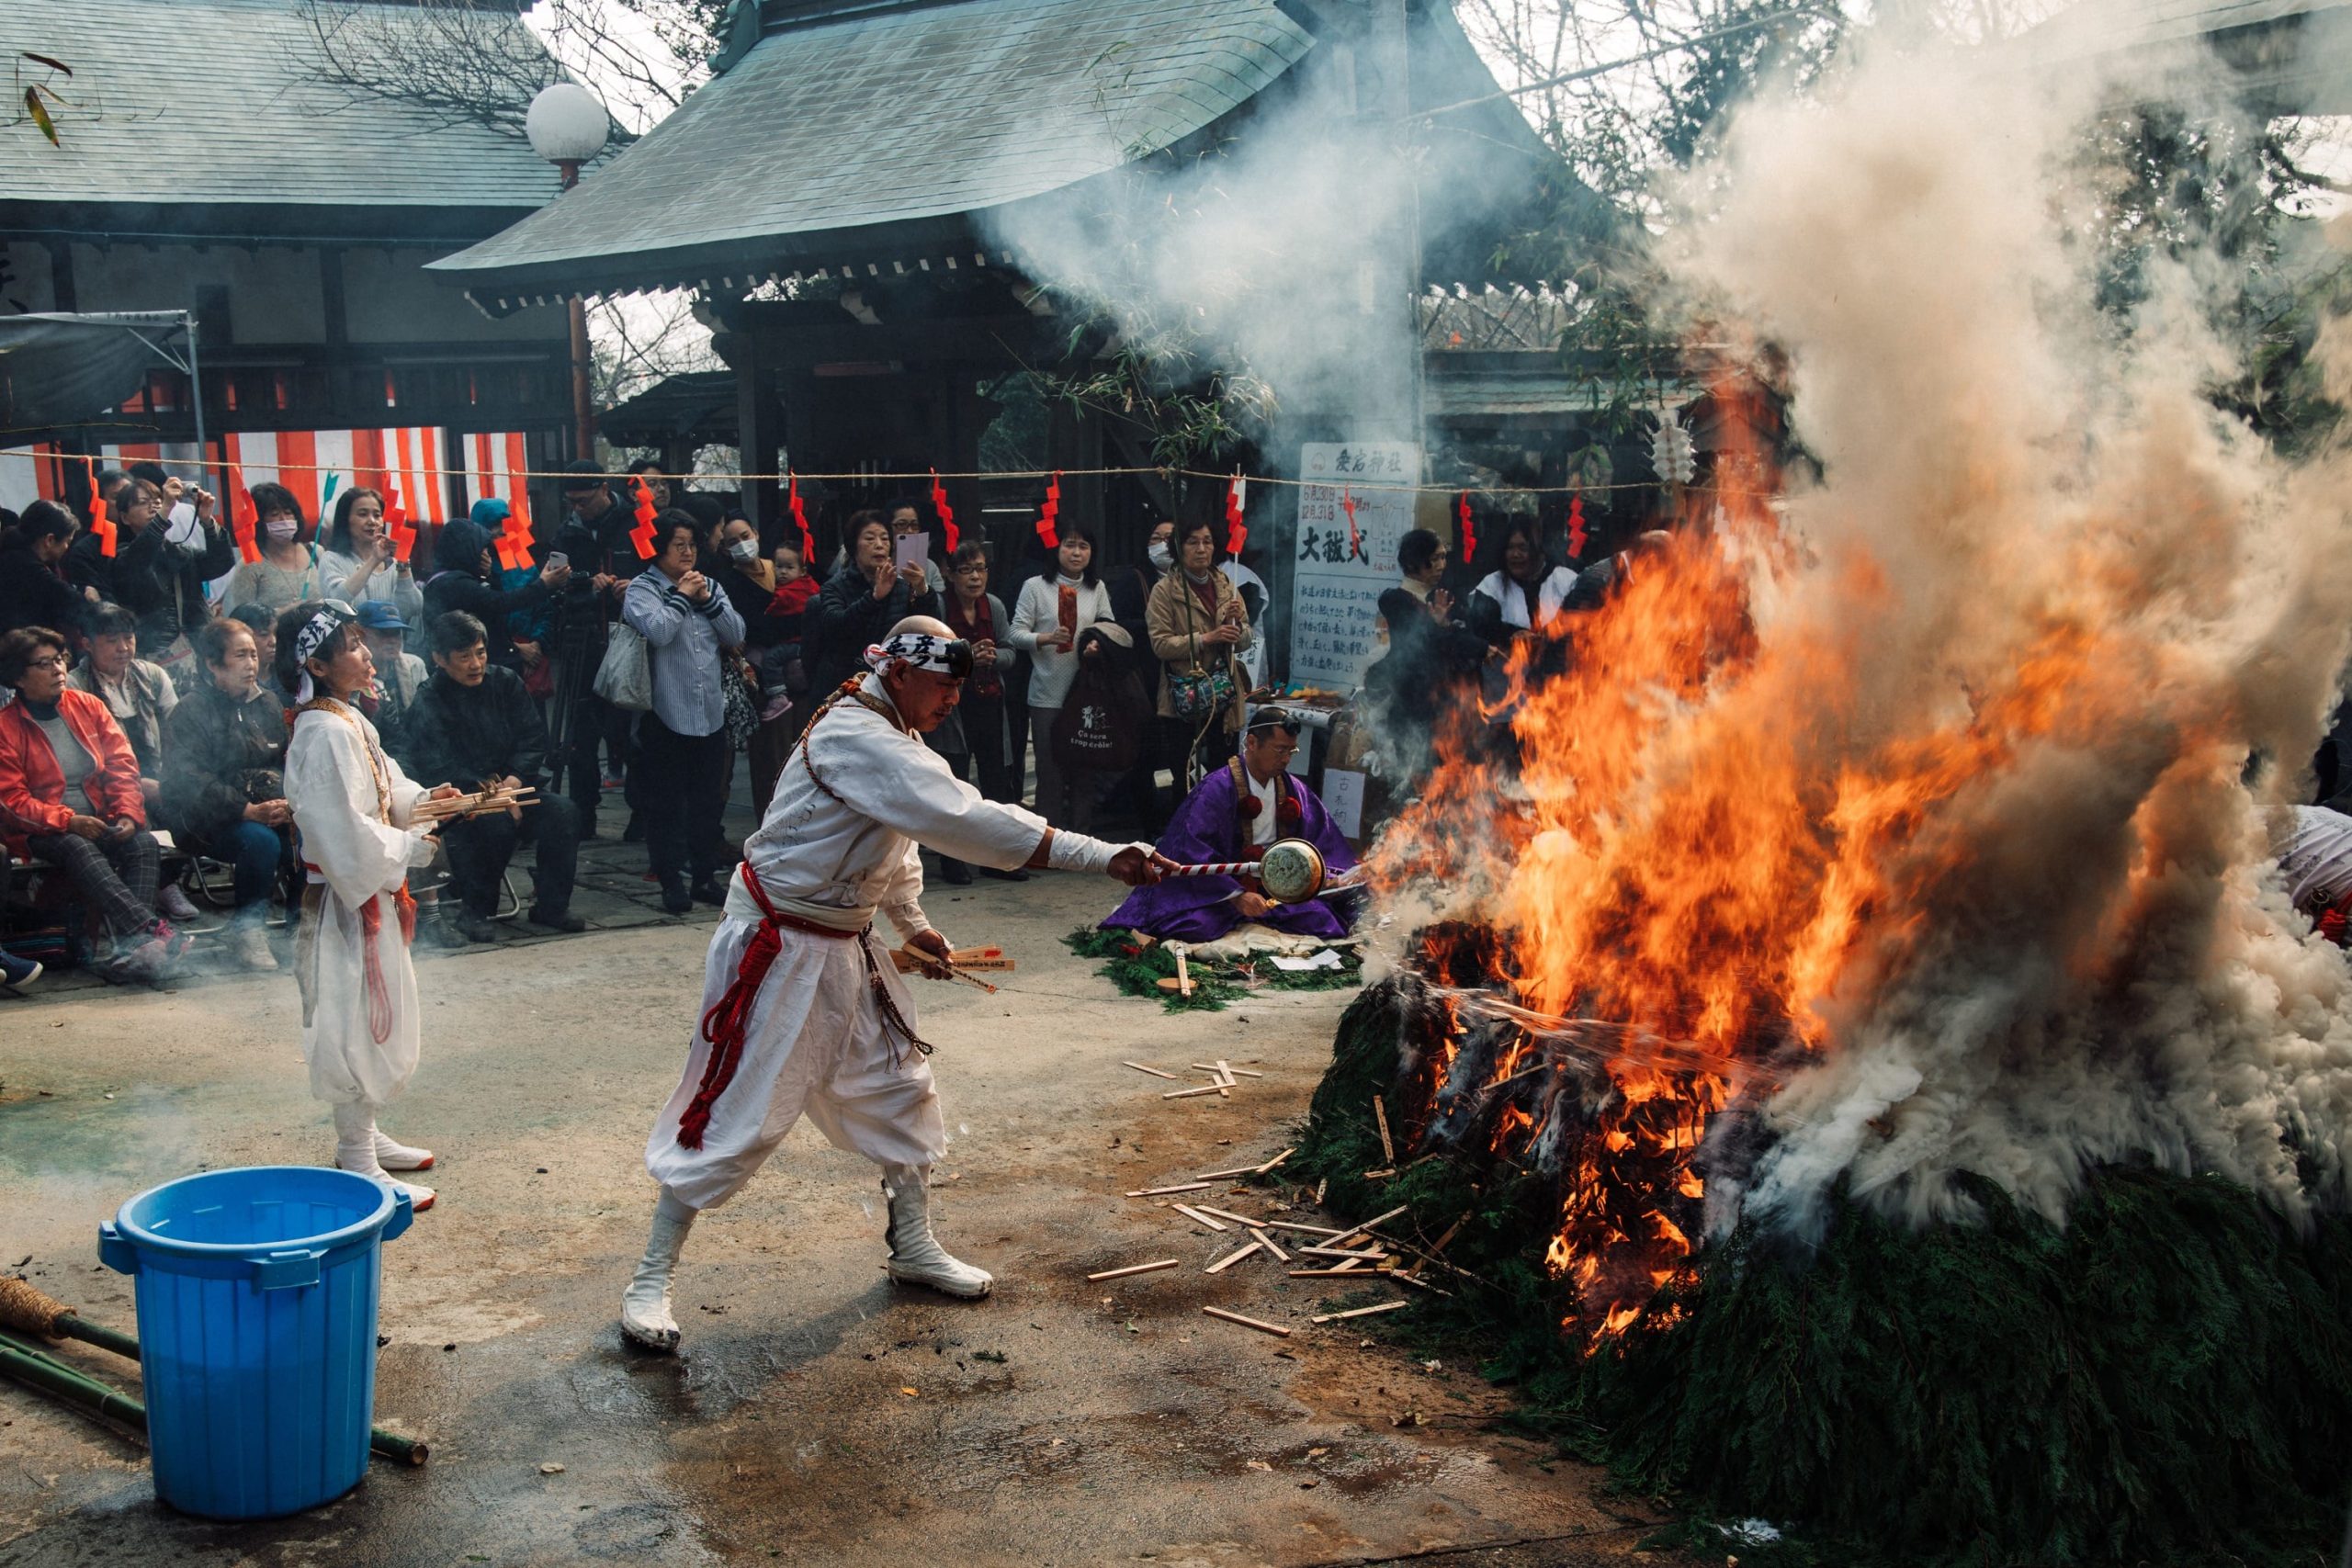
In this shot below I couldn’t remove the bucket because it was cutting into the woman’s foot and here it was too complicated of a paint job. You can see how it kills the mood a little by making the shot feel modern. However, the flames are so intense in this shot that it pulls all your attention and you almost don’t notice the bucket.
Sharpening & Grain
I didn’t add any sharpness to these shots. Most lenses and cameras today are sharp enough that you don’t really need to mess with it. Some types of photography require it like landscapes, but I wanted these photos to feel classic, and adding extra sharpness wasn’t necessary.
The final step to all these shots was to apply a little grain.
The look of the grain will depend on your sensor resolution and how you want to present your photos. I designed the grain to look good at 100% and not at the 3000px displayed here. Just so if I ever want to print, I don’t need to mess with it again. I usually like my grain somewhere around 15-20 with the amount, 25 with the size, and 50 with roughness. More or less depending on the shot. Sometimes I’ll do a little bit more with Black & White but the grain is nice because it will give the images a little bit of texture and it can even create an illusion of more detail even if the shot is soft.

Tips & Tricks Conclusions
When going to events or traveling you do need to plan your gear a little. Although I don’t usually shoot with zoom lenses, I would not have been able to build out the story of this event without a lens like the 24-105mm and my photos would have suffered.
Before buying the Canon 24-105mm, I would have brought two cameras, likely the X-T3 and the X-Pro2 with each camera using a different lens, probably a 23mm (35mm) and a 90mm (135mm) and I would probably switch a few times throughout the event. But, I never would have been able to shoot out a scene as complete as I did with this scene with this zoom lens. It turns out that most of the shots were at around 50mm, around 80mm, or at 105mm so I could have done it probably with a two-prime setup with 50mm and something like 85mm.
Having the ability to shoot with different perspectives and focal lengths makes it easy to tell different stories. If you do this correctly, your series of photos will make events like this feel larger than life. Then all you’ll need is a little post-work to compliment the mood.


Leave a Reply