
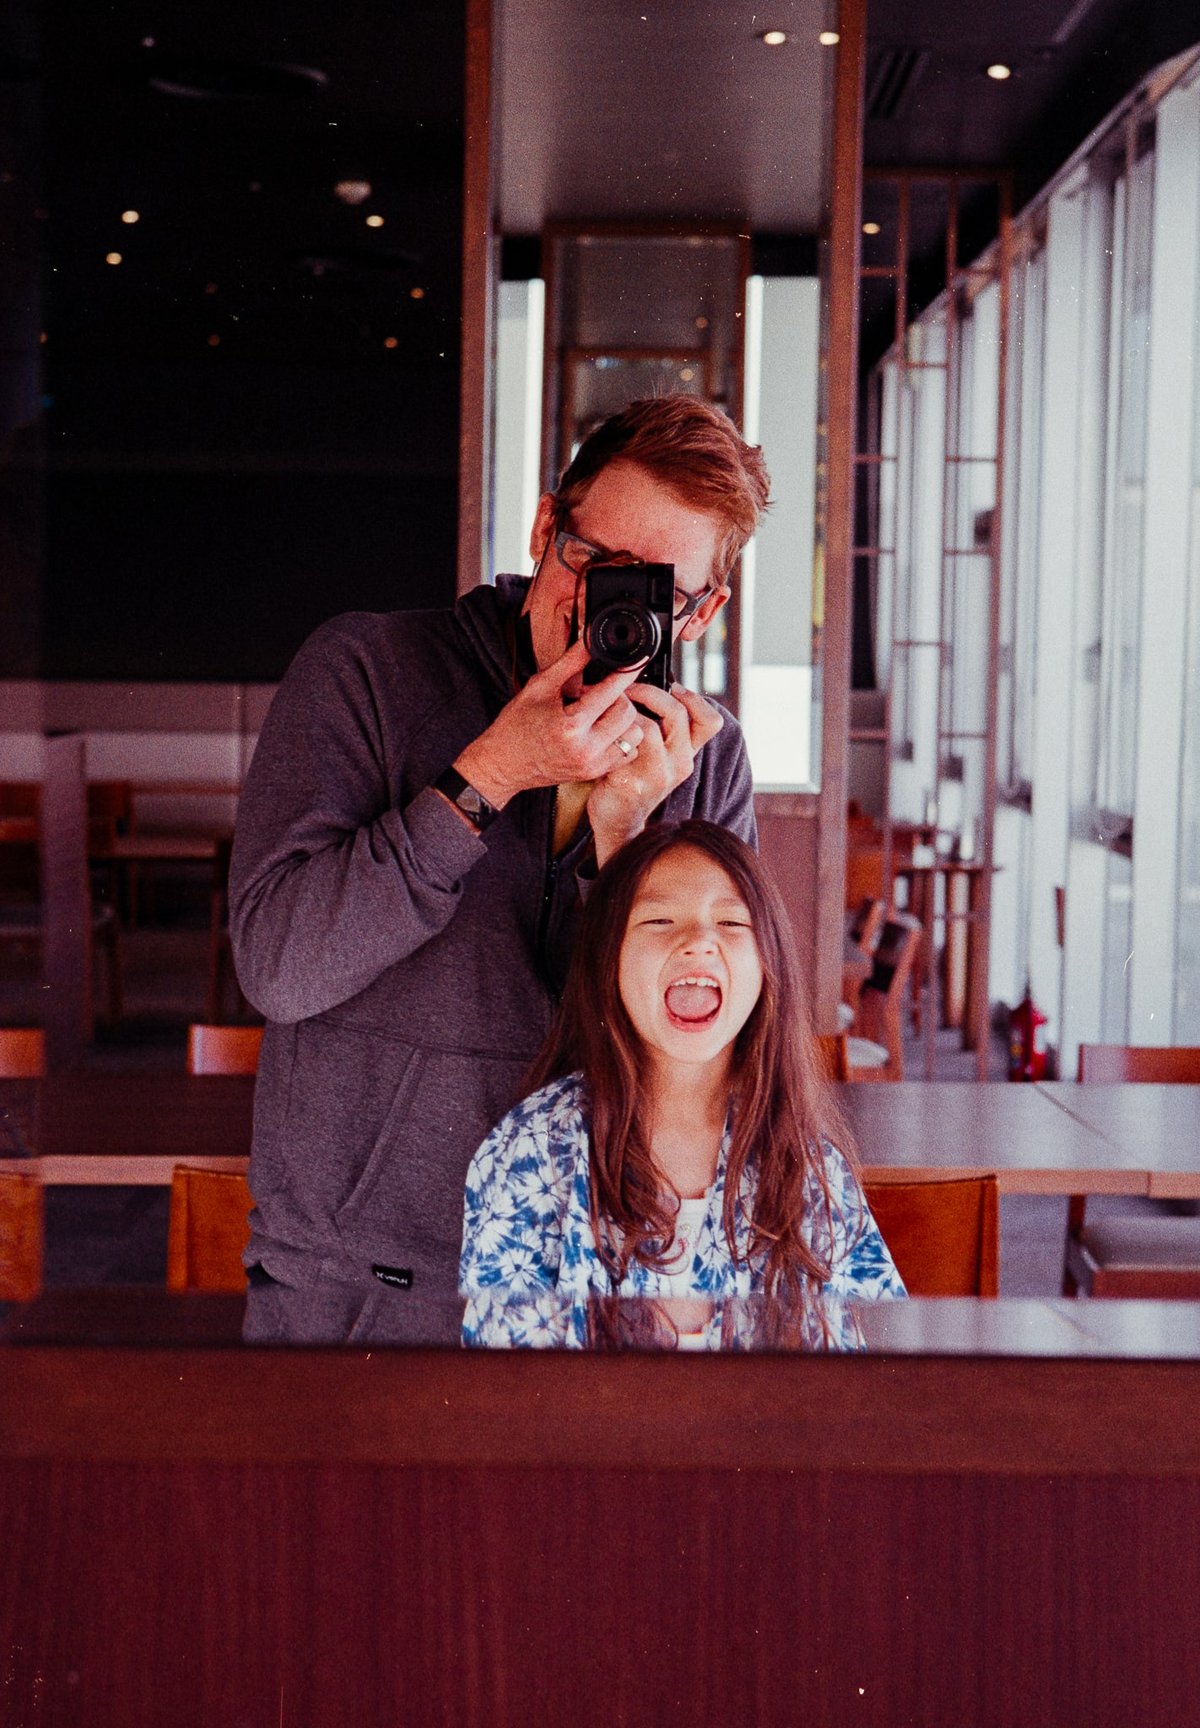
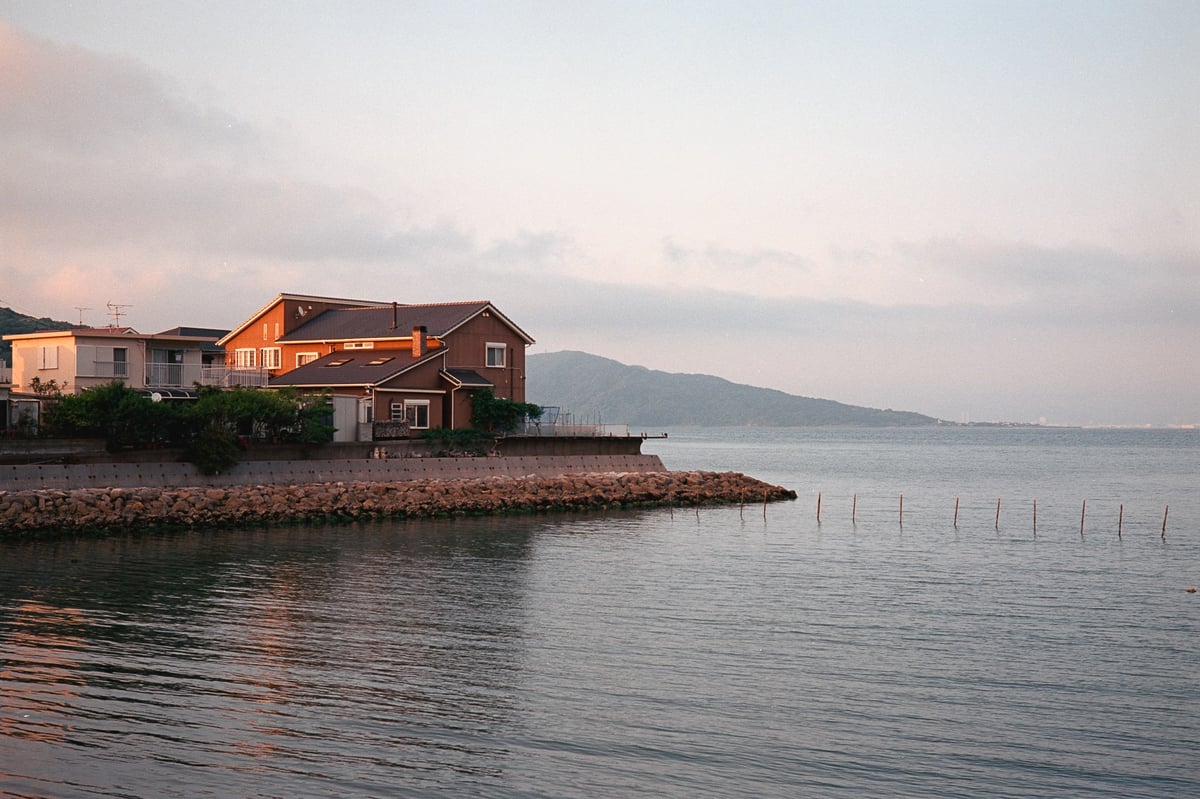
In this article, I’ll share a few simple color and grading techniques I’ve been using in my photo editing lately in a film-like style.
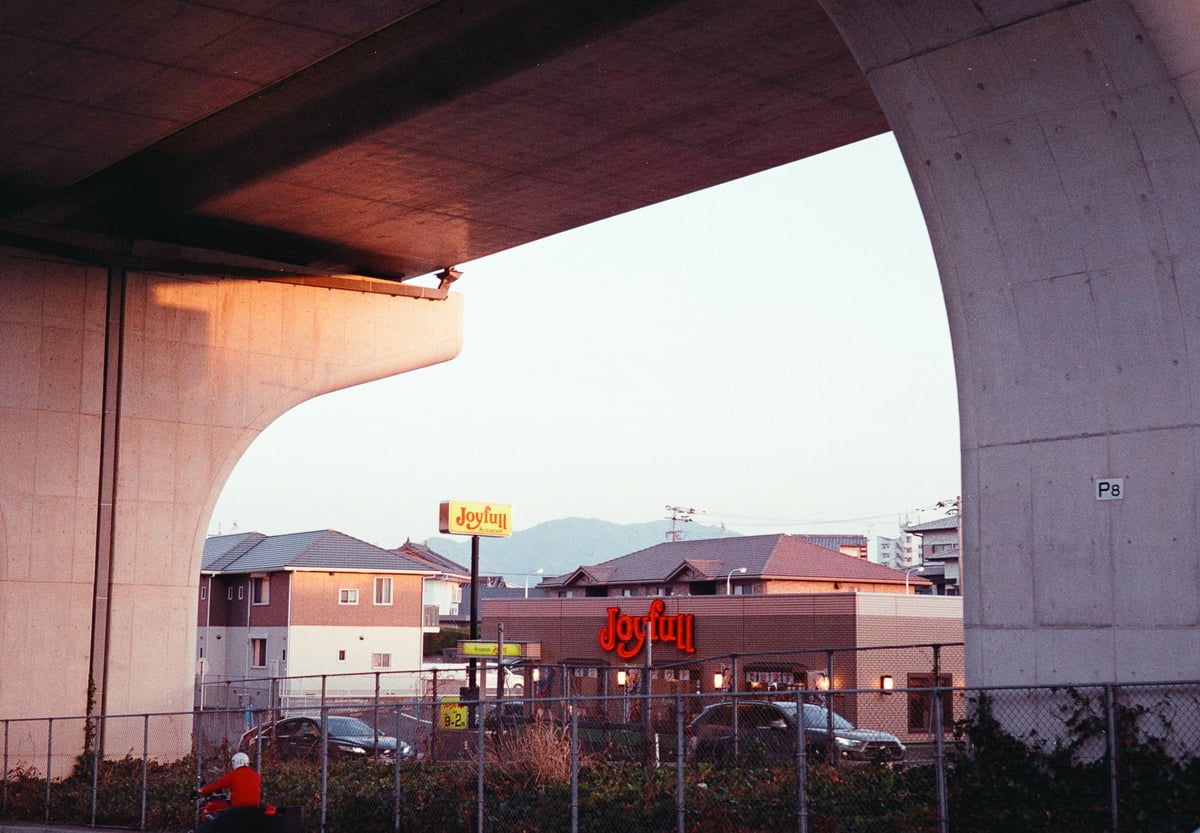
By the way, the image above is Kodak Gold, not digital. I’ll be sharing many film images in this article so we can examine what film does and how we can emulate it.
Why Film Is So Different
Many variables contribute to the way film will look, from color to tonality, grain, and exposure.
Film reacts drastically differently in different lighting conditions. The colors can also shift depending on the process, the age of the film, how long it was developed after exposure, or even the UV exposure.
If you tried to design a preset to look like Kodak Gold for daylight exposure, that preset wouldn’t match Kodak Gold under any other light conditions, such as under tungsten, because Kodak Gold would react differently under those lighting conditions, and your preset was only built to emulate the daylight reactions.
Various external elements can affect the film’s color shifts and contrast: processing, age, time to development, exposure, and push-pull processing. When you pair all that with the film’s different spectral sensitivity, you get an inconsistent and unpredictable output.
Sometimes, I just love those inconsistent color shifts and leave the magenta masks in the mids, shadows, and cyan highlights rather than correcting them.
If you were shooting at a professional level with film, there is a lot you can do to control those variables to get more consistent results. Many film stocks still have white papers on handling your film properly. Here is one for KodakGold.
When editing digital files to be more like film, there is no way to mimic film in any realistic capacity fully. All you can do is try to capture the vibe. I mostly try to do that in my presets and photo editing. If I wanted all the craziness of film, I’d shoot film. At the end of the day, with my presets, I just try to make things look cool.
You can check out my Core Color Preset.
So, here is how I capture some of those film-like vibes with my digital editing in Lightroom. All these tricks will also work in any editing program.
How to Edit For A Film Look
As mentioned above, a film can have different looks depending on the film stock, the situation in which it was shot, or even how the negatives are scanned and what software is used to convert them. If you scan a negative with a Nikon, Sony, Fujifilm, or Canon camera, you’ll introduce some of those cameras’ color biases.
However, some characteristics will always be consistent.
My favorite character of the film is the tonality and its soft glow.
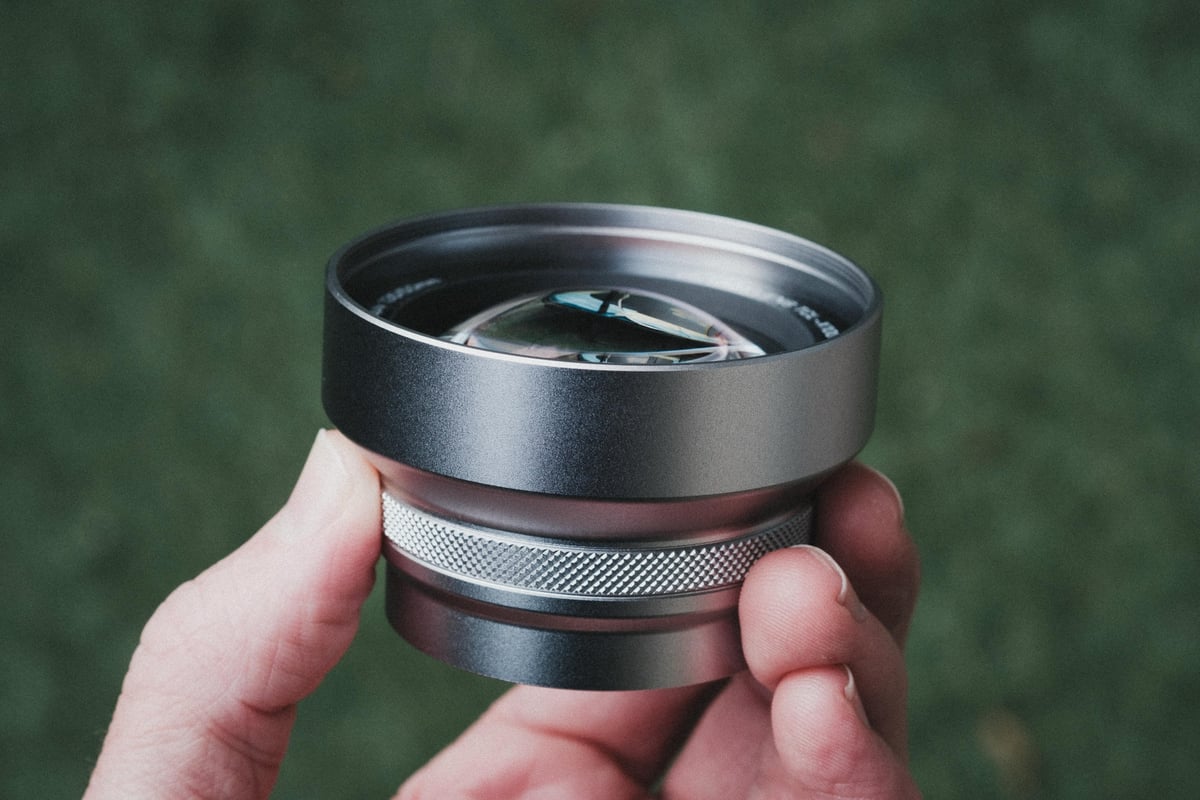
Using Diffusion Filters For A Soft Glow
To reproduce the soft glow of film, I usually use some type of mist filter. I’ve liked the Tiffen Pro-Mist filter lately, but I also use the Tiffen Black Pro-Mist filter, the Glimmerglass filter, the Firecrest Bloom Gold filter, and the K&F ShimmerGlass. You’ll want to use less intense filters at night and more intense filters during the day.
For the Tiffen brand, it’s fine to use a 1/4 filter during the day and a 1/8 filter at night. That generally gives a good look without being too crazy. Their Glimmerglass filters work on a different scale, so you could probably use a Glimmerglass 1 during the day and go lighter at night. I like the Glimmerglass 1/4 at night.
Each filter has its style, so you’ll have to experiment with how they react to different lighting conditions. For example, I think Pro-Mist or Glimmerglass filters work well during the day, and the Black Pro-Mist filters are a little nicer at night since they keep the diffusion a little more contained.
I’ve done a comparison between many of the popular diffusion filters.
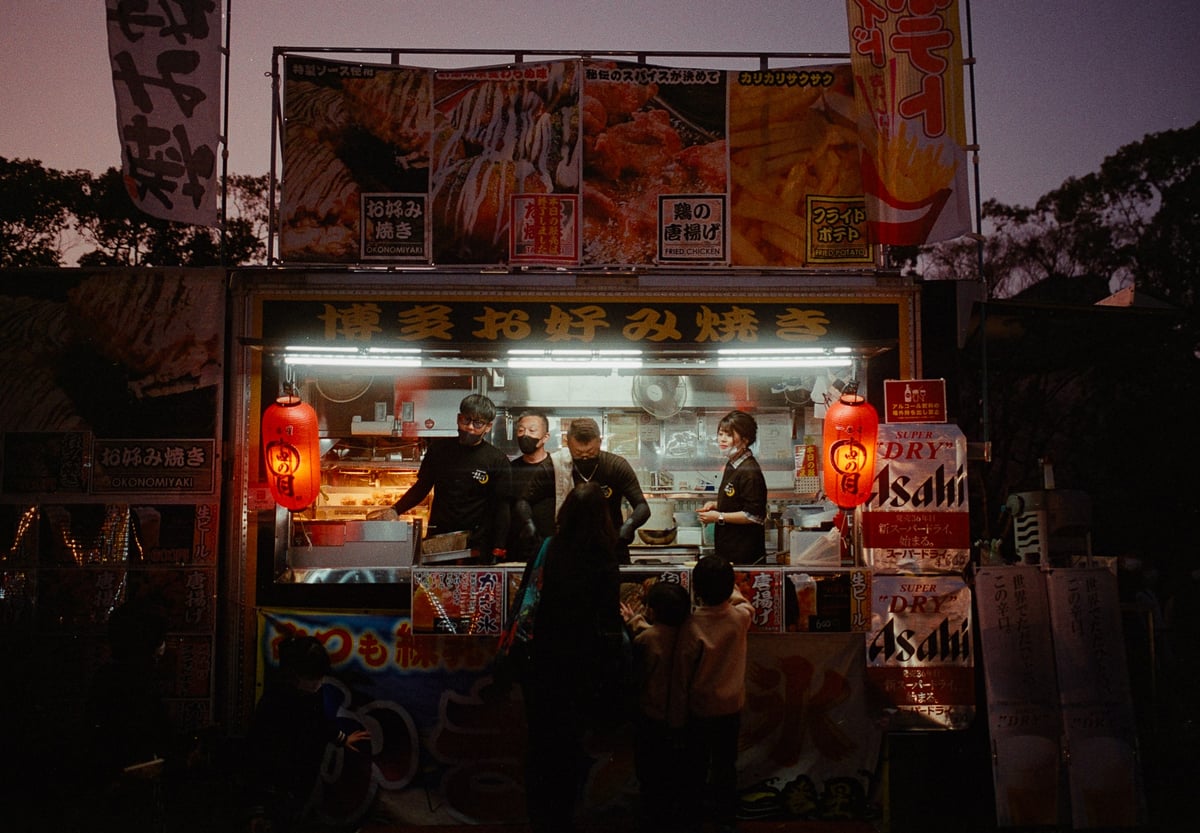
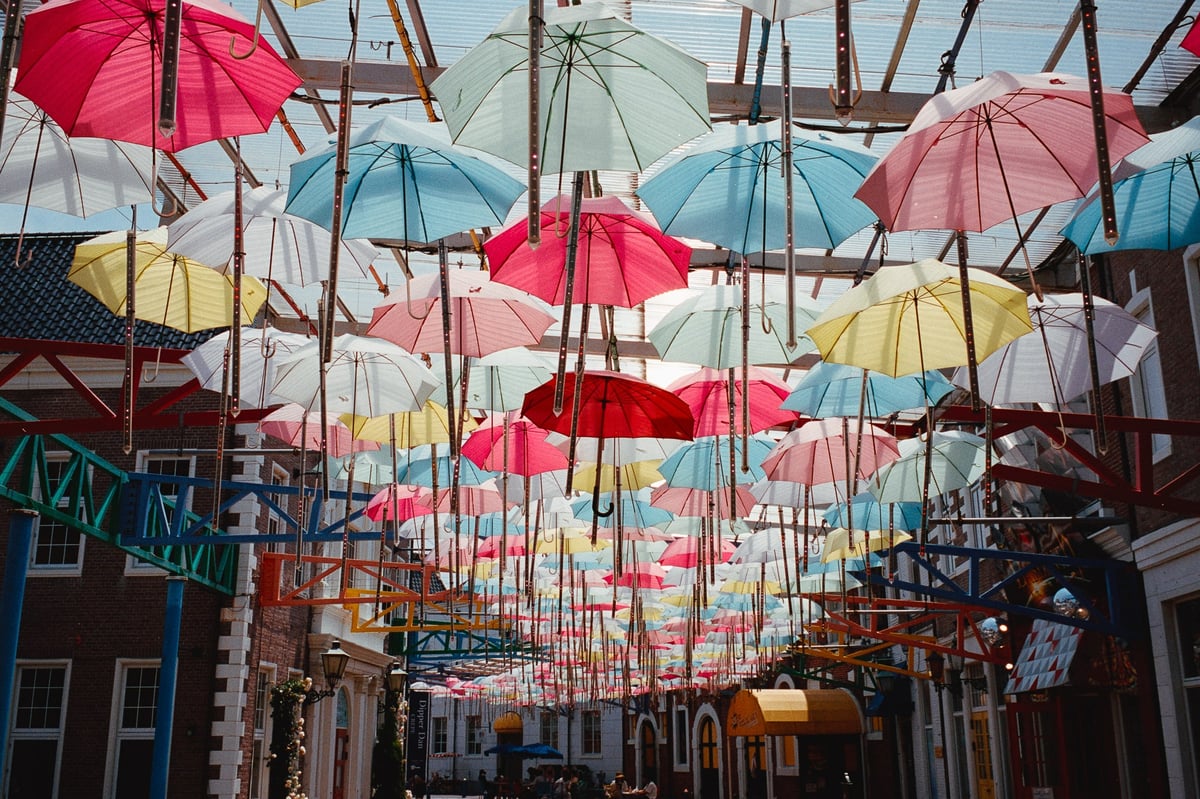
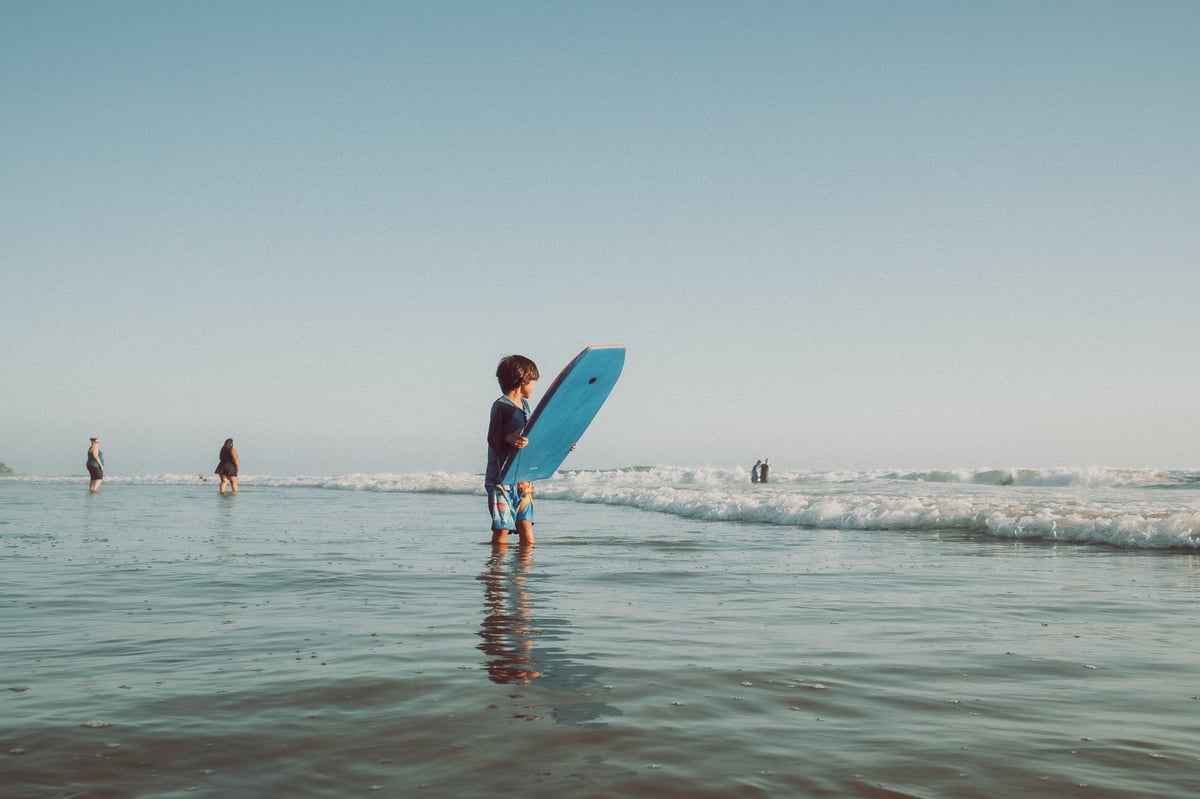
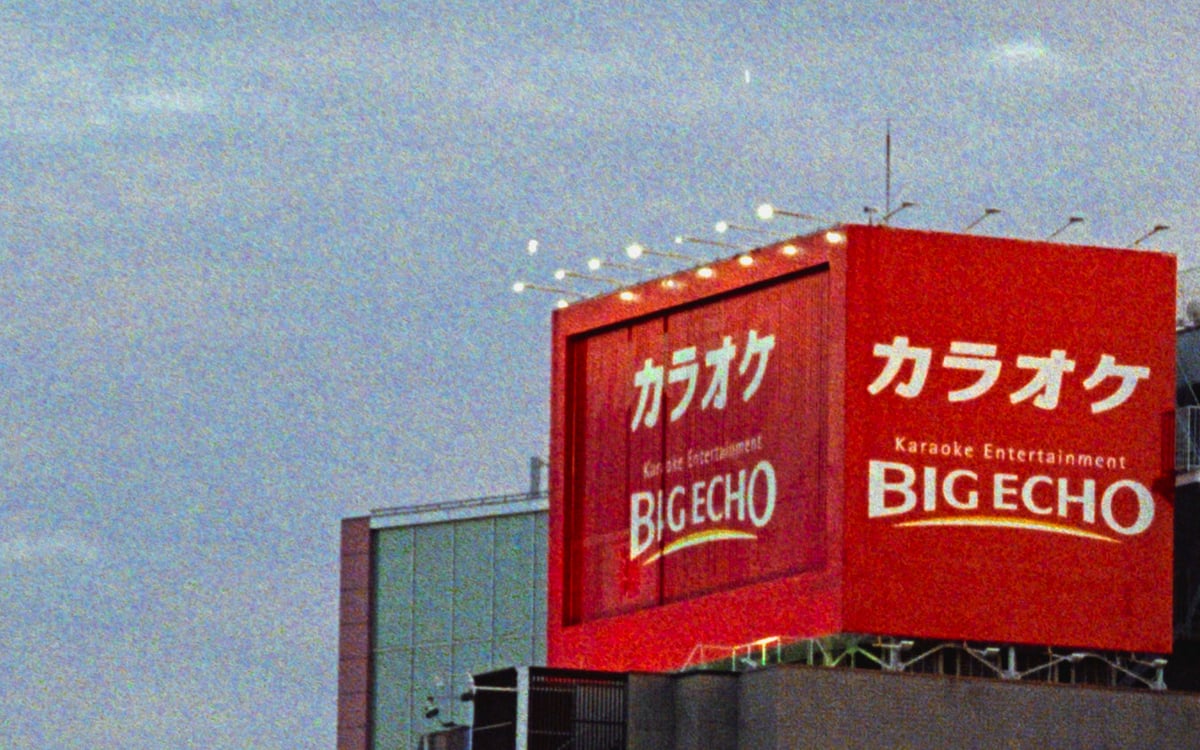
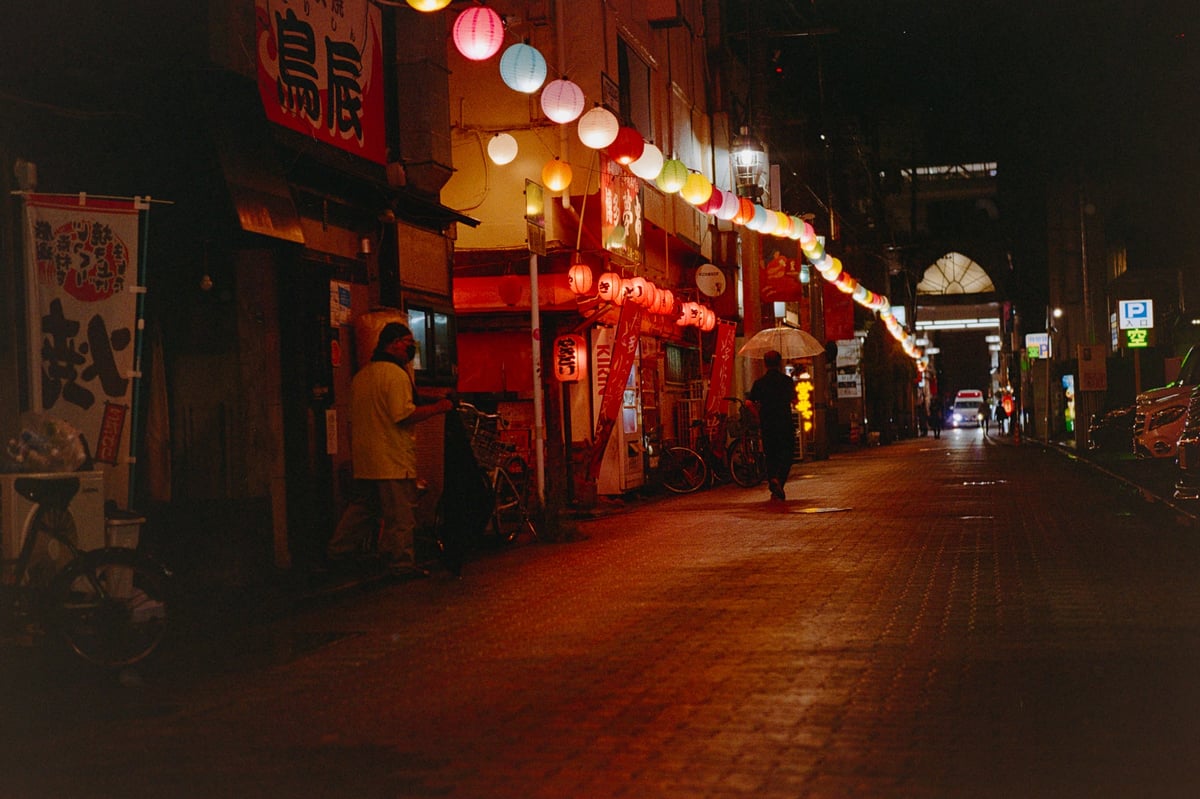
Here are two samples of how film can produce a softer glow in the highlights.
See how the highlights glow at night with Kodak Gold.
Here is how the Black Pro-Mist at 1/4 looks at night. Very similar. The bloom is contained mostly just around the highlights.
Here is another image where I’m using the Tiffen Pro-Mist 1/4 filter in the day with some muted highlights done in post – I’ll get into that in a minute.

Another really nice characteristic of film is the soft, muted highlights that roll off. The soft mist filters do help with this to some extent, but some of this has to do with the tonality, and you’ll have to adjust for this in the post.
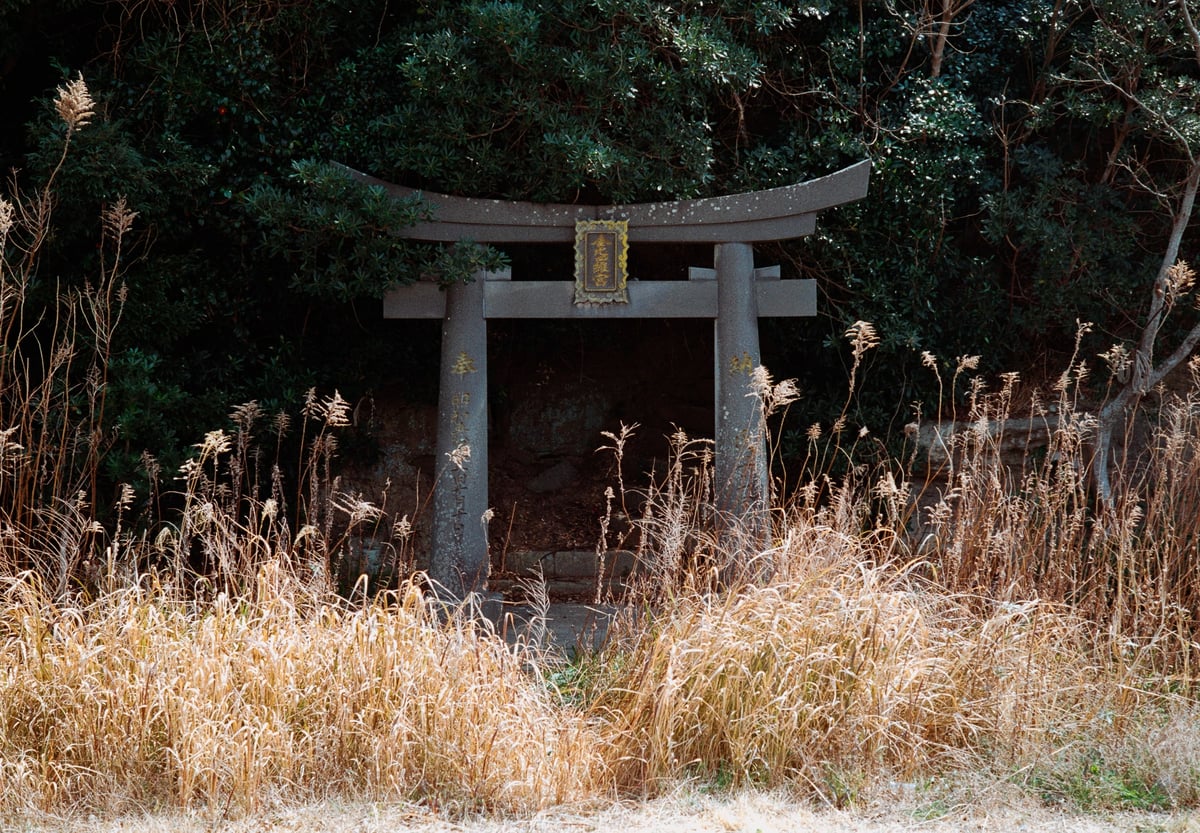
Here are some samples of softer highlights with Ektar. You can see it has very soft highlights but somewhat harsher shadows.
Here is an example with Portra 400.
Film also tends to have slightly crunchy shadows, at least with how I scan it. This is because the film has a very poor dynamic range in the shadows but a very good dynamic range in the highlights. We were taught in school ages ago to just always over-expose film by 1-stop to be safe. I usually do 2/3 a stop today.
Digital, on the other hand, tends to have softer shadows and crunchier highlights, with more dynamic range in the shadows and less in the highlights. With digital, it’s usually safer to under-expose, which is the opposite of film.
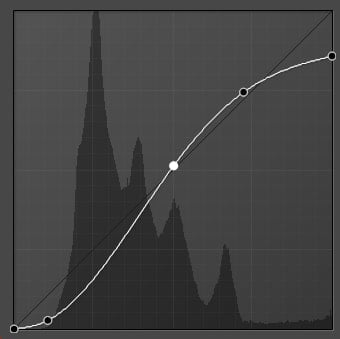
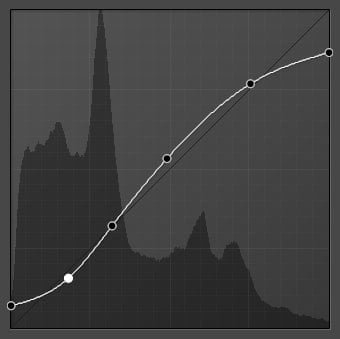
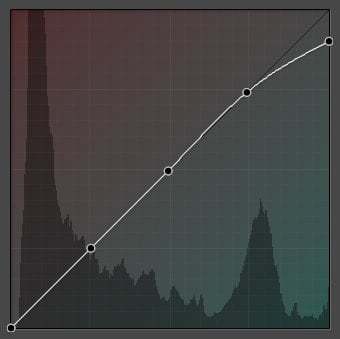
To match the soft highlights of film with a digital image, you’ll first want to make sure you didn’t overexpose the highlights. Then, you can use the curves tool to add softer, smoother highlights and crunchy shadows.
This is what that would look like.
Here is how that would look, when paired with one of my presets.
This was colored pretty warm, which I like; this is also using the Kenko Black Mist filter No.5, which is similar to the Black Pro-Mist filter 1/4. Ideally, if you want a little closer to the film look, you would probably want a Black Pro-Mist 1/8. However, I do like the exaggerated effect of the stronger filters.
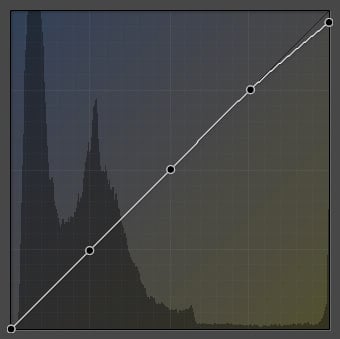
Since I typically like softer highlights and lifted shadows, I sometimes do a curve profile that is more like this.
That produces images like this.
The Nikon 35mm f1.4 also has a classic bokeh field curvature, with a shallow depth in the center and a deeper depth in the edges. Having lenses like this also helps with that classic look.

Getting the Film Color Shifts
Another characteristic of the film that we can reproduce is the random color shifts that sometimes appear, which are different from the film’s color profile. I haven’t really been able to figure out what causes this. Some of it might come from not using a UV filter, which I wasn’t using here.
Kodak Gold often shifts the highlights to a cyan or sometimes a yellow.
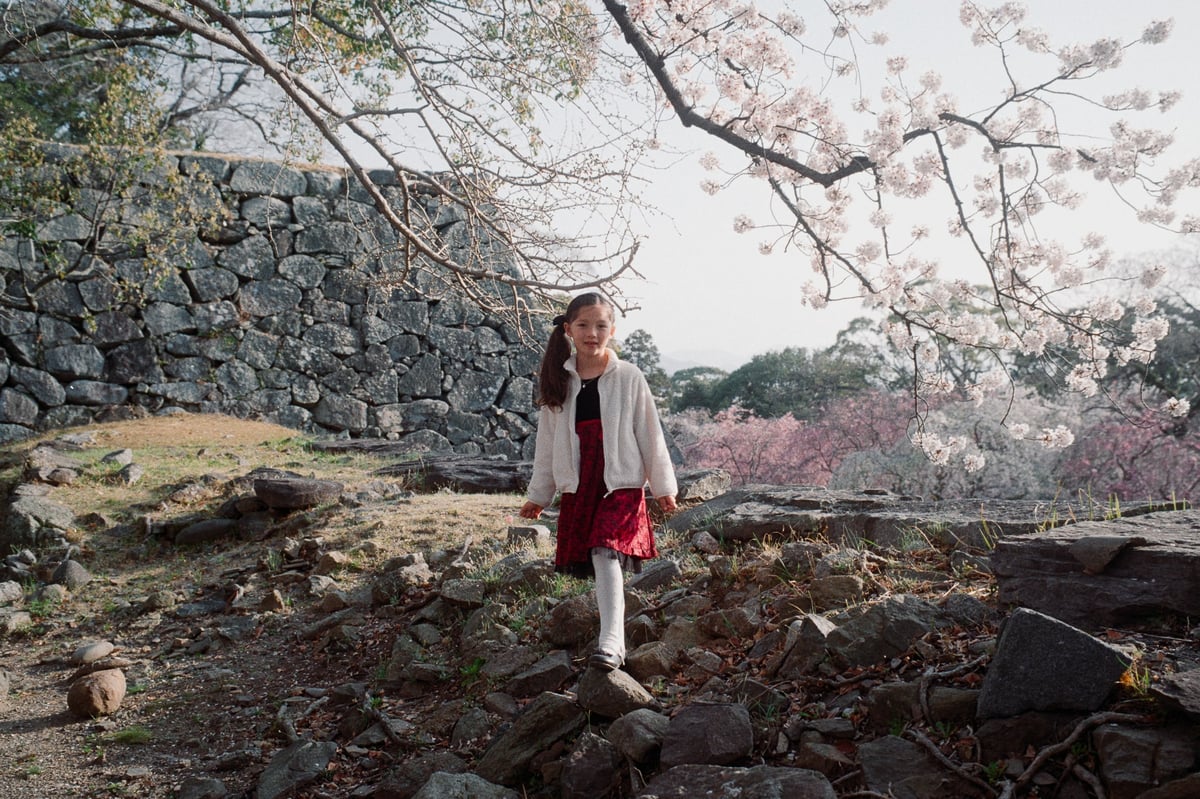
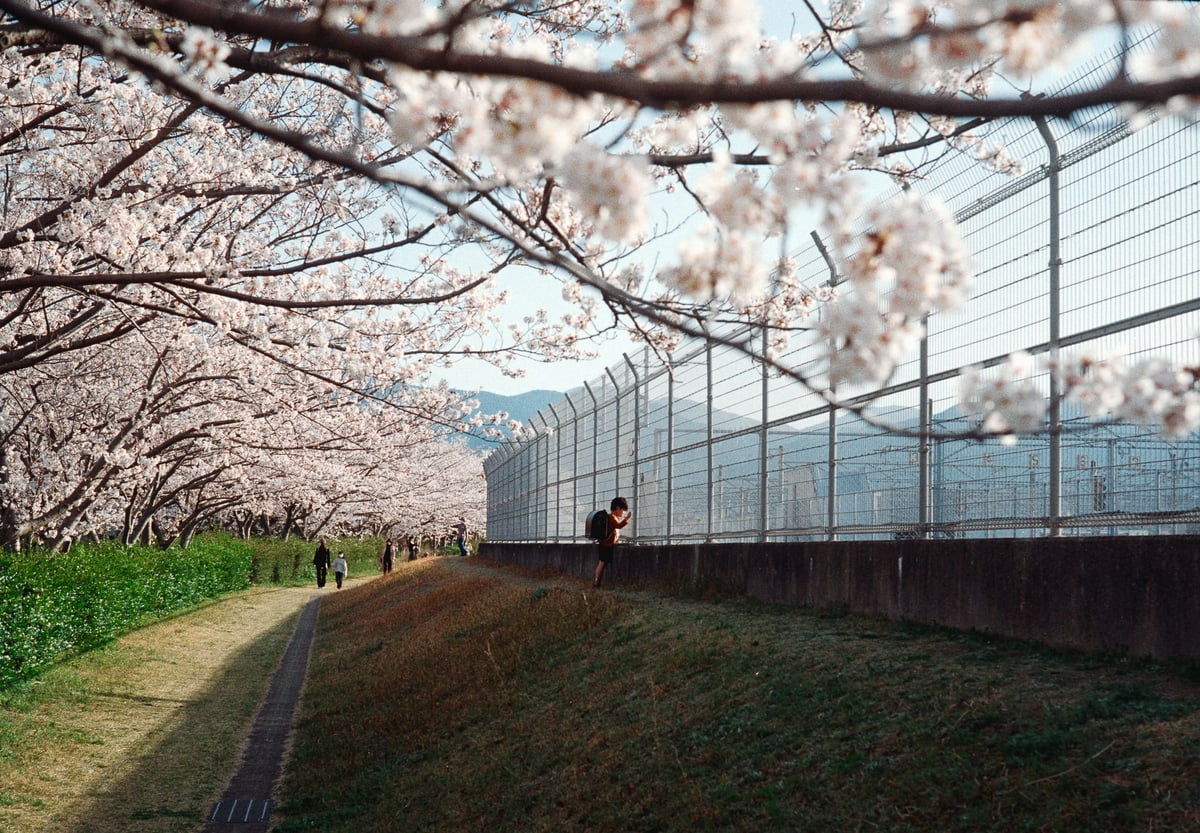
This is often why you get those minty blue skies when shooting on Kodak Gold.
Here, you can see the white in the cherry blossoms and the sky, which have both minty teal shades.
People like to use a few techniques for this classic color shift. Sometimes, they just take the Hue slider and shift the blues to be more teal.
Another option is adding a little cyan with the Color Grading wheels in Lightroom.
I don’t usually do that; I usually use the Curves Adjustment tool on the red channel and bring down the Reds into Cyan just a little bit.
If you’re not doing any other editing with the Curves tool, you’ll need to set up a few points to lock the mid and shadows so they don’t bend when you adjust those highlights.
I will adjust the blues and yellows to balance out some of the colors. Just doing Cyan is often a little too Cyan, and you’ll want to warm it up with some Yellow, just a little bit.
I’ve been doing more yellow and less Cyan; I like warmer yellow highlights these days.
Film also has a bit of Magenta in the shadows, so I’ll sometimes adjust the Red Curves to add this.

These adjustments, paired with just an image from the Fujifilm X100VI set to the Adobe Standard color profile, look like this.
On Fujifilm, you can use Classic Chrome, Nostalgic Neg, or Classic Neg if you want to pull in some of the Fujifilm color profiles to shape the look even more. Some of the Nikon color profiles, like their portrait mode, already feel very filmic, so I often use the Nikon camera profiles instead of Adobe Color/Adobe Standard.
I often use the Nikon Portrait look since it has more exaggerated warm colors.
If you don’t like crunchy shadows, you can lift them with a simple adjustment like this.
Be sure to adjust your white balance along the way. Here are a few samples of that without other editing.


So that’s the basic tonality of how to get a film look with curves, white balance, and soft mist filters. It’s super simple.
I like to do a lot more color editing, so I have many color shifts baked into my presets, where I load presets and tweak the curves and tonal adjustments to my liking.
For example, here is an edit from my Sepia looks, part of the Core collection. Of course, the greens in the background and the lighting here greatly help. Lighting and the color of what’s in the scene also play a huge role in getting the film’s retro look. We didn’t get all these hyper-bright colors in our clothing until the late 1980s or early 1990s; it was all a bit more earthen tones, something to keep in mind if you’re doing a photoshoot that you want to feel classic.
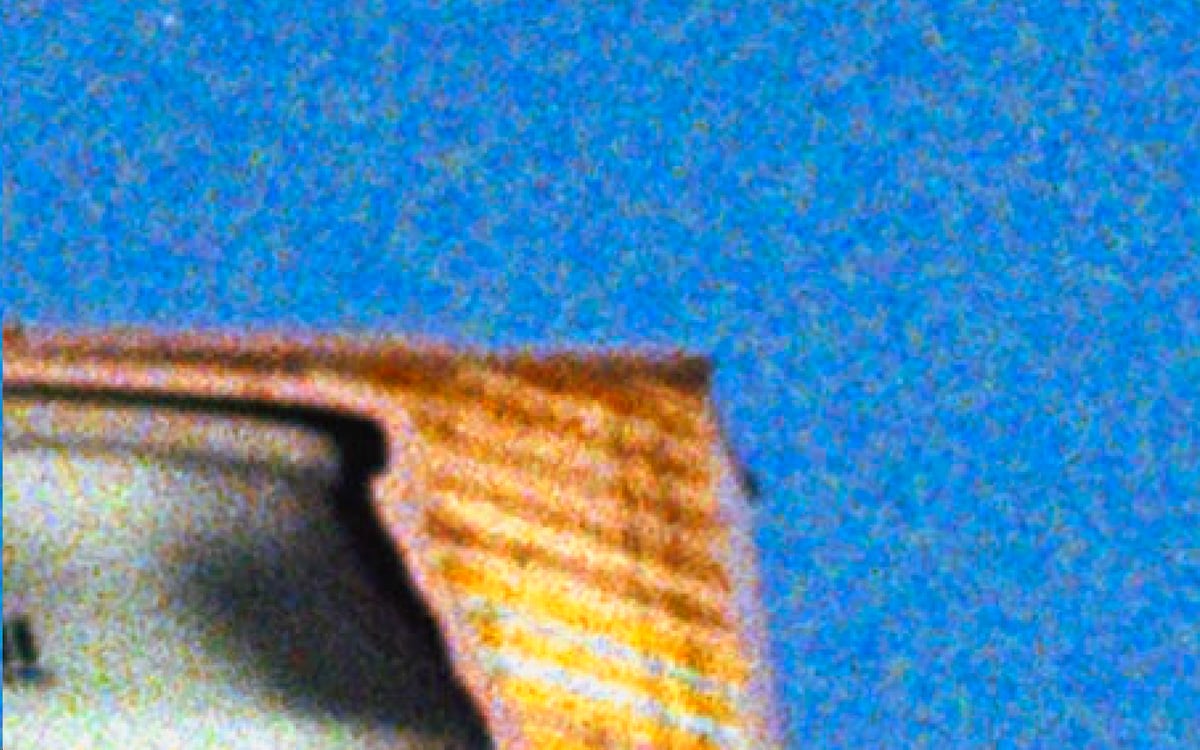
Grain Is Important
Film has a very crisp grain and a lot of it.
This is a big reason you can never quite emulate film colors with a digital camera; film colors are generally pretty dirty. Film grain is not a layer on top, but a mosaic of emulsion that makes up the color image, similar to how we interpolate RGB pixels with digital cameras.
Here is a sample at 300%
This crop is based on a scan from the Nikon Z6, which is 24MP using Kodak Gold.
Here is a sample at 100%
When dealing with film grain in Lightroom, think of Roughness as a contrast and Size as a feather. Then your Amount would be the Opacity.
Play between the Roughness and the Amount sliders will adjust the overall intensity of the grain’s presence, and the Size will play with how sharp or fluffy the individual grains feel. Increasing the size will increase the fluffiness, so increase the amount and Roughness again to make it sharper.
On the 26MP Fujifilm X100V, this setting here is pretty close to emulating the texture of Kodak Gold.

You’ll want to exaggerate the Amount depending on how intense you want the grain to look based on where you post the image.
On Instagram, you’ll need to exaggerate the grain to see it on a tiny phone screen, but I can leave the amount close to around 40-50 for something like this blog. Sometimes, I have to turn the amount slider down just a little for blog post images since I use the “sharpen for screen” option on my exports, and I only export at a max size of 2048 for Internet use.
In other words, your export and where you plan on displaying your images will affect how much grain you should add. I recommend blasting it for Instagram.
This is the grain setting above with some of my Core Sepia presets layered on Classic Chrome taken with the X100V using the Godox Jr Retro Flash (my favorite flash for the X100 cameras).

It got a little sharpened here for the screen export, but then the compression algorithms ruined it a little, unfortunately. It looks great in Lightroom.
For digital grain, I generally like to do a bit finer and sharper than what is posted here. So that would mean turning the size down, and the Amount and Roughness up a little. That’s just my personal taste.
To match the texture of the grain on your camera, download the 100% cropped image above and edit the grain on your files while at 100% or 50% if you have a high-resolution camera.
Editing Film Colors
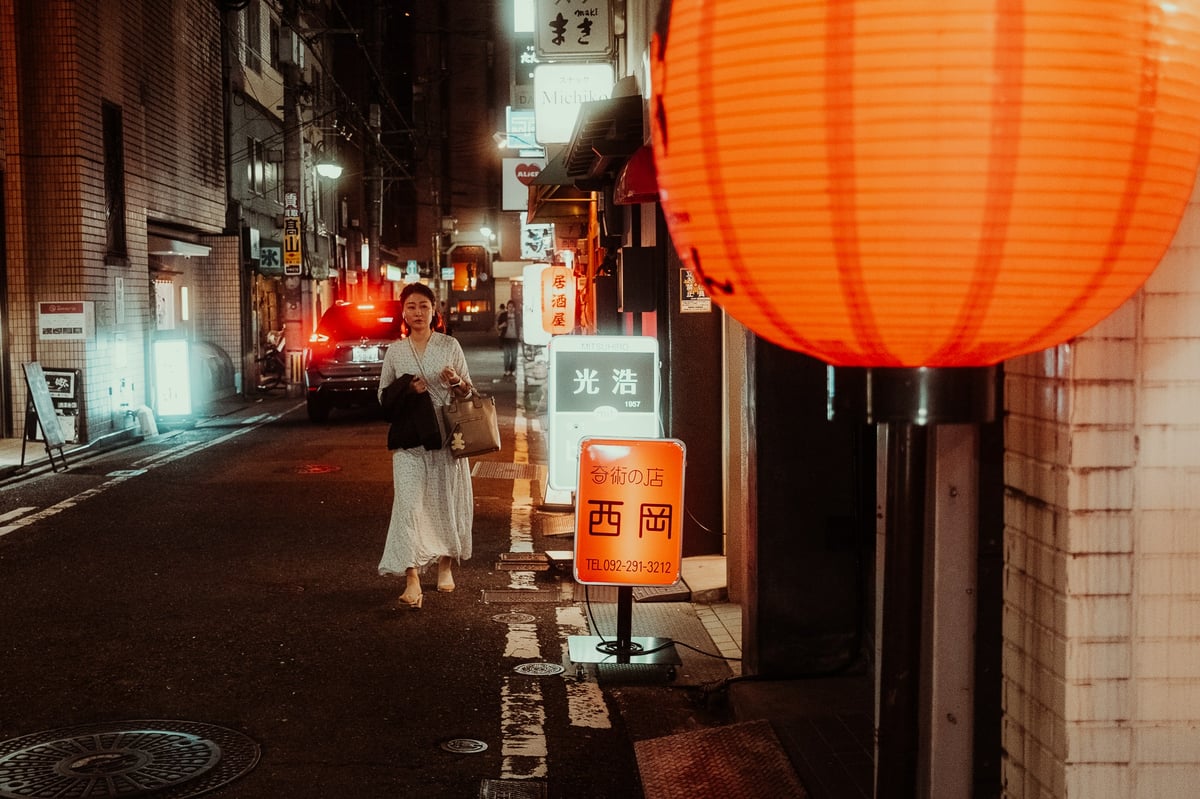
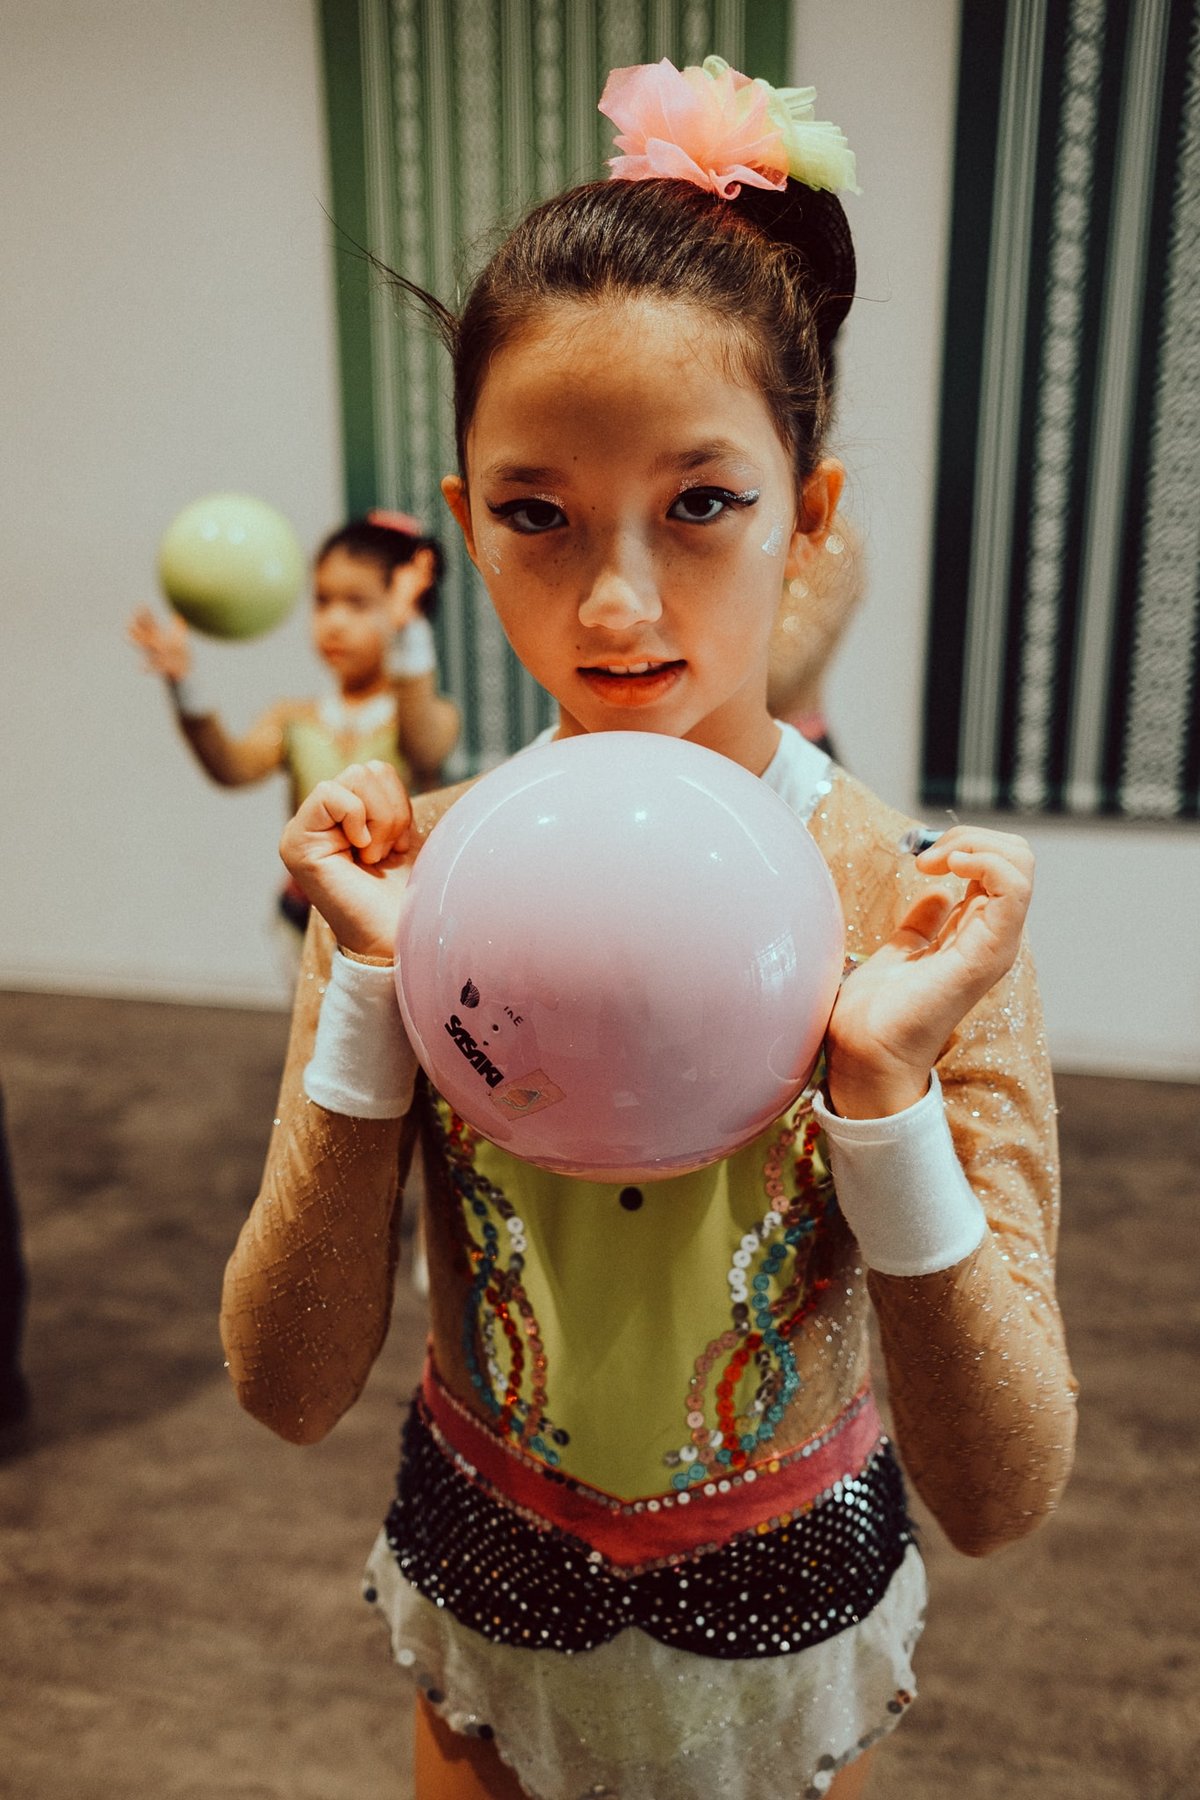
The film doesn’t always look distressed and retro, and it doesn’t always have color shifts. But it usually has a softer glow to the highlights, and different film stocks will color things differently.
This is especially true if you use nicer film stocks like Portra and especially if you’re using medium format. Other than the shadows having no dynamic range in film and crunching out, this image’s colors and overall quality look very nice.
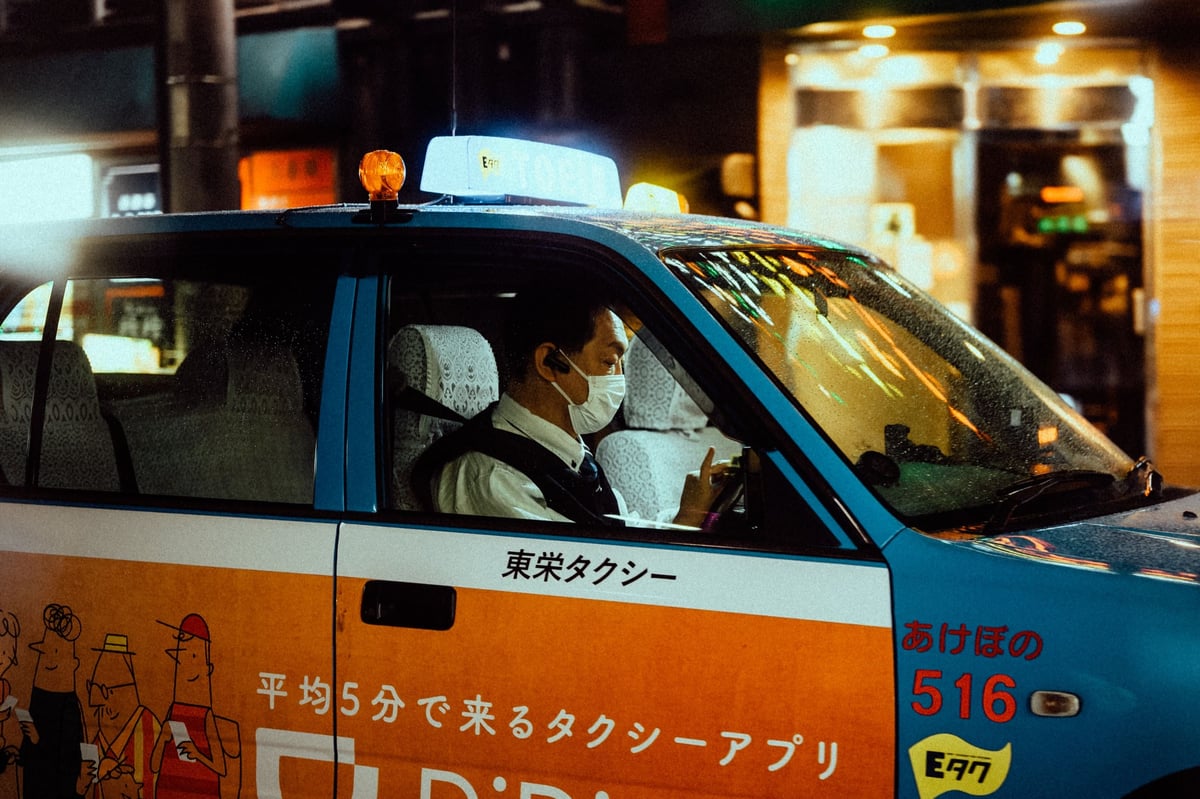
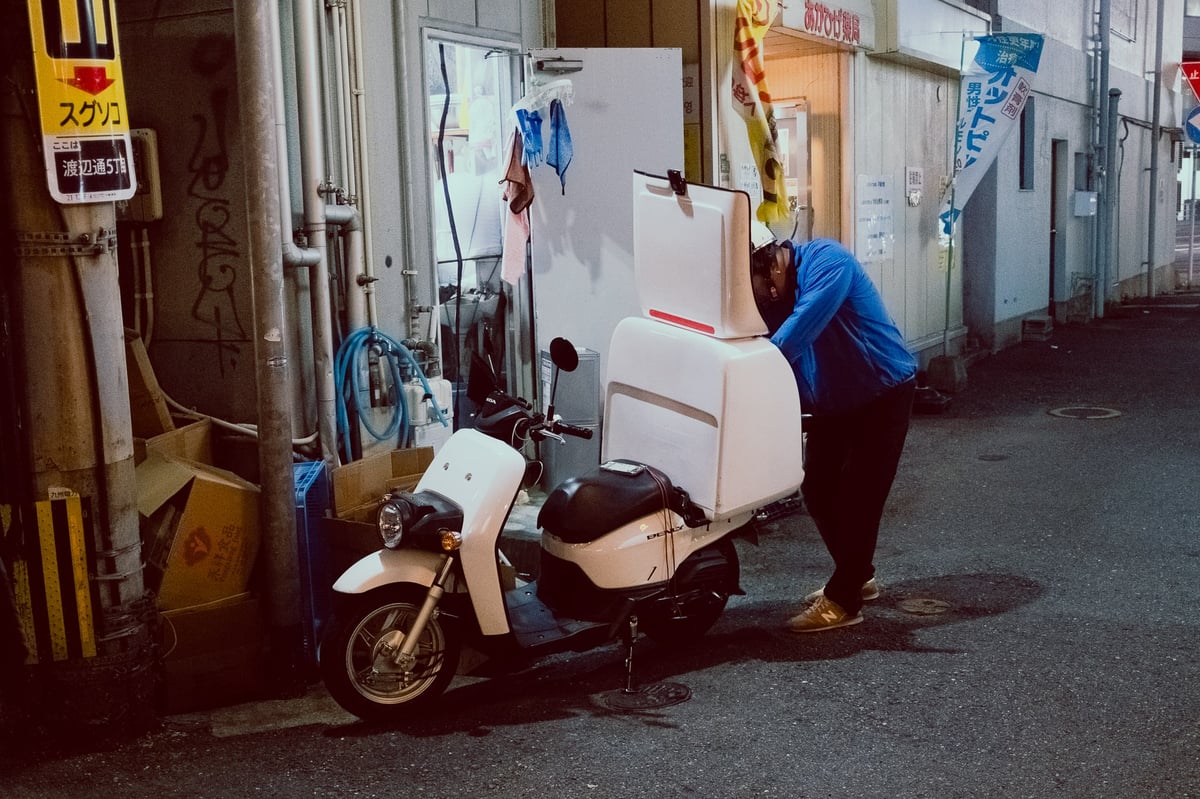
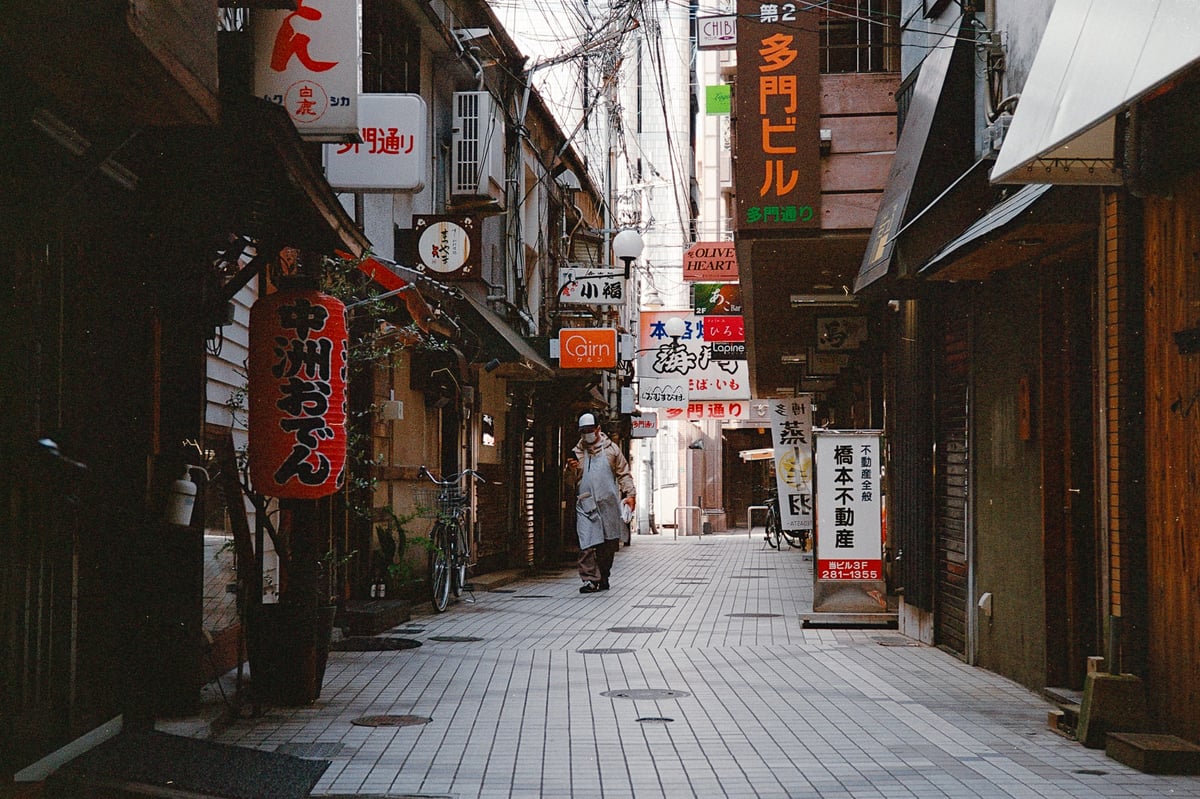
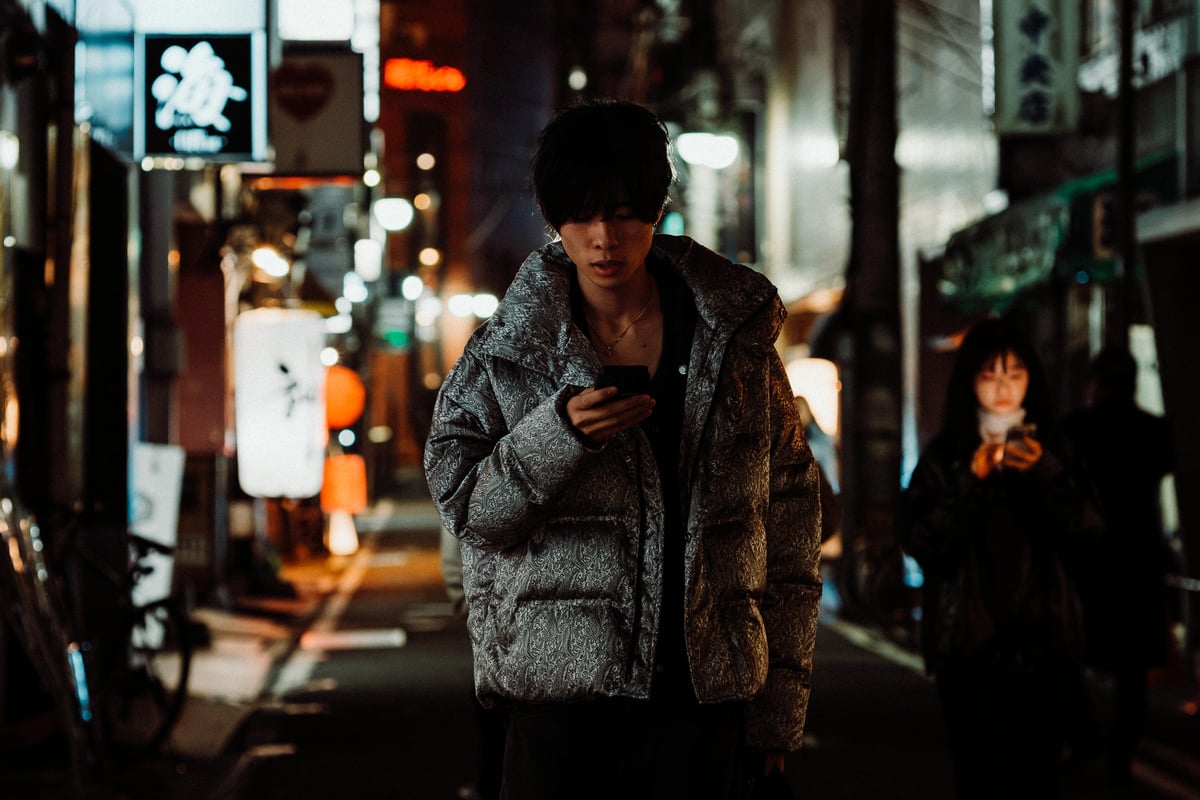
Film also shifts certain frequencies of light around in a way that digital never would. For example, the street light casts a green luminance on the scene, but the lights in the background are not green. If I shot this digitally, this street light in the foreground would not be nearly as yellow/green, but probably more of a lime green. Look at how saturated the reds are.

I’ve always felt that the different lighting frequencies tend to spill around the image more with film than digital, which makes it really hard to build presets since every scene has its own characteristics, depending on the lighting.
Using The Calibration Tool
With Kodak Gold and Ultramax, it always feels like the warmer colors are balanced more toward red. Thus, you lose those subtle color transitions between warm and cool colors. This is very hard to emulate with digital processing. I mess a lot with the Calibration tool in Lightroom to try to do this same sort of shift to reduce some of the color range.
For a Kodak gold look, you can do something like this (this is not perfect, I built this in 10 seconds).
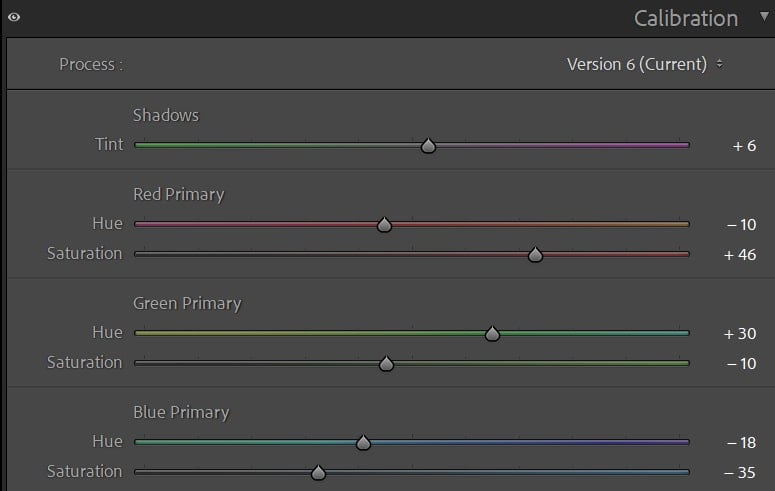
Shadows: Developed film negatives tend to come out with a brown; when you invert the colors, things turn slightly magenta. So we can add a little magenta to the shadows.
Red Primary: Warm colors in Kodak Gold and Ultramax tend to be more on the red side, and reds are very dominant, so we can push the Hue more toward red and increase the saturation (In most of my presets, I push it more towards the right, it’s a little easier to get nicer skin tones this way).
Green Primary: Greens on Kodak Gold tend to render more blue; overall, Kodak Gold doesn’t render the yellows and greens very well. So here we push the Hue to the cooler side and decrease the saturation.
Blue Primary: Blues can render well with Kodak gold, but when we think of blues, we think of skies, which are highlights. The skies with Kodak gold will often have that cyan bloom to them. So, to simulate this, we turn the Hue more towards cyan and desaturate it.
You would want to edit the HSL settings to dial in the look from here.
With just an edit to the Calibration Tool and the Curves, here is what that setting above looks like, with the same curve adjustments applied as we discussed earlier.


It’s not perfect; it’s a bit extreme, but you’d dial it in closer with the HSL sliders or reduce the effect by not pushing everything so hard as I did above.
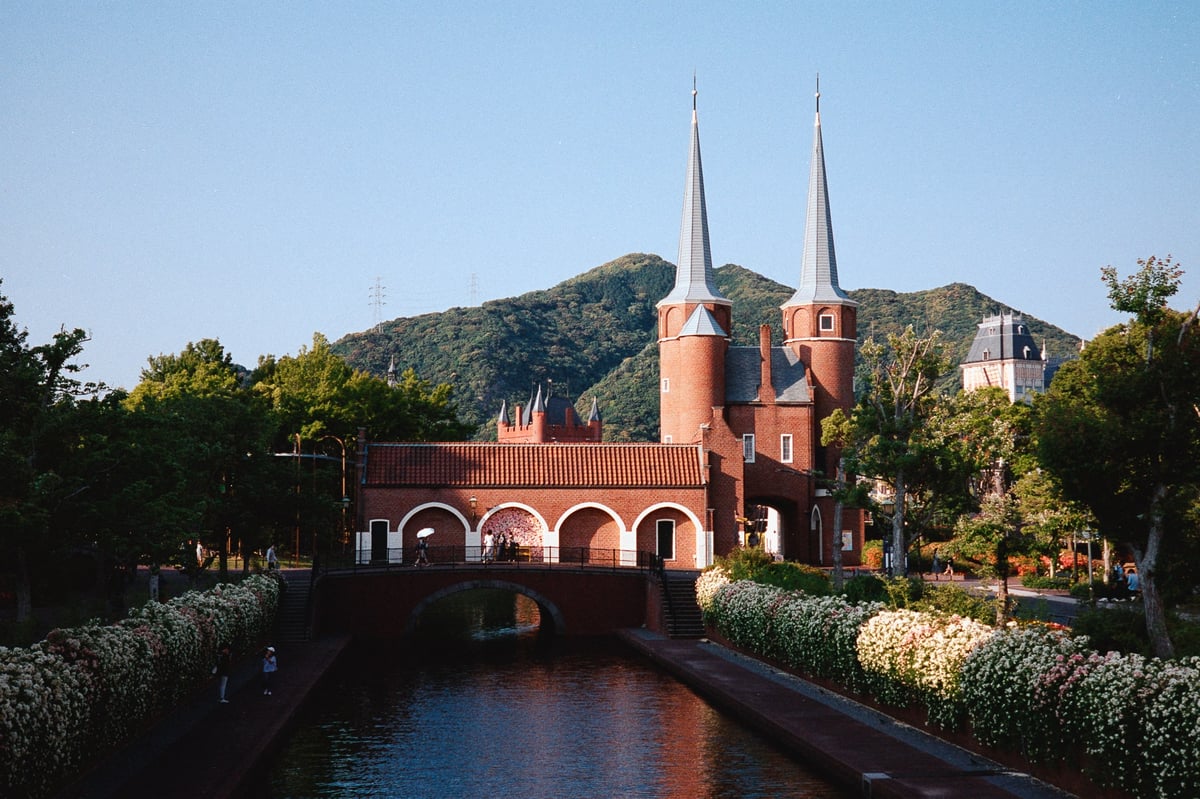
Samples of Film and How The Color Renders
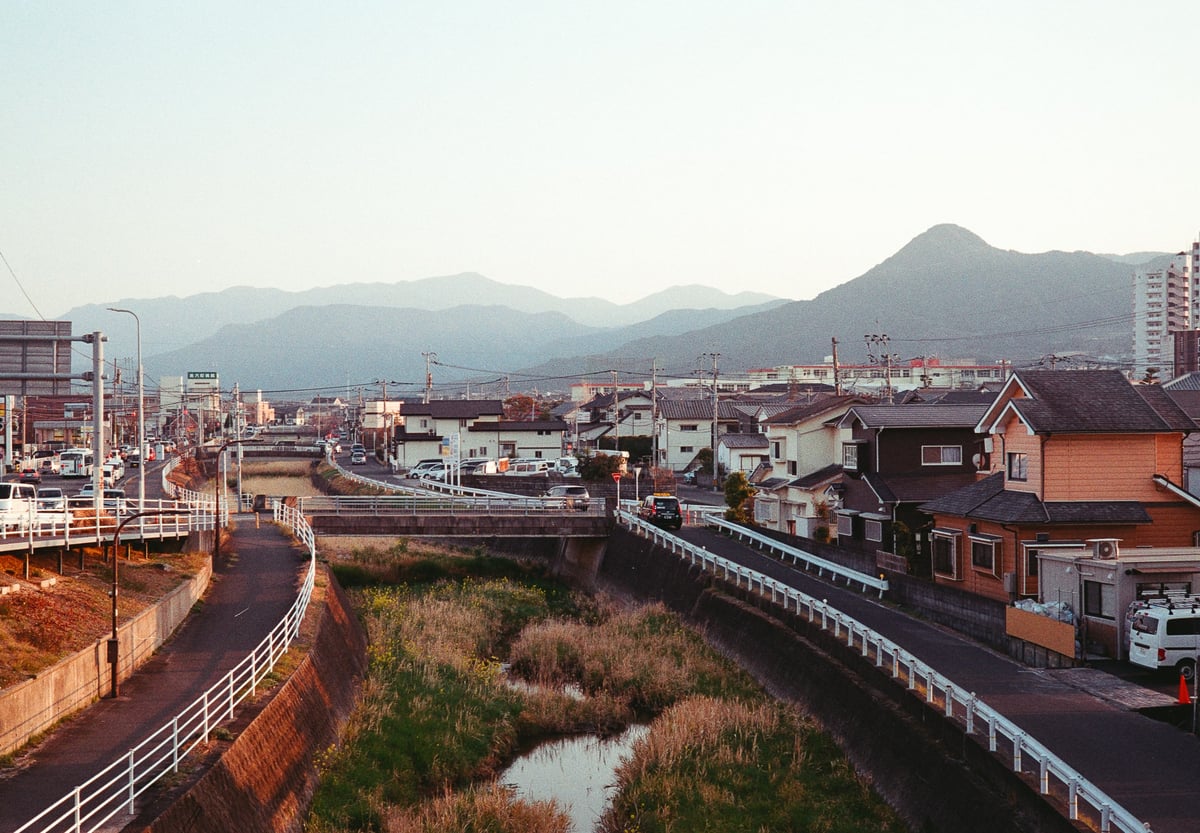
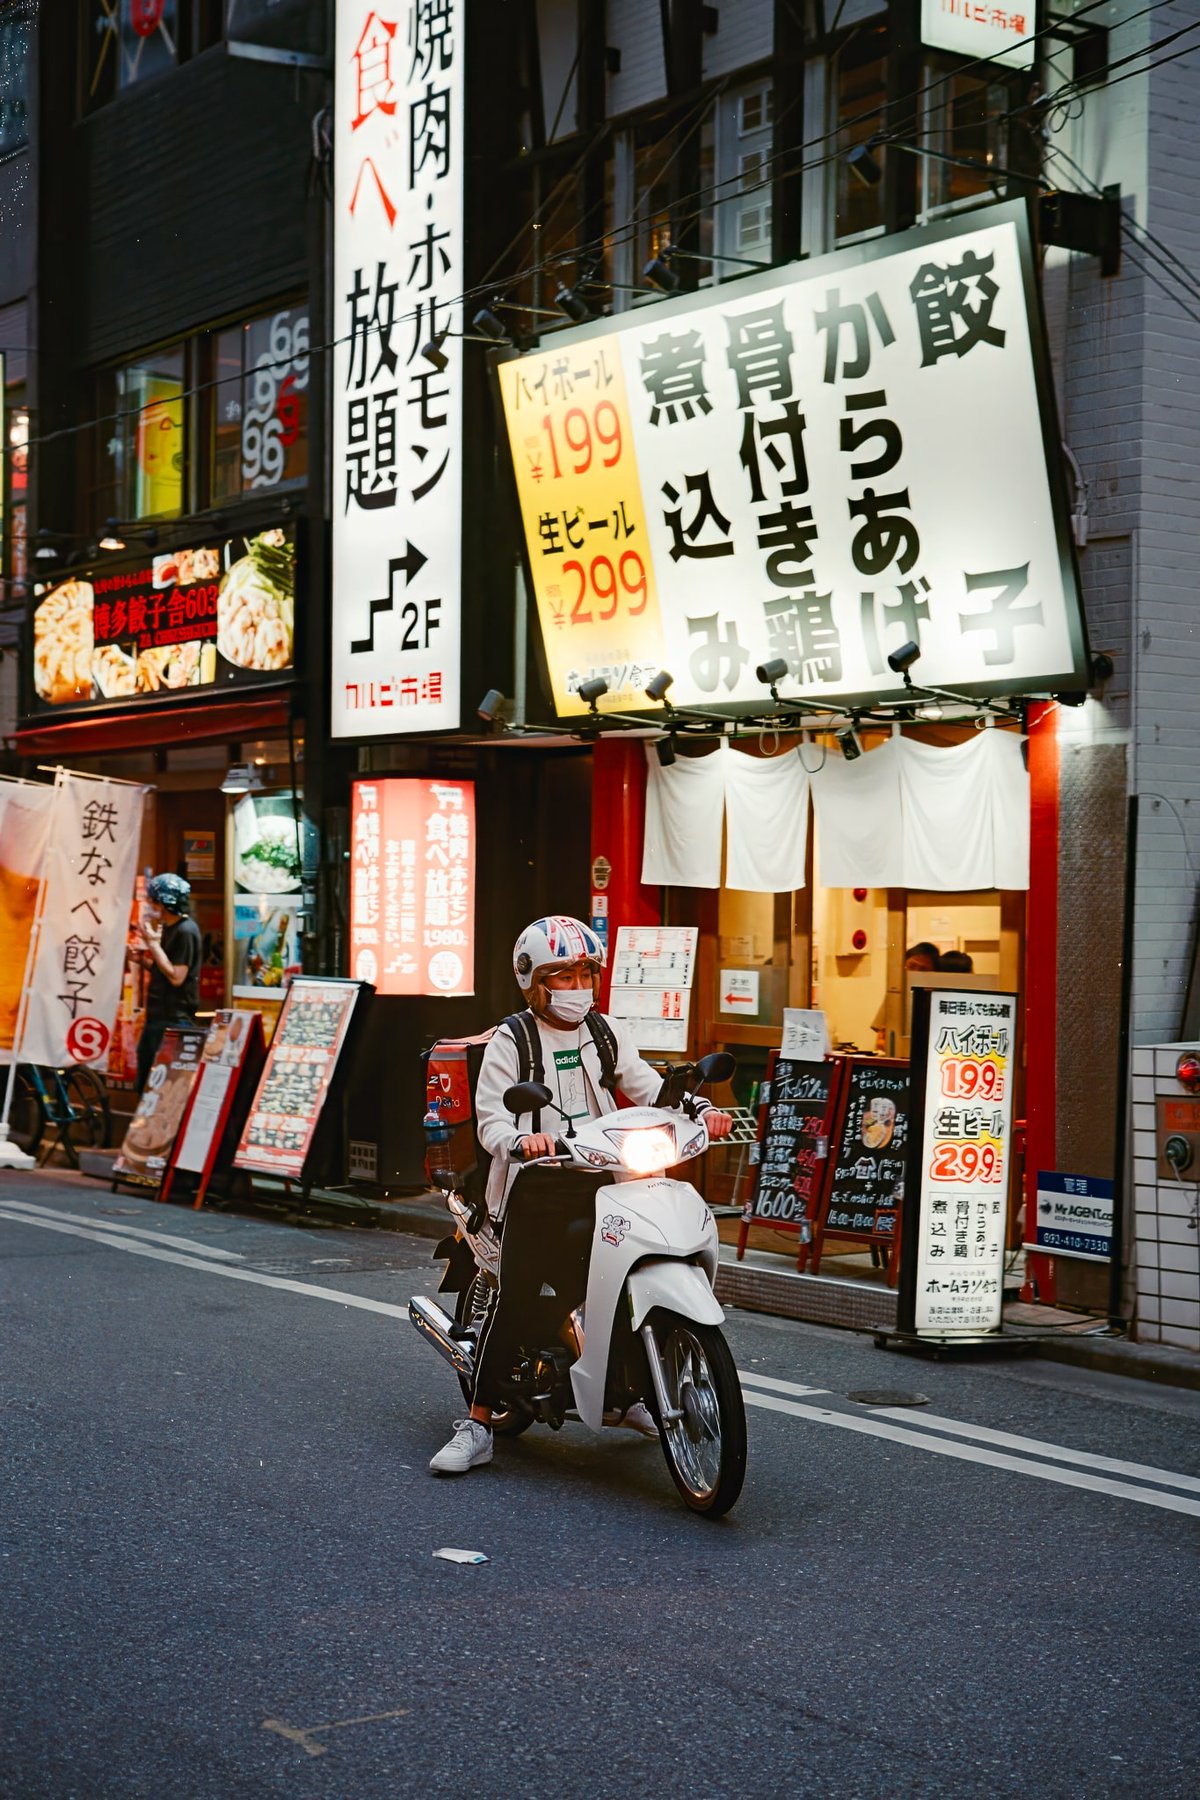
This image is from Miyazaki, Japan. It’s such a cool little city.
You can see the really dominant reds here, and the highlights have a little bit of a yellow-teal cast.
Kodak Gold typically pushes warm colors a little more toward red and cool colors a little bit more toward cyans and blues. So blues often look a bit more cyan or teal, and greens look more blue.
This is a sample with Kodak Gold where the greens are shifted more blue. There is also some magenta in the shadows.
Here is another example, shot on Ultramax. Crunchy shadows but lifted blacks. Highlights are very soft, with a little yellow, but have a very gentle roll-off. Reds again are very saturated.
Highlights are a bit yellow, oranges and yellows are pushed a bit warmer. Magenta in the shadows, and there is a subtle lift in the blacks. But some of that is from how I scan and edit.
In this next shot, Kodak Gold is doing the shift it’s famous for: magenta in the shadows with cyan highlights—the infamous orange-and-teal look. Although more Magenta and Teal. You would have to use the Lightroom Calibration tool if you wanted to remove those magentas from the shadows.
I believe that’s what the Calibration tools were originally designed for in Adobe Camera Raw: to fix Film to look more normal.


Leave a Reply to Jose Romero Cancel reply