
I see a lot of techniques floating around the interwebs on how to practice the ancient art of Luminosity Masks for landscape photography in Photoshop. I’m pretty sure most of these techniques date back to the 1990s before layer masks existed.
Adobe has recently, in the last ten or twenty years, made a lot of new and great tools for us that make our workflow more intuitive, quicker, and easier.
I will show you the compelling method I use to create luminosity masks that don’t predate the digital photography era. 🙂
The method uses Apply Image mixed with Layer Masks. You can also get this Action in my Free Panel by subscribing to my newsletter. See below.
Using Apply Image For Your Luminosity Masks
The purpose of using Luminance Masks like this is to target very specific areas of luminance in which to work.
Step 1.)
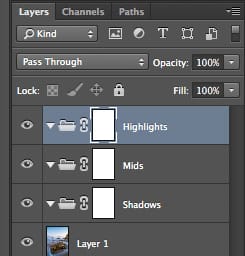
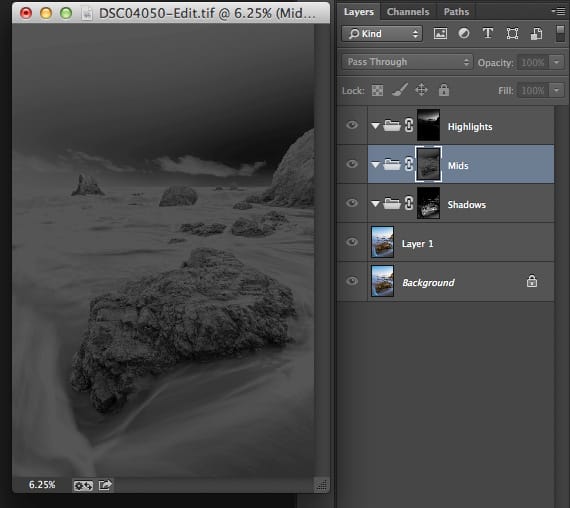
Create a few folders. For the sake of this tutorial, we’ll only use three.
Name one Shadow, Mids, and Highlights. These will be your masks.
Next, apply a layer mask to each folder.
It should look something like this.
Step 2.)
Select your Highlights layer mask. We’ll start with highlights first.
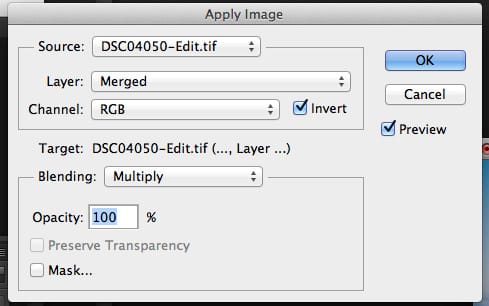
Next, go up to Image and apply an image.
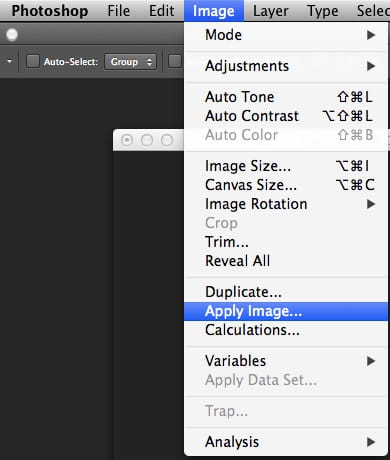
Copy the settings shown here.
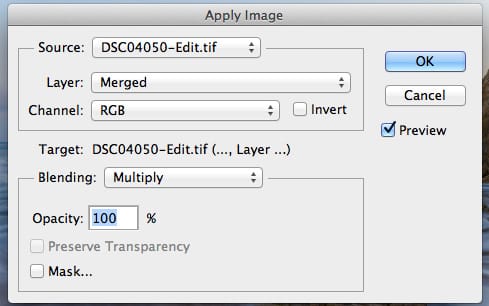
This applies the image onto the layer masks, splitting the tones.
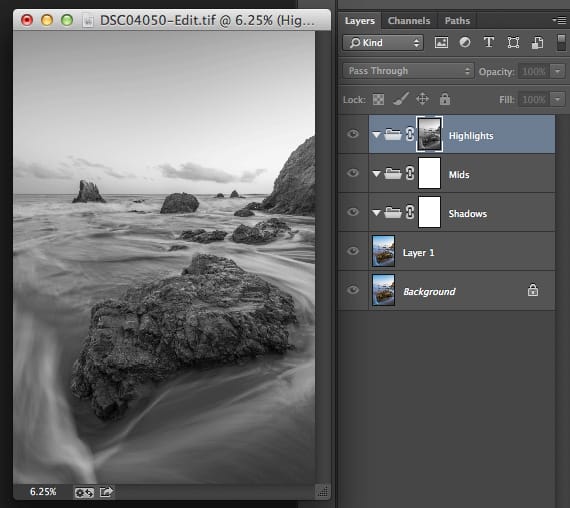
You can alt-click the layer mask to see the effect.
It sets the highlights to white and the shadows to black, so any effect you put into that folder, like the curves adjustment tool or an alternate shot from a bracketed sequence, will only affect the highlights with a nice gradient into the shadows.
This is powerful because it allows you to apply additional effects within that folder that will only be affected by the target luminosity mask.
Step 2b.)
Apply the Image a few more times to that same layer mask. The effect will stack up. Keep doing it until you’re only isolated from the extreme highlights.
I like to create a few different folders with different levels of effect to work with. But as you can see, you get a very powerful image of what you’re working with and you’ll have a nice isolated area to work in.
Step 3.)
Do the same thing on the Shadows Layer Mask, but click the invert button now.
It will apply an inverted image onto the layer mask.
Repeat until you get the desired shadow area selected.

Step 4.)
Mid Tones. This is a bonus. Select your tones layer mask, then Apply the Image once with invert unchecked and again with it checked.
What this does is it creates a layer mask focusing only on the midtones. Why would you need this effect?
On hazy days or when shooting vast landscapes, adding contrast to only your mid tones will help punch through the haze and enhance mid-tone details. Many third-party plugins have this built-in, but this is how you do it with Photoshop Vanilla.
That’s it. Now, add any effect you wish to those folders, and they’ll only affect the image within that preset luminance level. For instance, you might want to punch the saturation only on the highlights since that’s how saturation works naturally. Or you might want to drop the exposure slightly on only the brightest area. Or you might want a different color shift from your highlighted region to your shadows, which is how light falls off naturally in the real world.
Work all that into an action, and you’re good to go.
Using Blending With Underlying Layer
Another trick that won’t work with folder group but will work on a single instance is found in your blending options.
An excellent example of when to apply this method is if you’re taking a landscape photo and you shoot a second shot with a darker exposure to capture only the skies. You can quickly Alt-click on that layer to bring up your blending options.
Then, hold down Alt and drag out two underlying layer settings. Copy my settings here.
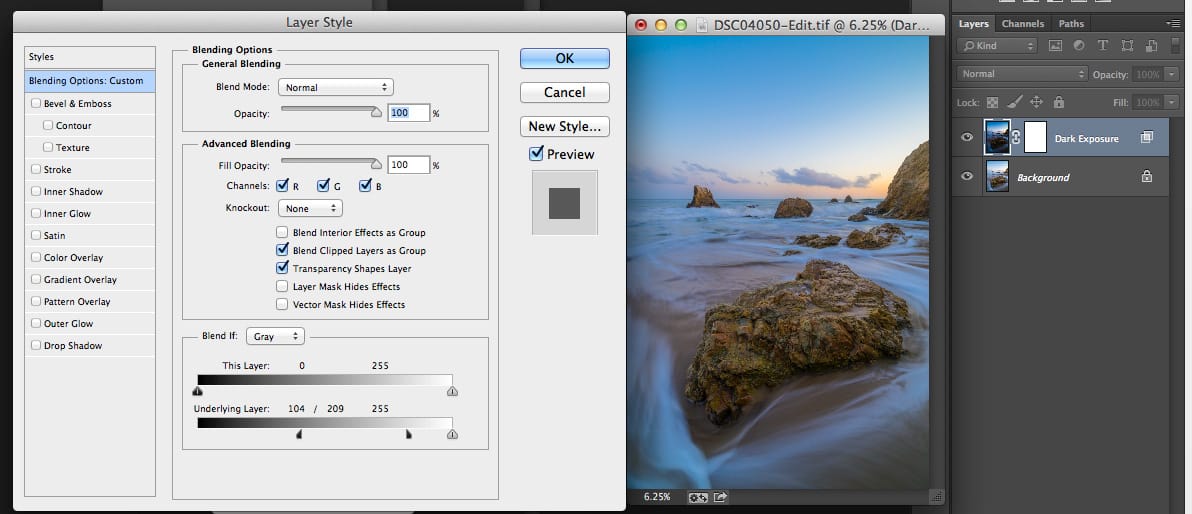
This creates a luminosity mask on the fly that is completely user-controlled.
You can adjust the darkest visible area and feather into the highlights by breaking the two control points to create a smooth and gradual effect.
This is great for use with curves, saturation, or other tools where you want precise control over areas of different luminance. You can always add a layer mask on top to tune further.


Leave a Reply