Some sunsets or scenes are so amazing that they don’t need much post-processing. I’ve spent days on some shots, and minutes on others. This shot was quick and easy to process, and I’ll show you the tools I used.
I have different techniques for processing my images, depending on the quality of the shot and how I feel.
For this shot, I used Color Efex Pro 4 and Lightroom, and I’ll explain how I combined them to process my landscapes. This technique is very effective for creating beautiful landscapes with minimal effort.
Behind The Shot: Santa Monica Nights
As a Fujifilm shooter, you always have two compelling routes to take when it comes to shooting your photos: RAW or JPEG. I’ll begin with RAW, which is what I use for landscapes with my Canon or Sony. JPEGs are only on my Fujifilm because it’s the only camera that makes them look superior.
Getting The Shot – The RAW File
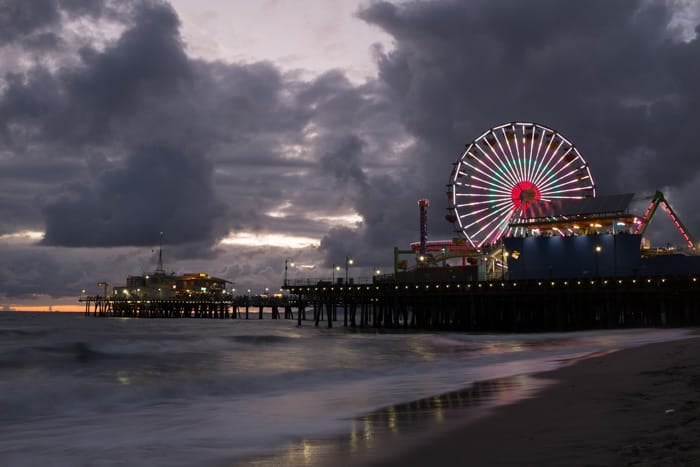
This is the RAW file in Adobe Photoshop with the default Adobe Standard color profile. It looks awful and nothing like the real scene.
I used a tripod and set the camera to ISO 200, f11, and 1-second shutter.
I always shoot landscapes in RAW or RAW+JPEG for more color and detail.
This shot is a bit dark, but that’s fine. The pier will look better dark in the final image.
I usually bracket my shots by ±2 stops in one direction. I did that here, but I only used the dark shot. I liked the water, and the highlights were not overexposed. I could use a lighter shot to brighten the pier, but that’s too much work and unnecessary for this scene.
If I used an older camera like a Canon 5Dmkii, I would not overexpose or underexpose but bracket both ways. Sony A7r, I bracket just in case, but I often only need one direction. I would expose the image correctly, then take another shot for the highlights or shadows. I think the Sony would also work with one exposure because it has a good dynamic range.
First Adjustments In Lightroom
I like Lightroom for its great organizing features, but I recommend trying Iridient Developer to process your Fujifilm RAW files. Lightroom has gotten much better over the years, so I’m not sure which one comes out on top.
Iridient used to be specially designed for the Fuji X-Trans CMOS II sensor, which has a unique color pixel pattern that captures color more accurately. This makes the images from Iridient sharper than other programs.
Adjusting Tones
With Lightroom, I start by just making a few simple adjustments. This includes basic tonal and curve adjustments and changing the camera profile to Velvia/Vivid.
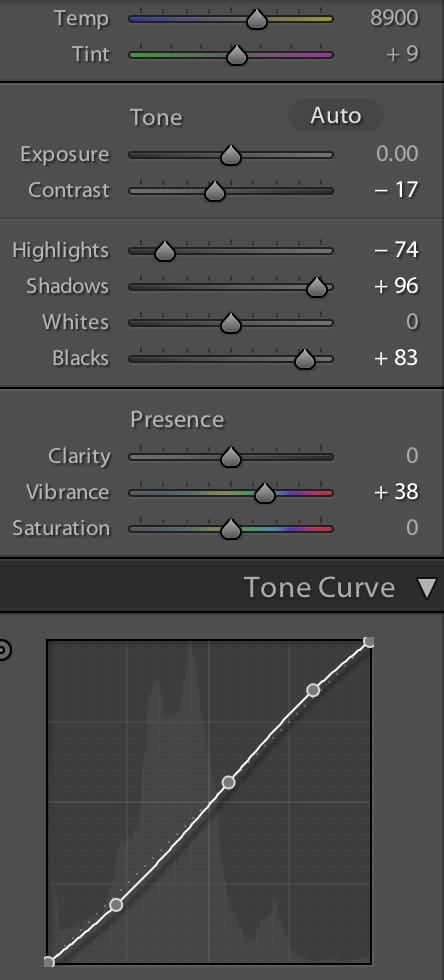
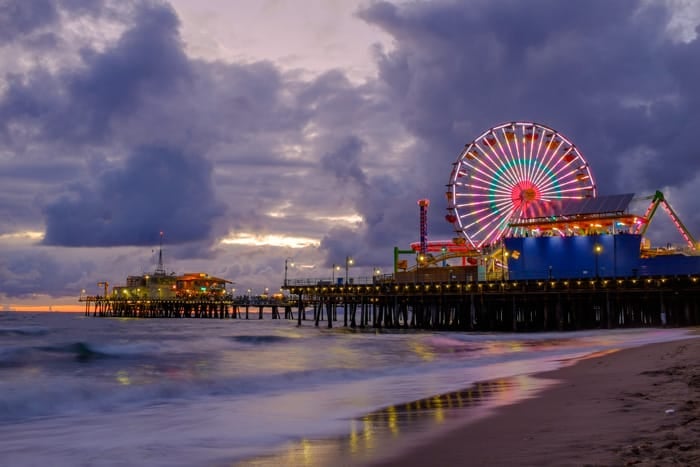
My goal is just to get the image to look tonally stable and correct. I’ll be styling it later. It’s still a little dark but that’s fine.
The image now looks like this.
Run It Through Color Efex Pro 4
Next, I exported to Color Efex Pro 4 and loaded a Recipe.
My basic recipe includes Polarization, Remove Color Cast, Pro Contrast, and Detail Extractor.
Occasionally, I’ll use Sunlight.
Here are the settings I used on each.
Polarization
Polarization is a nice tool to use on your skies. It will shift around the colors and contrast slightly like a polarizer would. It seems to focus mostly on the highlights. It’s not a huge difference, but it can sometimes help to make your clouds pop out a little from the blue skies.

Remove Color Cast
I didn’t need much on this shot and oftentimes don’t use this since I like where the colors are already. But if you get a strange cast in your shot, this is a great neutralization tool.

Pro Contrast
This photo editing tool is one of my favorites. It is the best one I have ever used. It has a feature called Correct Color Cast that can adjust the colors of your shots when they are off or have weird tints.
Another feature is Correct Contrast, which is similar to the usual contrast tool but does not ruin the image quality or make it too saturated. It enhances the contrast in a balanced way.
The last feature I want to mention is Dynamic Contrast. It is hard to describe, but it makes the image more vivid and sharp. It has a significant impact on the image.

Detail Extractor
This feature is a bit mysterious to me, too. I think it uses tone mapping and high-pass sharpening to enhance the image.
It makes the details more crisp and clear. I use it sparingly and cautiously because it can also amplify the noise in the image.

Color Efex Pro has enough tools and filters to finish your entire shot without leaving the software. I just find the Lightroom sliders and gradient filters much faster and easier than Photoshop. Because of this, I almost always use Lightroom to finish my shots.
The image now looks like this: it is a little saturated, and the contrast is a little crunchy, but way better than what the scene originally gave me.
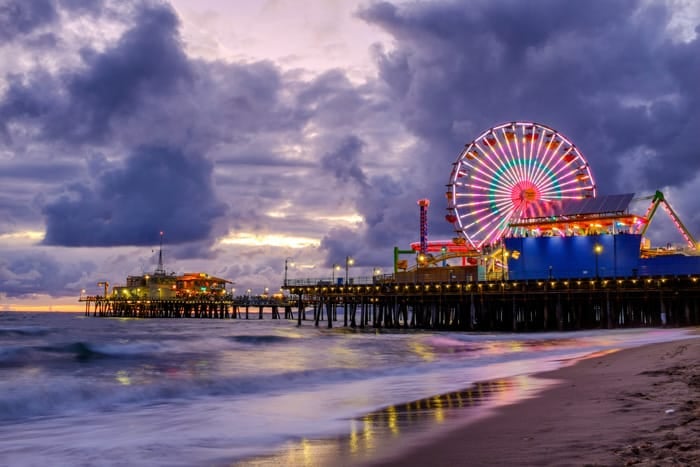
Final Adjustments In Lightroom
This is where I style the photo. I again adjust the image with basic adjustments and the tonal curves. However, this time, I also use the Gradient Filter and Adjustment Brush to control the scene’s mood.
Gradient Filter
I start with the Gradient Filter to make the foreground darker, more contrasted, and slightly purple. This adds depth to the image. Then, I reduce the contrast and clarity in the sky and make it lighter blue. Finally, I use more gradients to darken the edges and create a vignette effect. This draws attention to the sunset in the center.

Adjustment Brush
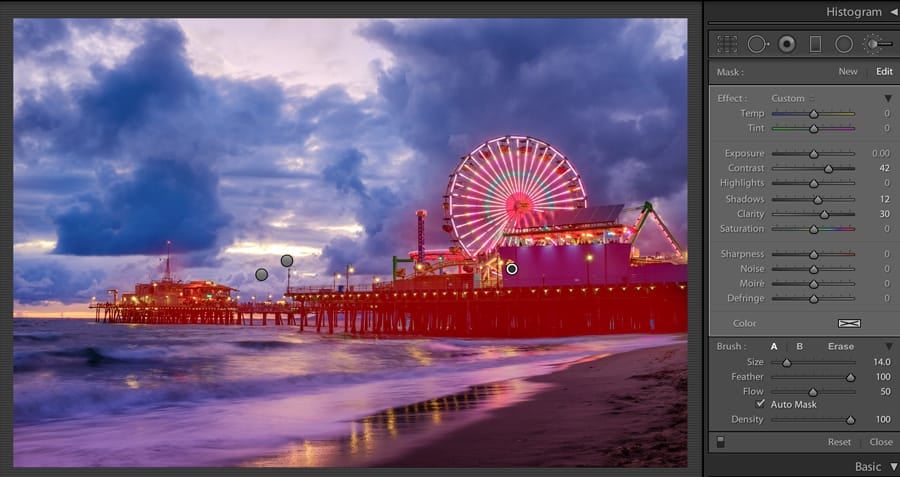
I use the adjustment brush to make the areas of focus clearer. I set the clarity to +30 and painted over them. For this photo, I did that for the pier.
I also added some more color to the sunset with the brush. Sometimes, I use the brush to change some areas’ contrast, exposure, or shadows. This can create a dodge-and-burn effect. It can also help to make the shadows less saturated, which is more realistic. I didn’t do that for this photo.
I use the brush for most of my photos. I usually adjust the clarity, contrast, or dodge and burn.
Split Toning
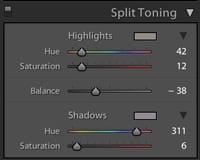
I used split toning to add some color to the image. I made the highlights orange and the shadows purple. A good trick for fixing overexposed highlights in the sky is to use split toning. Choose an orange or yellow tone for the highlights and move the balance slider to the left. This will color the bright areas and make them look less white and more glowing. It will seem like you meant to do that.
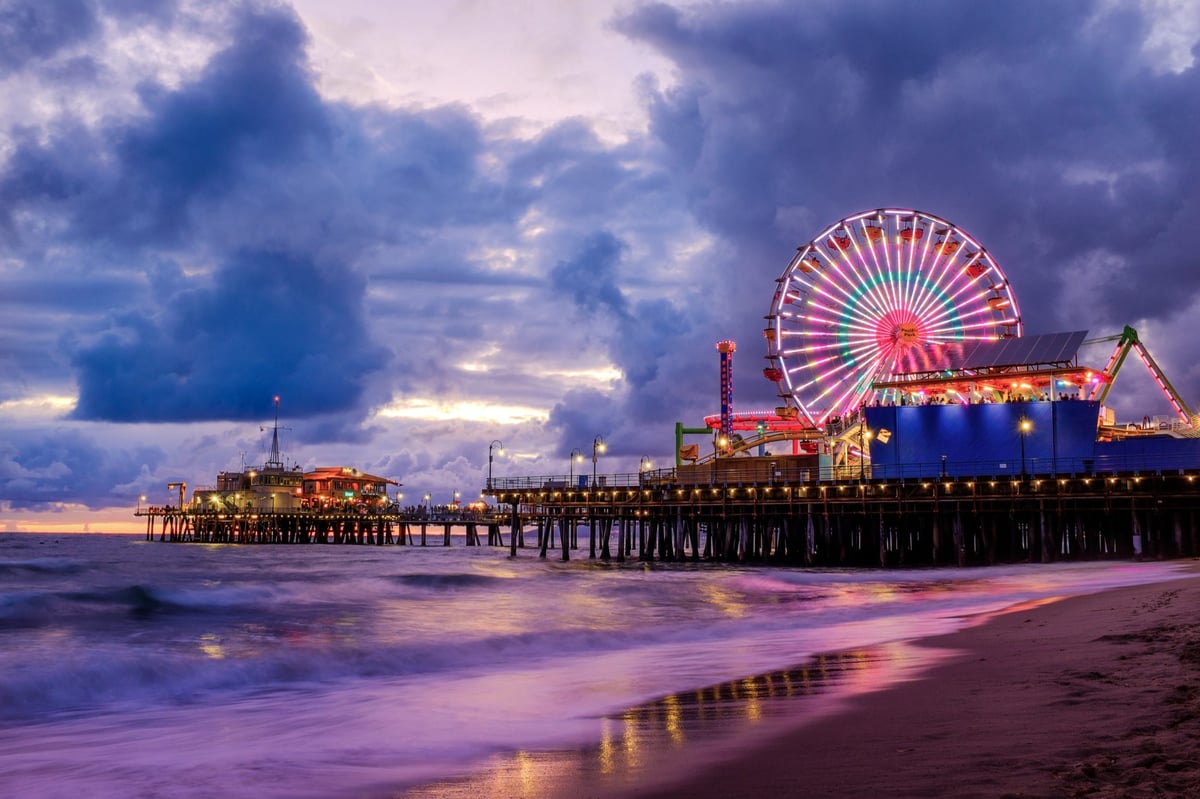
The Final Shot looks something like this.
Method #2 Using The JPEG
Fujifilm shooters know that the JPEGs from the camera are amazing. If I don’t need the RAW’s dynamic range, I use the JPEG for easier post-processing. The colors and contrast are more realistic, and I can get a beautiful image with Lightroom only.
For landscapes with Fuji X100T, I set the camera to RAW+JPEG and Velvia/Vivid profile. I use these settings: Highlights +2 Soft, Shadows 0, Saturation -2.
Then, I skip the first two steps and do the final Lightroom edits.
This is the JPEG image with Lightroom only.
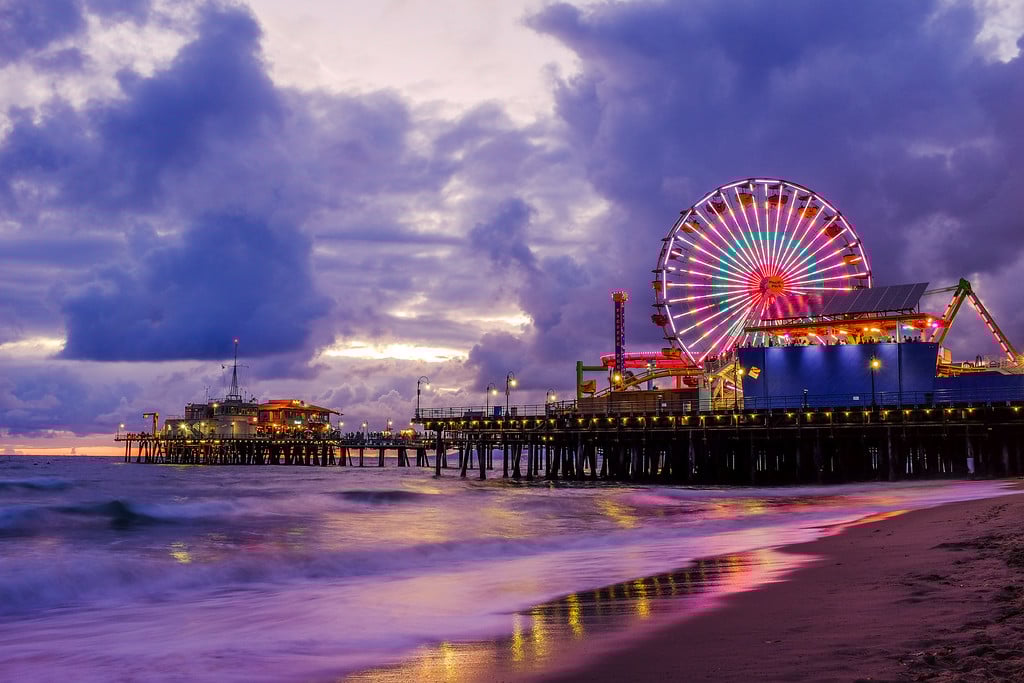
I prefer the JPEG; it was a lot less work to make it look great.
A Little About Color Efex Pro 4
This program is amazing. It may not suit advanced Photoshop users, but it is perfect for enthusiastic amateurs who don’t want to spend too much time learning Photoshop. I highly suggest you try it with Lightroom. I am an advanced Photoshop user, but I still use this program often and for a long time.
I wrote a Color Efex Pro review a while ago. You can look at it if you want to learn more.



Leave a Reply