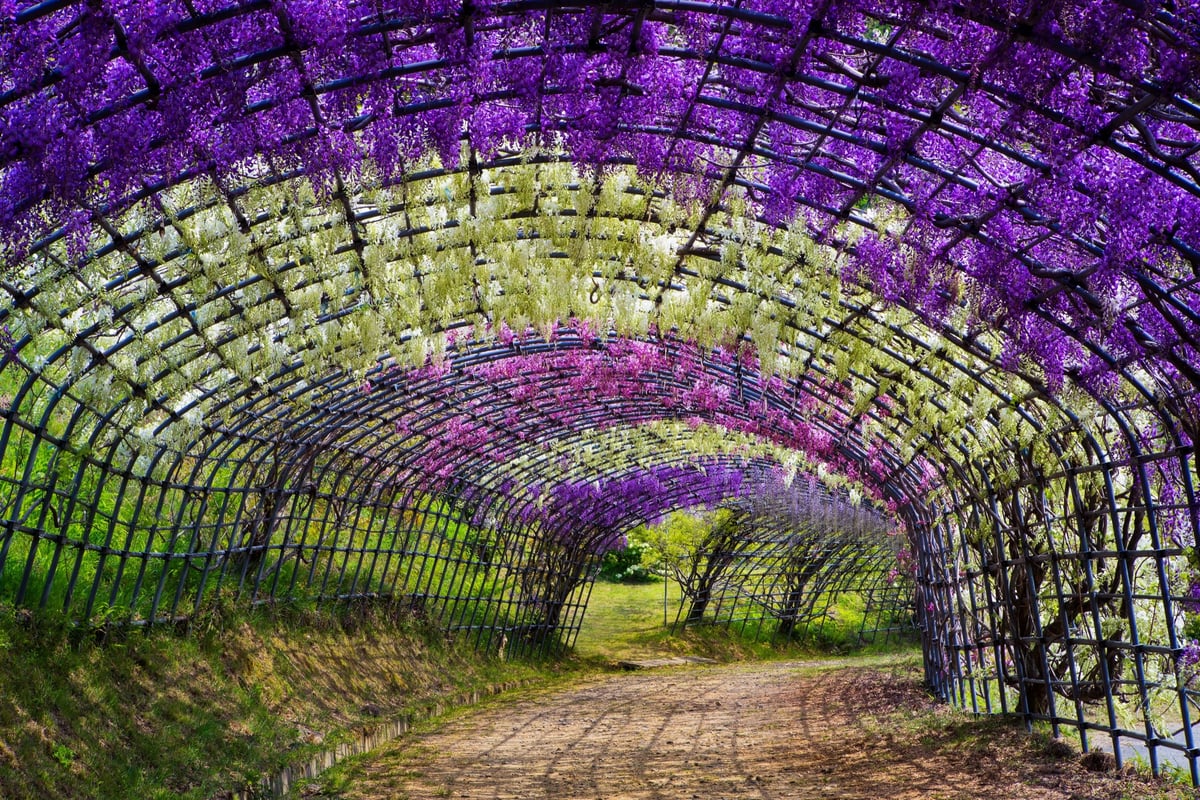
The Kawachi Fuji Garden is one of those hot spots/places to see before you die in Japan.
This location has two tunnels, a dome, a small trail, and an additional Fuji flower rack. It is pretty cool and very photogenic.
Although I was about a week early to get the full Fuji flower blast, the location was still wonderful.
The only problem is that places like this are often very crowded in Japan, especially in the spring. So, shooting around the crowds can be difficult and require more work. In this case, it took shooting several shots that I then combined to get one clean, people-free image.
It’s a simple process and can save your shot when traveling to those crowded locations.
Behind The Shot – Shooting The Kawachi Fuji Garden Of Japan
When I first started shooting at the Kawachi Fuji Garden tunnels, I thought of an ultrawide 14mm. However, the low density of the Fuji flowers from being a week early only accentuated the lack of flowers. By the time I switched to my 24-70mm the crowds had swarmed in and I couldn’t catch a break.
I waited for maybe 20 minutes, hoping it would clear up, but it never did, so Plan B,
Shoot several shots and blend them in Photoshop.
The Shoot
On a tripod, I took a series of shots filled with people, trying to keep a mental image of where people were or were not standing.
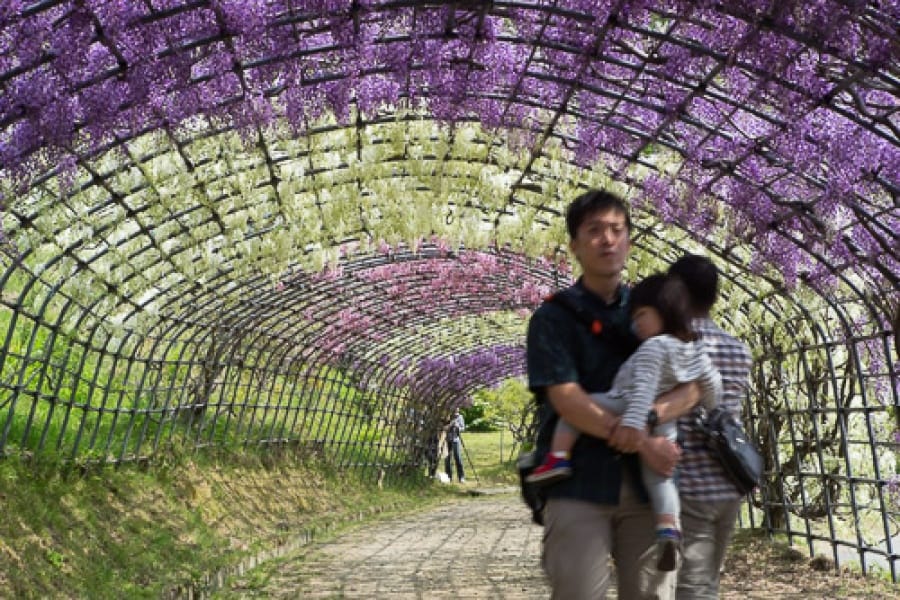
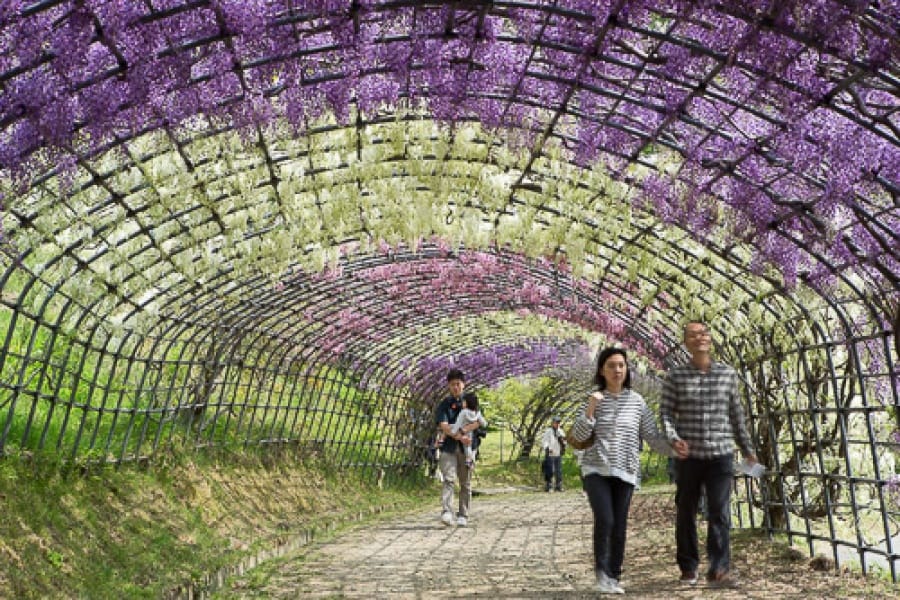
However, some other photographers camped out at the end of the tunnel during the process, and they would not budge.
So, my wife kindly asked them to move over a few feet for a few minutes to get the final piece I needed.
By the way, my wife is fantastic. I would have just waited them out; it could have taken forever.
Combining The Shots
The final shot only took me a total of 4 images.
I layered them together in Photoshop and used layer masks to paint the areas I wanted.
Some of the shots fell under shadows from clouds, so I had to lift them separately with the curves adjustment tool. And because I used layer masks blended with the brush tool, I could feather the tiny differences between shots without them being noticeable.
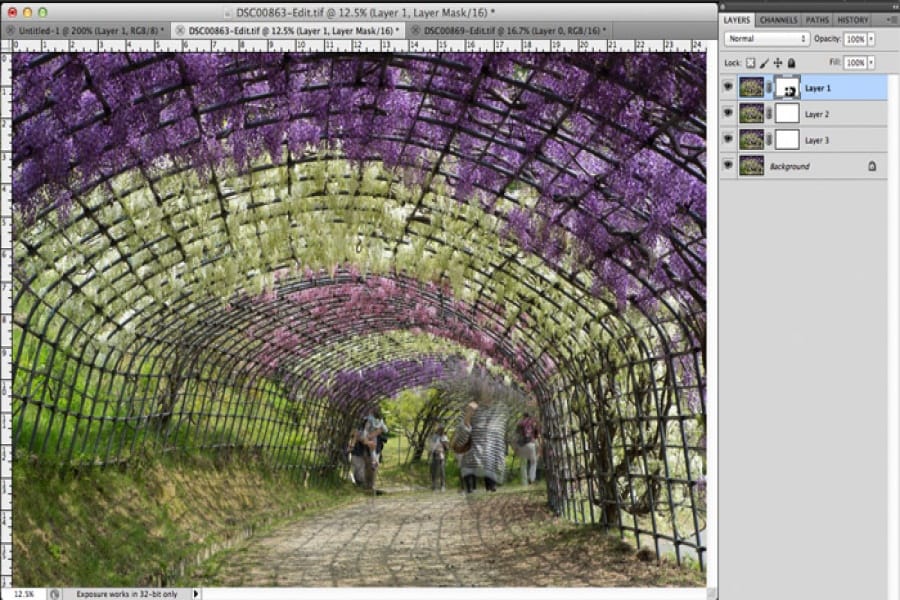
By the end, the only part I had to clone stamp was part of a tripod leg and one of those photographer’s feet.
Once that process was done, I processed the image as usual. In this case, it was mostly just some curves and saturation, all entirely in Photoshop.
I used Lightroom to do my final exports and fill in my metadata.
The Photo – The Fuji Tunnel
Camera: Sony A7r
Lens: Canon 16-35mm f2.8
ISO: 100
Aperture: F16
Shutter: 1/10
Date Taken: 4-26-2014

Leave a Reply