
If you’ve switched over from OSX to Windows and you’re looking for an image compressor as good as ImageOptim or if you’re a Windows user and just need a great free image compressor then there are only a few free options – Caesium Image Compressor and Riot.
What Makes ImageOptim so great?
If you’re a Mac user and a blogger you should be using ImageOptim to compress your images for the web. It is the best image compressor for Mac and it even works as a droplet. It does Lossy compression for JPG which you cannot do with Lightroom or Photoshop. You also have the option to preserve all the metadata for your copyright or EXIF data. This gives you the most efficient images for web viewing for Photographers or Bloggers who run their own sites.
The Best ImageOptim Alternatives For Windows
I’ve tried a ton of programs and combed through a million crappy spam websites to try to find the best options, and still, I came up empty-handed. Finally, I asked chatGPT, “I need an alternative to ImageOptim for Windows, it has to be free and has to do lossy compression.”
It gave me four answers, two were no good since they were command prompts for sweaty deep on the spectrum Windows geeks. But the other two worked great – Riot and Caesium Image Compressor.
Caesium Image Compressor
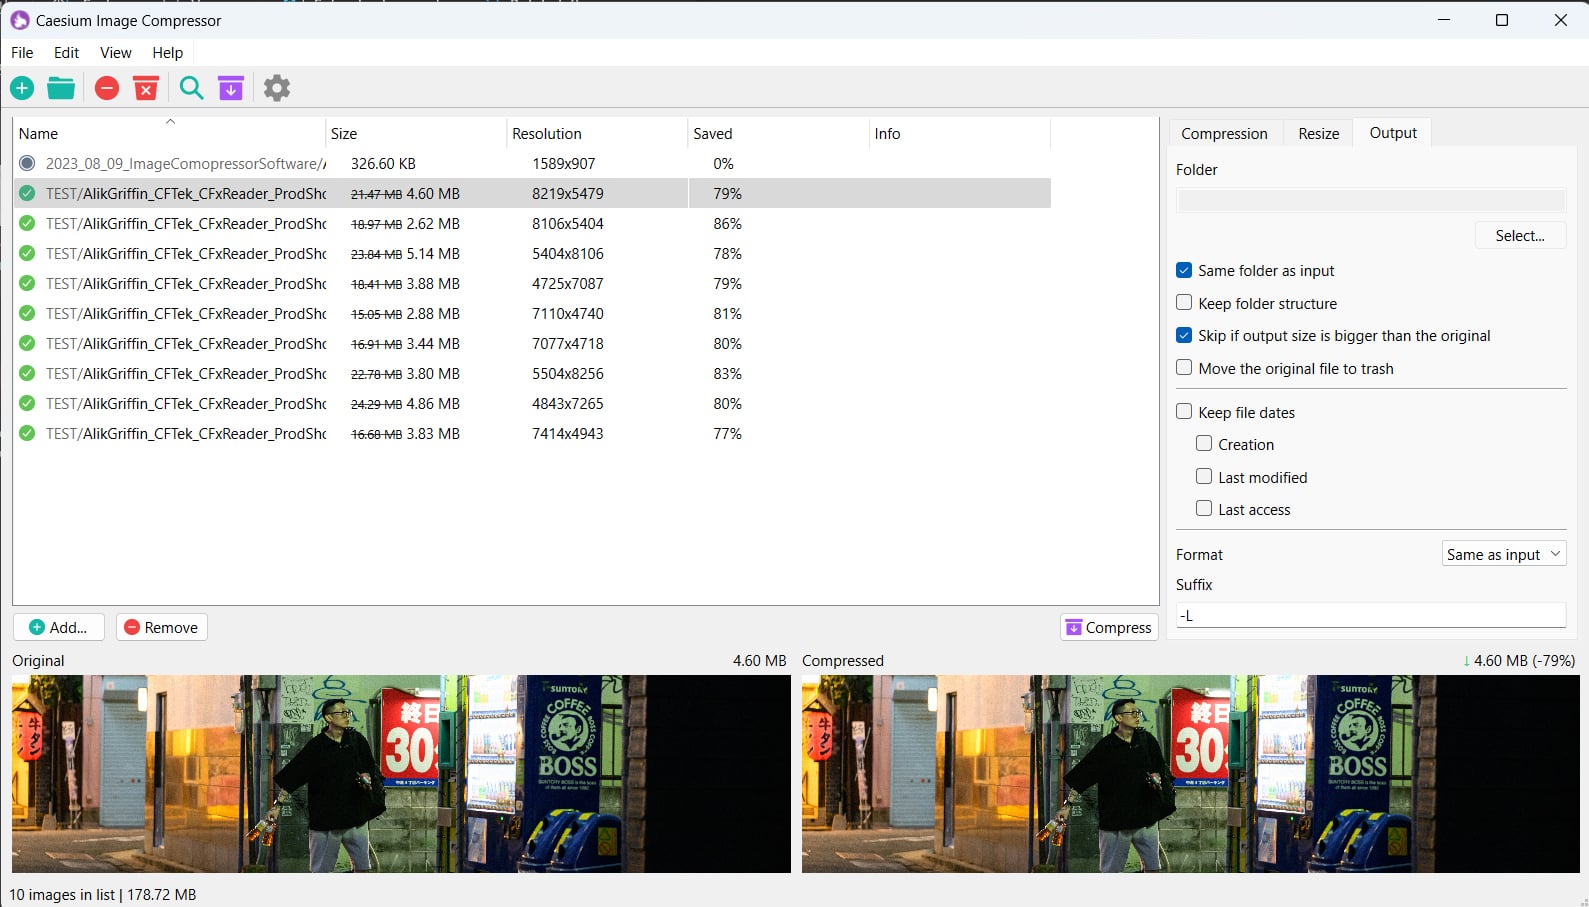
This compressor gives you most of the same settings as ImageOptim plus more, except it doesn’t function as a droplet like ImageOptim. You can batch and automatically add a suffix to the end of the file names which makes it the most useful option. More useful than ImageOptim since it’s also the best free WebP image compressor out there.
Although there is no reason to use Webp if you do a proper JPG compression even though Google continues to try to push that image codec on us.
Riot Image Compressor

Like many Windows programs, Riot has that classic “designed in 1995 by a third-grader” Windows look to it, but it’s also very functional. What I like about RIOT that I haven’t seen in any other image optimization software is it allows you to set the chroma subsampling, so you can choose 4:1:1, 4:2:0, 4:2:2 or even 4:4:4 for your JPG images.
Both these image compression tools give you images that can match ImageOptim in file size and look as well as allowing you to preserve your image metadata and EXIF information.
If you are using Lightroom or Photoshop to compress your images for your website and you’re a blogger who uploads thousands of images a year, I highly recommend you start using these mentioned compressors as you do not need lossless images filling up your server.
My Image Compression Workflow For This Site

Previously I was doing everything through an Automator with OSx using a drop folder that loads ImageOptim.
Now on Windows, I’ve finally decided to A/B test resizing and compression. I’ve found that resizing with OSX, or with a Windows Automator (you can use Power Toys Image Resizer on Windows) doesn’t yield as nice of results as resizing with Photoshop or Lightroom where you have various resizing algorithms you can use or sharpening tools you can use which can dramatically increase the sharpness.
In Lightroom, I export with Sharpen For Screen. Then run the image through the Caesium Image Compressor with a compression of about 81%.
This gives me slightly better results than when I was just automating it in the past.


Leave a Reply