There are a few ways to convert 24p or 29.97i / 29.97p to 1080i50. You can do it through Compressor or After Effects.
With After Effects you’ll be using motion compensation and applying a pulldown.
The Crude But Quick Way
It’s nasty but you can just drop your 29.97 or 24fps footage into a Final Cut Pro 25fps sequence.
It will skip or duplicate frames here and there. Might not be a big deal, especially an event or action shots. You’ll see it on dolly and pans.
I get footage from editors all the time like this. It’s better going from 24 to 25 because it just adds frames which you can just cut out later. Going from 29.97 to 25 is a bit nasty because it drops frames, no way of getting them back.
The Compressor Way
The compressor way works well if you are going to 50i.
Bring your footage into Compressor and apply these settings.
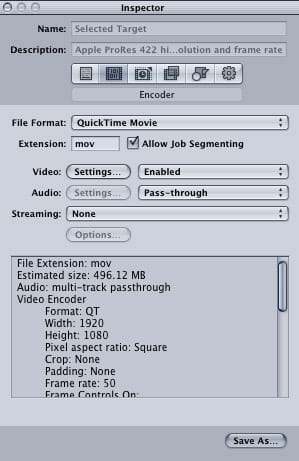
You can set audio to be whatever your specs are, or just use pass-through. Then open your video settings.
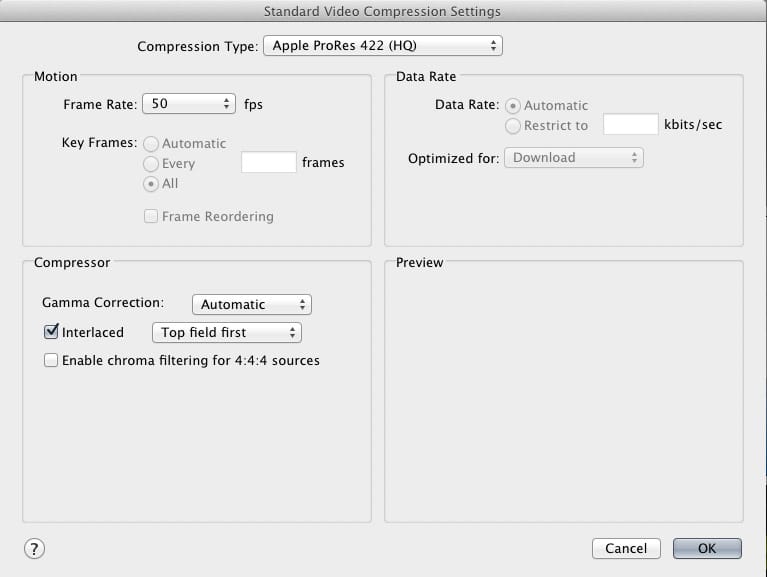
You can use Prores or whatever spec you need to edit in. DNxHD, Uncompressed, etc.
Make sure you select 50 Frames Per Second and Upper Field first. Gamma correction doesn’t matter. Auto or none.
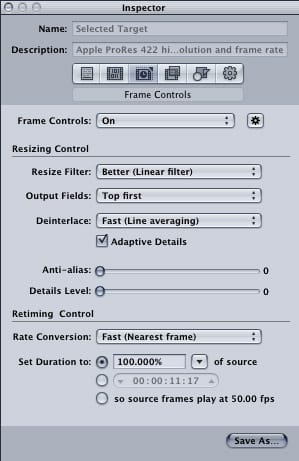
Go back to the inspector and select the frame control tab.
Click the little gear next to the frame control and turn it on. Then match the settings shown.
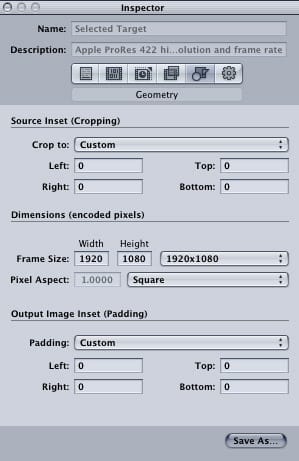
Then match the output settings. The frame size and pixel aspect ratio could be different depending on what your specs are. Most likely it will look like this.
Save, then render. Done.
Be sure to check it on a broadcast monitor to make sure the results are acceptable to you. You’ll get a little bit of ghosting here and there.
Convert 24p to 25p (or 50i) By Speeding It Up And Pitching The Audio
You can add your speed adjustment in After Effects or Cinema tools. Whichever you prefer. If you do it with Cinema Tools just skip the After Effects steps in the following tutorial.
Conform it to 25fps in Cinema Tools. Bring 25fps footage into Final Cut Pro. If your audio is longer for some reason, you can just time-stretch it. Press ‘S’ three times and drag it to the proper length. (it’s hot keys like that that made Final Cut Pro 7 the best.)
The After Effects Method
This is best to do on individual clips. Not the final edit since the runtime will change.
Open After Effects and import your clip.
Right clip on your click and ‘Interpret footage’
Change your frame rate to 25
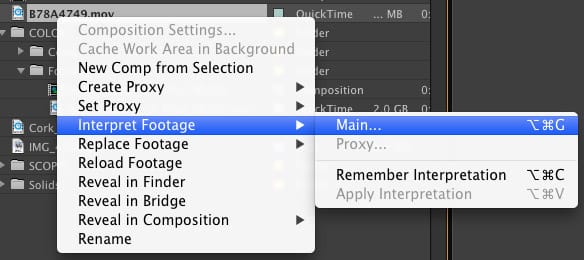
Create a new sequence out of that clip by dragging it onto the ‘Create New Composition’ icon.

Select the Composition then go to Composition -> Add to Render Queue
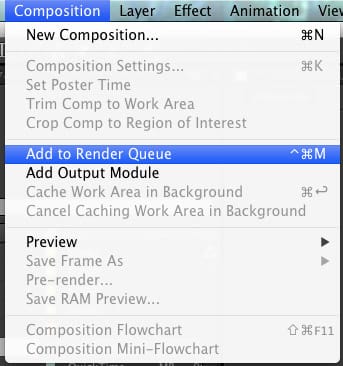
The open your Render Queue, there should be a new tab created on the bottom. Or press Command+Option+0 or Control+Alt+0 on a PC.
In the render Queue Select the Render Settings

Leave the Frame Rate at 25fps and Set the Field Render to the Upper Field First. (*You can skip this step and allow Final Cut Pro or Premiere to add the interlacing if you want.*)
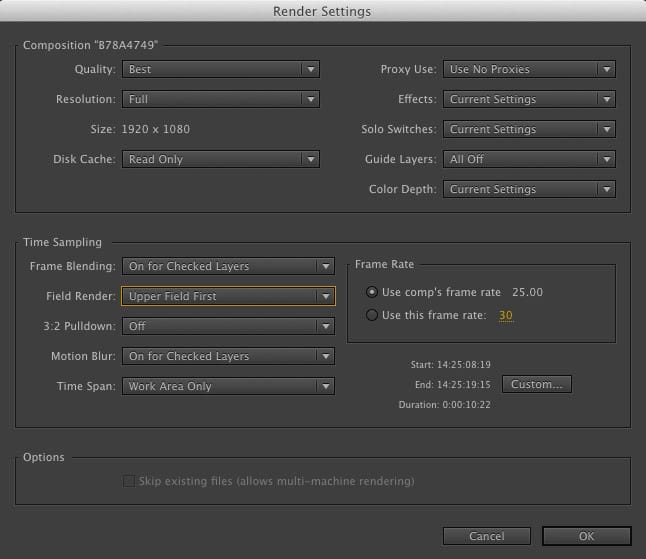
Hit ok. And then hit the Render Button.
Now bring your clip into Final Cut or Premiere and onto a new 50i sequence or 25fps if you need to be progressive. And apply an audio filter to the audio.
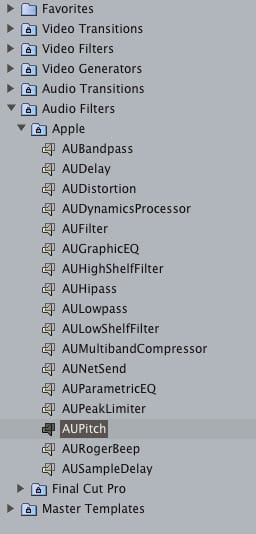
Now pitch your Audio by 4.17.
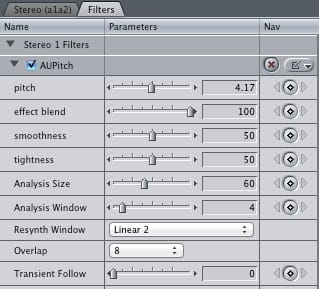
Now render your clip out of Final Cut Pro or Premiere and you’re done.
Remember, HD is the upper field first. SD is the lower field first. Always!
This shit’s complicated and a pain in the ass. When I’m doing a TV spot that’s shot in 24fps and it’s getting an EURO release, I’ll take my final clips or a Media Manage with some handles. Do this technique on every clip then sort of re-edit the spot in a 25fps sequence. But you’ll have to also get a new mix.
You have to re-edit for pal because the timing on all the clips will change slightly. It just adds a few frames here and there which is usually fine. If you’re doing a big C.G. spot just always see if you can get the gfx team to give you a few frames of handles on every shot. It’s really important for this reason. They’ll bitch but make them do it.
| **This website contains affiliate links. We will earn a small commission on purchases made through these links. Some of the links used in these articles will direct you to Amazon. As an Amazon Associate, I earn from qualifying purchases. |


