
Over the years as Lightroom has evolved, it’s become a tool that can almost do everything you could ask for, aside from serious retouching and artistic design.
How To Use Masking While Sharping in Lightroom
One cool feature that is really useful is the sharpening module. It works like Unsharp Mask in Photoshop but allows you the ability to enhance the detail slightly and to sharpen on an adjustable mask. Similar to the Find Edges Sharpening technique in Photoshop. Here’s how to do it.
Go Down To Your Detail Module
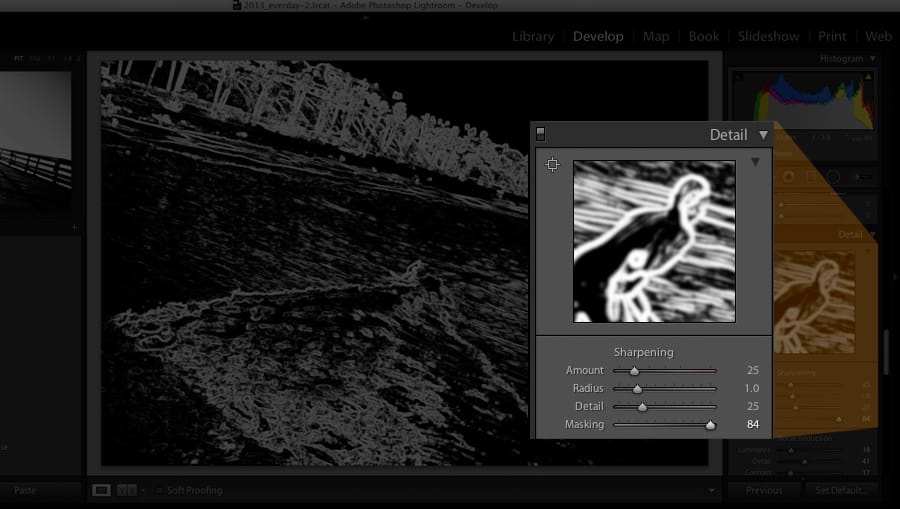
Find the Masking slider and hold down Alt (Option on Mac) and drag it out. You’ll notice it creates an edge mask around the details of your image that you can now see as long as you hold Alt (Option). The sharpening tool will now only sharpen within the white area. Drag it out until you have the desired area you wish to sharpen and adjust the sharpness amount and detail and you’ll only be affecting the edges within that mask.
This will allow you to add a greater sharpening effect on your image without enhancing the grain or noise outside of the edge detail.
I find this to be a much faster technique for sharpening than using the find edges technique in Photoshop. With that technique, you use the find edges filter and create a channel mask that you’ll use to sharpen. It works almost the same but takes five times longer. This is why for most of my photography I often fine-tune my final sharpness in Lightroom, the Masking tool just makes it too easy.
San Clemente Surf


Leave a Reply