I come to the Santa Monica Pier a few times a year to test cameras and lenses or to just update my portfolio. Even though I only live a few miles away, it’s a huge pain in the ass dealing with the crowds and parking. At least this time it ended up being a rewarding experience.
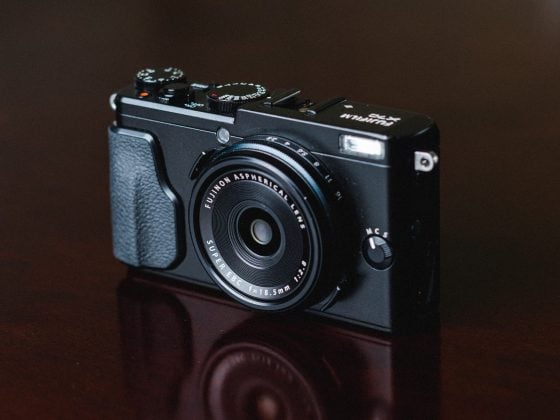
This time I was using the Fujifilm X-Pro 2 and the Fujinon 16mm lens.
My original Santa Monica Pier is one of the most popular shots on Google. I’ve licensed it a number of times and have sold several copies. It’s also number three when you search Santa Monica Pier. It was number one a few weeks ago.
Back then I shot the pier with the Canon 5Dmkii and it took so much work to clean up all the noise and flaws to get it presentable. Hours and hours of work. You can see that shot here: Santa Monica Pier at Night. There is still something magical about that shot that I’ve never been able to reproduce.
Now with the Fujifilm X-Pro 2, the image comes out so sharp and so clean with such little noise, that it only takes a few minutes to process to get it looking pretty. The only drawback of shooting APS-C is, that to match the same resolution as the full frame I can’t shoot at as high of an aperture because of diffraction. I don’t usually like going over f8 with APS-C. You can read a little more on that on my Fujifilm X-Pro2 Review.
These lower apertures mean I won’t be able to get those little stars on the lights as I did with the Canon 5Dmkii shot unless I shoot a separate shot with a higher aperture and mask those over the image. I do that sometimes, but with the setup in this scene, I had to chase the waves and only had a few seconds between each shot.
Getting The Shot
I would have liked to shoot this a little earlier in the day so the sky would have had more color than just dark blue/purple, but it’s Summer in Santa Monica and on a Friday night. There were people everywhere.
For these kinds of shots, the only way you can get the reflection on the ground is when the water is still fresh from the waves. So you have a few seconds after a wave comes up to get the shot before the sand absorbs it. This means getting in the water and getting wet.
I had the camera set to drive mode with three shots +-2 EV and a two-second countdown timer. My tripod was adjusted to the lowest setting to get as close to the ground as possible. After the wave rolled in, I would chase the water back out to my spot, set up my tripod real quick, level it, and shoot my three exposures until the reflection went away.
I also had the camera’s white balance set to daylight. I’ve gotten in the habit of using daylight white balance for sunset and night photography because I’ve been shooting Sony for many years now and their AWB balance always turns my images into catastrophes. So at least when the camera is set to daylight you’d have a stable color balance to adjust from.
Fujifilm X-Pro 2 – 16mm f1.4 R WR – ISO 200, F8, (7.5s, 1.9s, 0.5s)
HDR With The X-Pro 2
I know a lot of guys these days don’t like to shoot traditional HDR anymore and exposure blending manually has come back in style with some great new advancements. But you know what, Photomatix is awesome and quick and I don’t have time to spend three hours in Photoshop per photo unless it’s a shot I am really passionate about.
One of my biggest disappointments with Fujifilm over the last few years was they sucked for HDR photography. They would only allow you to bracket your shots +-1 EV. So you always had to bracket manually if you were in a high-contrast situation like with this shot.
The X-Pro 2 solved this problem allowing us to now bracket +-2 EV which is perfect for HDR. I know Sony lets you do more than that, and I modified my old Canon to give me even more, but the +-2 EV is perfect and I rarely shoot anything other than this.
What else is great about the X-Pro 2 is the OVF. I know a lot of turbo nerd camera reviewers like to trash-talk this feature saying it’s completely unnecessary. But you know what, they just don’t get it and I really really like it. It’s so much fun to use and it makes shooting in dark situations so much easier. I 100% would not have bought the X-Pro 2 if it did not have an OVF.
Why I Used Photomatix
Photography is just like anything else in that it goes through trends. Five years ago everyone got into HDR and was using Photomatix and tonemapping everything. Today more and more photographers are doing their blending in Photoshop and using the Orton effect on everything.
But I still like and use Photomatix. When tonemapping in moderation it still gives the image a very punchy and unique look that is just impossible to emulate in Photoshop. Plus it’s about 100x faster than noodling the shoot to death in Photoshop.
I actually give away my Photomatix Presets for free if you’re a user. What I typically do is use one of the presets that comes close to what I’m looking for, then make a few adjustments from there. I then export back to Lightroom, make a couple of tweaks, and call it a day. It’s quick, it’s easy and you don’t need your PHD in Photoshop to pull it off.
| **This website contains affiliate links. We will earn a small commission on purchases made through these links. Some of the links used in these articles will direct you to Amazon. As an Amazon Associate, I earn from qualifying purchases. |


