Alik Griffin
San Clemente Sunset
Subscription Form
  • Reviews
    • Accessory Reviews
    • Calculators
      • Video Data Rate Calculator | Record Time Calculator
      • Diffraction Calculator
      • DoF Calculator | Lens Equivalent
      • Shutter Speed to Shutter Angle Calculator
    • Camera Reviews
    • Lens Reviews
    • Memory Cards Recommendations
      • Fastests SD Memory Cards
      • Fastest MicroSD Cards
      • Fastest CFExpress Type-B Card
      • Fastest CFExpress Type-A Cards
      • Best CFast Memory Card
    • List of Mics
      • Best Streaming & Podcast Mics
  • Camera Guides
    • List of all Blackmagic Cameras
    • List Of all Canon RF Cameras
    • List of all Fujifilm Cameras
    • List of all Nikon Z Cameras
    • List of all Panasonic Cameras
    • List Of all Sony E Cameras
  • List of Lenses
    • Canon RF Lenses
    • Fujifilm GFX Lenses
    • Fujifilm XF Lenses
    • L-Mount Lenses
    • Leica M Lenses
    • Micro Four Thirds Lenses
    • Nikon Z Lenses
    • PL Mount Cine Lenses
    • Sony E Lenses (FE and APS-C)
  • Store
  • My account
Alik Griffin
Alik Griffin
  • Reviews
    • Accessory Reviews
    • Calculators
      • Video Data Rate Calculator | Record Time Calculator
      • Diffraction Calculator
      • DoF Calculator | Lens Equivalent
      • Shutter Speed to Shutter Angle Calculator
    • Camera Reviews
    • Lens Reviews
    • Memory Cards Recommendations
      • Fastests SD Memory Cards
      • Fastest MicroSD Cards
      • Fastest CFExpress Type-B Card
      • Fastest CFExpress Type-A Cards
      • Best CFast Memory Card
    • List of Mics
      • Best Streaming & Podcast Mics
  • Camera Guides
    • List of all Blackmagic Cameras
    • List Of all Canon RF Cameras
    • List of all Fujifilm Cameras
    • List of all Nikon Z Cameras
    • List of all Panasonic Cameras
    • List Of all Sony E Cameras
  • List of Lenses
    • Canon RF Lenses
    • Fujifilm GFX Lenses
    • Fujifilm XF Lenses
    • L-Mount Lenses
    • Leica M Lenses
    • Micro Four Thirds Lenses
    • Nikon Z Lenses
    • PL Mount Cine Lenses
    • Sony E Lenses (FE and APS-C)
  • Store
  • My account
  • Viltrox 9mm f2.8 Air Review
    Viltrox 9mm f2.8 AIR Review & Sample Photos
    • January 14, 2026
  • Biker Bro
    Viltrox Spark Z3 Flash – Review & Sample Photos
    • January 14, 2026
  • Kalina Flower FIeld
    Nikon Z 50mm f1.4 Review & Sample Photos
    • April 13, 2025
  • TTArtisan 27mm f2.8 AF Front of Lens
    TTArtisan AF 27mm f2.8 Review & Sample Photos
    • March 8, 2025
  • TTArtisan 23mm f1.8 Product Shots
    TTArtisan AF 23mm f1.8 Lens Review & Sample Photos
    • February 5, 2026
  • Thypoch Simera 75mm f1.4 Review

    Thypoch Simera 75mm f1.4 Review & Sample Photos

    View Post
  • Cool Street In Nakasu Fukuoka

    Viltrox WCL-X100VI Review | A Budget-Friendly 28mm Upgrade

    View Post
  • Sony A7V Announcement

    Sony A7V – They’re Back In The Game

    View Post
Trending Posts
  • Nikon Zf Official Announcement 1
    Nikon Zf – The Fujifilm Killer?
    • December 25, 2024
  • Nikon Z 50mm f1.8 S Lens Review 2
    Nikon Z 50mm f1.8 S Lens Review & Sample Photos
    • April 11, 2025
  • Kamlan 50mm f1.1 II Product Shot 3
    Kamlan 50mm f1.1 II Review & Sample Photos
    • January 18, 2025
0
  • Blog
  • Photo Tips
  • Software Reviews

Why You Need FUJIFILM X RAW STUDIO

  • Alik Griffin
  • May 18, 2024
  • 11 comments
**This website contains affiliate links. We will earn a small commission on purchases made through these links. Some of the links used in these articles will direct you to Amazon. As an Amazon Associate, I earn from qualifying purchases.

A few years ago, Fujifilm released a free photo editing software called Fujifilm X RAW Studio for its users. 

Now I know what you’re thinking, camera editing software applications always suck, why should I waste my time with this?

Because this is different, this software is essentially an extension of your camera’s JPG engine, and all the processing is done through your camera. So it’s not really a stand-alone photo editing tool, rather it’s an extension to control, manage, and build the different JPG looks on your camera for the RAW source images.

The advantage is it’s much faster to adjust and experiment with recipes with this software than it is to poke through your menus in the camera. You can also build and save a bunch of profiles that you can load or unload from your camera as needed. – By the way, you set these up and cycle them quickly through your Q menu. If you’re ever wondering, that’s what those C1 – C7 controls are for in the Q menu.

For me, I use this to modify recipes so that they work in a broad range of conditions. This software allows me to quickly test recipes on older photos that I have already shot that are no longer on my camera. So I can quickly check looks through all different types of photos from different dates, indoors, outdoors, with flash, etc. The last thing you want to do is load up your camera with a bunch of cool recipes, but you will find that they don’t work indoors under LED lighting.

FUJIFILM X RAW STUDIO Interface Sample

Fujifilm X RAW Studio Review

Let’s start off by talking about what this thing is.

Fujifilm X RAW Studio is a JPG machine that allows you to work with RAW and only RAW files – or RAFs as Fujifilm calls them. The whole point of this software is to build custom recipes that you can use in your camera to generate JPGs on the fly. Shooting just JPG, or RAW+JPG like me.

If you’re on a budget, you actually can use this as an image processor since it will allow you to work with the original 14-bit RAW files generated by the Fujifilm cameras. So you can just keep shooting RAW, and use this to “save” some of your bad exposures. There is just no ability to crop or anything so you’ll have to do that elsewhere, maybe on DarkRoom App on your iPhone or Tablet. 

And for the “professionals” that ONLY shoot RAW and can’t be bothered by measly JPGs, this at least allows you to pack your camera with some great looks for those times when you just go to the beach, or Disneyland with the kids and want to rip out some shots for ol Grandma that you share on your smartphone.

So, the JPG machine by Fujifilm is a great tool to pack your camera with custom looks for those moments when you just want great-looking shots without a hassle. I’ve been personally shooting more with JPG now out of convenience. They look good enough most of the time, and I can go straight from my camera to my phone to share.

The Limitations

First, you have to keep your camera plugged into your computer as it will use your actual camera’s processor to make the modifications. But it only works on the camera that you shot the RAW files on. In other words, you can’t use the processing engine from your X100V on XT2 shots.

Second, you have to shoot RAW to be able to edit the files.

Third, you can’t export other types of files besides JPG – bummer.

No ability to crop or fine-tune rotation – so it’s not editing software, just a look generator.

The Advantages

It allows you to build as many custom looks as you want and set them to your camera with incredible ease. The camera holds only 7 at a time, so you can store more looks that you can cycle through depending on what you’re shooting. It’s super easy to load and unload new looks compared to programming them manually with the camera.

You still get to work with the original 14-bit RAW file and make all your adjustments and edits to save the highlights or lift the blacks or correct any effects that were too intense when originally shot. Then you click ‘convert’ and it makes a new JPG from that for final editing in LR.

How To Use Fujifilm’s X RAW Studio

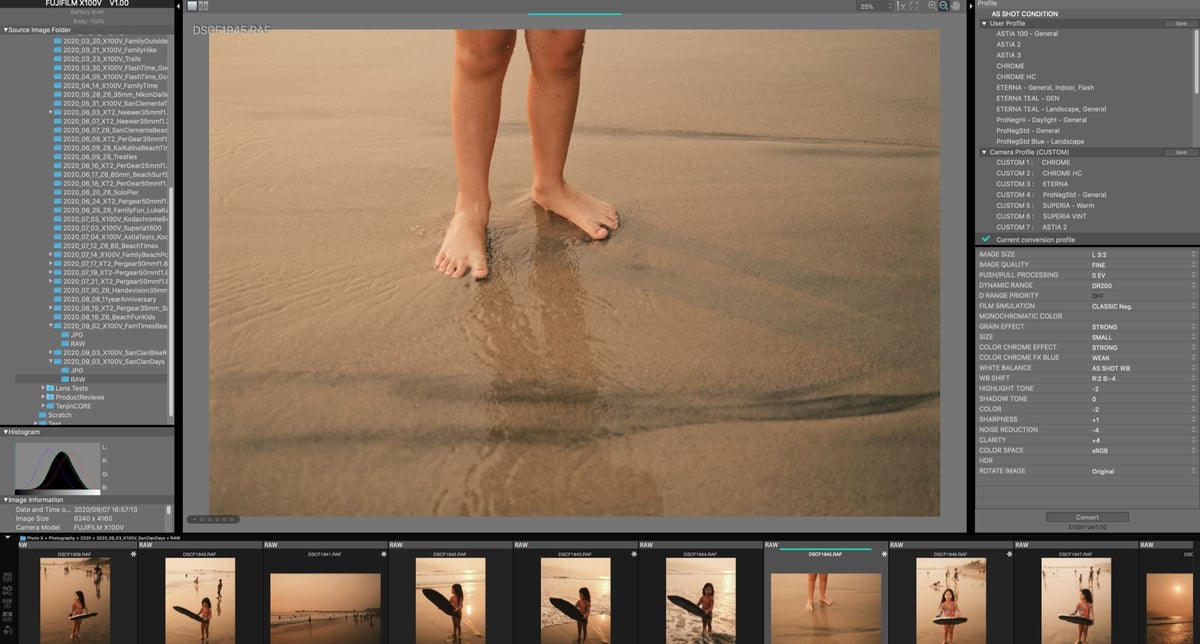
Using the software is easy. On the left, you pick the folder of where your images are, or you can Minimize that to just get the camera information an histogram.

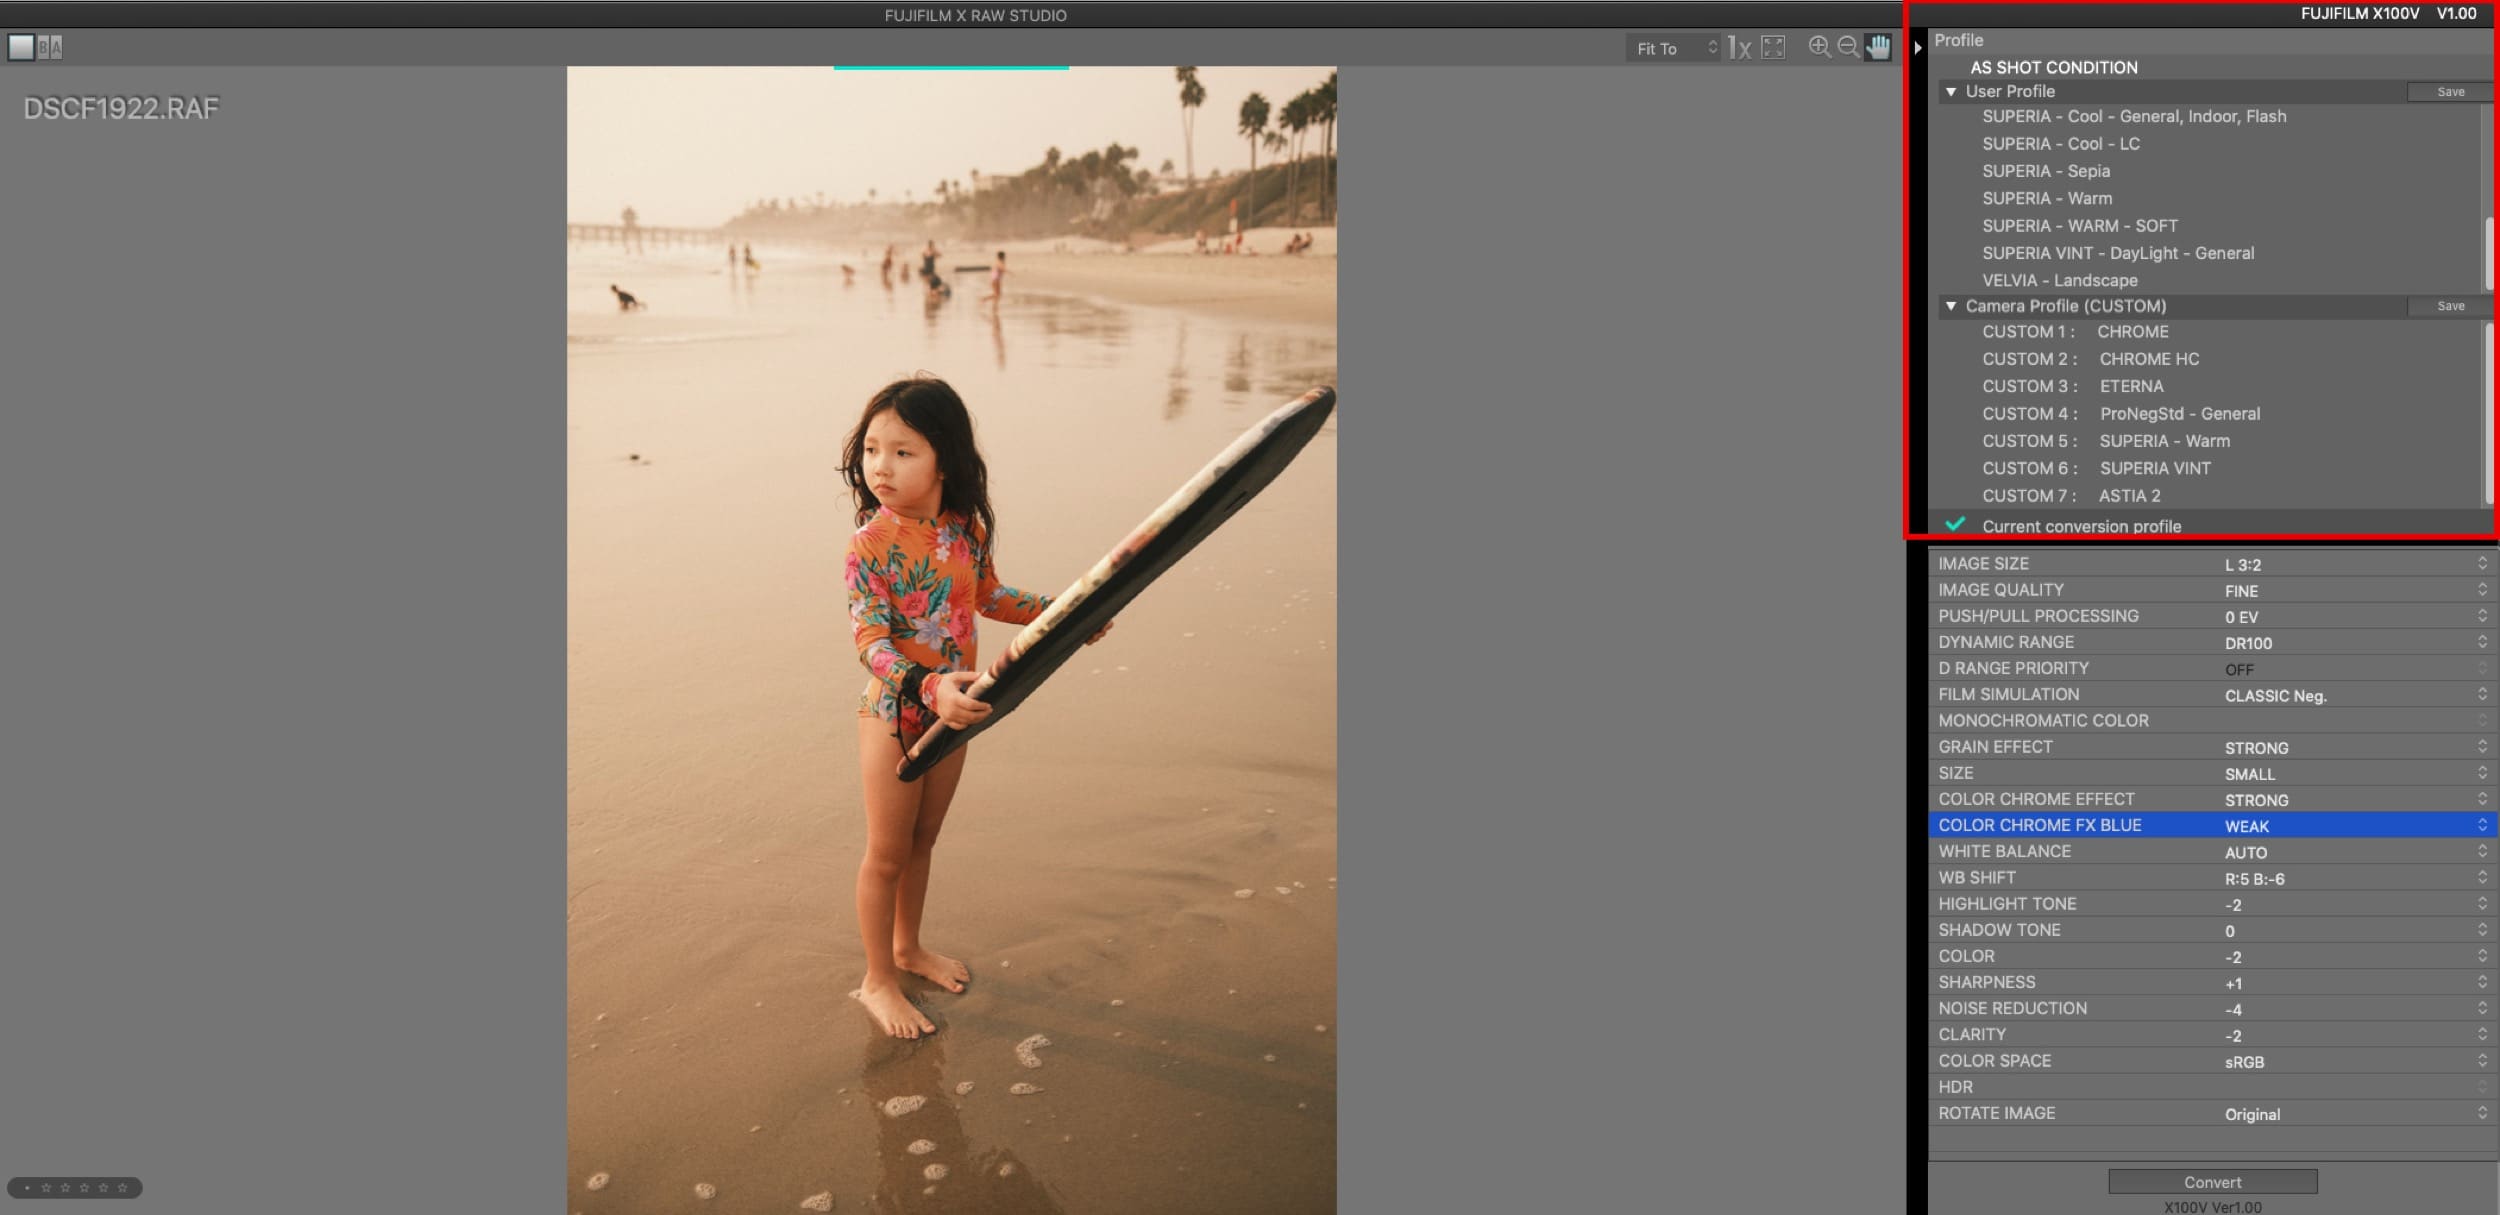
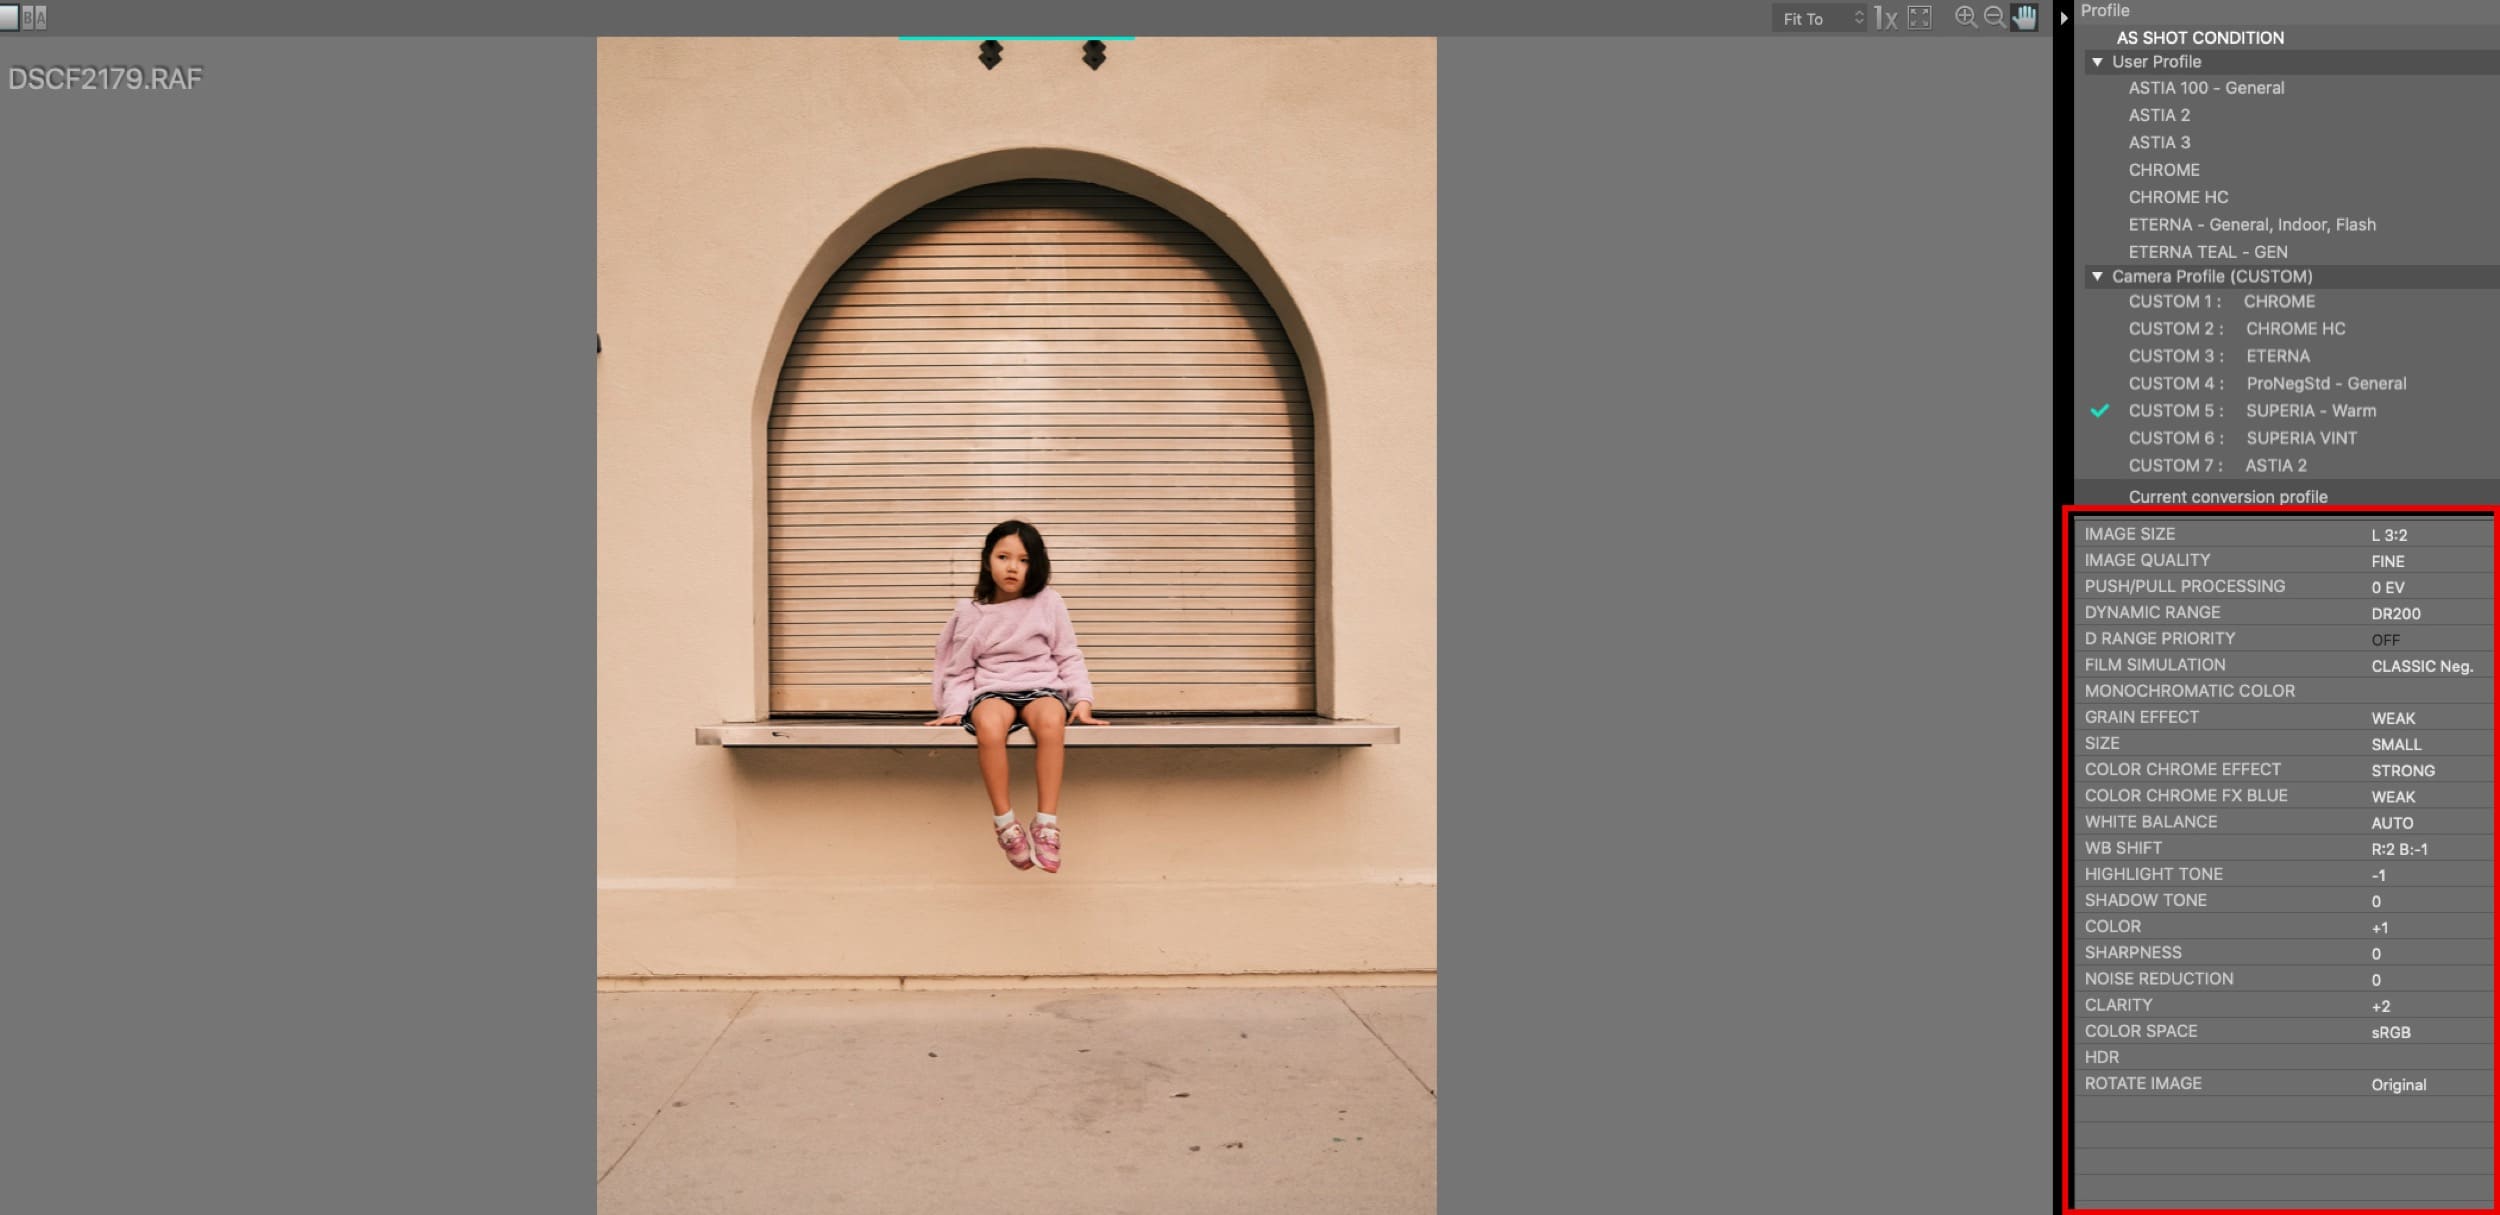
On the Right, you have three sections. The Top is your custom profiles, below that are the Camera Profiles (anything you change here gets changed in your camera).

FUJIFILM X RAW STUDIO As Shot Conditions Window

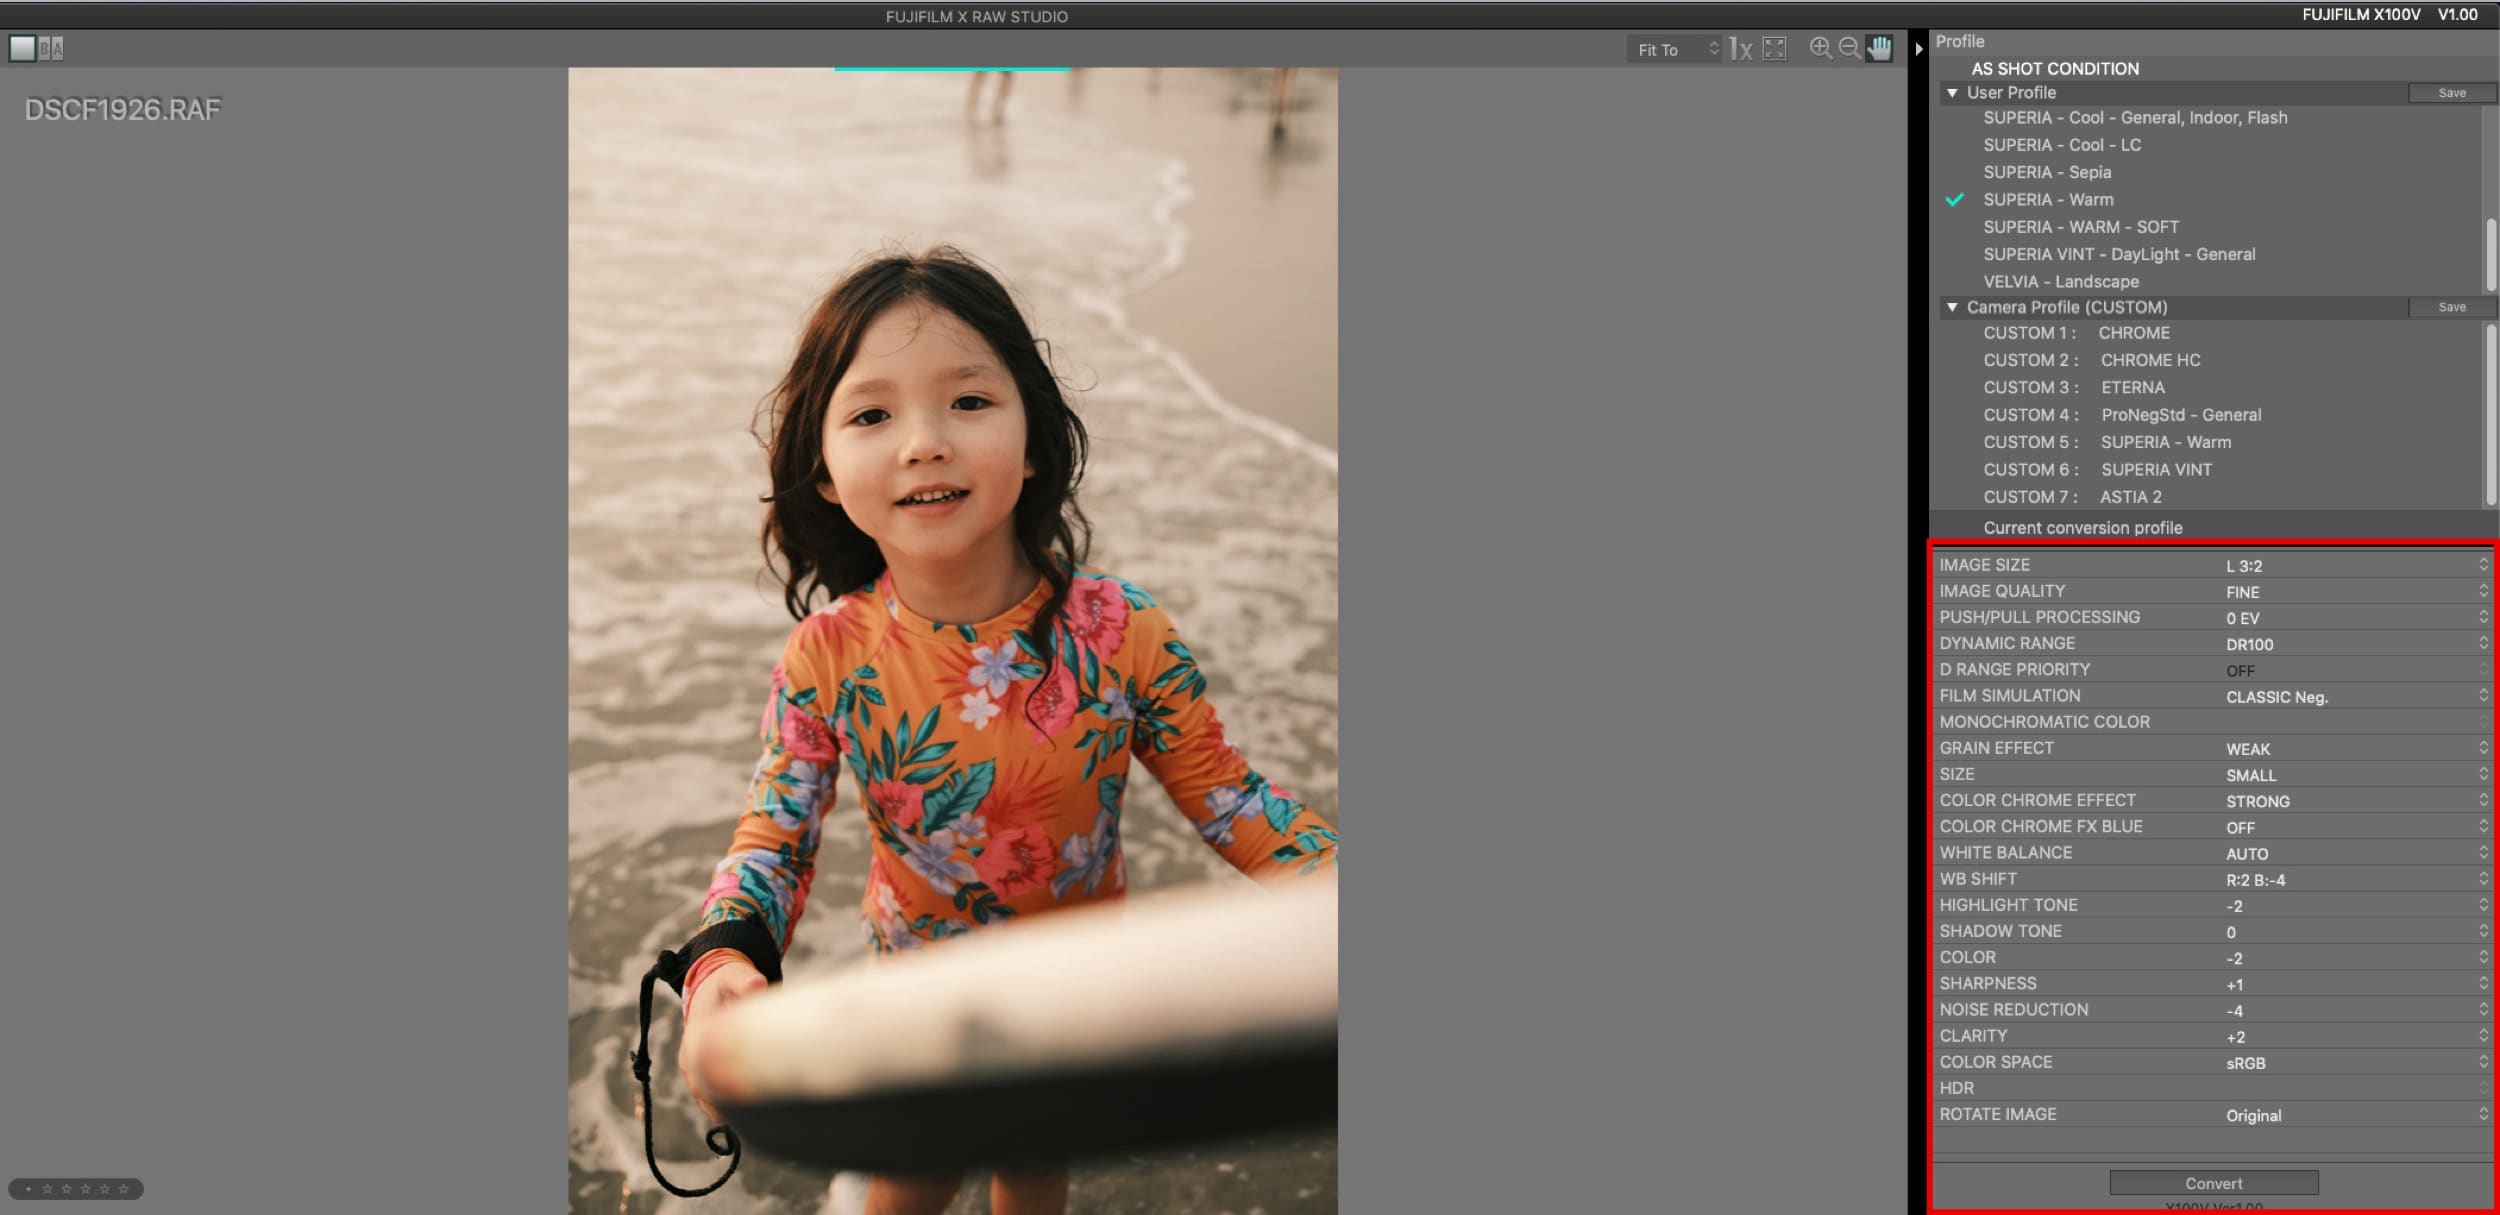
On the bottom of the right panel are the camera controls.

All you do is adjust your camera controls and save them to the User Profiles or Camera Profiles.

This Classic Neg looks amazing. Maybe turn on the Color Chrome Blue to Weak for slightly punchier blues.

FUJIFILM X RAW STUDIO Current conversion profile panel

Pretty much anything in the camera controls section will be on your camera, depending on what camera you have. For example, older cameras won’t have Color Chrome and many of the film simulators like those seen here.

This should be pretty straightforward from there.

One tip to remember – If you change the looks on your camera, it will default your camera back to shooting JPG only, so you need to remember to switch back to RAW+JPG or RAW after loading new looks through this program.

Another thing: Some controls cannot be set with this software if they are not set with the camera. For example, if you shoot at ISO 100, you won’t be able to adjust the DR settings to get DR200, since it requires a higher ISO. The push-pull process should be done while shooting with your exposure comp dial, it’s in this software just in case you missed exposure on the original shot.

Why I Like It

I’ve been pretty busy lately and haven’t really had time to go through the usual workflow of editing my RAW files where I tend to take too much time fixating on every little thing. Having great-looking JPGs custom-tuned that have unique looks made with the Fujifilm X RAW Studio allows me to get back into shooting casually while still having custom looks that are unique to my style. 

This allows me to get more photos on Instagram or to share with family and friends with very little work.

Now I just tune up some looks with X RAW Studio, load them into the camera and I’m good to go.

You’re still of course limited since there are no color curves or anything, you’re mostly just left with a WB adjustment to change the overall feel of the colors.

However, Fujifilm’s JPG engine looks like it intelligently adjusts the image based on a tonal curve of their film simulators, so the image will be processed differently if it’s overexposed or underexposed.

This means you can overexpose but manually bring down your highlights, and the mid-tones will sit on a different portion of that tonal curve, or visa versa, underexposure, then manually lift the shadows. 

This allows you to get different feels from the same film simulators. You can go for really nice soft effects, or really hard high-contrast effects, and depending on your exposure, it will have a different tonality.

To do this successfully you should play with the DR controls to give you the dynamic range you might need. I like often shooting with DR200 to make sure my highlights are protected, then you can usually bring back the most overexposed details with a -2 to Highlights. And you get a softer flatter feel, but then punch it back up slightly with a +2 clarity.

This brings me to another good reason to use X RAW Studio. Effects like ‘Clarity’ tend to slow down shooting since it takes a few seconds to process the effect. I think it eats the battery a lot faster too. So now what I usually do is set Clarity to 0 in the camera, then add it later if I feel like I need it. Some look like Astia looks amazing with a little +2 clarity. Then you just hit Convert, and resync with Lightroom, and it’s ready to go.

Some Great Looks

I’ve come across some nice looks I’ve found online and modified or have come up with on my own. It mostly comes down to the WB shift and there are only so many looks that work well, so you may see a lot of the same shooters using similar WB shifts.

The Highlight and Shadow controls do a lot to the tonality. Especially if you’re adjusting the DR settings along with the exposure comp dial.
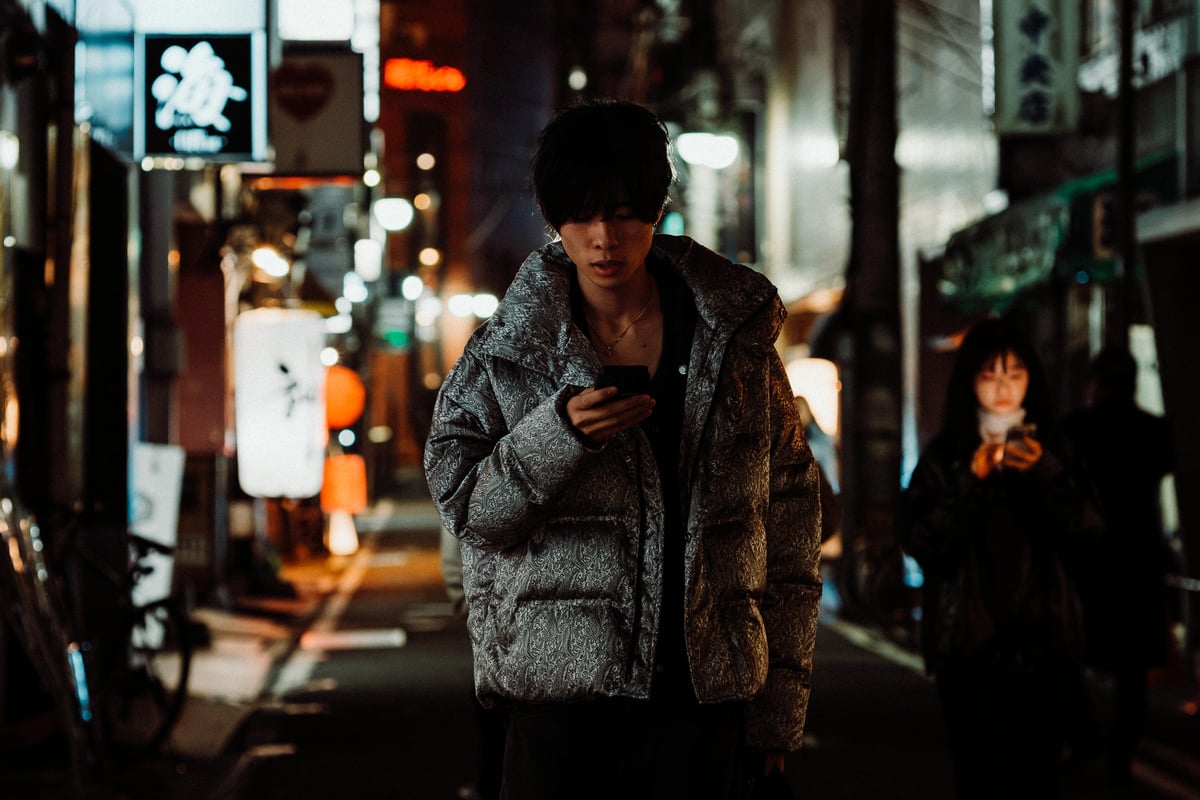
ETERNA

I did a post on this recently. It has a WB shift of 5, -6. But you can reduce the orange and yellow, or increase it. Just stay on that diagonal grid and it will look great. If you increase the Sepia effect, turn down the Color a little.

So basically the WB shifts of R: 5, B: -6, R: 4, B: -5 R: 3, B: -4 all look great with this film simulator.
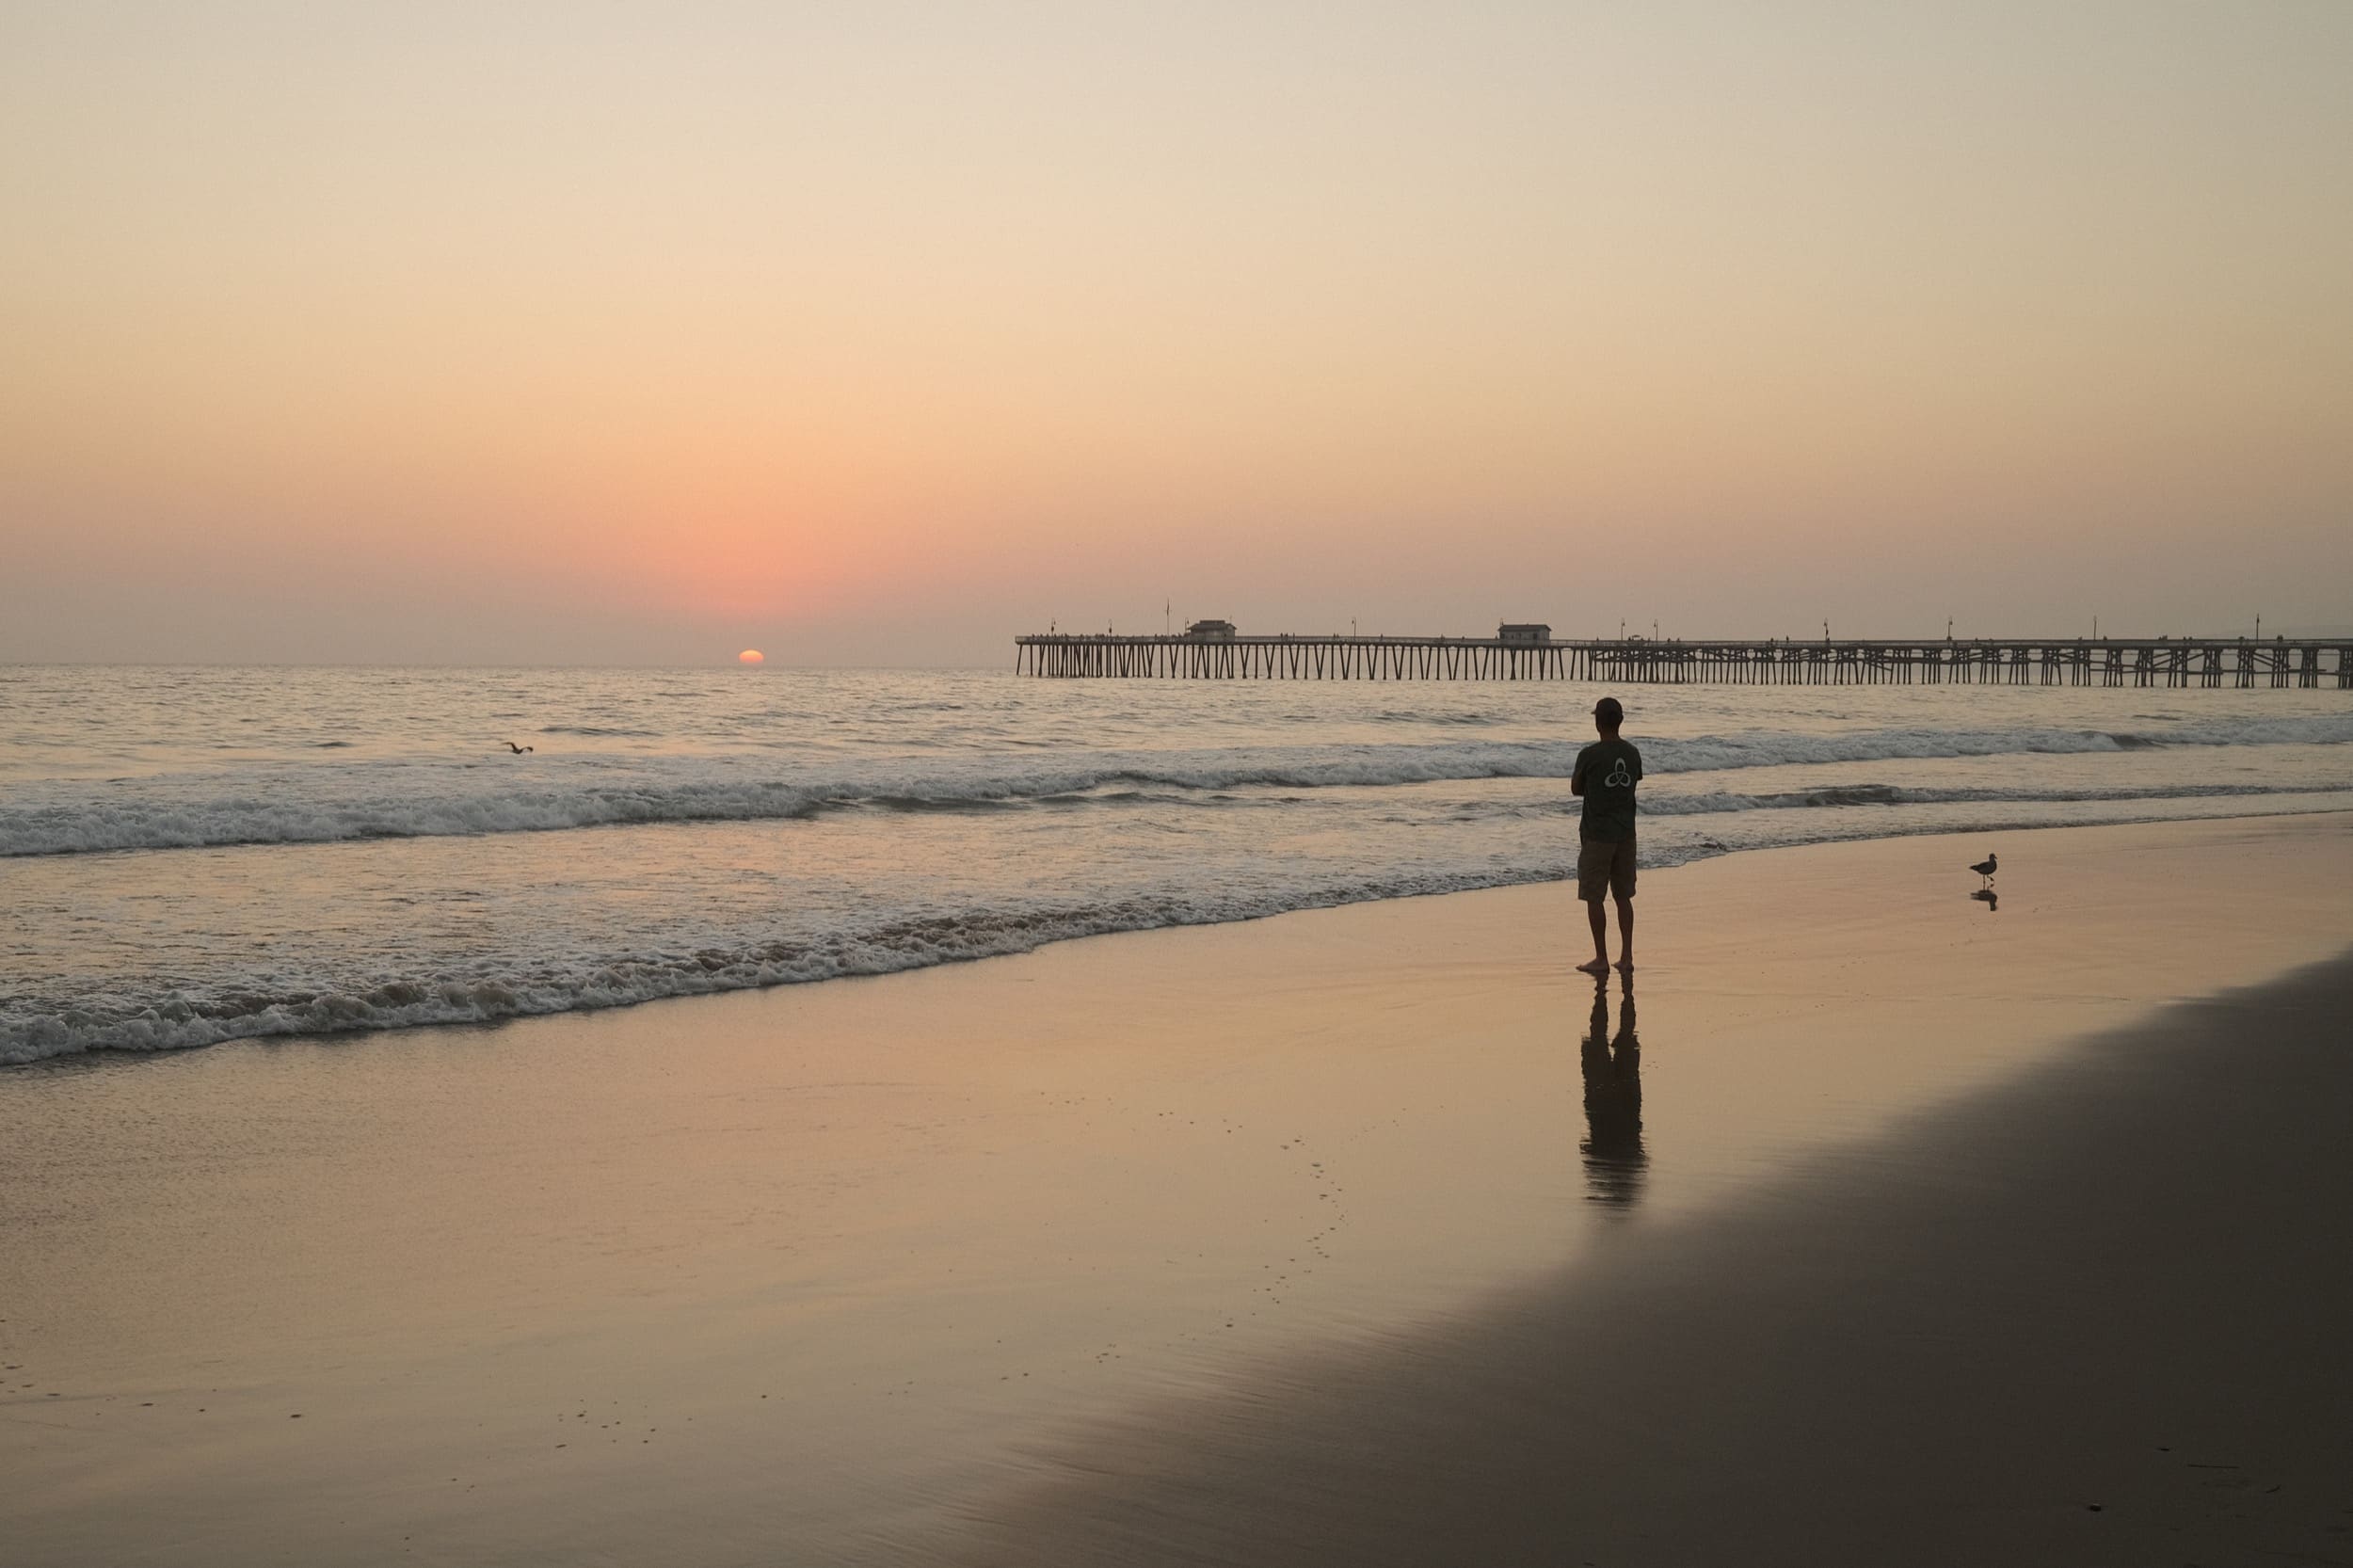
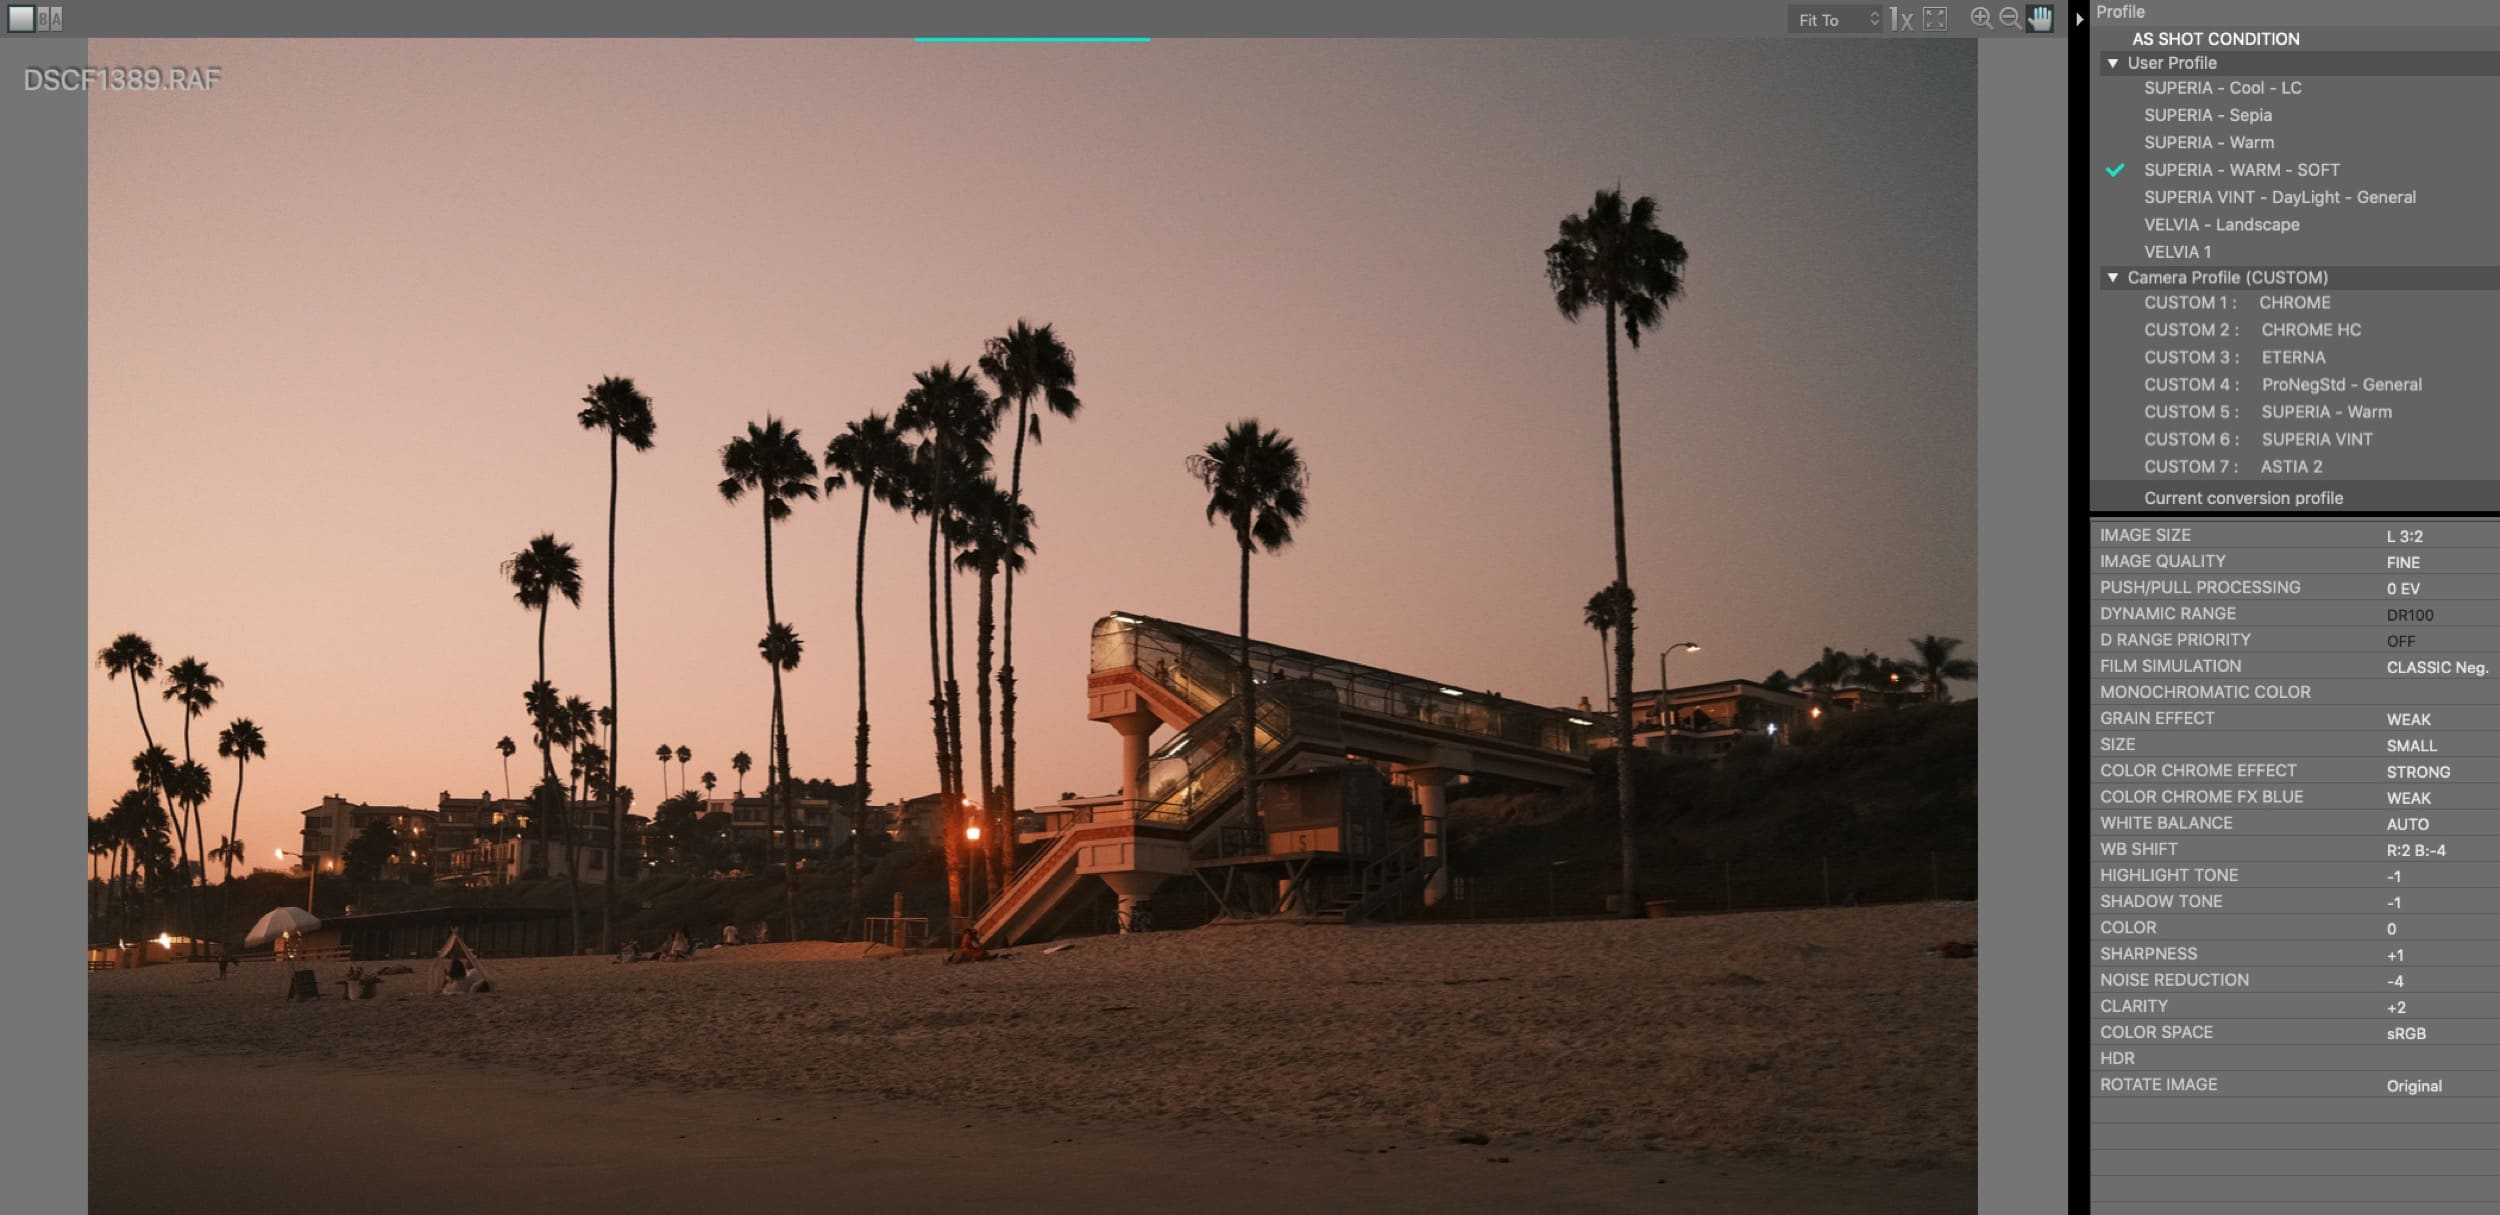
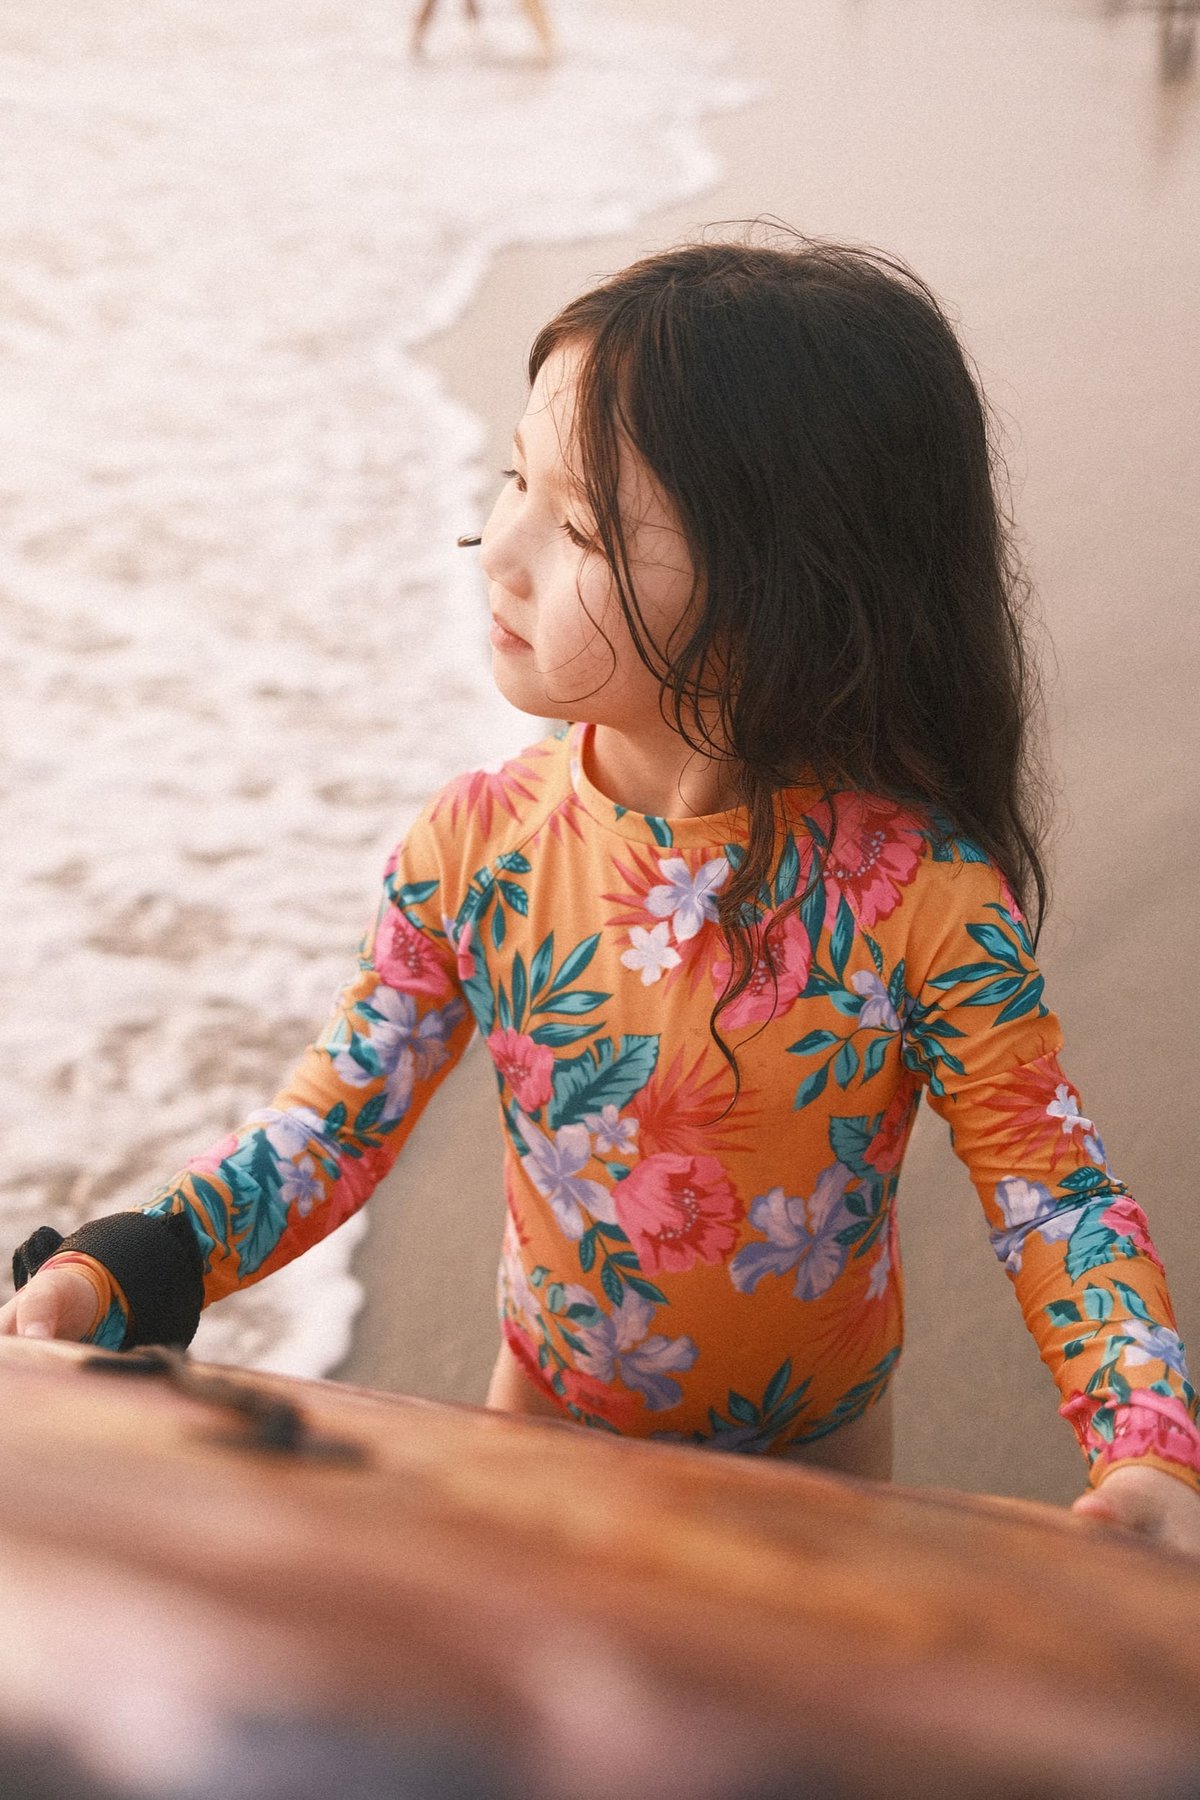
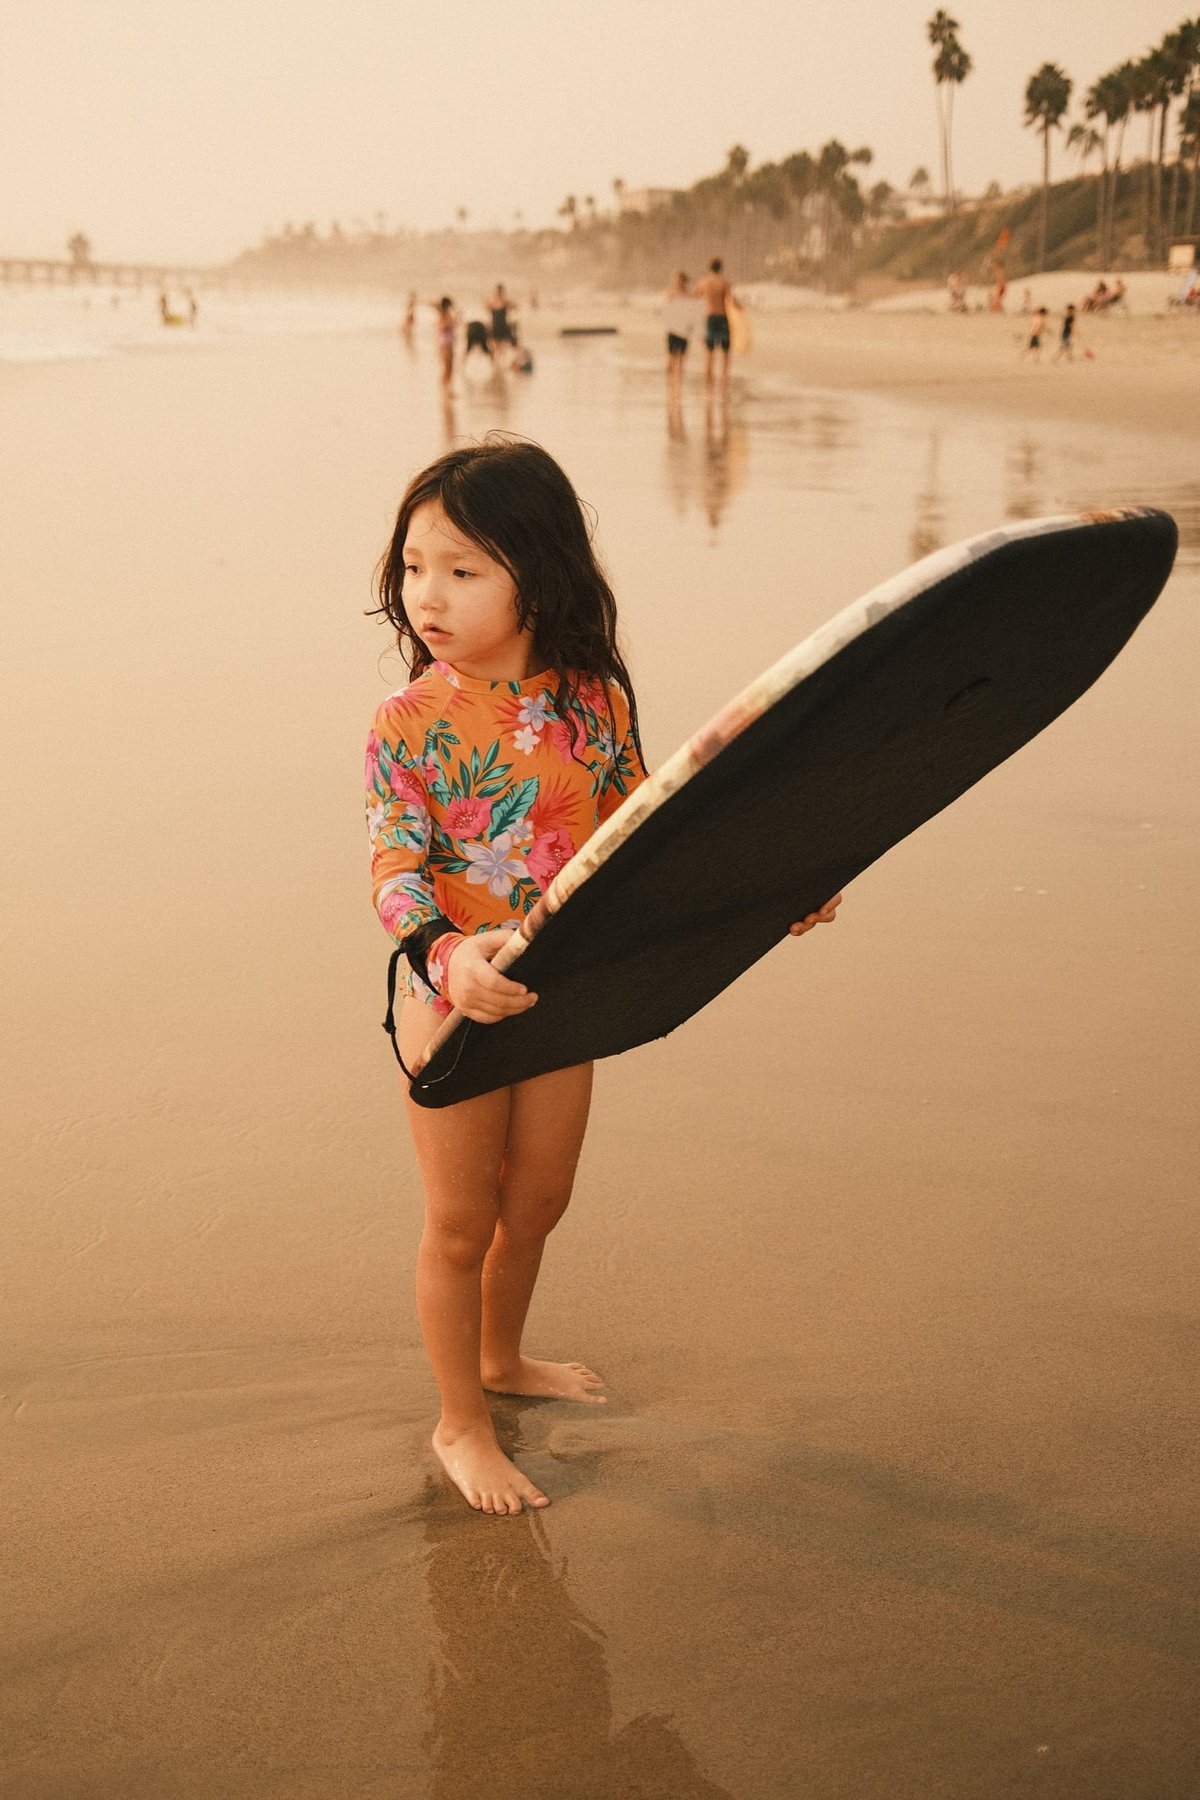
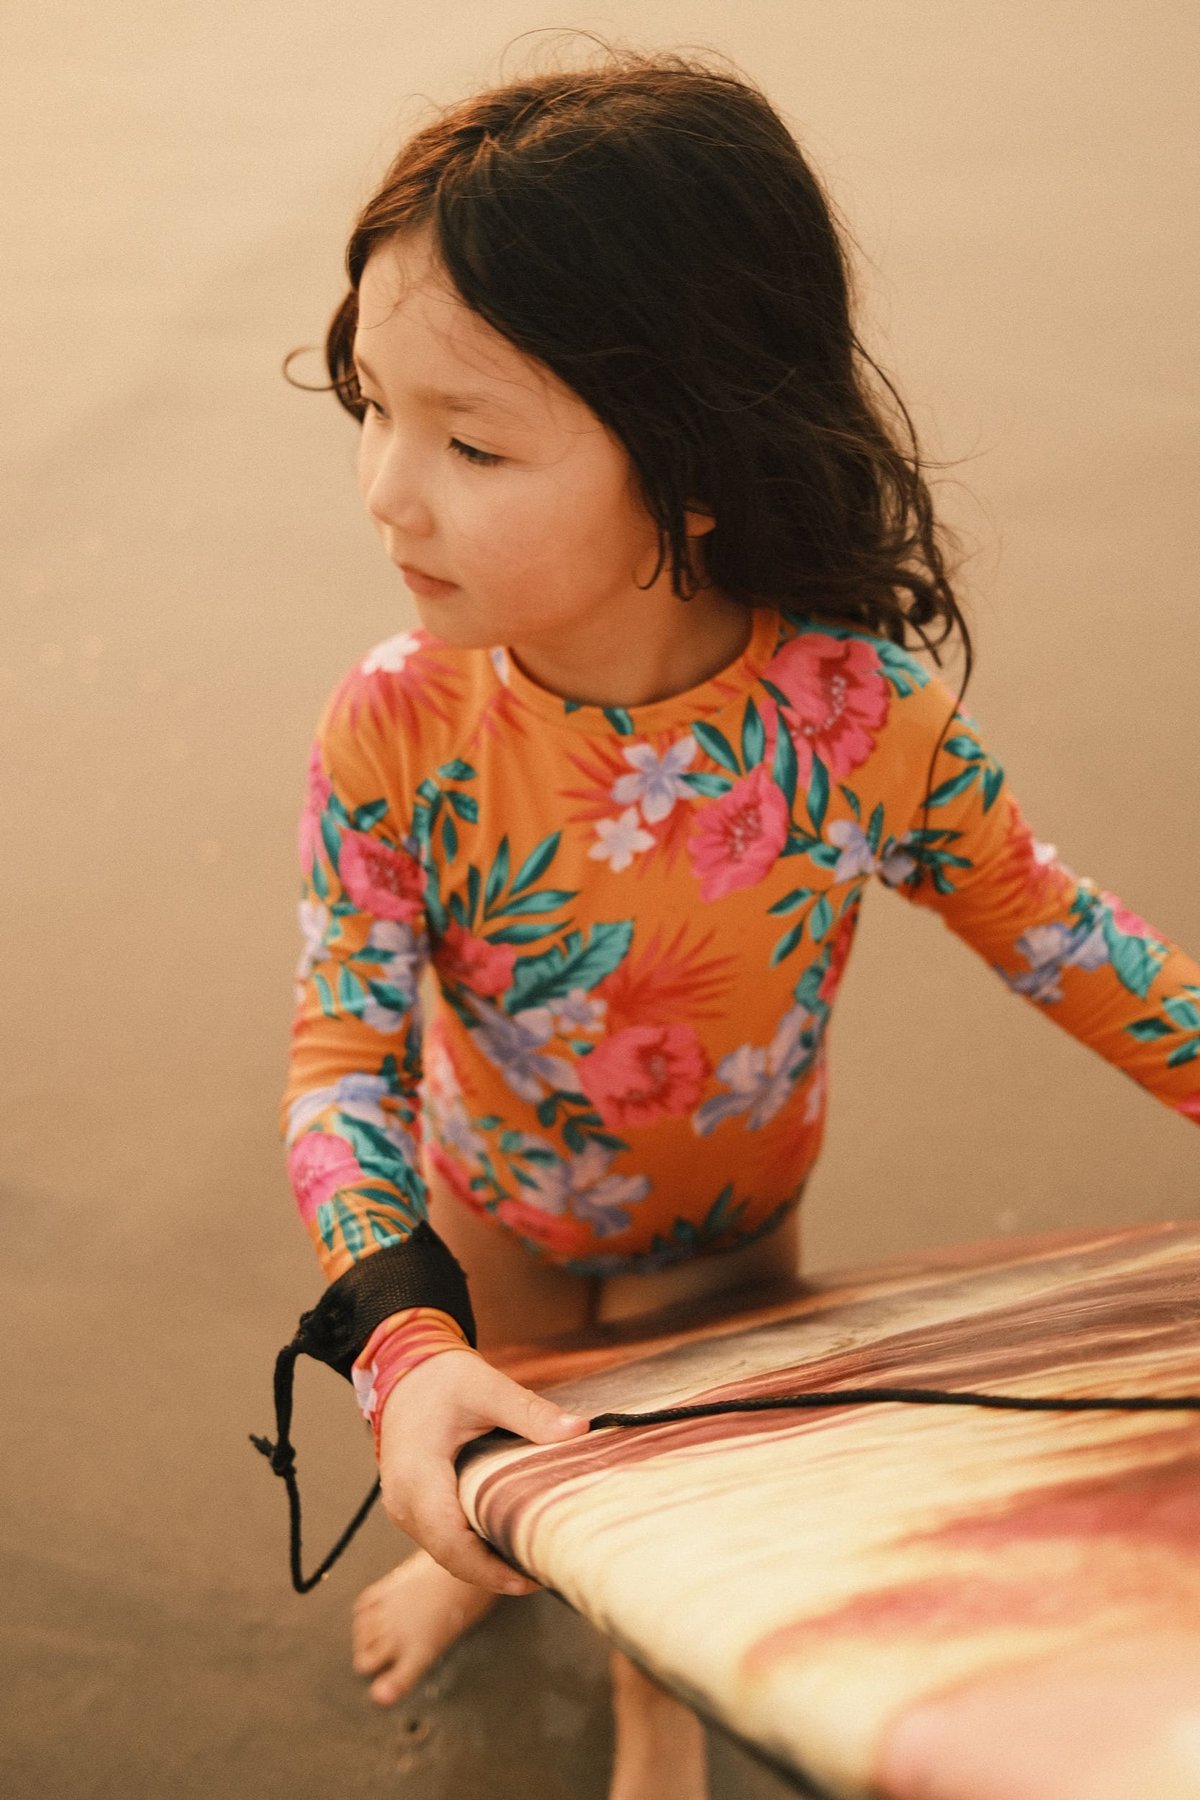
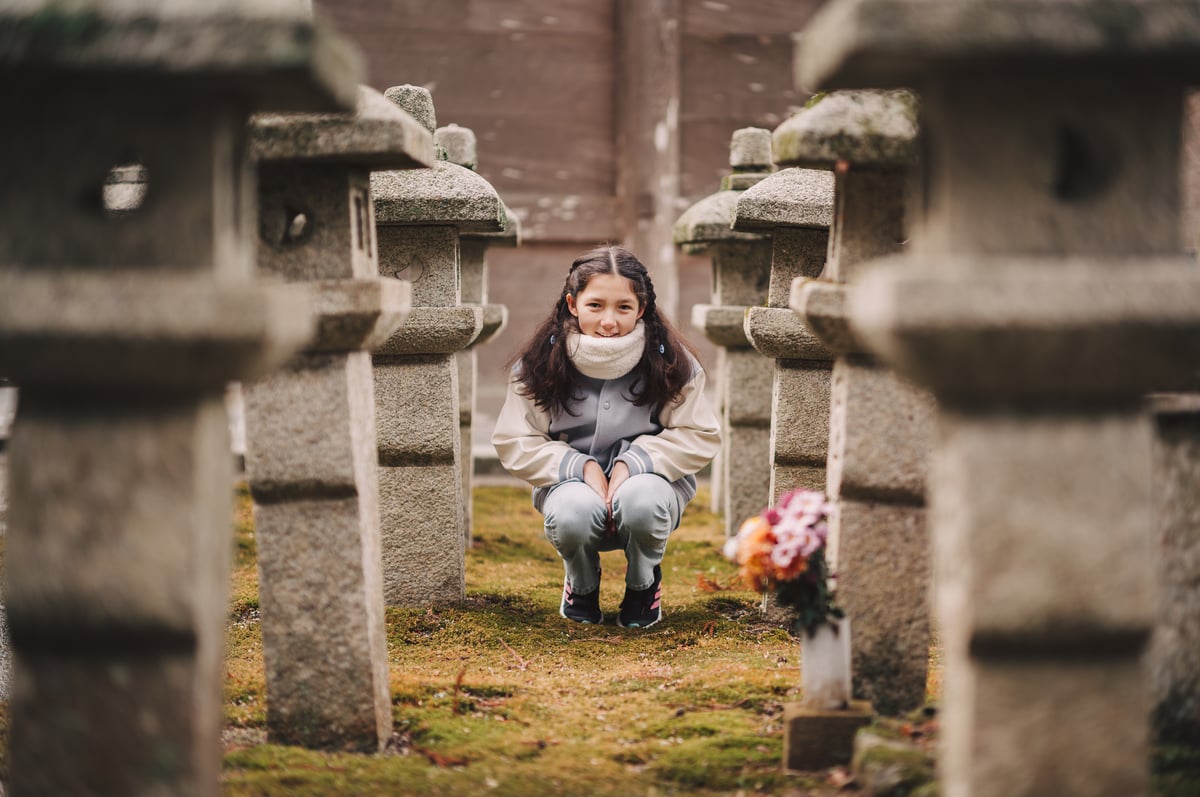
Sunset Photo of T-Street in San Clemente
ISO 160, f4, 1/105
Sunset Photo of a Lifeguard Tower
ISO 160, f4, 1/220
Sunset photo of San Clemente Pie
ISO 160, f5.6, 1/80

Classic Neg

I have a few classic Neg looks coming. So far I really like this look.

R: 2 B: -1

Sample Look with FUJIFILM X RAW STUDIO

Here is a slightly different variation that I use a lot.

Sample Look with FUJIFILM X RAW STUDIO

Fujifilm X RAW Studio Bottom Line

If you like shooting JPGs, or like the look of Fujifilm JPGs but want to still be able to adjust your 14-bit RAW files, then this software is a ton of fun and extremely simple to use and it’s free.

Just install it, plug your camera in, and it’s good to go. 

Hopefully, in the future Fujifilm will adopt HEIC or TIFF files with this software or cameras, then I could see it really being worked in with a professional workflow. But in its current state, this software is fantastic for quickly building and trying out new looks.

You can download Fujifilm X RAW STUDIO.

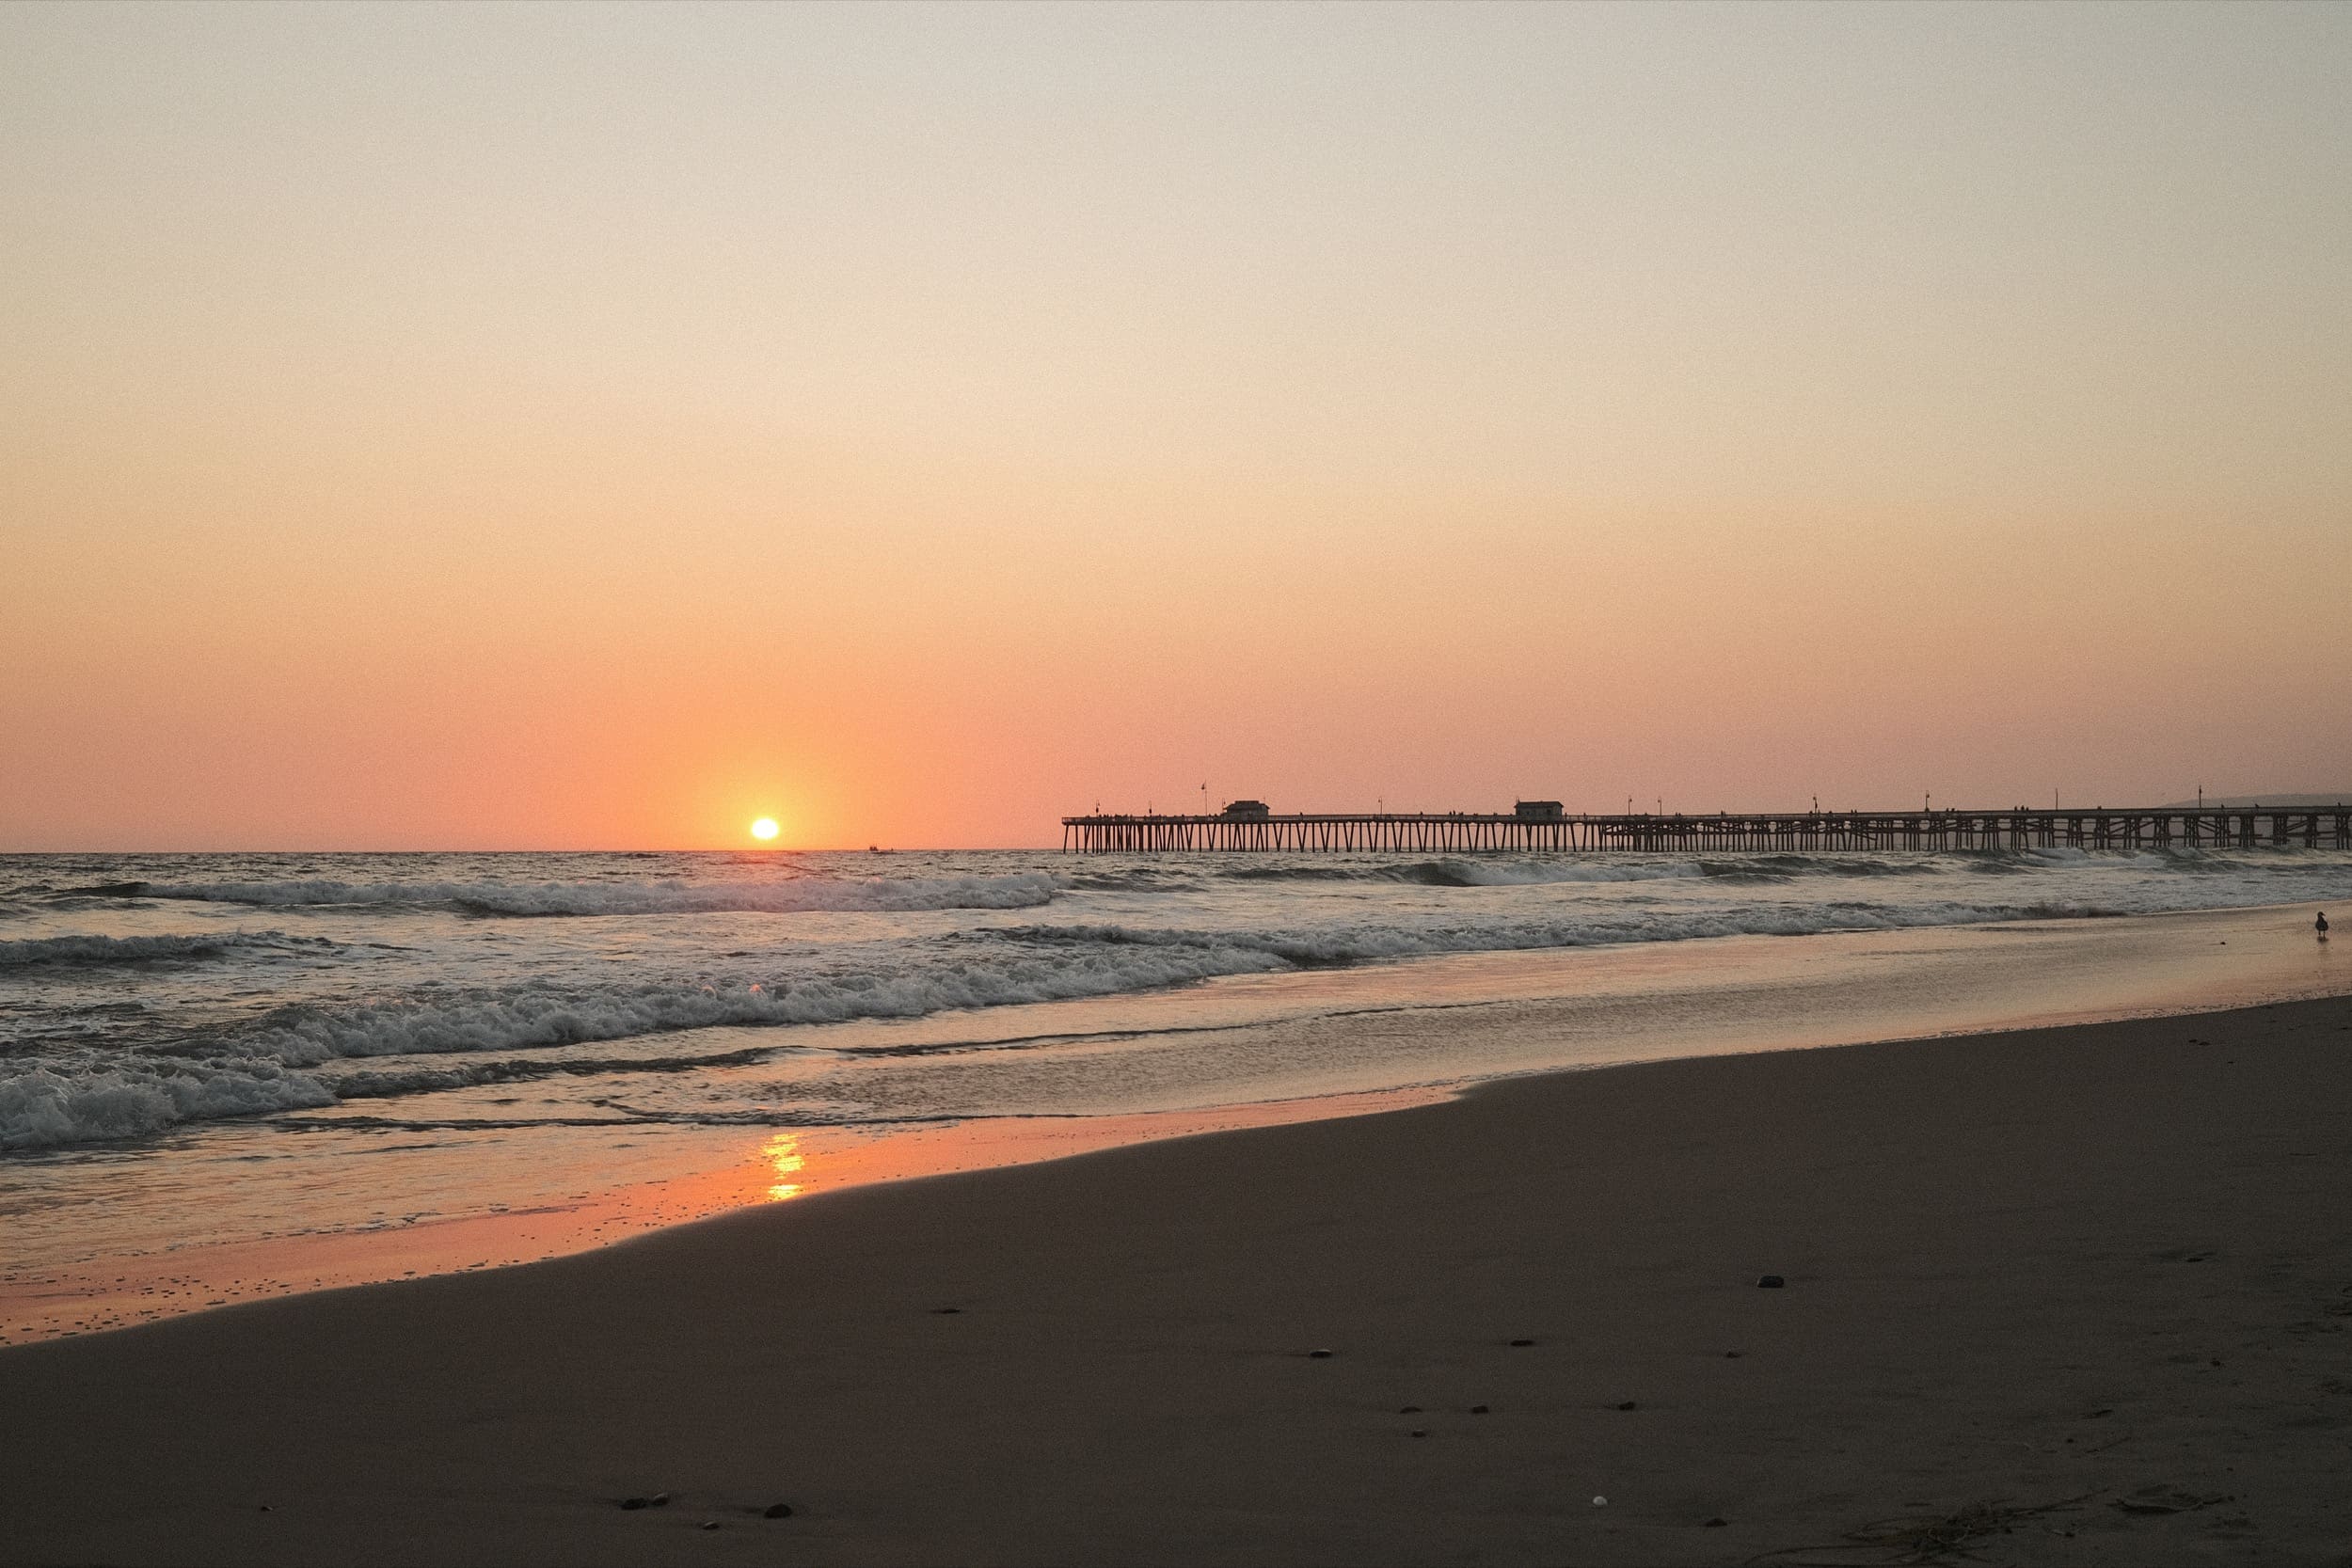
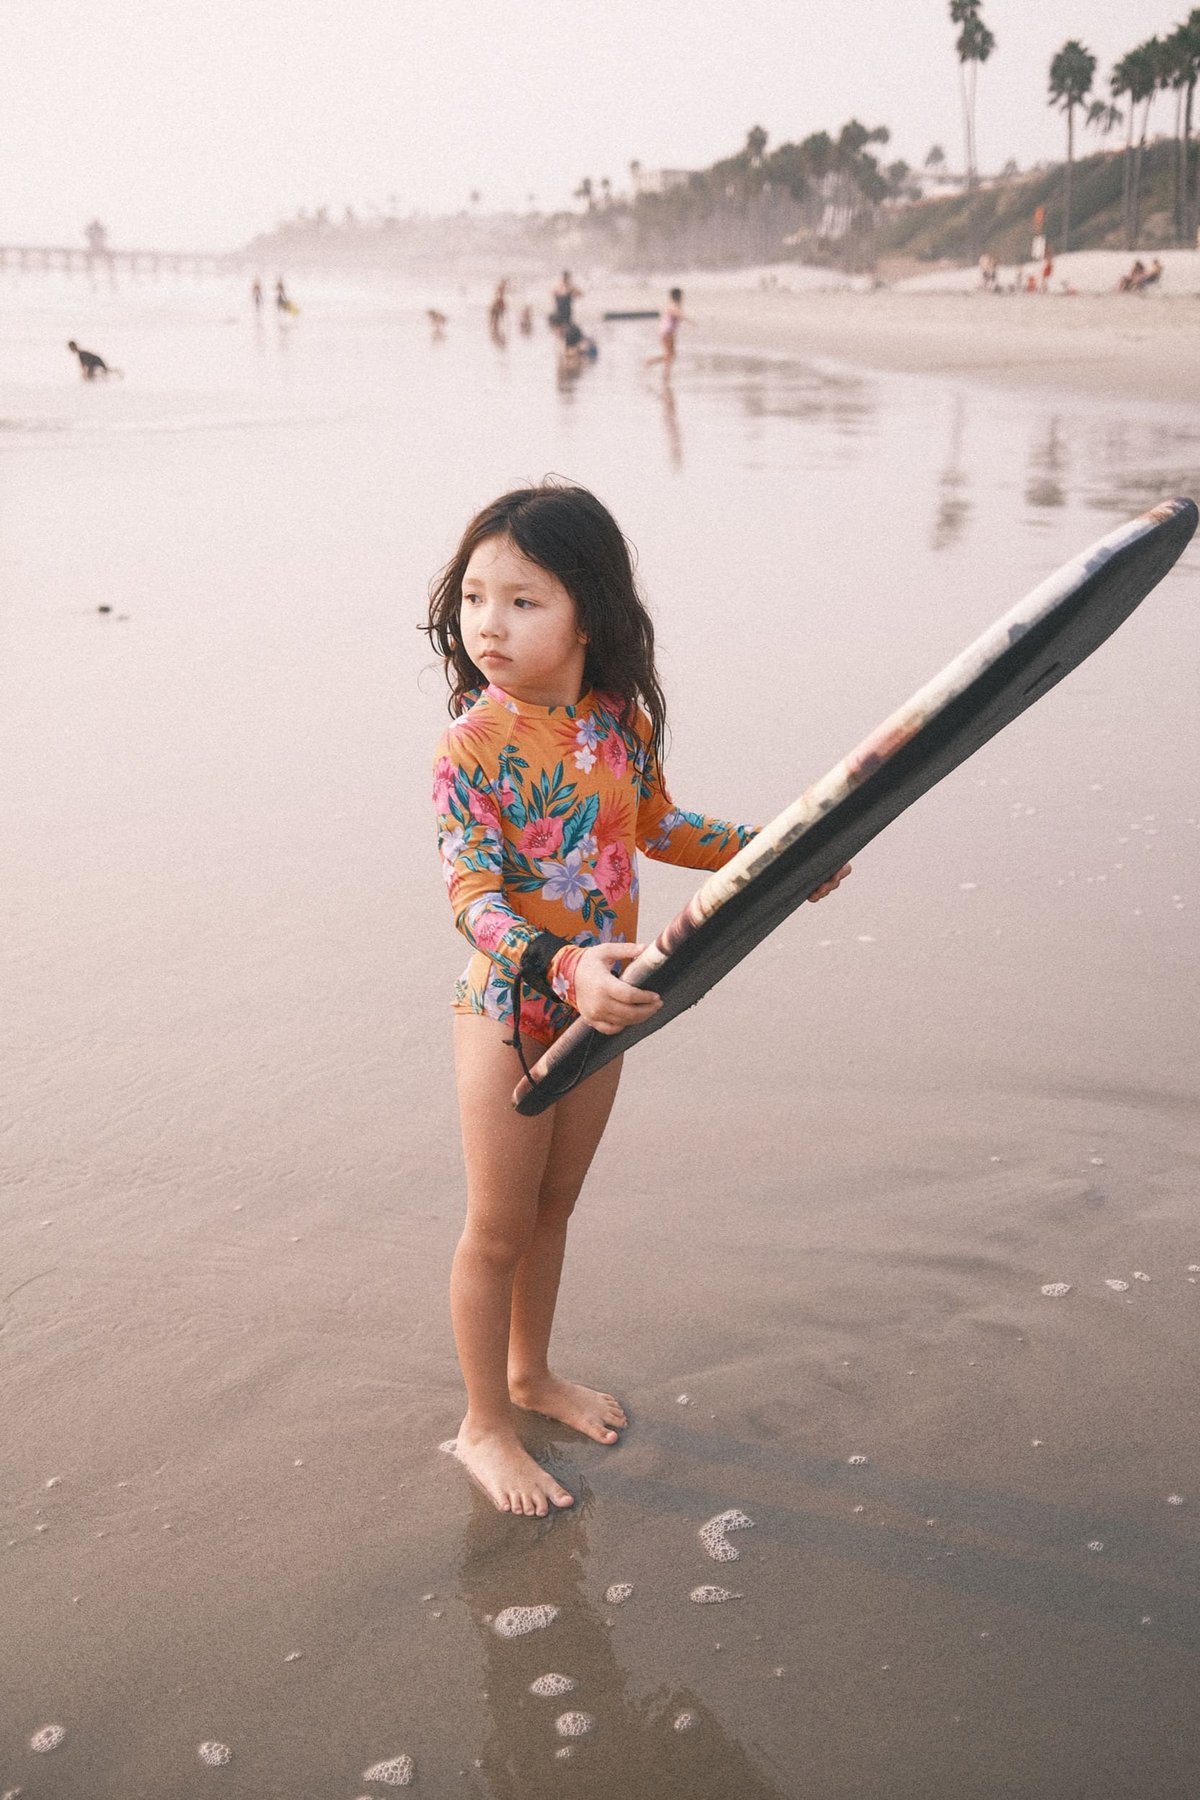
Here are a few Classic Neg looks I’m working on. Things are a bit warmer than usual because of the fires making everything orange but stay tuned.

Classic Neg Looks made with FUJIFILM X RAW STUDIO
ISO 320, f2, 1/160
Classic Neg Looks made with FUJIFILM X RAW STUDIO
ISO 320, f2, 1/160
Kalina with Body Board
ISO 320, f2, 1/180
Classic Neg Looks made with FUJIFILM X RAW STUDIO
ISO 320, f2, 1/150
0
0
2
0
0
Alik Griffin

A professional video editor, and photographer with a Bachelors in Film studies from UCSD. Based in Los Angeles, I have created commercials, trailers, and other video content for various clients and platforms since 2005. I also love to write about my passions and share my insights on my blog.

Related Topics
  • Fujifilm
  • Photography Tips
Previous Article
  • Calculators

What Is Diffraction In Photography?

  • Alik Griffin
  • April 15, 2024
View Post
Next Article
GoPro Hero 19 SD Cards
  • Memory Cards For GoPro

Best Memory Card GoPro Hero 9

  • Alik Griffin
  • April 22, 2025
View Post

Subscribe

Subscribe now to our newsletter

You May Also Like
Thypoch Simera 75mm f1.4 Review
View Post
  • Blog
  • Lens Reviews

Thypoch Simera 75mm f1.4 Review & Sample Photos

  • Alik Griffin
  • January 28, 2026
  • No comments
Cool Street In Nakasu Fukuoka
View Post
  • Blog
  • Lens Reviews

Viltrox WCL-X100VI Review | A Budget-Friendly 28mm Upgrade

  • Alik Griffin
  • January 18, 2026
  • 2 comments
Sony A7V Announcement
View Post
  • Blog
  • What's New

Sony A7V – They’re Back In The Game

  • Alik Griffin
  • December 30, 2025
  • 4 comments
Viltrox 9mm f2.8 Air Review
View Post
  • Blog
  • Featured
  • Lens Reviews
  • Reviews

Viltrox 9mm f2.8 AIR Review & Sample Photos

  • Alik Griffin
  • January 14, 2026
  • 2 comments
Subscribe
Notify of
guest
guest
11 Comments
Inline Feedbacks
View all comments
Earl Goodson
Earl Goodson
5 years ago

I’m disappointed by how few people play with this program. It’s really good despite the tethering limitation. I think Fuji’s in-camera sharpening algorithms are perfectly suited to my tastes and it’s so nice duplicating the in-camera look, particularly Color Chrome Fx/Blue.

Reply
Alik Griffin
Alik Griffin
Reply to  Earl Goodson
5 years ago

Yes, and thanks for the comment. All you have to do is turn town the noise reduction because it eats details sometimes. But their sharpness and image is solid after that. I even like the grain patterns.

Reply
Grey
Grey
5 years ago

I recently switched to full Jpeg, after finding my rhythm, just doing all this in the Q menu. Saves needing a computer to be the superfluous middle man, and you can do it anywhere. Tweak a few things between metro stops, or between shots on site. It’s already super easy, so I can’t see any benefit of having the program without at least some basic editing functions like crop, rotate, etc. At least something like tweaking base settings in film simulations would be cool. Like if I could make +2 colour the default 0 for CC or something. Idk.

Reply
Alik Griffin
Alik Griffin
Reply to  Grey
5 years ago

You can rotate with this, but yeah no crop that I know of. It would be cool though if Fujifilm lets you use software to completely alter the curves of the profiles like Nikon does, rather than just shadow and highlight adjustments. This way you could really mix up some of the looks, or flatten any of the profiles to be more useful for video, etc.

Reply
Emporio
Emporio
5 years ago

Hi Alik,

X Raw Studio is indeed great for benefiting from Fuji’s jpeg engine through your computer.

One major drawback to be mentioned though: you need to have the camera with which the raws have been shot. I’ve recently sold my xt-30 for an xt-4. All my previous raws can’t be edited anymore. Shame.
(x raw studio can export TIFF 8 or 16 bits with the xt-4)

Reply
Aditya Gupta
Aditya Gupta
Reply to  Emporio
5 years ago

He has mentioned that in the article.

Reply
Andre Vallejo da Silva
5 years ago

Hi.Nice post, seems a nice tool. Now, I went to test it with my X-PRO2, and although I could make it work, I can’t seem to make the Camera Profiles appear under the User profiles as I see in your post. Actually I can set the parameters but I can’t even save the profile, I click save and nothing happens…wired…any hints? Thanks!

Reply
Alik Griffin
Alik Griffin
Reply to  Andre Vallejo da Silva
5 years ago

You know, sometimes when I would hit save it wouldn’t save too. It seems like it can be buggy.
But something to check, are you using the USB cable that came with your camera? Sometimes random USB cables won’t let you send data signals over them. I have that problem a lot when I try to update the firmware on my Sony cameras. I have to find a cable that’s designed for data transfer that Sony likes.You could be experiencing something like that.

Reply
Andre Vallejo
Andre Vallejo
Reply to  Alik Griffin
5 years ago

Could be, but if it was a data signal problem, then it wouldn’t be working at all, and I couldn’t make any adjustments I guess…anyway, I’ll try to find another cable…

Reply
Jan Myskowski
Jan Myskowski
5 years ago

I have seen comments in a YouTube post about this topic that indicate you can’t transfer the recipes from the software to the camera unless you have the latest models (x-t4, x-pro3). Have you succeeded in doing so with earlier models? Great article!

Reply
Alik Griffin
Alik Griffin
Reply to  Jan Myskowski
5 years ago

So far I’ve just done it with the X100V. I haven’t tried it on my older cams yet. That would be a disappointment if you can’t do it on older cams though.

Reply
San Clemente Sunset

Join The Newsletter

Featured
  • How To Edit Photos To Look Like Film
    • 4 comments
  • On Board
    Fujifilm X100VI Review & Sample Photo
    • 4 comments
  • Mud Face
    Nikon Z 35mm f1.4 vs Nikon Z 35mm f1.8 S – Sample Images
    • 28 comments
  • What is Micro Contrast
    Micro-Contrast, Is It Real? – Samples With Lens Comparisons
    • 17 comments
  • Nikon Z 26mm f2.8 Review – A Little Miracle
    • 24 comments
  • Zeiss Planar 50mm f2 on the Leica M11
    Zeiss Planar 50mm f2 Review & Sample Photos
    • 5 comments
  • Nikon Z 28mm f2.8 Review & Sample Photos
    • 18 comments
  • Tiffen Black Pro Mist Filter At Night. Streets Of Tenjin Japan
    Tiffen Black Pro Mist Review – Is This The One?
    • 10 comments

Subscribe

Subscribe now to our newsletter

Privacy Policy | Ethics Statement | Licensing | About Me | Contact

Copyright © Alik Griffin Inc. 2025

Input your search keywords and press Enter.

Manage Consent
To provide the best experiences, we use technologies like cookies to store and/or access device information. Consenting to these technologies will allow us to process data such as browsing behavior or unique IDs on this site. Not consenting or withdrawing consent, may adversely affect certain features and functions.
Functional Always active
The technical storage or access is strictly necessary for the legitimate purpose of enabling the use of a specific service explicitly requested by the subscriber or user, or for the sole purpose of carrying out the transmission of a communication over an electronic communications network.
Preferences
The technical storage or access is necessary for the legitimate purpose of storing preferences that are not requested by the subscriber or user.
Statistics
The technical storage or access that is used exclusively for statistical purposes. The technical storage or access that is used exclusively for anonymous statistical purposes. Without a subpoena, voluntary compliance on the part of your Internet Service Provider, or additional records from a third party, information stored or retrieved for this purpose alone cannot usually be used to identify you.
Marketing
The technical storage or access is required to create user profiles to send advertising, or to track the user on a website or across several websites for similar marketing purposes.
  • Manage options
  • Manage services
  • Manage {vendor_count} vendors
  • Read more about these purposes
View preferences
  • {title}
  • {title}
  • {title}