
Do you ever wonder if you’re using the most time-efficient workflow?
If you’re a Fujifilm shooter and want to use Iridient Developer as your primary photo processing software, or even if you want to use it as a RAW converter, then having a solid and consistent workflow is not only going to save you a lot of time, but it will also make your photo editing process a lot simpler.
In this guide, I want to share how I use Iridient Developer to process my Fujifilm RAW files and a file structure to help you stay organized.
Iridient Developer Workflow
I’ll cover two ways of using Iridient. One uses Lightroom first to build and organize all your photo catalogs, and the other uses Iridient as a plugin that you send files to and from.
The other method uses Iridient Developer Only and manually organizes your photos and exports.
Using Iridient Developer With Lightroom
There are really only two good ways to use Iridient with Lightroom. One is to set it up as an external editor (or plugin), and the other is to send files to the Iridient Developer manually. Both are good to know, and I personally use the two interchangeably.
I’ll cover later how to get files back into Lightroom. There are a few ways of doing this, but really only one that you need to know.
Setting Up Iridient As A Plugin – For JPEG
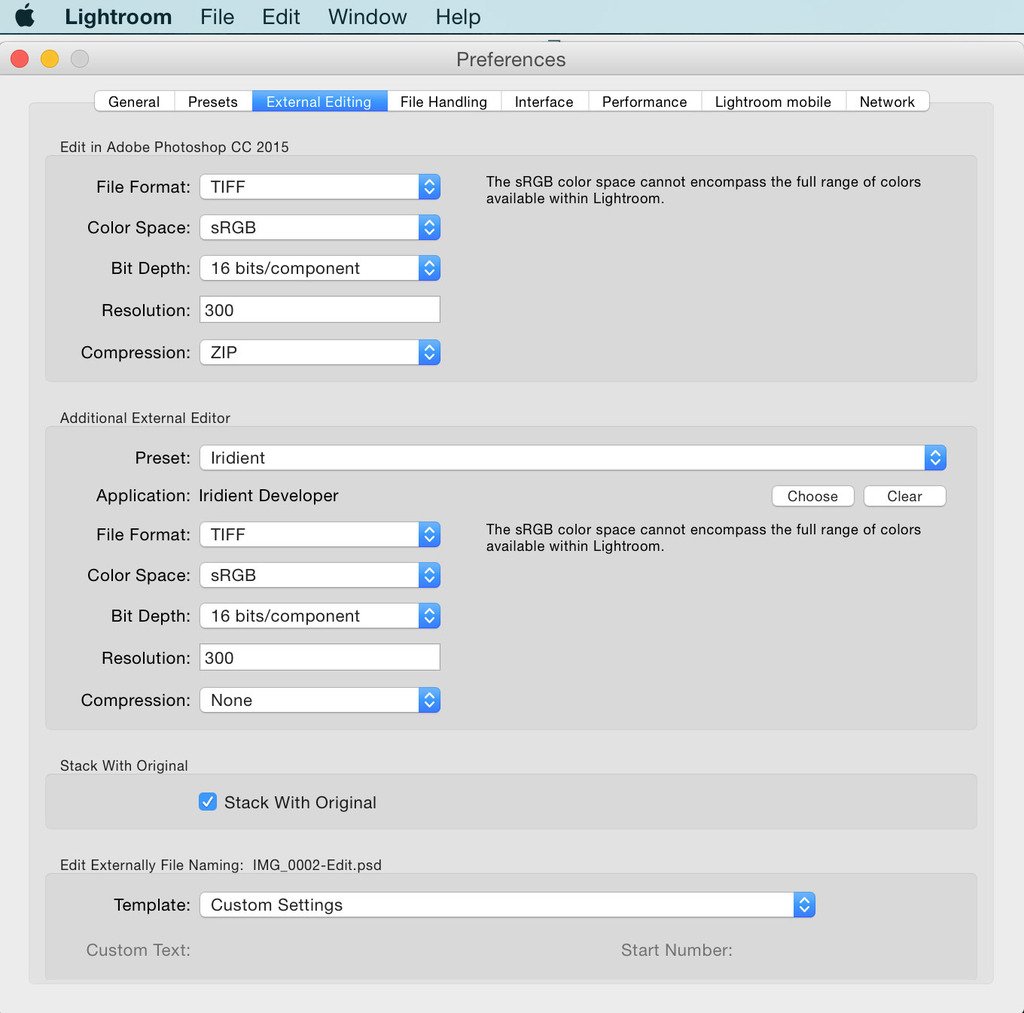
To set up Iridient Developer as a plugin, you only need to go into Lightroom Preferences, find the External Editing Tab, and choose a new Additional External Editor. Navigate to Iridient Developer in your Applications folder, and you should be ready. There are a few options you can choose from as well. I usually set mine like this.
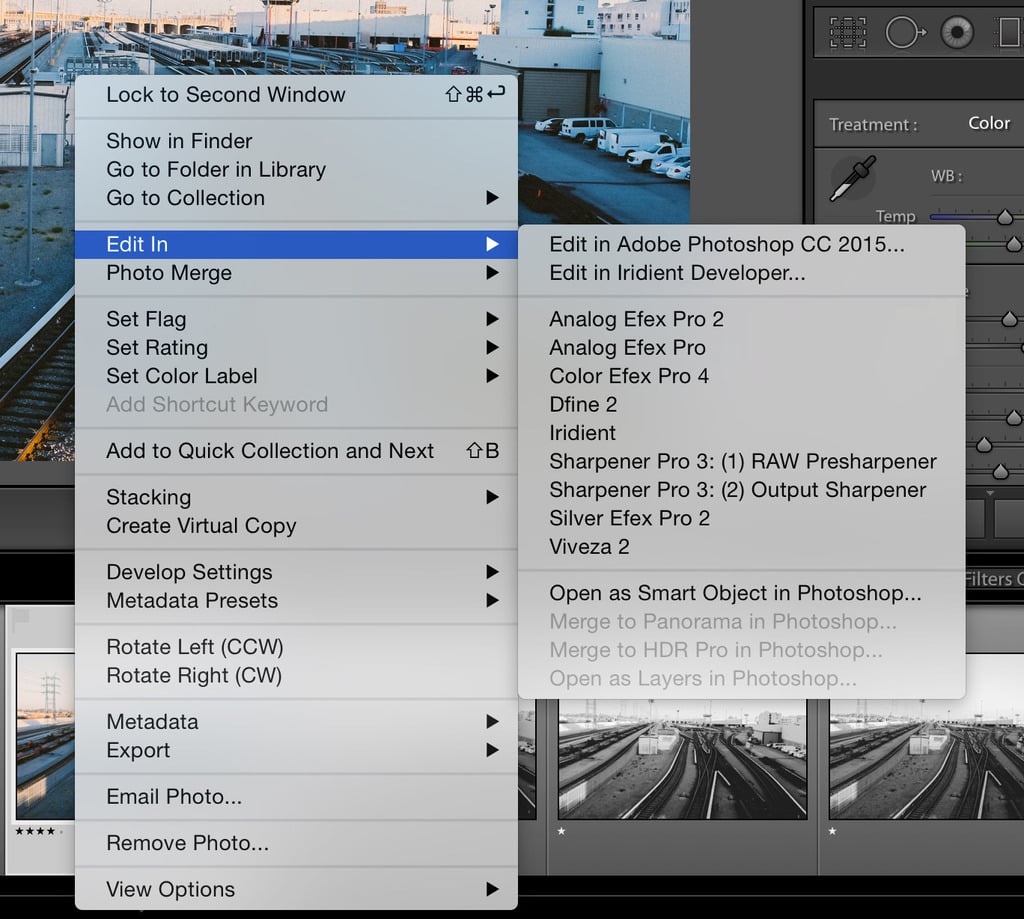
From there once you’re files are in Lightroom, all you’ll need to do is right-click each image or group and select Edit In -> Iridient
You’ll be prompted with a few options that look like this.
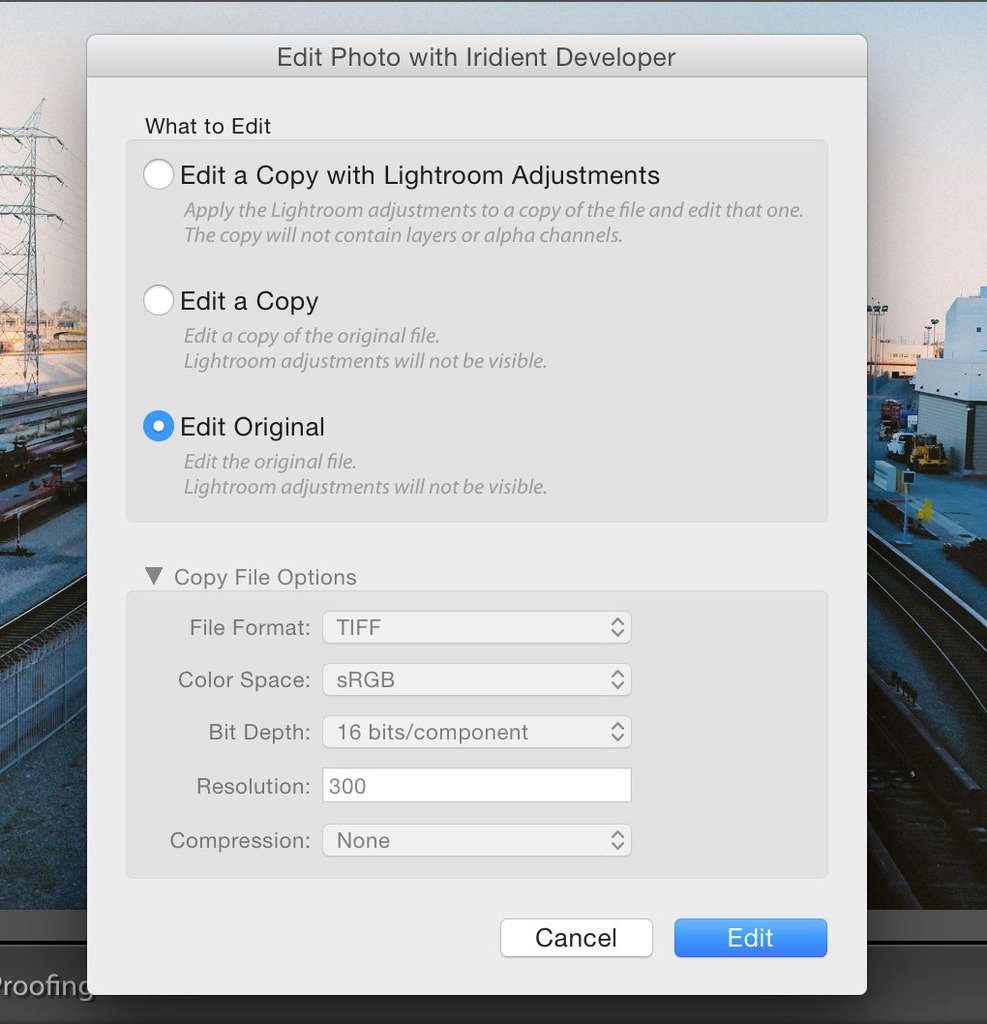
EDIT: Unfortunately, this only works for JPEG or TIFF files. It will not work with RAW files.
If you shot a JPEG, you should Edit a Copy always to have a backup of the original.
Now, you will edit your photo in Iridient like you normally do.
This will not really give you any huge advantage in terms of image detail or X-Trans image RAW converting since you’re using JPEG, but it will allow you to use Iridients’ other great features, like their sharpening and noise reduction tools, which I love.
Send Files To Iridient Developer Manually – For RAW
If the plugin technique isn’t working for you. Or if you’re shooting exclusively RAW, you can always send files to Iridient Developer Manually. It’s as easy as selecting one or as many photos as you like in Lightroom and dragging and dropping them onto your Iridient Developer Icon on your Dock.
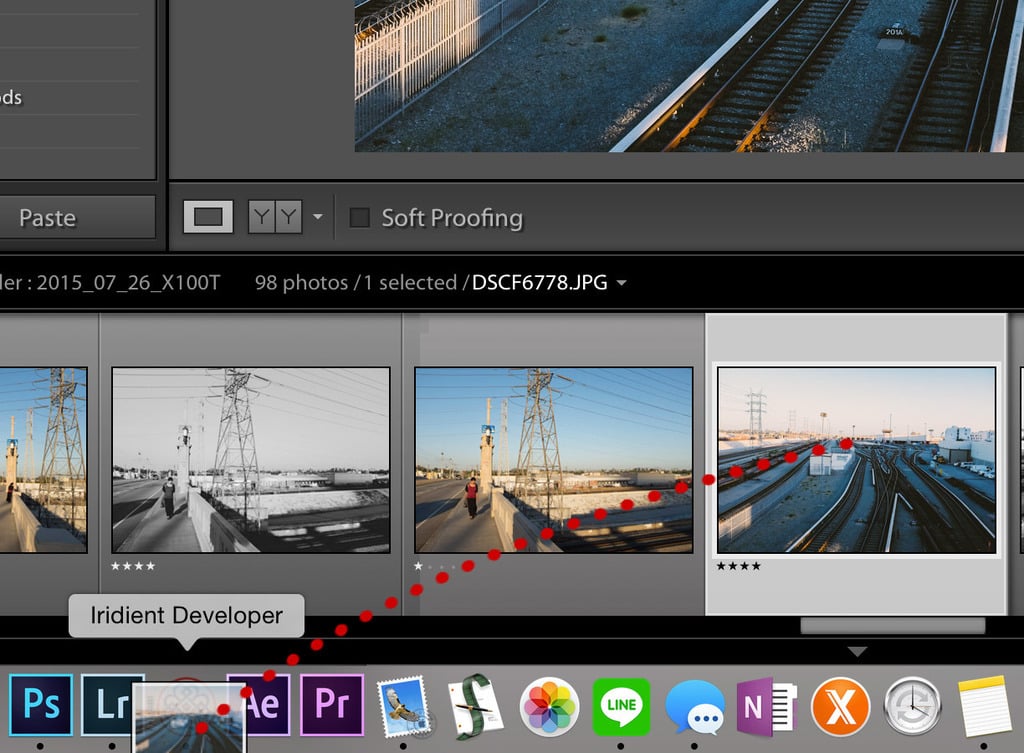
If the icon isn’t there, then open Iridient first, and it should appear.
Exporting From Iridient Back To Lightroom
When you export from Iridient Developer (or Process Image and Save As), you have a few options: DNG (Photoshop), JPEG, JPEG 2000, PNG, or TIFF. Any of them are fine, although I prefer TIFF. 16bit is ideal.
You’re usually prompted to Save Image to the same folder the file is from, if not, navigate to that folder and export there.
I usually add something like -IR to the end of my file to look like this: DSCF0256-IR.TIFF
This way, when I’m in Lightroom, I’ll be able to instantly see that the file was processed using Iridient Developer by looking at the file name above the preview clip.
To get the file back into Lightroom, you only need to find your corresponding folder in Lightroom, right-click it, and select Synchronize Folders.
Lightroom will then scan that folder and automatically import any new files.

Exporting From Iridient Without Lightroom
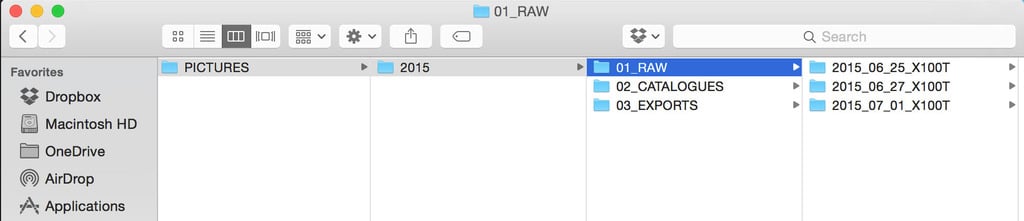
If you’re not using Lightroom and since Iridient has almost no catalog or organizational features, you’ll likely want to create some folder system to manage your exports in your Finder.
I typically set up everything by date and go from there.
If you don’t have a file structure, you can use something like this or a modified version to suit your needs.
Saving Your Work With Iridient
If you’re using only Iridient and want to save your all your work or create libraries, you can import as many photos as you like into Iridient and select File -> save image settings for all images. This will save the state of all the images you imported into Iridient so you can work on them later.
You’ll need to use bookmarks to instantly load certain files or folders with your saved work.
Creating Catalogs With Bookmarks
If you want to create catalogs similar to Lightroom, the closest thing you can do is to create bookmarks.
There are two options when creating bookmarks.
- Add Current Folder
- Add Current Image
Add Current Folder will load the entire folder of the image you’re working on and allow you to save it as a bookmark.
Say you have a day when you go to Yosemite. You can load those images and Add the Current Folder. It will ask you to type the name of this Bookmark, and it will then store that set of photos under your bookmarks for you to load instantly at any time. Just remember to save your work permanently.
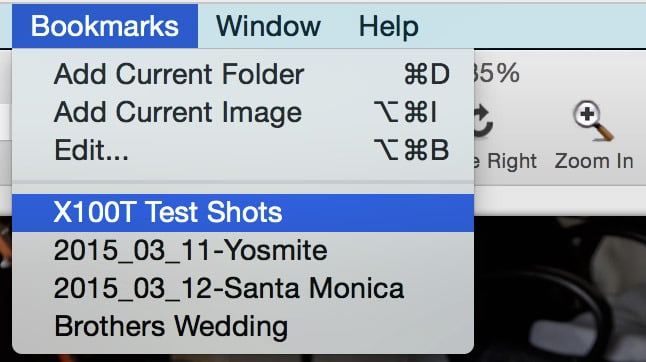
Adding a Current Image allows you to do the same thing but only with a single image.
Working With Iridient Conclusions
Working with Iridient can be a great experience if you can master this workflow. It does a lot for Fujifilm photographers and is worth every penny.
By following this relatively simple guide, you should be able to keep your workflow with Iridient very organized, whether you’re using It with Lightroom or by itself.
You could probably even use similar workflows with Apple’s Photo Application, although that application is not as flexible regarding organization and managing your photos, from my experience.
However, it can be great for your final exports since it works with the cloud, where you’ll forever have backups if anything catastrophic happens. I personally use a Dropbox folder for my cloud-based backups.


Leave a Reply