
I was curious to see how the FujiX100T handled image quality between JPEG and RAW using the new Classic Chrome color profile.
At first, I thought they would be almost indistinguishable or at least extremely close. After all, why would a JPEG image look any different than RAW with Classic Chrome? The profile is built by the same company using the same curves, but the results are surprising.
Raw vs. JPEG with Classic Chrome
Several of the shots looked very close, but then I had a lot that turned out to look nothing like the RAW. I thought I might have done something wrong until I remembered the camera does a lot of post-processing to create these JPEG images, even though all the settings are set to 0.
Highlight Tones, Shadows Tone, and Sharpness, including the Dynamic Range setting, all seem to affect the JPEG and do little to the RAW files. You can set the DR to 100%, 200%, 400%, or auto, but you can never turn it off. This is probably why this camera defaults the ISO to 200. So you always get that latitude in your highlights.
Midway through reviewing the photos, something strange happened. I started getting some photos that were wildly out of balance, or the exposure was just off—usually too bright. After testing and testing, I learned that the problem is actually Lightroom’s RAW converter, not the Fuji color profiles.
Classic Chrome – Raw vs. JPEG Sample Images
For this test, I shot some RAW+F to have a RAW file that I could add the Classic Chrome profile to in Lightroom. The JPEG files would be baked with Classic Chrome in the camera.
I left everything in the camera settings, such as shadows, highlights, sharpness, and saturation, at their defaults.
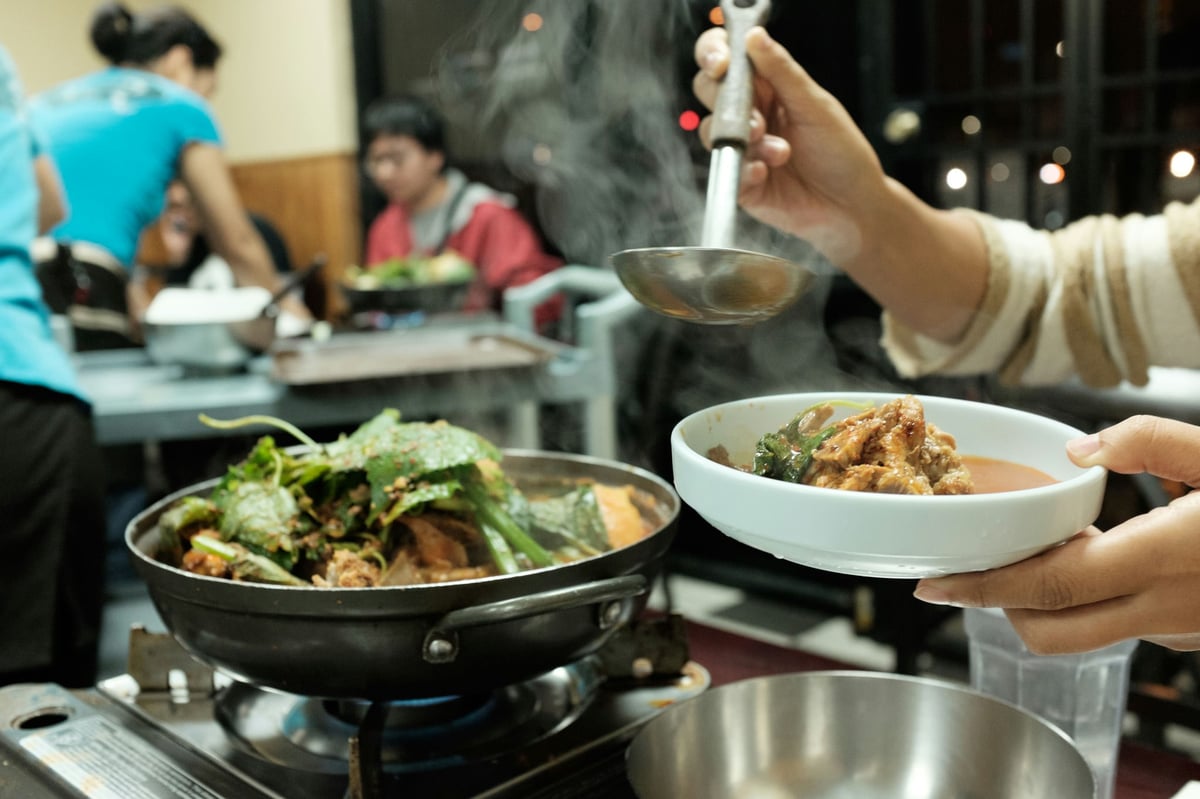
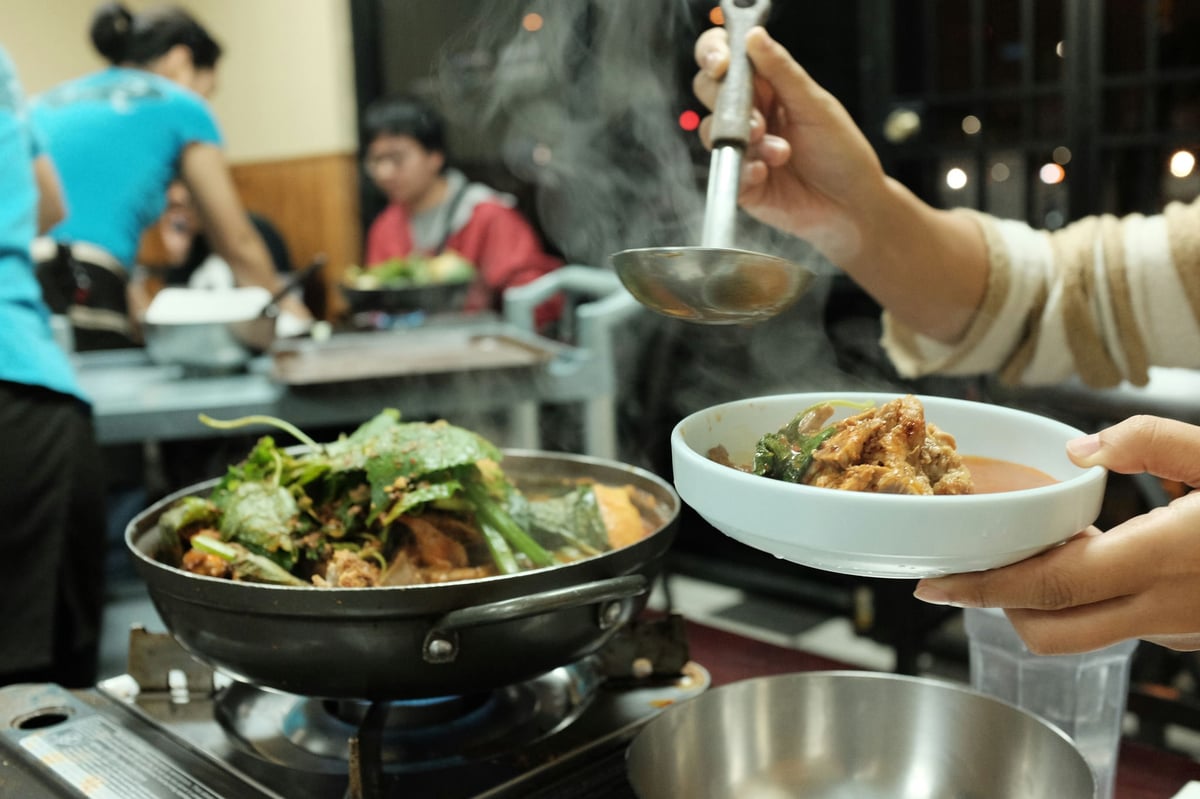
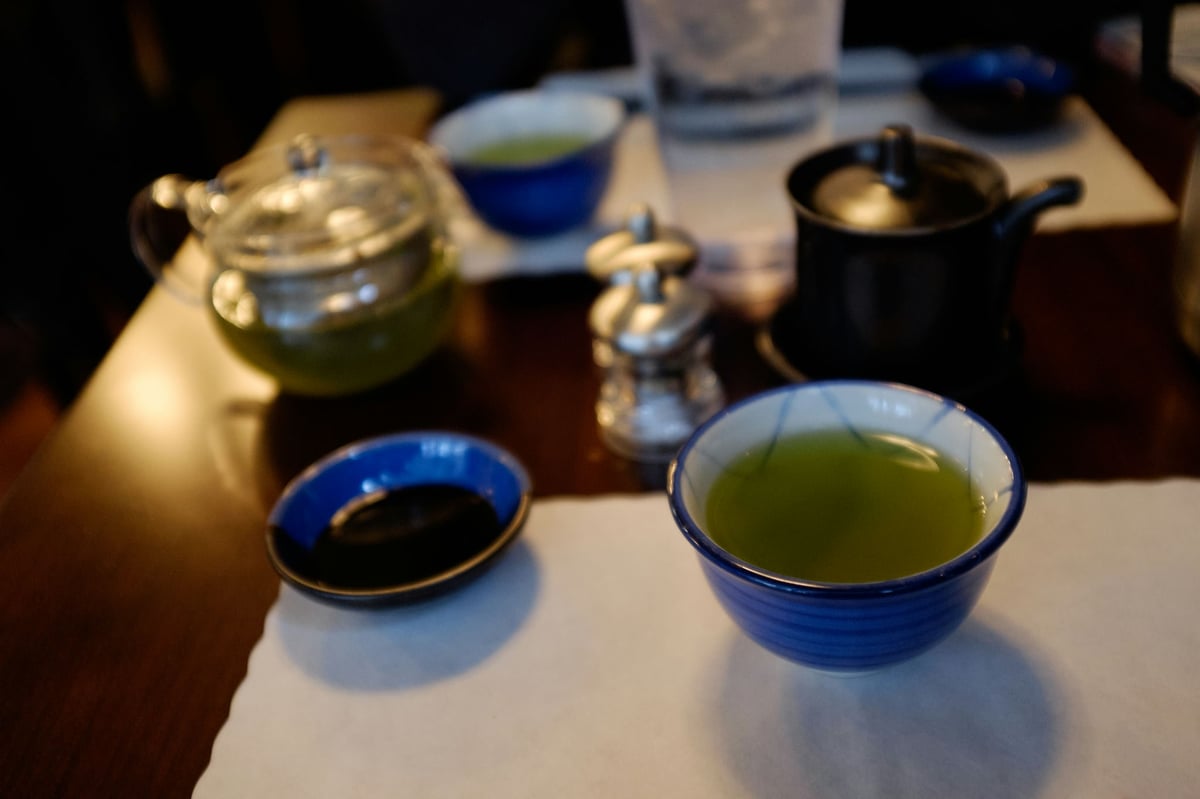
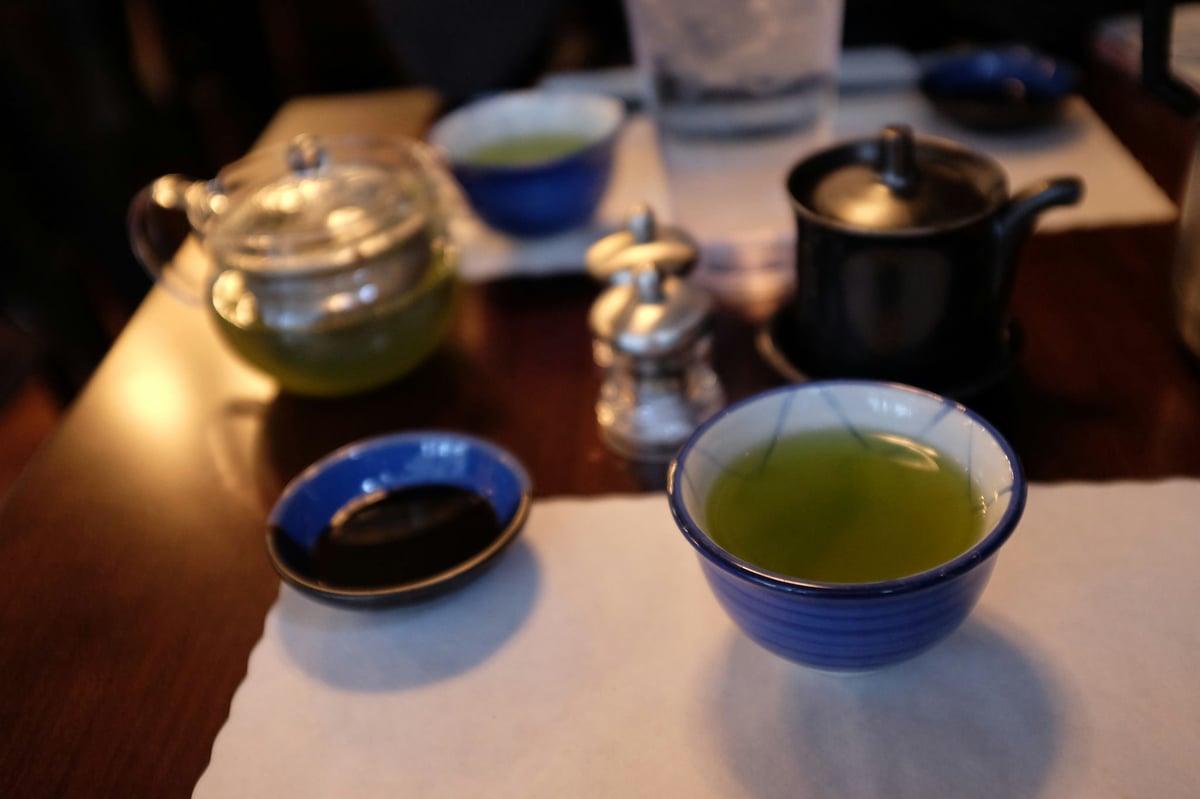
Shot 1 – Gamjatang Korean Soup
In this relatively well-lit area with semi-even lighting. The difference between RAW and JPEG using Classic Chrome was very subtle. Almost unnoticeable. You can only really see the subtleties in the highlights and shadows. It looks like the Fuji X100T has pulled down the highlights a bit to preserve them and lifted the blacks slightly. A look I actually think contributes to the film look we’re going for by using Classic Chrome. The JPEG is actually very nice, and the RAW looks correct.
Camera: Fuji X100T
Color Profile: Classic Chrome
ISO 2500, f/4.0, 1/60sec
Use the slider at the bottom left of the image to swipe between images.
RAW <—-> JPEG
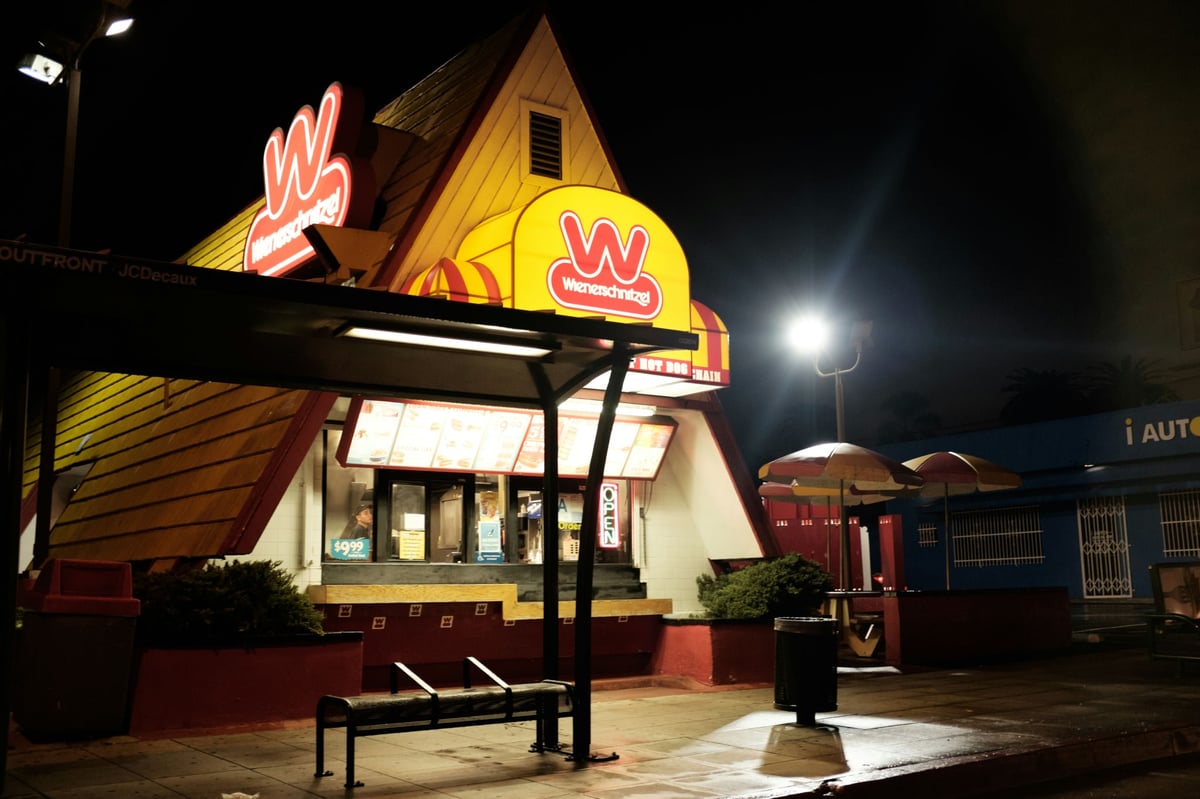
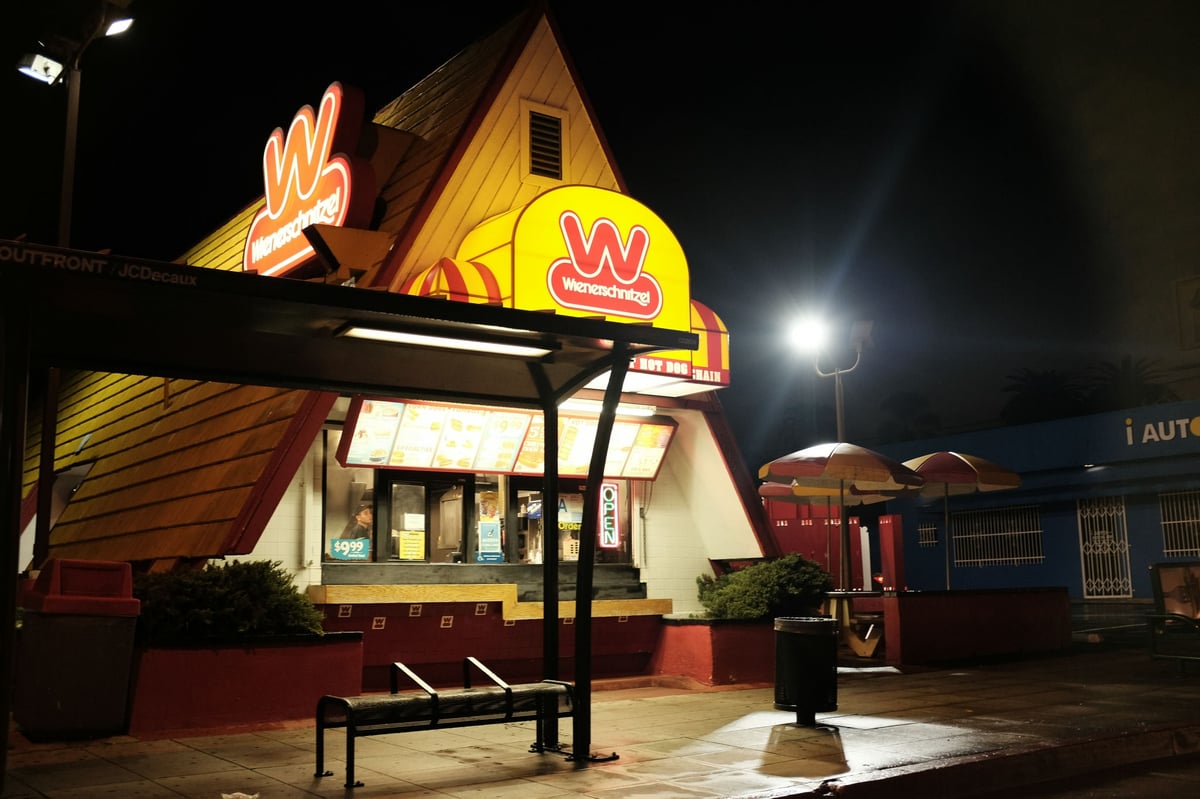
Shot 2 – Wienerschnitzel
This photo also has the lifted black and preserved highlights. Colors in the reds also seem to shift significantly. This could have something to do with the JPEG trying to bring down that highlighted detail. If you look at the W signage on the left in the RAW, you’ll see it’s red, and in the JPEG it’s almost orangish.
Camera: Fuji X100T
Color Profile: Classic Chrome
ISO 1600, f/2.8, 1/60sec
RAW <—-> JPEG
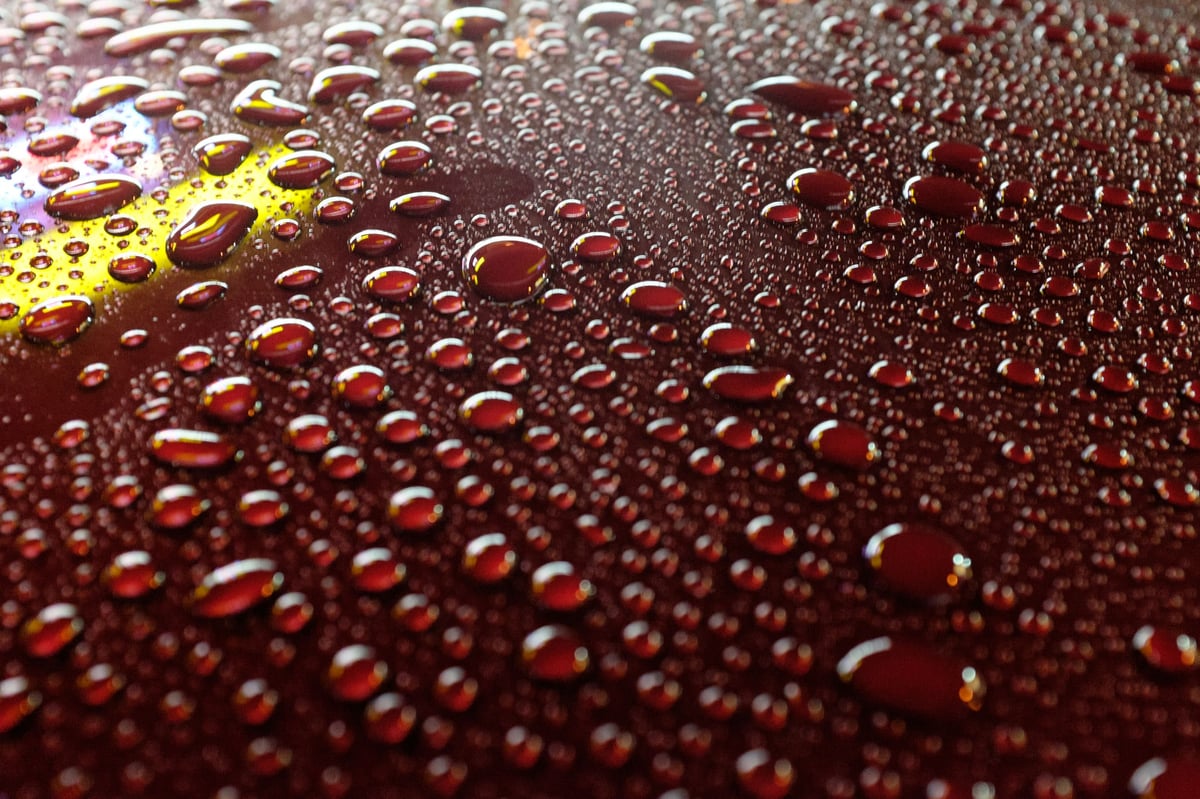
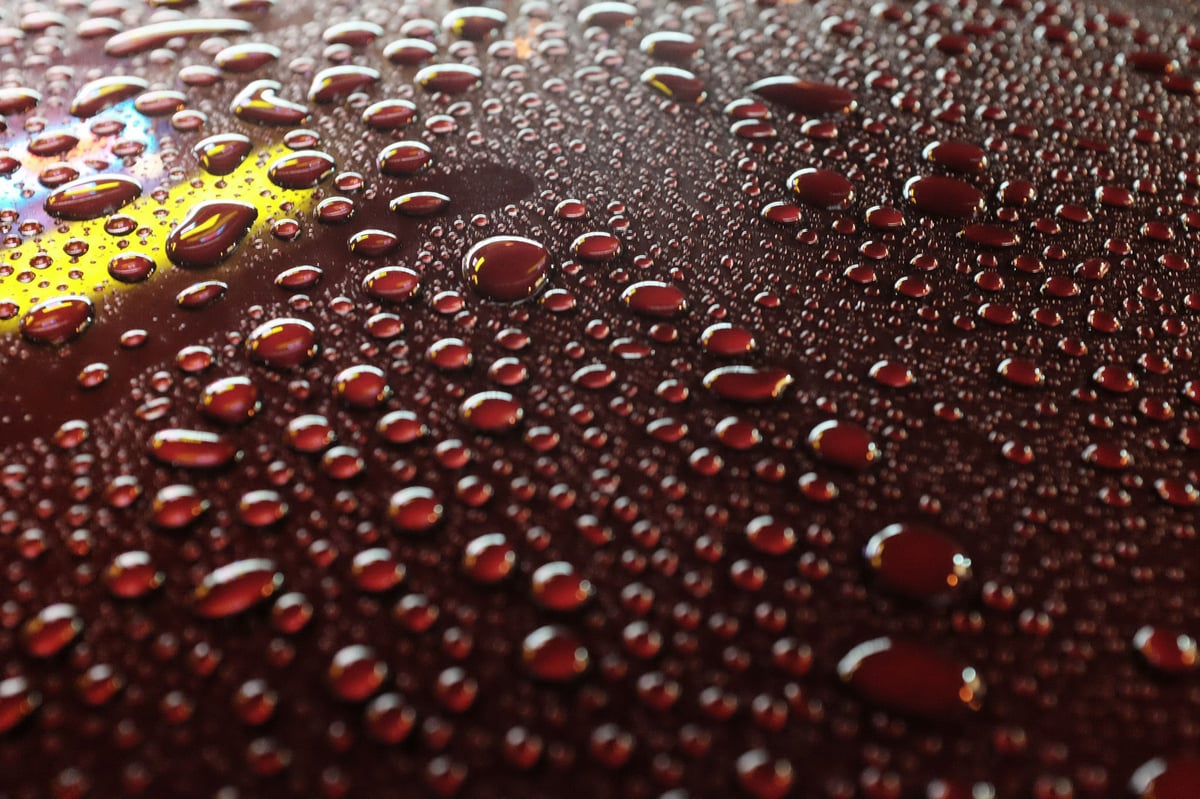
Shot 3 – Water Drops
This is where things got weird. And I actually have a lot of photos that turned out like this when shooting at night. The RAW converter drastically adjusts the exposure in Lightroom. My guess is it did some sort of auto-exposure, but I don’t really know. The photo looks fine on the back LCD panel of my camera, but it’s a full stop that is too bright in Lightroom.
Camera: Fuji X100T
Color Profile: Classic Chrome
ISO 6400, f/4.0, 1/20
RAW <—-> JPEG

Shot 5: Sergio
The colors between the two shots here are all over the place. It feels like there is a white balance correction in the JPEG shot, shifting it towards the purple-pink spectrum. The RAW seems more green.
Camera: Fuji X100T
Color Profile: Classic Chrome
ISO 1250, f/4.0, 1/60
RAW <—-> JPEG


Does Lightroom Suck For The Fuji X100T?
By doing this test on one topic, it became another. I can’t accurately compare Classic Chrome JPEG to the Classic Chrome profile in Lightroom because so many of my RAWs seem to be a full stop too bright. Some also seem to have the white balance shifted. So, I opened Iridient Developer to compare its RAW files with Lightroom’s RAW files.
For Lightroom, I’m using Adobe Standard; for Iridient, I’m running the default IDv300.
Iridient: IDv300 Fuji X100T Standard <—-> Lightroom: Adobe Standard
The only real difference I’m seeing is that the Lightroom image is slightly brighter, easily corrected by lowering the exposure. The colors don’t seem to be drastically different.


Other Looks In Lightroom – Raw vs JPEG
I shot these on Aperture Priority – RAW+JPEG.
All JPEG settings, Highlight Tone, Shadow Tone, Noise Reduction, Color, and Sharpness were set to 0. Long Exposure NR was also turned off.
RAW <—-> JPEG
Use the slider to reveal the RAW image.
ASTIA
VELVIA
PROVIA
PRO NEG STD

CLASSIC CHROME
RAW vs. JPEG With Classic Chrome Conclusions
I have to say I can’t decide how to work with files using the Fuji X100T, RAW JPEG, or both. I want the Fuji film to look in RAW, but they seem off in Lightroom on many shots. Classic Chrome seems to be the closest, sometimes indistinguishable. But Astia, Provia, Velvia, and Pro Neg all seem to have a bigger shift. I imagine Adobe, not Fuji, built the Adobe Fuji Simulators. Can anyone shed light on how these are made?
Strangely, some sequences show larger color and exposure shifts than others. I think it’s just that Fuji has a little army of gnomes inside the camera, developing the JPEGs to perfection. And that’s what Fuji is known for. Great JPEG imaging.
I hoped I wouldn’t need RAW and could add the film look later, which I still can do. However, JPEGs are nice by default.
As an exclusive RAW shooter, I’m now in a place where I can’t ignore JPEG quality. It just looks better when using the Fuji film simulators. That leaves me shooting RAW+F, which slows your SD memory card’s write speed. But we can use the JPEG images to pump out some quick looks for Instagram. And when we feel like trying out different looks or using Lightroom Presets, we still have the RAW files.
Another thing I might start doing is shooting all RAW all the time. Then, select an image from the camera and use the RAW Converter to create the JPEGs. You can do this by selecting the play button, finding an image you like, and selecting ‘Menu Ok.’ OK, your settings are right there.
I’m curious to know what everybody else is like. Are. Are you mostly shooting JPEGs or both? Which has been working better for you?


Leave a Reply