You may have heard of this Iridient Developer RAW converter if you’re a Fuji shooter. If you haven’t, it’s something worth checking out.
I’ve been using Iridient for the last few months with my Fuji X100T and have been so blown away by the difference it makes when converting my Fuji RAW files that I decided to make a detailed comparison between Iridient and Lightroom to show you just how much better it can be at processing Fuji X-Trans files.
And the results turned out a lot better than I was expecting.
Iridient vs. Lightroom A Detailed Comparison
For this test,t I’m not going to compare features. When it comes to features, Lightroom is still years ahead of Iridient. I aim to focus on detail, color rendition, and noise reduction.
And while Iridient is a little clunky and comes with almost no documentation, that’s okay; it’s not designed to be a one-stop-shop photo editing program. The idea is to convert your raw files into PSDs or TIFFs before editing them using photo editing software like Lightroom or Photoshop.
What makes Iridient so good?
If you’re a Fuji X shooter, Iridient uses a unique algorithm designed specifically for the Fuji X-Trans sensor. Because of this, we see a lot more detail and color accuracy when processing our RAF files.
It’s also really nice at decoding standard Bayer sensors, which I cover a little at the end of this comparison.
Iridient vs Lightroom Baseline Comparison
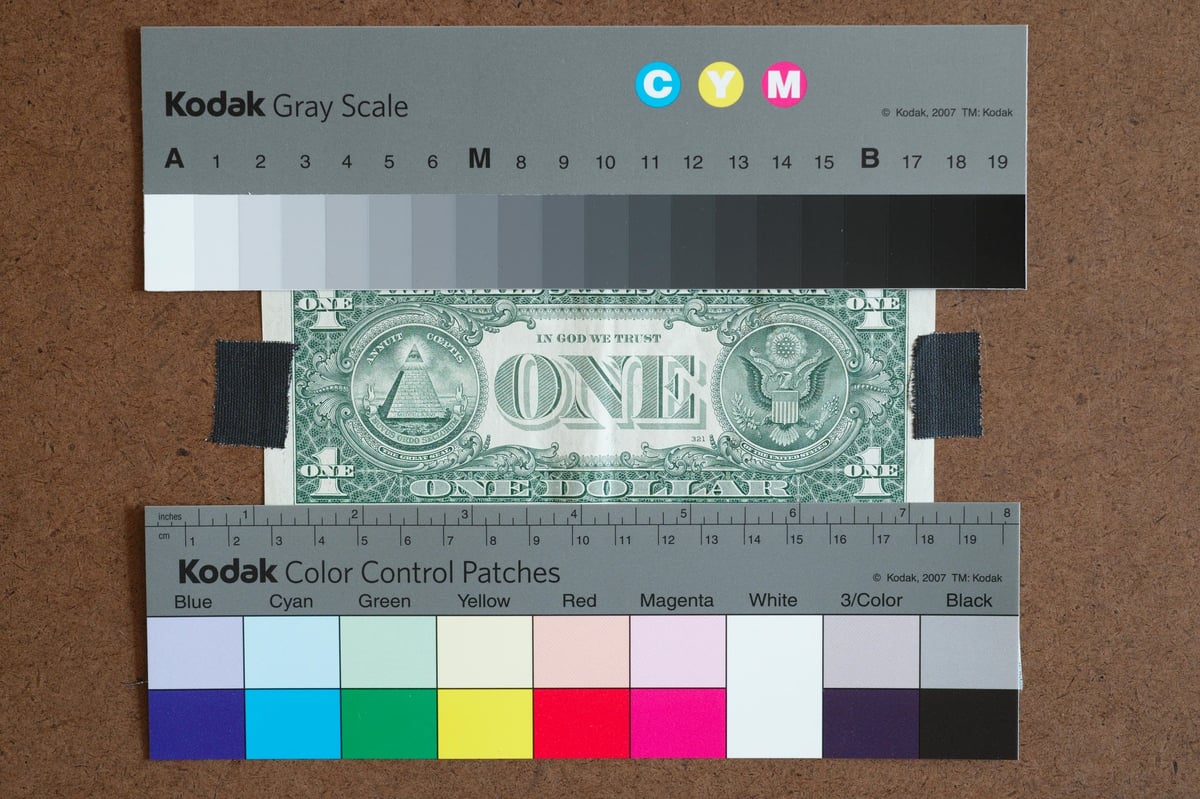
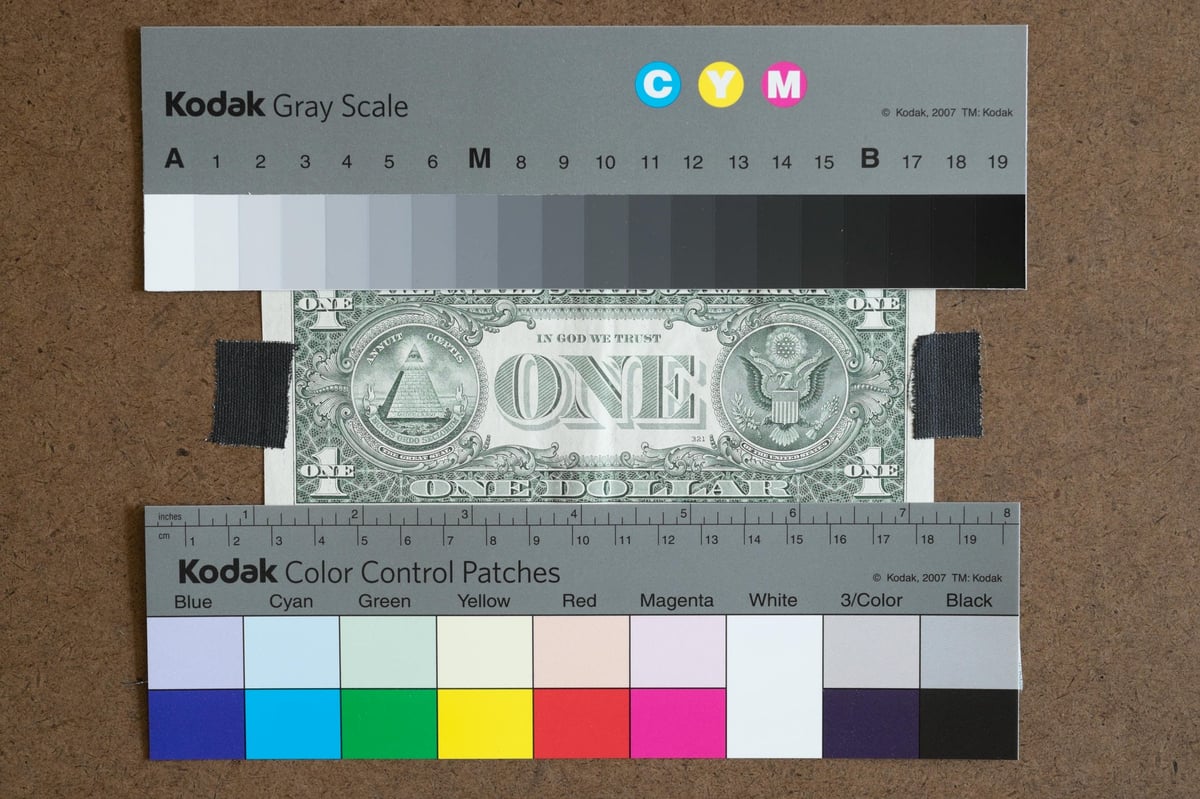
With the baseline comparison, I turned all the settings off completely. No sharpness, no noise reduction. The image was shot at ISO 200, f5.6 on the Fuji X-T1 with the 56mm f1.2 lens.
This comparison shows the difference in color rendering and base sharpness.
Color Sample RAF File – Iridient
Color Sample RAF File – Lightroom
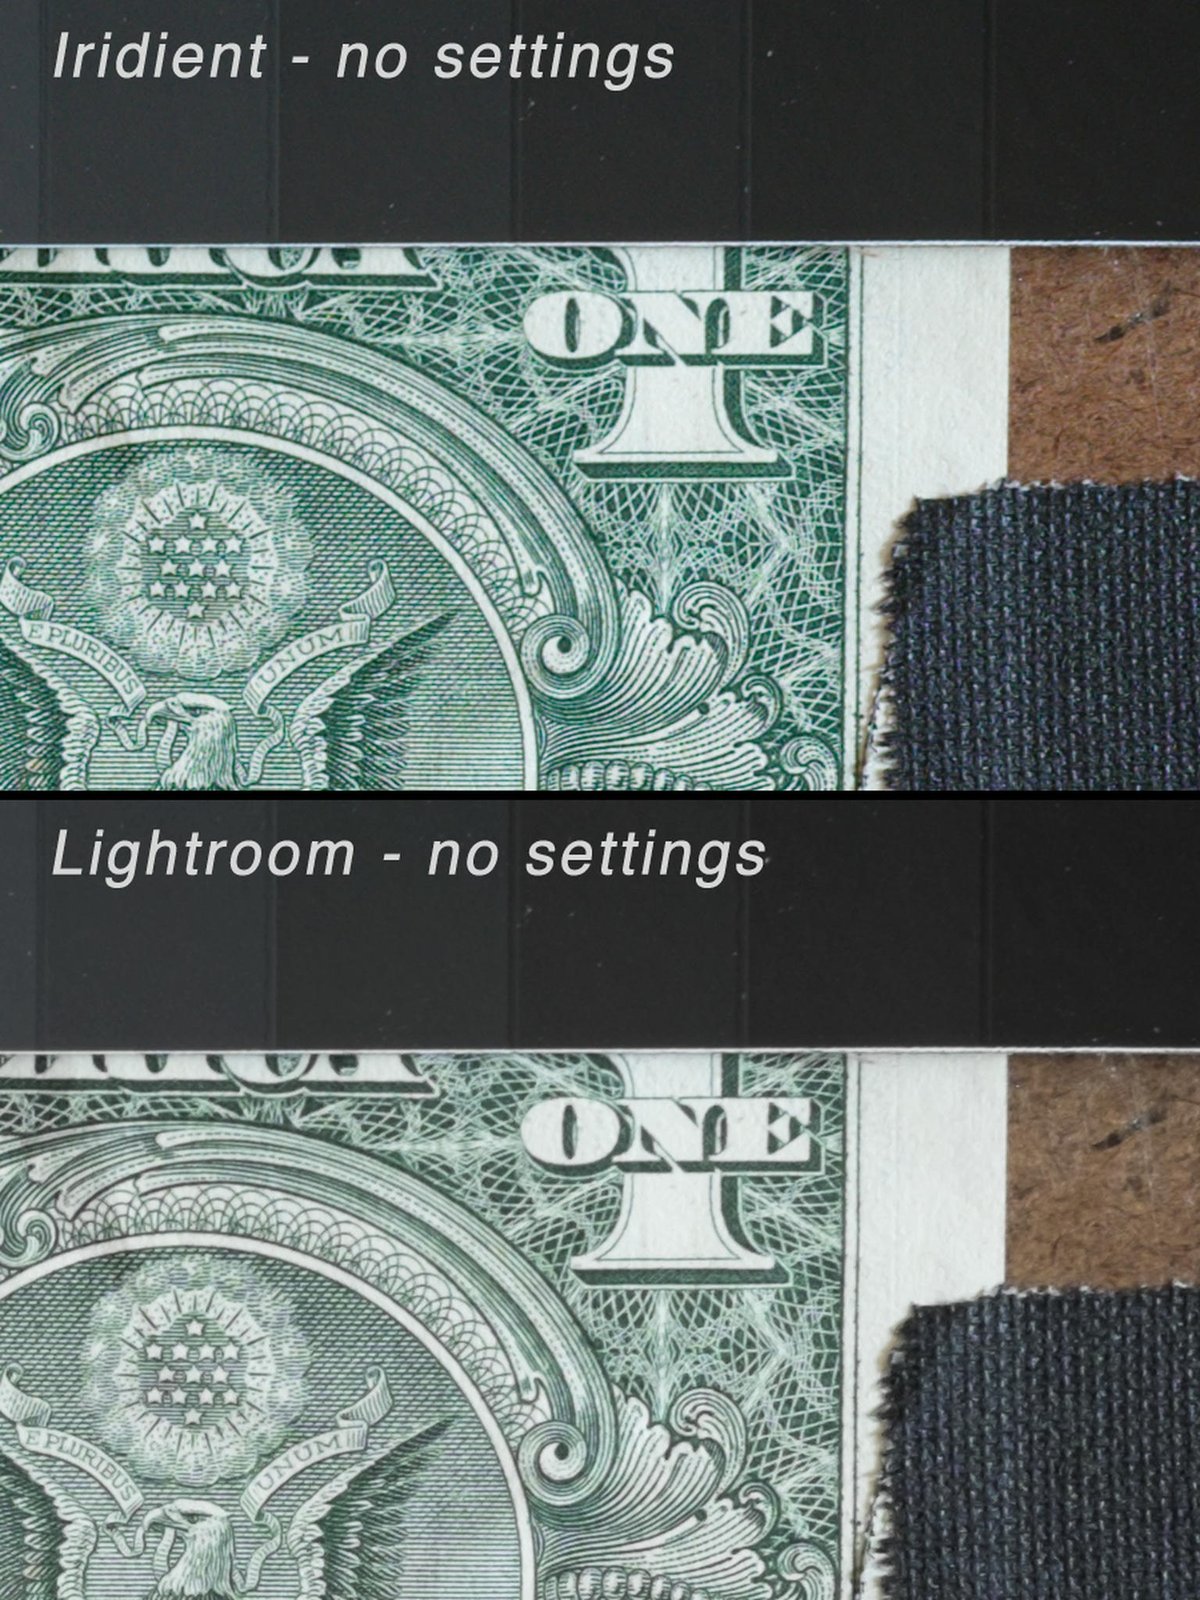
Baseline Sharpness Comparison Chart
With no settings, Iridient is already significantly crisper and has much more detail. And that’s looking at it with Internet Jpeg compression.
100% Crop.
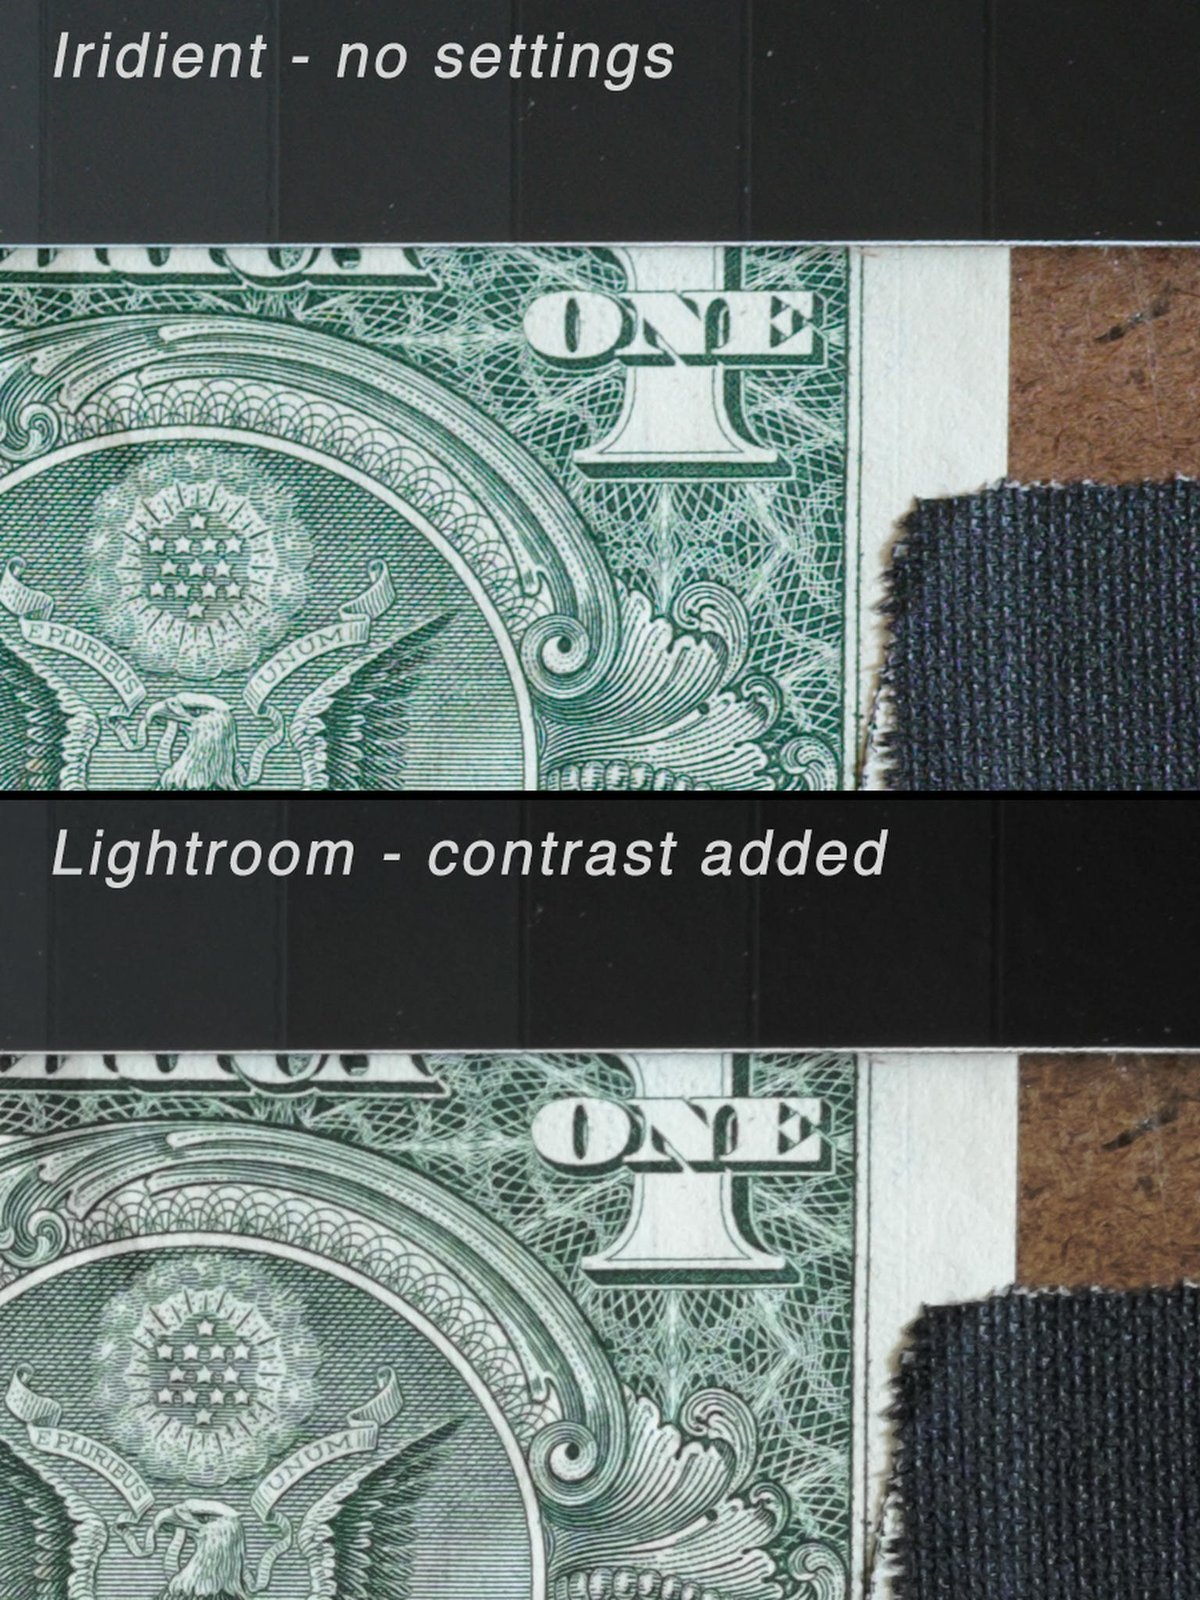
Baseline Sharpness With Lightroom Contrast
By default, Iridient adds some extra contrast to the images. Extra contrast naturally will make some details more apparent and cause the colors to pop. So, I did a test where I tried to match contrast to see if there was still a difference.
The Lightroom sample looks a little nicer, but the image still seems more smeary.
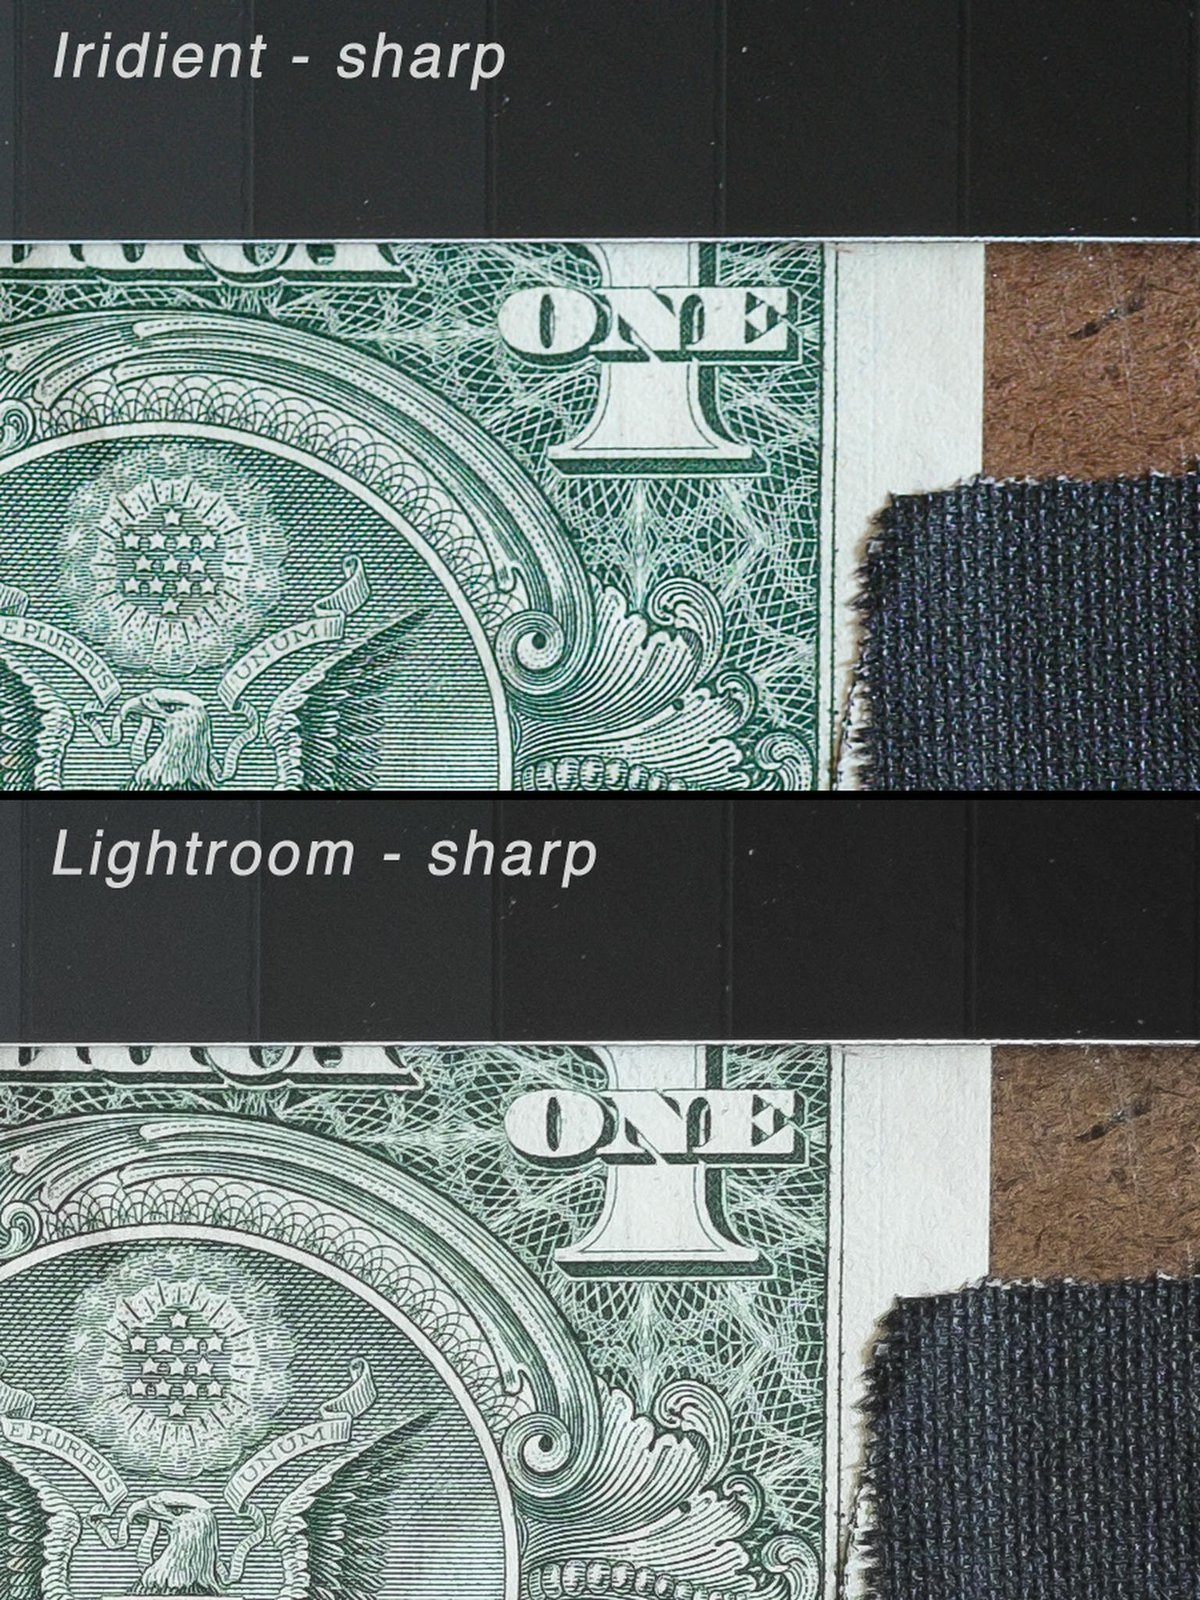
Iridient vs. Lightroom Sharpness Comparison
The sharpness comparison is tricky since the settings are not the same. Lightroom uses some form of Unsharp Mask, while Iridient has six different sharpening options with varying results. I’ve chosen Iridient Reveal to simplify things since it is the default.
My goal with this test was to push the sharpness as far as possible while creating minimal artifacts. (Or those little squigglies that tend to appear).
Sharpness Comparison Chart 01
We can see significantly sharper details but also richer colors.
100% Crop
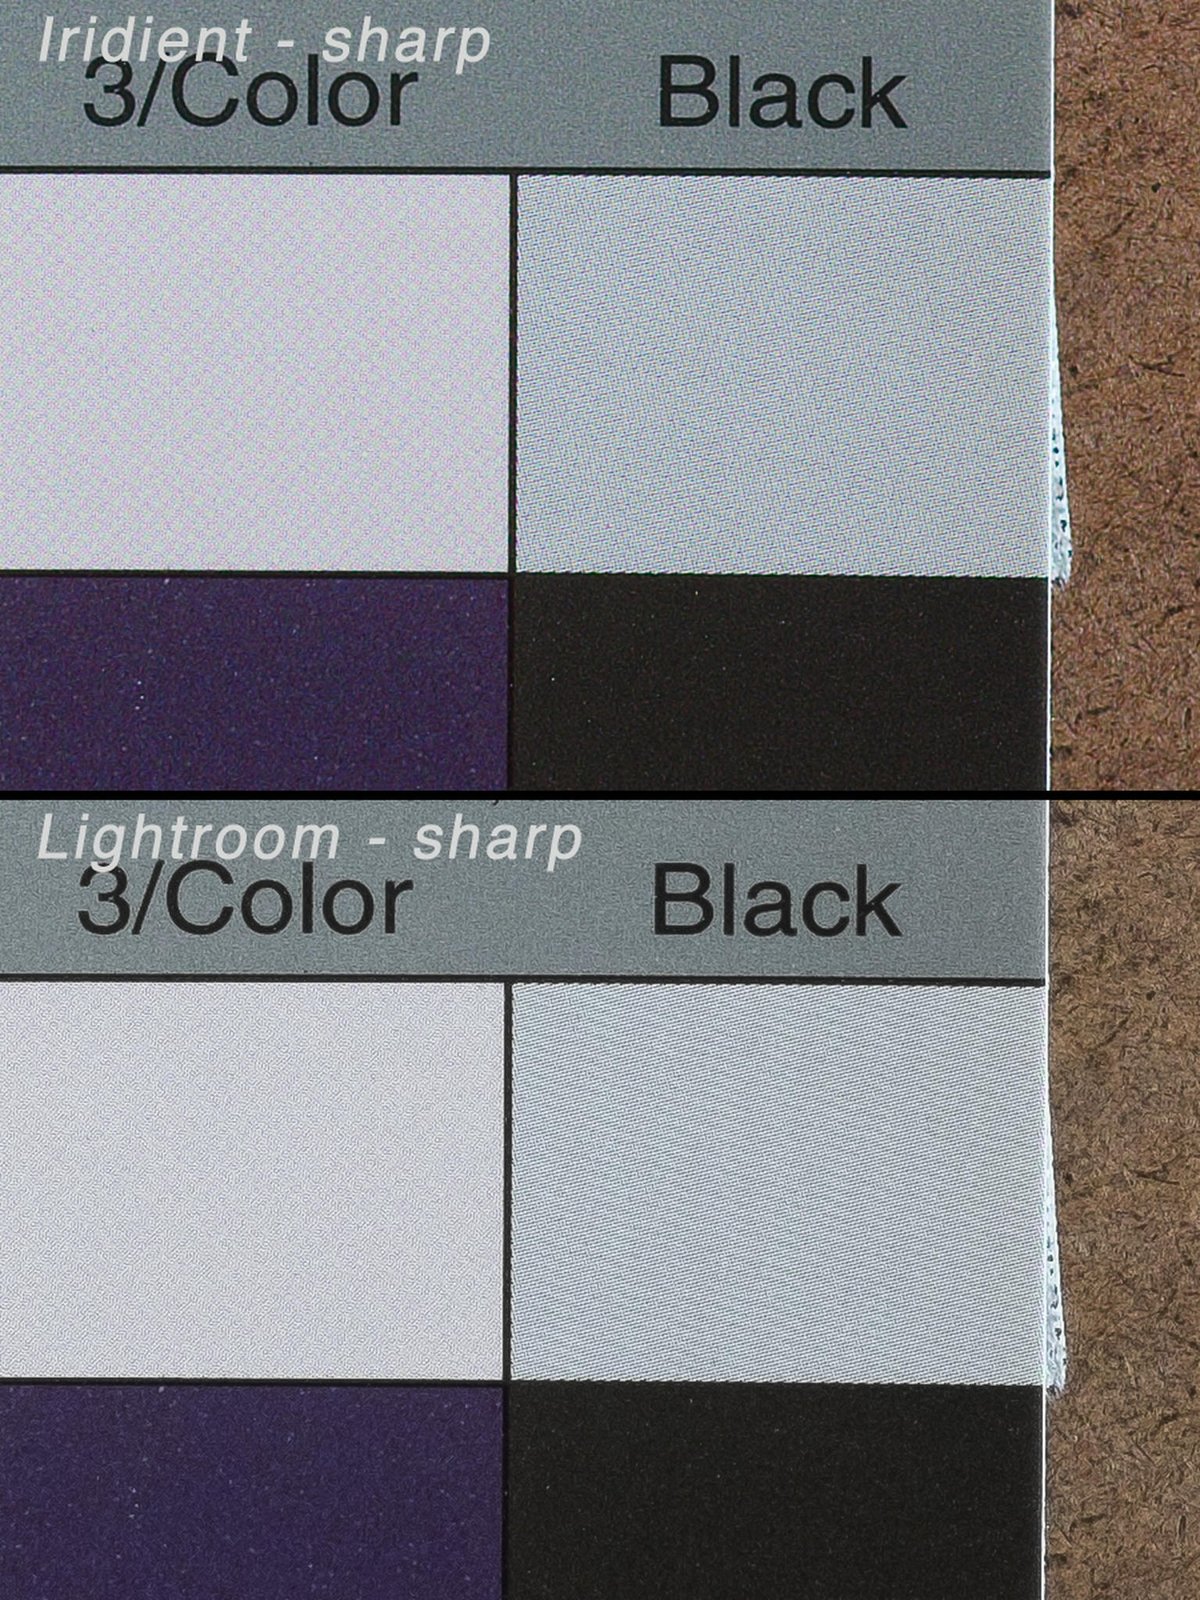
Sharpness Comparison Chart 02
We do get some strange color patterns on some of the color swatches. It only happens on Red, Magenta, 3/Color and Blue.
With Lightroom, you can see some patterns in Black, Red, Magenta, and Blue. But it is much less pronounced. This is a characteristic of the X-Trans pixel array, and Iridient accentuates it.
100% Crop.
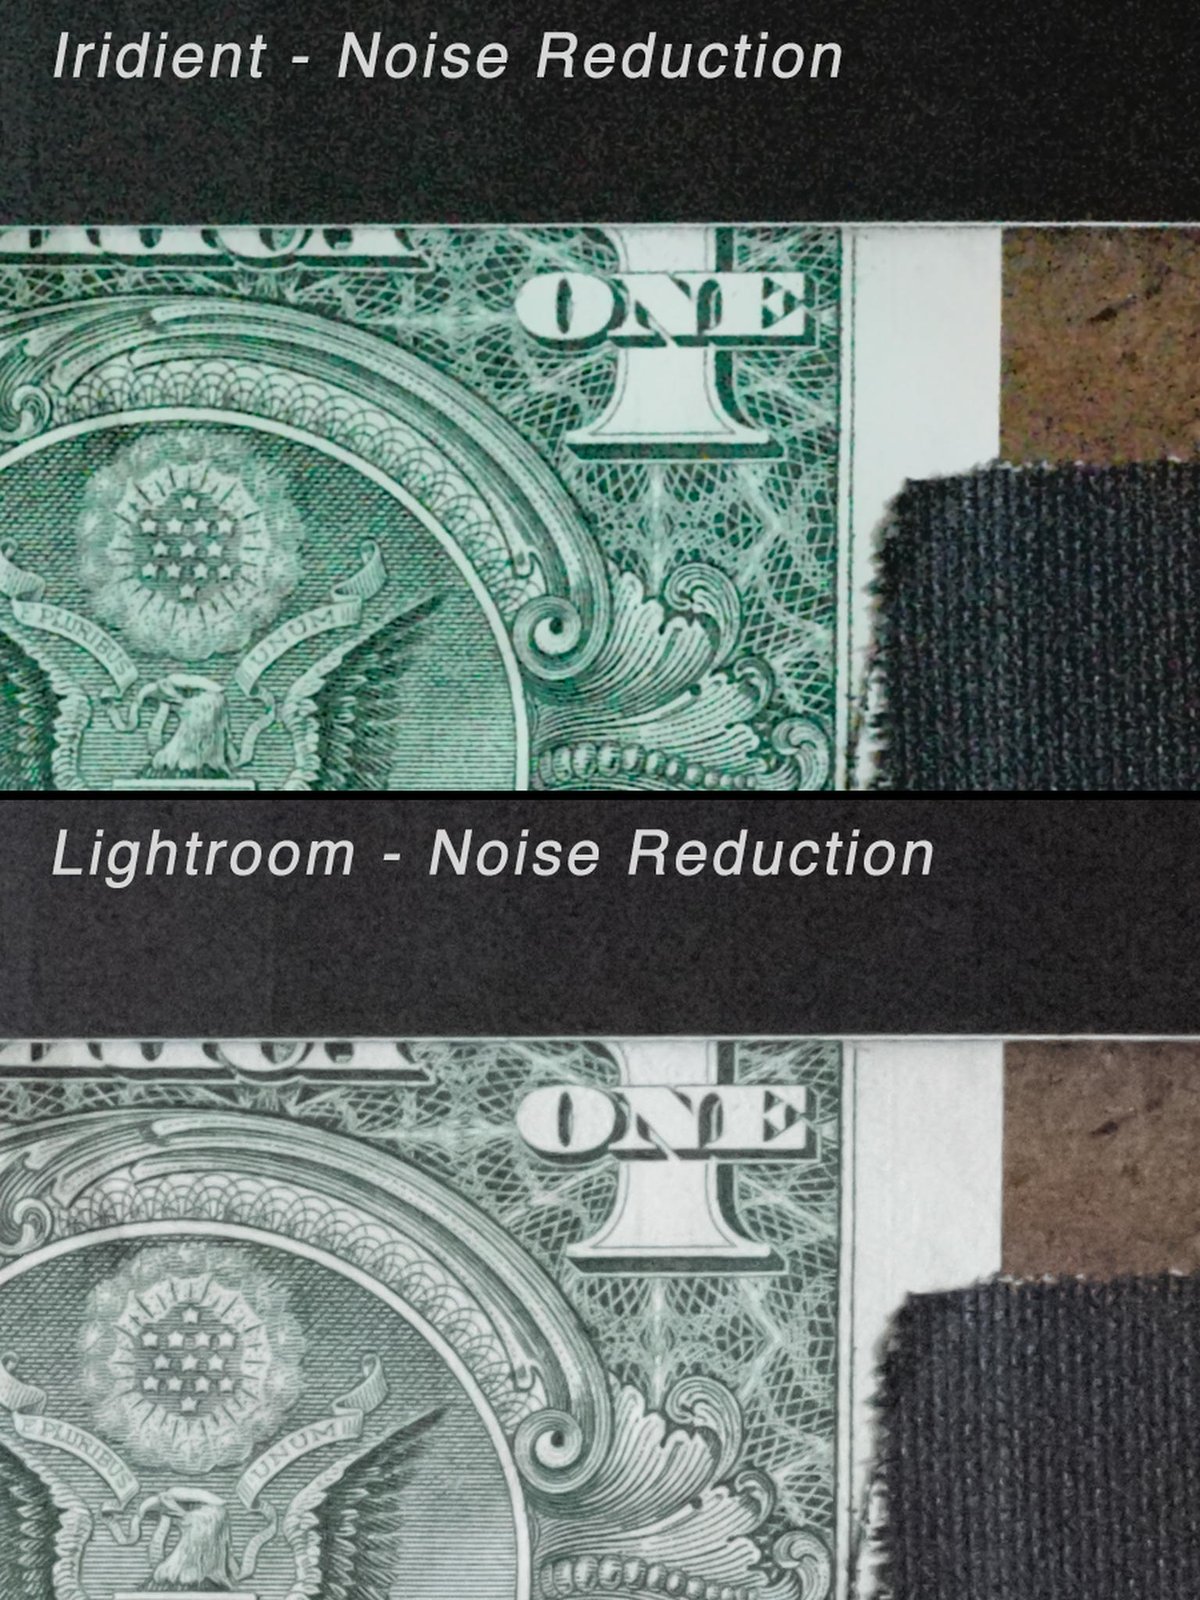
Noise Reduction Test
I shot three stops underexposed at ISO 3200 for noise reduction, then pushed the exposure to correct.
With Iridient, there are also a few different noise reduction techniques. I chose V3 since it is the default.
Noise Reduction Test Chart
The two different programs take a completely different approach to noise reduction.
It seems Lightroom sort of blurs everything, causing a loss of detail. Iridient is doing something else here. The noise is slightly more chunky with Iridient, but the detail and color are also very good.
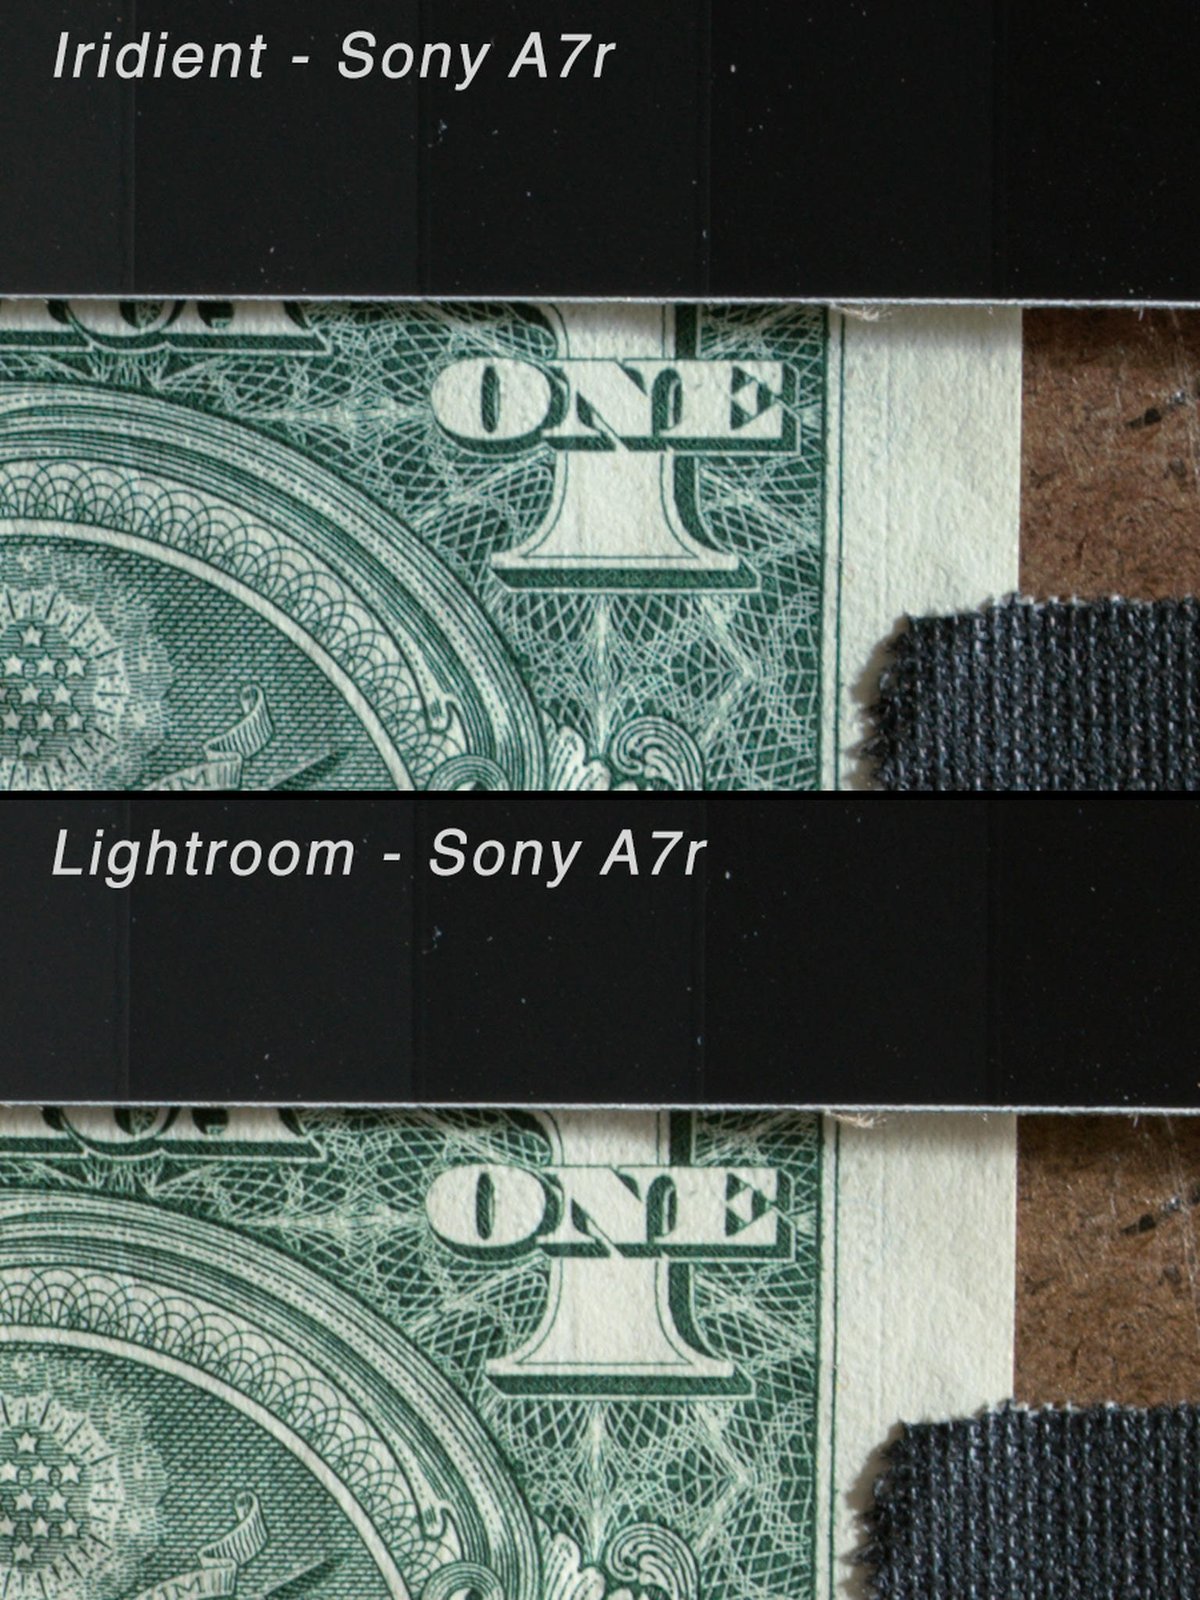
Iridient vs. Lightroom – Standard Bayer Sensor
Out of curiosity, I tested with the standard Bayer sensor of the Sony A7r.
The difference in sharpness is marginal, but the Iridient sample seems to have this extra crispness that’s slightly more pleasant.
Iridient vs. Lightroom Conclusions
I was waiting for the new version of Lightroom before doing this test, but all signs of it seemed to vanish. Hopefully, there are some improvements to Lightroom’s RAW converter since it is falling behind, but I guess we would have seen that with the latest Adobe Camera Raw update.
In this comparison, we can see that Iridient brings our Fuji RAW files into a whole new class of image quality. The resolution and detail you can obtain are worth the hassle of adding an extra step to your workflow.
If you’re a serious Fuji X shooter, I wouldn’t pass this one up. And if you’re a JPEG-only shooter, this is a good reason to consider shooting RAW on some of your more important photos.


Leave a Reply