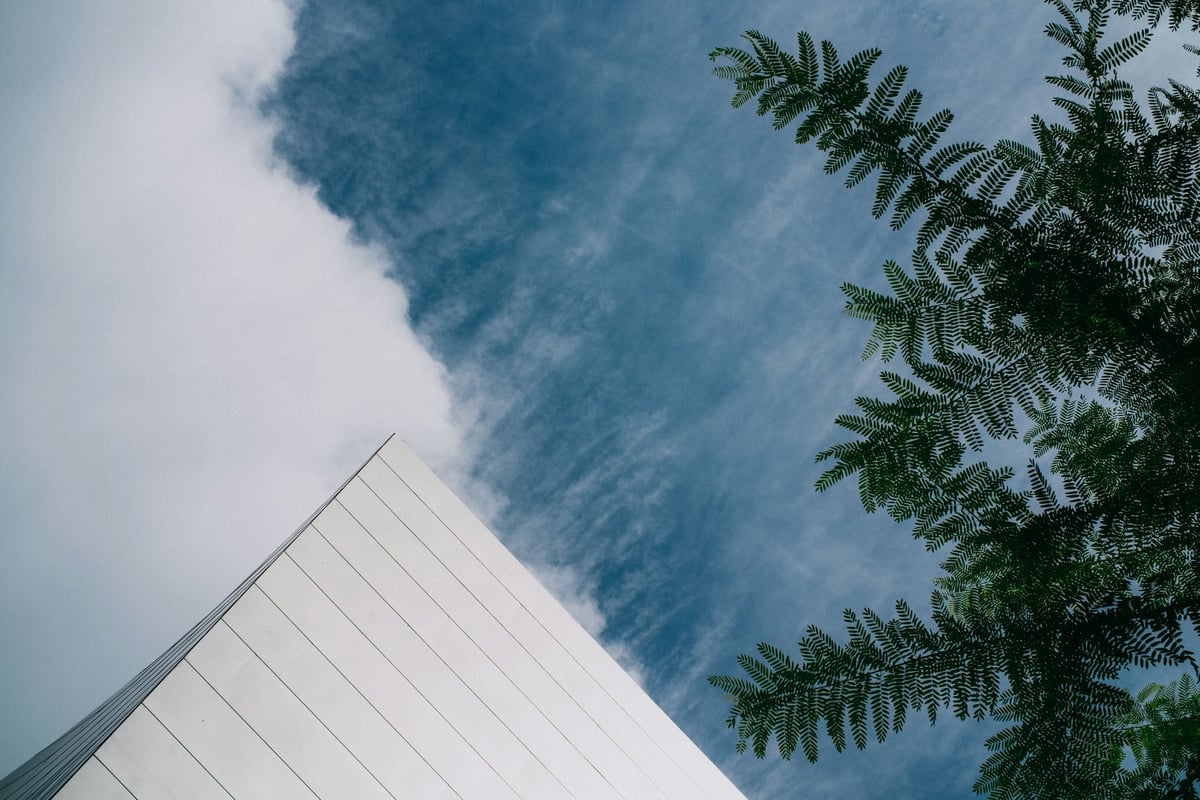
Shooting video is complicated, and shooting video on the Sony A7r II is even more complicated. So many functions and settings have to awork together to produce a great video that I’ve decided to create a dedicated video guide just for the Sony A7r II.
So, if you want to learn how to shoot better video on the Sony A7r II, this is it.
This guide is just a start, but it should set you up with a solid understanding of how to use your Sony A7r II to shoot great videos. Or at least it should help you avoid painful mistakes. But before getting too deep into technique, I’ll need to cover some basic camera settings and requirements that are vitally important.
Note to Sony A7s II readers: Everything you see here also applies to the Sony A7s II, except for the crop sensor. The Sony A7s II has a few additional features, and I’m working on a specific video guide for it.
Sony A7r II Memory Card Requirements For 4k Video
This is completely crazy but also the most important bit of information you need to know.
Sony screwed up badly in the memory card department by sticking with USB 2.0 memory card interface speeds. This limits all memory card write speeds to around 35MB/s. And sometimes the camera will tell you certain cards that should work don’t work.
And because I did a Sony A7rII memory card comparison test, I get my email inbox littered with emails from people telling me cards that should work (according to spec) don’t work for shooting 4k video. It’s crazy pants.
What You Need To Know!
To shoot 4K 100M video, you’ll need a UHS-I SDXC U3 class card. Sometimes,, U1 cards work, and and sometimes,, they won’t. And I’m not talking about about different brands. Sometimes, my PNY U1 card works fine, and other times, the camera tells me to use a U3 card. It’s inconsistent and crazy.
SDXC vs. SDHC
You need SDXC. This is an ExFat file system that XAVC S video requires. To make this easy for you, just remember you need a 64GB or larger card. Anything 64GB or larger will be SDXC. Simple. Update: Sony now allows SDHC memory cards for their advanced video codecs.
U3 vs U1
As mentioned earlier, the camera will usually tell you to use a U3 card, but often times U1 works. If you’re buying your first card for this camera, stick with a U3, and I recommend a very trusted quality brand like the Sandisk Extreme Pro 64GB.
Shooting Full Frame VS Super 35mm (APS-C Crop Mode)
The Sony A7rII can now shoot internal 4 Kt’s the bettwhich ision? Should we shoot 4K in APS-C Super 35mm mode or ore??
I’ll start by saying that if it were my production, I would shoot in Super 35mm mode.
Location: Gear (second tab) -> Page 6 – APS-C/Super35mm – turn it ‘On’ for Super 35mm and ‘Off’ for full frame.
Shooting 4K Super 35mm APS-C
The main advantage of shooting in the 35mm crop mode is getting a cleaner, non-aliased image, which is a higher-quality output.
Here is why!
In Super 35mm mode, the camera will shoot a cropped portion of the sensor, giving you a roughly 5k image that is scaled down to 4k. This results in finer details and a crisper image.
Advantages Of Super 35mm On The Sony A7rII
– More detailed image.
– Cinema lenses have been designed for this format for over a century. So, if you get a PL to E-Mount adapter, you’ll have many options for great cinema lenses that will work perfectly for your camera.
Disadvantages Of Super 35mm On The Sony A7rII
– You will get more rolling shutter.
– Your full frame lenses will be cropped. So your 50mm lens will look like a 75mm field of view.
– APS-C or super 35mm also won’t have as shallow a depth of field as a full-frame sensor.
Shooting In Full Frame Mode
If you want to shoot in Full Frame mode, there are a few advantages and disadvantages you should consider.
Advantages Of Shooting Full-Frame Video
-You’ll get the full frame field of view of your lenses. A 50mm will look like 50mm.
-You’ll have a more shallow depth of field over 35mm crop.
-Less rolling shutter.
Disadvantages Of Shooting Full-Frame Video
-Pixel Binning. – Ok. I’ll be honest: if you Google “What is pixel binning,” you’ll get all this information that makes it sound like a good thing. But I can’t find much information on what this means in the application of video recording. So, I’ll wait for one of the experts to clarify this in the comments, and then I’ll update this post. Thank you readers!
From my understanding, Pixel Binning can mean two things. One, you take 4 pixels and use them as 1. Cameras have already been doing this when you look at RGB sensors and gather information for color pixels, Red, Green, and Blue, and turn them into one proper color value. This is pixel binning, and the same can be applied to taking a 7k image and converting it to a 4k. So it’s like scaling but different.
The other term for binning I’ve seen used (I think this is what they mean when they talk about pixel binning in Full-Frame video) is to throw pixels away. To bin something is to dump it, to trash it.
So, instead of line skipping like the old Canon 5DMkii and Mk ii do, the camera will dump a calculated set of pixels. That’s what I think binning is on the Sony A7rII, resulting in a more aliased, less detailed image.
Either way, it won’t give you as detailed of an image as a 35mm crop.
Sony A7r II Shooting Format
Now that you have a basic understanding of the advantages and disadvantages of shooting super 35mm, I’ll go over codecs and bitrates.
What I don’t know is whether shooting 1080p in super 35mm results in pixel binning or a scaled image. I’m actually starting to think that because there is no 1080p 100M option, the camera automatically shoots at 4k 100M and bins down from there, resulting in a 50M file.
Until further tests are done, I would say it’s best to shoot 4k 100M if you can and do all your scaling in post.
Recording Options And Codecs
The Sony A7rII now comes loaded with many shooting options, too many. All you need to focus on is XAVC S. That will give you the highest bitrate recording.
But if you’re curious about the other options, here is a list of video codecs and settings you can choose from.
You have four recording modes, each with several options.
Location: Camera (first tab) -> Page 2 – File Format: XAVC 4k
XAVC S 4k – 4k recording
– 30p 100M
– 30p 60M
– 24p 100M <- My favorite option
– 24p 60M
Recording location on memory Card: private/M4ROOT/CLIP
XAVC S HD – 1080p recording ( Just about 2k )
Did you know most movies shot today are still being finished in 2k? Sometimes, even shot in 2k.
I personally would stick with 4k 100M, then scale down to 1080p because you’re getting twice the bitrate.
– 60p 50M
– 30p 50M
– 24p 50M <- My favorite option
– 120p 100M
– 120p 60M
Recording location on the memory card: private/M4ROOT/CLIP
AVCHD – 1080p, an older Sony codec
Sony made this back when they still hated the consumer. Now they like us (except the guy that designs the menu system), so avoid this unless you need to shoot interlaced for some strange reason.
– 60i 24M(FX) <- 1080p Broadcast standard
– 60i 17M(FH)
– 60p 28M(PS) <- A Broadcast standard for 720p. So you would have to scale down to 720p.
– 24p 24M(FX) – < – My favorite option for the web or general usage.
– 24p 17M(FH)
Record location on the memory card: private/AVCHD
MP4 – This is a lower bit rate recording
Use MP4 only when quality isn’t really something you need, and you’d rather take up less space.
– 28M at 1080p60
– 16M at 1080p30
– 6M at 1280×720
Location on Memory Card: MP_ROOT/100ANV01
Sony A7r II Picture Profiles & Creative Styles
To simplify your life, Sony has littered the camera menu with even more profiles. And they even inconveniently put them in a different spot. Luckily, most of them are just garbage, and can be ignored.
So now there are two sets of profiles. Our Creative Styles are in most Sony cameras, and our new Profiles are designed specifically for video but can also be used for stills.
Creative Styles
Photographers mostly know these styles. You have your Standard, Vivid, Neutral, Clear, Deep, Light, Portraits etc.
Although creative styles are primarily designed for photographers who shoot JPEG, they can also give you nice colors in video. If you want punchy, nice colors, go with Standard, but if you want to shoot an image that’s a little more flat, shoot Neutral.
I try to shoot Neutral or Standard for video if I’m casually shooting.
For example, when I was using the Sony A7rII when my daughter was born, I just shot 4k 100M with a Standard Creative Style, and the footage looks amazing. There is no need to do any color enhancements in the post.
Location: Camera (first tab) -> Page 5 – Creative Style: Standard
Picture Profiles
If you aim to create a cinematic masterpiece, you should probably get to know your Picture Profiles.
There are a lot of options here, but there are too many. I’ll cover some of the presets, but I won’t go over what you should set your Color Phase and Knee, too, since that is a topic for its own dedicated guide.
The camera has seven picture profiles from PP1-PP7 with preset options that you can change.
Once you turn your Picture Profile on, you automatically turn off your Creative Styles.
You have a few defaults: Movie, Still, Cine, Cine2, ITU709, and S-Log2.
Location: Camera (first tab) -> Page 6 – Picture Profile: PP7
What You Need To Know
Buried in all the profiles are two settings that matter. S-Log2 and S-Gamut.
S-Log2 – This is a default found in PP7. What this does is flatten the image tonally so your dynamic range is extended slightly. If you shoot in S-Log2 and S-Gamut, you must color grade your image when editing.
Cine and Cine2 – These are great looks and can also be nice if you find S-Log too flat for what you want.
ITU709 – Don’t worry about this. It’s a broadcast profile.
Something to keep in mind: color profiles will not extend the camera’s dynamic range; they just provide us with an image with more range in the shadows and the highlights based on what the sensor can already do. Since shooting video is like shooting in JPEG mode vs RAW, it’s better to have an image where the blacks are lifted as much as possible so little detail is lost.
You’ll notice the Sony A7sII shoots S-Log3. The main difference with S-Log3 is it extends the dynamic range even further. Something like 1.5 stops. It adds a lot more gain to the shadows and mids, which also results in a lot more noise.
Sony A7r II Camera Settings And Interface
As you know, the menu system in the Sony A7r II is a complete catastrophe. It’s 2015, cars now have autopilot with built in 4G, you would think a camera company could give you a description of what a setting does in camera. I guess the Magic Lantern Hacks do for the Canon’s, and it’s amazing and so helpful.
Across the board, Sony does not know how to design a UI. From the PlayStation to Sony TVs, it’s been a mess for many years. Granted, it’s not completely their fault with the cameras. Every time some nerd on the Internet complains about the camera not doing something, Sony adds that option as a feature, even though 99% of normal people will not need it.
So you have this camera crammed with features and settings that, you’ll ignore. They could at least consolidate all the video recording options into one tab, all the photography settings into another, and a third for universal settings.
Rant over, now I’m here to help. Here are some basic settings you should know about that are buried in the labyrinth.
NTSC/PAL Selector
In the Americas, you should have your camera set to NTSC. In Europe, It should be Pal. For the web, it probably doesn’t matter because you should consider shooting at 24p.
Location: Tool Box -> Page 2 – NTSC/PAL Selector
File Number – Series
You’ll want to set your file recording numbers to be a series. This will make sure every time you change your battery or memory card, the file naming convention does not reset. If it does, you might have duplicate file names associated with different clips, which will make editing messy.
Location: Tool Box -> Page 5 – File Number: Series
DRO/Auto HDR
This allows you to set the camera’s basic highlight and shadow recovery strength.
It works with your Creative Styles and only with your Creative Styles. If you’re using a Profile, this setting is not an option.
It’s best to set it to 5 if you’re in a high-contrast situation.
Location: Camera -> Page 5 – DRO/Auto HDR: D-Range Opt.
Auto Slow Shutter – Off
This setting got me bad once, and I wish it didn’t even exist. It basically will automatically slow down your shutter in low-light situations. You don’t even want the camera doing things you can’t control, so leave it turned off.
Location: Camera -> Page 8 – Auto Slow Shutter: Off
How To Shoot Better Video – The Cinematic Look
This part of the guide will cover some camera settings and gear to help you get a more cinematic look. A few very simple tricks can go a long way.
Frame Rates And Shutter Speeds
Many people think that 24p is the key to a cinematic look. While I don’t agree with this 100%, it can help. I feel that the shutter speed contributes to it the most.
Typically, in a Hollywood movie, you shoot at a 180-degree shutter. In the film, this means your shutter is open for half the time that the single frame of film is in the gate. If you were shooting 24p, your shutter would be 1/48sec. And that is the formula.
If you were shooting at 48fps, you would shoot at a 360-degree shutter. Or, in the case of the Hobbit, Peter Jackson shot a 270-degree shutter, which is 1/64th of a second, which is why that movie looks so weird.
Whether you’re shooting 48fps, 30fps, or 60fps, your goal is to get that shutter as close to 1/48 as possible. Most cameras will only let you do 1/50, which is fine. – If you don’t see 1/50 as an option, be sure to set your Exposure Step to 0.3EV.
The Advantage of 24p
There is also one huge advantage to shooting at a slower frame rate, which most people don’t mention. With digital cinematography, each frame has to be compressed. The more frames you cram into a second, the less detail each frame can have because of the limits of today’s technology.
For example, if you’re shooting at 50Mb/s, each frame in a 24fps sequence will have more information than a 60fps sequence because you’re breaking that 50mb/s steam into more frames. This also applies when making video encodings for YouTube.
Depth Of Field & Lenses
A shallow depth of field plays a huge part in the Cinematic look, and it’s easiest to get with long lenses. When I was in film school, I remember shooting with my Canon XL1, and I would constantly zoom in or out depending on if I wanted a close-up or a wide. Do you know what I learned from that? I was doing it completely wrong.
Don’t think you need a wide lens to get a wide shot. Longer lenses will always give you a shallow depth of field and a nice, specially flattened image. What I do now when I’m trying to shoot a wide shot is to stick with a longer lens. At least a 50mm or even a 85mm, then move the camera way back. (Assuming you have room) You’ll be surprised by the results.
When shooting close-ups of people talking, I always use an 85mm. The film I shot years back on the Red One, the Zeiss Super Speed 85mm lens was probably the most used lens.
Your Aperture
To maintain a shallow depth of field, stick with wide apertures when you can. Sometimes, something like a 1.2 will be way too much, so I try to stick with something around 2.8-5.6 for standard portrait-type shots.
If you’re doing something that’s a complicated camera move where a lot of tracking of focus is involved, you’ll want a much higher aperture. f5.6 to f11 to make your depth of field a lot less shallow.
So, how do you maintain a 1/50 shutter with an f5.6 when shooting outside?
You use ND filters.
ND Filters
An ND filter is a filter used to cut down light. They come in various strengths; some are variable, and some have gradients.
You’ll need to use these to keep your camera settings consistent throughout a scene and to keep a wide aperture. You don’t want to shoot one close-up at 5.6 and then the reverse at f11. When you cut back and forth in the edit, it will look weird and inconsistent.
You also must have an ND filter when shooting outside on a bright day to keep your aperture wide enough to get that cinematic depth of field. Usually, a 3 stop or 0.9 ND is great for daylight sun. Sometime,s you might want a little more or less, so get a variety of filters.
White Balance
If you’re shooting your family vacation, you can leave the camera set to AWB.
If you’re working on your cinematic masterpiece, you should manually set this to how you’re lighting the scene and the look you want. In other words, if you’re using tungsten lights, set it to Incandescent, but if you’re using blue gels on tungsten lights mixed with yellow gels, maybe set it to Incandescent or program in your own custom setting.
If you’re shooting in a scene that’s cloudy, or daylight, or a sunset, use the built-in settings. I often like to use daylight, even during sunsets.
Since the camera does not shoot RAW, the closer you get to nailing your white balance, the easier color grading will be and the better it will look.
Color Grading
Color grading is probably one of the biggest contributors to the cinematic look, in addition to camera settings. It makes such a huge difference. There is so much art and skill required for great color grading that I can’t get into it in this guide. But I can point you to something cool I’ve been doing lately.
If you’re using the new Premiere Pro CC, look at the new color grading tools called Lumetri Color. Apply them to a clip and there are a ton of great color grading presets and tools, you can even load S-Log2 LUTs – great if you’ve shot on S-Log2.
Cinematic Look Summary
You should now have some basic knowledge of how to get a cinematic look. Shutter at 1/48 (or 1/50), a frame rate of 24fps, manual ISO and aperture, long lenses with wide apertures, and ND filters to control how much light goes into the camera.
Practice using all these together ,and you should be on your way to some great looking video.
Where To Put The Camera & Keeping It Steady
Positioning The Camera
A dolly, a pan, or a jib, will all impact the feeling a scene as well. If you watch a Christopher Nolan movie, you’ll notice that he’s very intelligent in how he moves the camera. He’ll keep the camera always panning, or in motion during scenes where he wants to maintain momentum. But when a scene is more emotional, and the energy is a lot lower, he’ll keep the camera very still.
Keeping A Steady Hand – IBS
You might think, “The Sony A7r II has in-body SteadyShot. I can turn this on, and things will be great.” Not true. Do not confuse this camera with the Olympus EM5-II. SteadyShot in the Sony 7r II, from my experience, is really just a vibration reduction. It’s a gimmick; it’s not very good.
That being said, it is great at cutting out those micro-vibrations. It can be good to us if you’re shooting a scene handheld where the camera isn’t moving around a lot, but if the camera does move a lot, you’ll start to notice these little ‘jumps’ in the image as the IBS resets and re-aligns itself. If you’re shooting a serious production, this could be a problem.
Many camera accessories are out there to help you steady your image. One trick I like is just to mount the camera to a small tripod and hold the tripod instead of the camera. But tons of accessories will do the job, as you can find on my Sony A7r II Accessories Page.
Post Production – Computers & Hard Drives
I want to go over some basics on post-production since it’s where most people run into problems. I’m only going to talk about Premiere CC at this point since that’s now the only software I believe in anymore. Learning FCPX is dangerous. Apple tends just to kill their pro software. You might spend years mastering FCPX, only for it to disappear one day. This happened with FCP7, Shake, and Aperture, to name a few.
Because of this, I refuse to invest any time learning Apple software, and I recommend you do the same.
Avid is great, but it functions at such a pro level that most people won’t need an Avid guide, and usually, Avid editors have the AEs do all the work for them anyway.
Dealing with 4k footage can be a pain, especially if your computer is not cut out for the job.
I’ve been doing these guides for a while for other cameras, and a common problem that happens to people is that they can’t play back the footage they capture. It’s usually because of one of two things. 1. Their computer isn’t good enough. 2. They don’t have a fast enough hard drive. It’s usually #2.
You can sometimes get around this by using Proxies for 4k Video Editing in Premiere.
So, what kind of hardware do you need for 4k video editing?
Computers and GFX Cards
If you’re serious about video editing, most computers built in the last four years should be able to decode 4k video. You’ll just want to ensure you have a decent graphics card with at least 1-2GB of video memory. My card has 4GB.
You really need to be set up to take advantage of Adobe’s Mercury Playback Engine or Open CL. It’s the only way.
From what I understand, you likely won’t see any benefit in having more than 4GB of video memory when only editing 4k video.
Hard Drives
Having a solid-state drive or a raid is just about a requirement nowadays. You also need to ensure you can connect USB 3.0, USB-C, Thunderbolt, or eSata. USB 2.0 and Firewire 800 won’t cut it.
I’ve used Sonnet raids for years but have recently switched to OWC. I’ve also used the Lacie 4Big and various other Lacie raids, which I like.
Editing
Working with your footage is pretty straightforward these days. Just copy your clips off your card and store them on your edit drive. I’ve listed above where the files are located on your SD memory card based on what format you shoot in.
Make sure always to keep a backup of all your footage!
Working With Premiere
Premiere can take just about any file now, so just drag and drop whatever you shot into Premiere, and you should be good to go.
One really important tip that I highly recommend you get in the habit of is to set your autosave files to a drive other than your edit drive. So if your edit drive happens to die, you’ll still have your project file ,and you can relink everything to your backup. I had this happen once on a huge TV spot, but because my project autosave was set to my internal drive, I was able to relink to the backup footage and be up and running in a matter of minutes.
Here is a template you can copy in Premiere to keep you organized. This is my basic start, and it works for most projects, but every project is different, so I’ll change a few things to fit what I need.
You should also match your Finder or Window Explore file structure to match this. Except you would change Sequences to Project Files.
The Ultimate Sony A7rII Video Guide Conclusions
The most important thing when shooting a video is to practice. Working with camera settings, codecs, frame rates, shutter speeds, and lenses should all become muscle memory. If it helps, create a checklist of settings you can check every day before shooting. I can’t tell you how often a setting will be wrong. Even the pros do this.
I was editing a spot once where one camera was shot in 24p, and the other camera was shot 30p. It was a mess to deal with. So, learn your settings and double-check them.
Like all my guides, I keep them regularly updated with new information I discover or with requests from readers. If you have any more questions or feel I missed something, let me know in the comments or email so I can address it. I’ve been getting pretty backed up on comments and emails these days, so please be patient.
Also, please contribute. I don’t shoot as often as I should, so if you know of any helpful tips and tricks or gear for shooting better video on the Sony A7r II. Let me know!