First off, please let me know if you find this guide useful. I do this stuff for a living as a professional editor and have to constantly deal with different codecs, frame rates, software etc, etc. If you have any questions let me know in the comments so I can make these guides better.
This guide covers all the video features on the Sony Mirrorless camera systems to help you shoot better video. The method works for all Sony Mirrorless and DSLR cameras but the features may be slightly different or named differently. If you find this useful please Like and +1. It helps me out.
Check out my guide for shooting HDR Photography on the Sony A7& A7r as well.
I also have a dedicated guide for shooting video with the Sony A7rII, much of it applies to the A7sII as well. It’s still in the works and continues to develop.
The Sony Mirrorless Shooters Guide
I’ve created a simple Sony A7 & A7r and NEX shooters guide for photographers who want to learn how to shoot better videos. Learn these few minor details and you’ll be on your way to becoming a Grand Wizard Videographer / Cinematographer / Master Filmmaker with the Sony camera you already own.
This Guide should apply to all Sony DSLRs and Mirrorless Cameras including the A99, NEX 5 / 7, and A6000. Since they all have similar settings for Video.
First And Foremost – Memory Cards
Now that Sony has added the XAVC S codec to many of their older cameras, it’s important to talk a little about memory cards. To shoot XAVC, which you should do, you’ll need to use an SDXC memory card. Or any memory card 64GB and larger.
1. Frame Rates / Record Settings
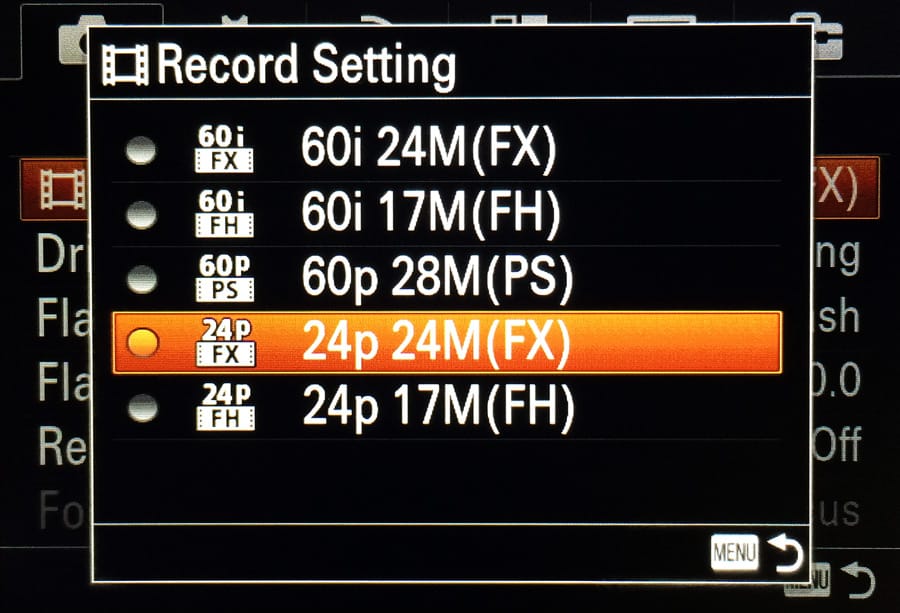
You have many frame rate options on the Sony A7, A7r & A6000. In your Record Settings you have:
60i 24M(FX)
60i 17M(FH)
60p 28M(PS)
24p 24M(FX) <- best for everyday recording
24p 17M(FH)
You’ll only want to shoot the first two if you’re broadcasting to an output that you know is 1080i. Like television. Otherwise, you’ll likely want 1080p24fps.
24M vs 17M has to do with bit rate. Choosing 24M will give you a higher-quality video.
To achieve a more cinematic look, lock your shutter speed at 1/50. This is as close as you can get to shooting 1/48 which is a 180-degree angle on a cinema camera. This combined with the 24fps gives video that magical cinema feel. Note going higher frame rates like 1/200 can give you that Gladiator / Saving Private Ryan feel. Which works great for action sequences.
2. How To Shoot Slow Motion
You have an option to shoot 1080p60 (60p 28M(PS)) which gives you 60 frames per second. This will be in slow motion. Note, 60i will not give you slow motion as the “i” is referring to fields not frames. 60 fields per second.
If you want to shoot slow motion you’ll have to first select 60p 28M(PS), then make sure you set your shutter speed to 1/60 or higher. If you shoot your shutter at 1/50 you’ll not be exposing each frame and your single exposure will span across two frames. You’ll basically be getting 30 frames per second at half the bit rate with a hold frame every other frame. So shoot 1/60.
3. Mastering Exposure
This one is tricky on this camera. I’ve found the histogram displayed to not be completely trustworthy nor the LCD display. The best thing you can do is turn on Zebras. Set them to 90% or 95% and make sure you never have zebras on any detail that you want exposed.
I choose 90% and 95% because it’s always better to underexpose video.
4. DRO / Auto HDR
Located in the first menu tab on the 4th page.
It’s important to know what your D-Range Optimizer is doing. Often I’ll set it to auto, and I always turn it off for shooting RAW stills.
But if you really want to make sure you’re maximizing your dynamic range you should set it to Lv5. The works sort of as the Highlight Tone Priority did with the Canon 5Dmkii and 5Dmkiii. A useful feature.
My advice, set it to Lv5 always for video.
5. Best Color Profiles / Creative Styles To Use
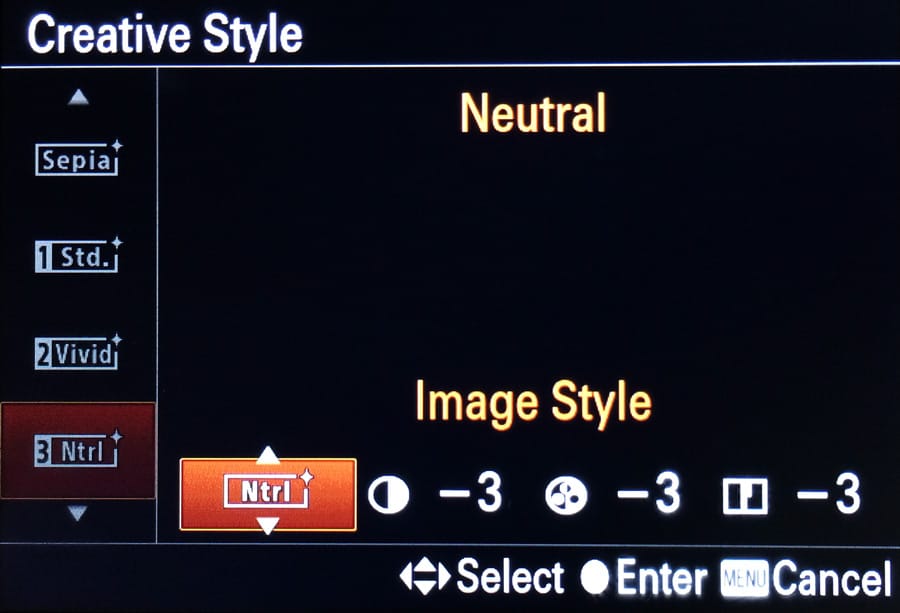
Since there is still no way of loading custom color profiles, your best bet is to use Neutral. And turn all the settings down. I feel even this has too much contrast and saturation, but it’s the best you can do for now.
And keep an eye on this. I’ve found it to reset sometimes for reasons I have yet to figure out.
6. What Memory Cards You’ll Need
Memory cards shouldn’t matter too much. Most decent speed cards will work fine. If you want to shoot longer than 4GB of data at a time you’ll have to get a 64GB card that is ExFat formatted. But I doubt this camera could shoot long enough without overheating to add up to 4GB of data. See Best SD Memory Cards For the Sony A7 and A7r for more info.
7. Best Codec / File Format
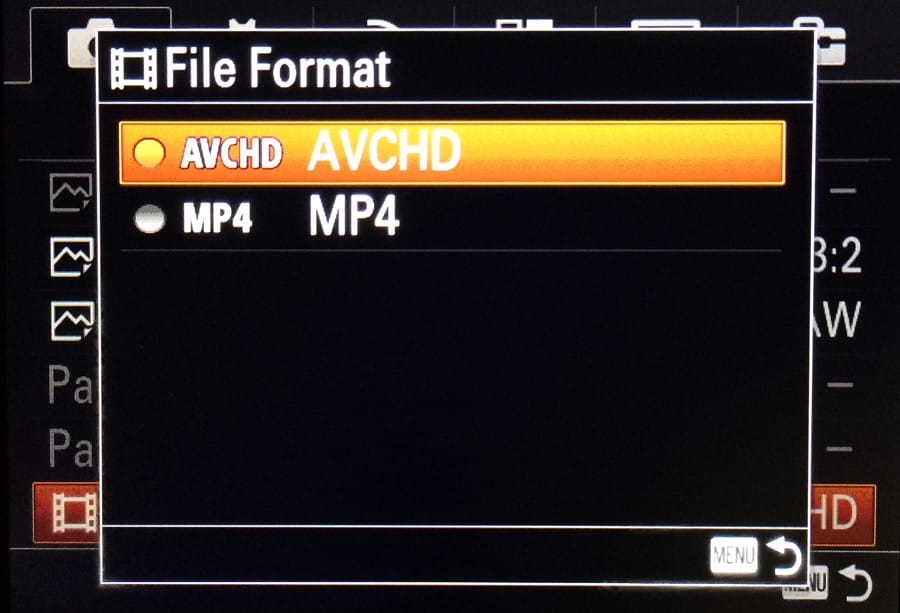
You have two options here. AVCHD and MP4. AVCHD will give you higher quality with a bit more bit rate but is a bit more complicated to work with. I’d use AVCHD for anything actually important to you. Use Mp4 if you’re just filming your kid’s soccer game and want instant access to the footage.
8. How To Importing / Capturing AVCHD Footage and Editing
This is where AVCHD gets tricky. You’ll need Quicktime or VLC to be able to preview the clips.
FinalCut X – To import footage into FinalCut X you simply connect the camera to your computer via USB and import the footage from Camera. It will then capture the footage off your camera and encode it to an Apple intermediate codec. This is fine for editing and finishing.
Premiere CC – You should be able to import your media directly into Premiere from your MTS files. But first, you need to get at them.
Accessing the MTS files
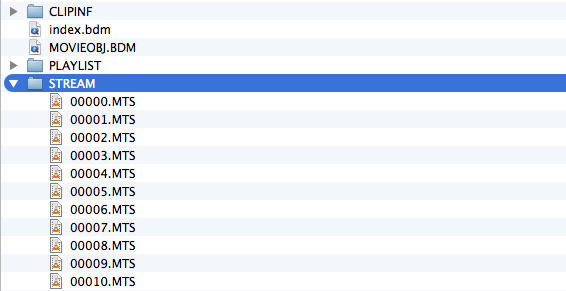
On a MAC you have to right-click the AVCHD folder and select Show Package contents. Do this again on the BDMV folder. In the STREAM folder is all your media, they are labeled 00000.MTS. Copy these to a separate folder outside of the AVCHD folder.
I highly recommend you rename these when shooting a multiday production. I’ve noticed my Sony always resets the names every time I format my card. Haven’t figured out a way to work around it yet. So adding the date before the file name helps. There is a great OSX app I use to batch rename my files called Renamer.
FinalCut Pro 7 – FCP 7 will not allow you to work with MTS files directly. You have to convert them to something FCP likes (i.e. ProresHQ) To do this I use After Effects. You can bring the clips into After Effects, create new compositions, and export them to whatever codec you want. If your sound is not working on the MTS files you’ll have to uninstall and reinstall After Effects or use an older version. It’s a bug currently.
Shooting On A7s
The Sony A7s video settings are completely different than on any of the other Sony mirrorless cameras.
The Sony A7s gives you the option to shoot in the XAVC codec which requires you to have an SDXC SD card. The difference, SDHC and regular Class 10 cards are formatted with a Fat32 file system. The SDXC cards are formatted exFat which is 64bit. The codec requires 64bit to work and if you do not have a SDXC card you will not be able to record in XAVC.
Some clarification from reader Moomin, “XAVC-S is recorded in a MP4 container. So this is why you see a mp4 file. Formatting the card will not change this. If your card cannot record in XAVC-S the camera will tell you.”
If you want to shoot 4k on your Sony A7s then you have to have an external recorder. As it is right now you cannot record 4k internally. The best 4K recorder for the Sony A7s right now is the Atomos Shogun.
Conclusions
Learn this tech and the rest is easy. Video on DSLRs is never simple and it does require a bit of practice since you’re shooting on such a large sensor and you will have a very shallow depth of field to work with. This requires understanding what F Stop you’re at, how the depth of field works, and the use of lighting and ND filters to get the F Stop you want. It also requires a lot of practice with manual follow-focusing.
You’ll also need to learn to keep the camera steady. I personally have not had a problem keeping the Sony A7r camera steady when handheld, but I’m not an alcoholic like most cinematographers/videographers so I don’t get the shakes. If you are an alcoholic you can mount your camera to a lightweight tripod and hold the tripod instead of the camera. This will provide you with enough stability to minimize the micro shake.
| **This website contains affiliate links. We will earn a small commission on purchases made through these links. Some of the links used in these articles will direct you to Amazon. As an Amazon Associate, I earn from qualifying purchases. |

